身份证识别项目(二)-- 3755个汉字的识别
目录标题
- 阶段目标
- 步骤
- 1 构建常用3755个字体
- 2 获取汉字label映射表
- 3 构建训练集
- 3 网络搭建
- 4 模型训练
- 7 接下来的难点
阶段目标
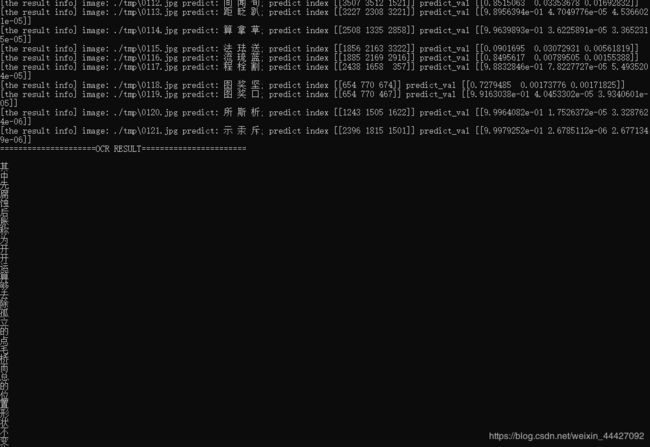
在opencv对图片预处理,截取相关文字信息后,需要对其进行识别,由于pytessact模块效果不好,所以选择使用tensorflow构建模型进行识别。
!!
本博客引自冠军的试炼:https://www.cnblogs.com/skyfsm/p/8436820.html
冠军的试炼模型构建:https://www.cnblogs.com/skyfsm/p/8443107.html#!comments
(本文仅对其技术做简单总结以记录项目进度,完成复现,并指出排除相应bug。版权归冠军的试炼所有,若有侵权请于本人联系,谢谢。)
!!
步骤
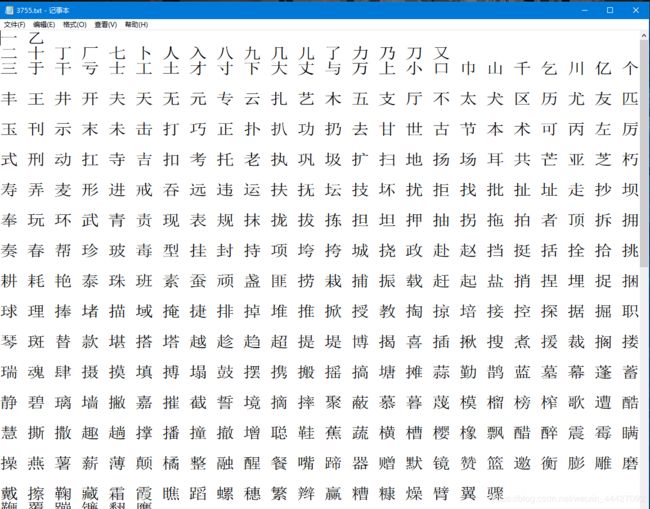
1 构建常用3755个字体
2 获取汉字label映射表
生成Chinese_labels文字映射文件,用两个字举例:
import pickle
import os

os.mknod('labels')
text = {1:'一', 2:'丁}
with open('labels','wb') as f:
i = pickle.dump(text,f,0)
print(i)
把汉字读入内存,建立一个字典,把这个关系记录下来,再使用pickle.dump存入文件保存。
3 构建训练集
收集常用的印刷体字体文件,用于文字的生成。
定义相应的一些参数:
def args_parse():
 # 解析输入参数
    parser = argparse.ArgumentParser(
        description=description, formatter_class=RawTextHelpFormatter)
    parser.add_argument('--out_dir', dest='out_dir',
                        default=None, required=True,
                        help='write a caffe dir')
    parser.add_argument('--font_dir', dest='font_dir',
                        default=None, required=True,
                        help='font dir to to produce images')
    parser.add_argument('--test_ratio', dest='test_ratio',
                        default=0.2, required=False,
                        help='test dataset size')
    parser.add_argument('--width', dest='width',
                        default=None, required=True,
                        help='width')
    parser.add_argument('--height', dest='height',
                        default=None, required=True,
                        help='height')
    parser.add_argument('--no_crop', dest='no_crop',
                        default=True, required=False,
                        help='', action='store_true')
    parser.add_argument('--margin', dest='margin',
                        default=0, required=False,
                        help='', )
    parser.add_argument('--rotate', dest='rotate',
                        default=0, required=False,
                        help='max rotate degree 0-45')
    parser.add_argument('--rotate_step', dest='rotate_step',
                        default=0, required=False,
                        help='rotate step for the rotate angle')
    parser.add_argument('--need_aug', dest='need_aug',
                        default=False, required=False,
                        help='need data augmentation', action='store_true')
    args = vars(parser.parse_args())
    return args
# 实现汉字到ID的映射,用于后面的字体生成
# 将汉字的label读入,得到(ID:汉字)的映射表label_dict
label_dict = get_label_dict()

char_list=[]  # 汉字列表
value_list=[] # label列表
for (value,chars) in label_dict.items():
    print (value,chars)
    char_list.append(chars)
    value_list.append(value)

# 合并成新的映射关系表:(汉字:ID)
lang_chars = dict(zip(char_list,value_list))
font_check = FontCheck(lang_chars)
# 设置文字旋转范围:
if rotate < 0:
    roate = - rotate

if rotate > 0 and rotate <= 45:
    all_rotate_angles = []
    for i in range(0, rotate+1, rotate_step):
        all_rotate_angles.append(i)
    for i in range(-rotate, 0, rotate_step):
        all_rotate_angles.append(i)
    #print(all_rotate_angles)
 # 生成字体图像,原文是黑景白字,为更好识别opencv灰度二值化图像,接下来将采用白景黑字。
 class Font2Image(object):

    def __init__(self,
                 width, height,
                 need_crop, margin):
        self.width = width
        self.height = height
        self.need_crop = need_crop
        self.margin = margin

    def do(self, font_path, char, rotate=0):
        find_image_bbox = FindImageBBox()
        # 黑色背景
        img = Image.new("RGB", (self.width, self.height), "black")
        draw = ImageDraw.Draw(img)
        font = ImageFont.truetype(font_path, int(self.width * 0.7),)
        # 白色字体
        draw.text((0, 0), char, (255, 255, 255),
                  font=font)
        if rotate != 0:
            img = img.rotate(rotate)
        data = list(img.getdata())
        sum_val = 0
        for i_data in data:
            sum_val += sum(i_data)
        if sum_val > 2:
            np_img = np.asarray(data, dtype='uint8')
            np_img = np_img[:, 0]
            np_img = np_img.reshape((self.height, self.width))
            cropped_box = find_image_bbox.do(np_img)
            left, upper, right, lower = cropped_box
            np_img = np_img[upper: lower + 1, left: right + 1]
            if not self.need_crop:
                preprocess_resize_keep_ratio_fill_bg = \
                    PreprocessResizeKeepRatioFillBG(self.width, self.height,
                                                    fill_bg=False,
                                                    margin=self.margin)
                np_img = preprocess_resize_keep_ratio_fill_bg.do(
                    np_img)
            # cv2.imwrite(path_img, np_img)
            return np_img
        else:
            print("img doesn't exist.")
 # 写两个循环,外层循环是汉字列表,内层循环是字体列表,对于每个汉字会得到一个image_list列表,里面存储着这个汉字的所有图像:
 for (char, value) in lang_chars.items():  # 外层循环是字
    image_list = []
    print (char,value)
    #char_dir = os.path.join(images_dir, "%0.5d" % value)
    for j, verified_font_path in enumerate(verified_font_paths):    # 内层循环是字体
        if rotate == 0:
            image = font2image.do(verified_font_path, char)
            image_list.append(image)
        else:
            for k in all_rotate_angles:
                image = font2image.do(verified_font_path, char, rotate=k)
                image_list.append(image)
 # 将image_list中图像按照比例分为训练集和测试集存储
   test_num = len(image_list) * test_ratio
        random.shuffle(image_list)  # 图像列表打乱
        count = 0
        for i in range(len(image_list)):
            img = image_list[i]
            #print(img.shape)
            if count < test_num :
                char_dir = os.path.join(test_images_dir, "%0.5d" % value)
            else:
                char_dir = os.path.join(train_images_dir, "%0.5d" % value)

            if not os.path.isdir(char_dir):
                os.makedirs(char_dir)

            path_image = os.path.join(char_dir,"%d.png" % count)
            cv2.imwrite(path_image,img)
            count += 1
写好代码后,我们在cmd中执行如下指令,开始生成印刷体文字汉字集。
python gen_printed_char.py --out_dir ./dataset --font_dir ./chinese_fonts --width 30 --height 30 --margin 4 --rotate 30 --rotate_step 1
相应参数:
–out_dir 表示生成的汉字图像的存储目录
–font_dir 表示放置汉字字体文件的路径
–width --height 表示生成图像的高度和宽度
–margin 表示字体与边缘的间隔
–rotate 表示字体旋转的范围,[-rotate,rotate]
–rotate_step 表示每次旋转的间隔
最终会在dataset文件夹下有train和test两个文件夹,train和test文件夹下都有3755个子文件夹,每个子文件的名字就是该汉字对应的id。每个train文件夹中有634个文件,test中有139个。
3 网络搭建
构建一个较浅的网络(基于LeNet的改进)
#network: conv2d->max_pool2d->conv2d->max_pool2d->conv2d->max_pool2d->conv2d->conv2d->max_pool2d->fully_connected->fully_connected
具体代码相见附加博客
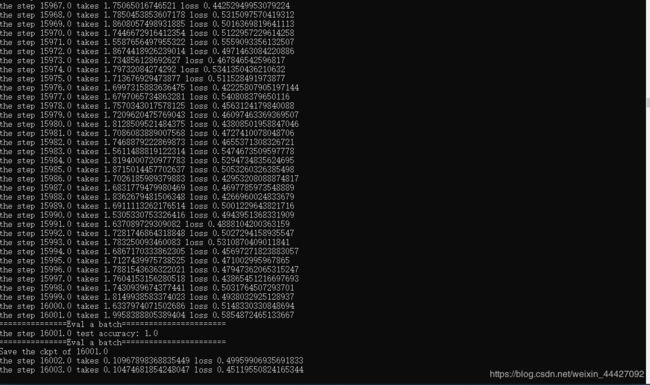
4 模型训练
训练中遇到的问题,在loss不断下降的过程中,accuracy始终为零,本文给出解决方案:
注销相应代码:

因有些小伙伴电脑较慢,附上模型链接,版权归原作者所有:
链接:https://pan.baidu.com/s/12S8Cdo35Z3C93UH0T1SMVw
提取码:xfe5
7 接下来的难点
因身份证地址中是数字和汉字混合的情况,在进行单字分割后送入模型,需要在训练集后单独加入0-9数字集,完成训练。