后端开发资料讲解以及技术分享-SpringBoot
1、开发框架
1.1 SpringBoot
1.1.1 背景与简介
-
J2EE笨重的开发、繁多的配置、低下的开发效率、复杂的部署流程、第三方技术集成难度大
-
Spring Boot是整个Spring技术栈的一个大整合,用来简化Spring应用开发,遵从约定大于配置, 去繁从简,只要点击运行就能创建一个独立的,产品级别的应用。,其实它不是什么新的框架,它只是默认配置了很多框架的使用方式
1.1.2 优点
- 快速创建独立运行的Spring项目以及与主流框架集成
- 使用嵌入式的Servlet容器,应用无需打成WAR包
- 提供各种’starters’自动依赖与版本控制
- 大量的自动配置,简化开发,也可修改默认值
- 无需配置XML,无代码生成,开箱即用
- 提供准生产环境的运行时应用监控
- 与云计算的天然集成
1.1.3 HelloWorld示例
功能:浏览器发送hello请求,服务器接受请求并处理,响应Hello World字符串
说明:本示例程序采用IntelliJ IDEA进行开发,仅供参考
- 使用IDEA创建Maven项目HelloWorld,完成后打开项目根目录下的pom.xml文件,在标签域中添加如下代码:
<project xmlns="http://maven.apache.org/POM/4.0.0" xmlns:xsi="http://www.w3.org/2001/XMLSchema-instance"
         xsi:schemaLocation="http://maven.apache.org/POM/4.0.0 http://maven.apache.org/xsd/maven-4.0.0.xsd">
    <modelVersion>4.0.0modelVersion>

    <groupId>com.testgroupId>
    <artifactId>HelloWorldartifactId>
    <version>1.0-SNAPSHOTversion>

    <parent>
        <groupId>org.springframework.bootgroupId>
        <artifactId>spring-boot-starter-parentartifactId>
        <version>1.5.2.RELEASEversion>
        <relativePath/>
    parent>

    <dependencies>
        <dependency>
            <groupId>org.springframework.bootgroupId>
            <artifactId>spring-boot-starter-webartifactId>
        dependency>
    dependencies>
project>
如果第一次使用Maven可能要稍等一会,项目会向远程仓库下载配置依赖中相关JAR包。
- 在项目的src/main/java下创建java类com.test. controller.HelloWorldController,代码如下:
package com.test.controller;

import org.springframework.web.bind.annotation.RequestMapping;
import org.springframework.web.bind.annotation.RestController;

@RestController
public class HelloWorldController {
    @RequestMapping("/hello")
    public String hello() {
        return "hello world!";
    }
}
- 在项目的src/main/java下创建java类com.test. HelloWorldMainApplication,代码如下:
package com.test;

import org.springframework.boot.SpringApplication;
import org.springframework.boot.autoconfigure.SpringBootApplication;

@SpringBootApplication
public class HelloWorldMainApplication {
    public static void main(String[] args){
        SpringApplication.run(HelloWorldMainApplication.class,args);
    }
}
- 直接点击main方法左边的绿色三角形按钮即可运行项目

- 项目启动后打开浏览器,在地址栏输入http://localhost:8080/hello,按下回车,就可以在浏览器中看到Hello World!了,这样一个最简单的SpringBoot应用就创建成功了,这也许是目前为止创建Web应用最简单的方法了

1.1.4 HelloWorld简要分析
- pom文件中的父项目
在pom文件中按住CTRL鼠标左键点击父项目可打开一个文件,看到下面的代码:
<parent>
 	<groupId>org.springframework.bootgroupId>
		<artifactId>spring-boot-dependenciesartifactId>
		<version>1.5.2.RELEASEversion>
		<relativePath>../../spring-boot-dependenciesrelativePath>
parent>
- 这个项目是Spring Boot的版本仲裁中心,用来管理Spring Boot应用里面的所有依赖版本
- 以后我们导入依赖默认是不需要写版本号。(没有在dependencies里面管理的依赖自然需要声明版本号)
- 启动器starter
<dependency>
	<groupId>org.springframework.bootgroupId>
	<artifactId>spring-boot-starter-webartifactId>
dependency>
- spring-boot-starter-web:spring-boot场景启动器,帮我们导入了web模块正常运行所依赖的组件
- Spring Boot将所有的功能场景都抽取出来,做成一个个的starters(启动器),只需要在项目里面引入这些starter,相关场景的所有依赖都会导入进来,要用什么功能就导入什么场景的启动器,SpringBoot的启动器可以参考官方文档进行查看
- 主程序类HelloWorldMainApplication
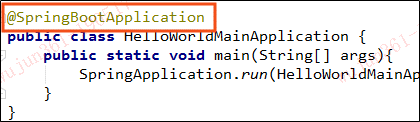
- @SpringBootApplication: SpringBoot应用标注在某个类上说明这个类是SpringBoot的主配置类,SpringBoot就应该运行这个类的main方法来启动SpringBoot应用
1.1.5 读取参数
当前台传参数给后台时,后台需要能够准确的接受并进行处理。
- 简单类型
功能:字符串类型的userName作为参数将被hello方法接受并输出hello和userName连接后的字符串到前台
@RequestMapping("/hello")
public String hello(String userName) {
    return "hello " + userName + "!";
}
前台请求:http://localhost:8080/hello?userName=SpringBoot

方法会自动接受名称相同参数的值赋给自己,若名称不同可使用@RequestParam注解进行参数说明,也可以达到相同的效果
@RequestMapping("/hello")
public String hello(@RequestParam("userName") String name) {
	return "hello " + name + "!";
}
- 复杂类型
若传入的参数是一个对象,如一个用户对象信息,则需要先创建用户实体类User.java,代码如下:
package com.test.model;
import java.util.List;
import java.util.Map;

public class User {
    private int userId;
    private String userName;
    private String password;
    private List<String> phoneNum;
    private List<Map<Integer,String>> event;

    public int getUserId() {
        return userId;
    }

    public void setUserId(int userId) {
        this.userId = userId;
    }

    public String getUserName() {
        return userName;
    }

    public void setUserName(String userName) {
        this.userName = userName;
    }

    public String getPassword() {
        return password;
    }

    public void setPassword(String password) {
        this.password = password;
    }

    public List<String> getPhoneNum() {
        return phoneNum;
    }

    public void setPhoneNum(List<String> phoneNum) {
        this.phoneNum = phoneNum;
    }
    public List<Map<Integer, String>> getEvent() {
        return event;
    }

    public void setEvent(List<Map<Integer, String>> event) {
        this.event = event;
    }

    @Override
    public String toString() {
        return "User{" +
                "userId=" + userId +
                ", userName='" + userName + '\'' +
                ", password='" + password + '\'' +
                ", phoneNum=" + phoneNum +
                ", event=" + event +
                '}';
    }
}
然后修改HelloWorldController:
在hello的参数上需要加上@RequestBody用来将传入的Json数据转换为对象中属性的值,在下面的hello程序将接受输入的user参数并将user.toString()后输出给前端。
@RequestMapping("/hello")
public String hello(@RequestBody User user) {
	return "hello " + user.toString();
}
最后进行测试:
使用工具:Postman
请求地址:http://localhost:8080/hello
请求方法:Post,application/json
请求参数如下:
{
	"userId": "1",
	"userName": "jack",
	"password": "123456",
	"phoneNum": ["213123","2312312"],
	"event": [
		{"1": "1年级"},
		{"2": "2年级"},
		{"3": "3年级"}
	]
}
返回结果:
hello User{userId=1, userName='jack', password='123456',
phoneNum=[213123, 2312312], event=[{1=1年级}, {2=2年级}, {3=3年级}]}
1.1.6 数据校验
功能:后台对于前台输入的数据往往需要进行校验是否符合规则。
- 基本类型参数校验
- 首先在HelloWorldController类上加上@Validated注解,表示开启数据校验,添加在类上用于校验方法,添加在方法参数中用于校验参数对象

- 然后在参数前面写上校验规则并且该方法抛出异常
@RequestMapping("/hello1")
public String hello1(@NotBlank(message = "用户名字不能为空")
    @Length(min = 2, max = 10, message = "用户名长度必须在 2 - 10 之间")
    @RequestParam("userName") String userName) throws Exception {
	return "hello "+ userName;
}
- 接下来写一个全局的异常处理程序com.test.exception.GlobalExceptionHandler用于输出校验结果
package com.test.exception;

import org.springframework.http.ResponseEntity;
import org.springframework.web.bind.annotation.ControllerAdvice;
import org.springframework.web.bind.annotation.ExceptionHandler;

import javax.validation.ConstraintViolation;
import javax.validation.ConstraintViolationException;

@ControllerAdvice
public class GlobalExceptionHandler {
    @ExceptionHandler(value = ConstraintViolationException.class)
    public ResponseEntity<String> constraintViolationExceptionHandler(ConstraintViolationException e) {
        return ResponseEntity.badRequest().body(e.getConstraintViolations().stream()
                .map(ConstraintViolation::getMessageTemplate)
                .findFirst()
                .orElse(e.getMessage())
        );
    }
}
- 最后在浏览器中输入请求后的校验结果如下:


2、对象类型参数校验: - 首先在方法的参数前面加上@Validated注解,并在该方法中加入bindingResult参数用于接受校验信息。
@RequestMapping("/hello")
public String hello(@Validated @RequestBody User user,
						BindingResult bindingResult) {
	if(bindingResult.hasErrors()) {
		return bindingResult.getAllErrors().get(0).getDefaultMessage();
	}
	return "hello "+user.toString();
}
- 然后在实体类需要校验的参数上面加上校验注解:
public class User {
    private int userId;

    @NotBlank(message = "用户名字不能为空")
    @Length(min = 2, max = 10, message = "用户名长度必须在 {min} - {max} 之间")
    private String userName;

    private String password;
    private List<String> phoneNum;
    private List<Map<Integer,String>> event;
- 最后运行程序使用Postman发请求得到校验结果:
请求URL地址:http://localhost:8080/hello
请求方法:Post,application/json
请求参数1:
{
	"userId": "1",
	"password": "123456",
	"phoneNum": ["213123","2312312"],
	"event": [
		{"1": "1年级"},
		{"2": "2年级"},
		{"3": "3年级"}
	]
}
校验结果1:
用户名字不能为空
请求参数2:
{
	"userId": "1",
	"userName": "r12312312321321",
	"password": "123456",
	"phoneNum": ["213123","2312312"],
	"event": [
		{"1": "1年级"},
		{"2": "2年级"},
		{"3": "3年级"}
	]
}
校验结果2:
用户名长度必须在 2 - 10 之间
1.2 MyBatis
1.2.1 简介
- MyBatis 是一款优秀的持久层框架,它支持定制化SQL、存储过程以及高级映射
- MyBatis 避免了几乎所有的 JDBC 代码和手动设置参数以及获取结果集。MyBatis 可以使用简单的 XML 或注解来配置和映射原生信息,将接口和 Java 的 POJOs(Plain Ordinary Java Object,普通的 Java对象)映射成数据库中的记录
1.2.2 特性
- 简单易学:本身就很小且简单。没有任何第三方依赖,最简单安装只要两个jar文件和配置几个SQL映射文件,易于学习,易于使用,通过文档和源代码,可以比较完全的掌握它的设计思路和实现
- 灵活,MyBatis不会对应用程序或者数据库的现有设计强加任何影响
- SQL写在xml里,便于统一管理和优化。通过SQL语句可以满足操作数据库的所有需求
- 解除SQL与程序代码的耦合:通过提供DAO层,将业务逻辑和数据访问逻辑分离,使系统的设计更清晰,更易维护,更易单元测试。SQL和代码的分离,提高了可维护性
- 提供映射标签,支持对象与数据库的orm字段关系映射
- 提供对象关系映射标签,支持对象关系组建维护
- 提供xml标签,支持编写动态SQL
1.2.3 与SpringBoot的整合使用
在SpringBoot应用中使用MyBatis作为与数据库相关的持久层框架,该示例将演示两个简单例子,分别为向数据库中添加数据和前台查询并显示数据库中的数据。
该示例使用MySql数据库,仅供参考。
- 在pom文件中添加jdbc相关依赖、mysql驱动和mybatis依赖包
<dependency>
   <groupId>org.mybatis.spring.bootgroupId>
   <artifactId>mybatis-spring-boot-starterartifactId>
   <version>1.3.4version>
dependency>
<dependency>
   <groupId>org.springframework.bootgroupId>
   <artifactId>spring-boot-starter-jdbcartifactId>
dependency>
<dependency>
   <groupId>mysqlgroupId>
   <artifactId>mysql-connector-javaartifactId>
   <scope>runtimescope>
dependency>
- 在src/main/resources目录下创建application.yml配置文件,配置与数据连接的相关数据和声明mybatis配置的路径
spring:
 # 数据源配置信息根据自己的数据库而定
 datasource:
  username: root
  password: root
  url: jdbc:mysql://localhost:3306/test
  driver‐class‐name: com.mysql.jdbc.Driver

mybatis:
 config-location: classpath:mybatis/mybatis.xml
 mapper-locations: classpath:mybatis/mapper/**/*.xml
- 在src/main/resources/mybatis目录下创建mybatis.xml配置文件
<configuration>
    <settings>
        <setting name="cacheEnabled" value="true" />
        <setting name="lazyLoadingEnabled" value="true" />
        <setting name="aggressiveLazyLoading" value="true" />
        <setting name="multipleResultSetsEnabled" value="true" />
        <setting name="useColumnLabel" value="true" />
        <setting name="useGeneratedKeys" value="true" />
        <setting name="autoMappingBehavior" value="PARTIAL" />
        <setting name="defaultExecutorType" value="SIMPLE" />
        <setting name="defaultStatementTimeout" value="3000" />
        <setting name="logImpl" value="STDOUT_LOGGING" />
    settings>
configuration>
- 在test数据库下创建用户表user
create table `user` (
	`user_id` bigint(20) not null auto_increment,
	`user_name` varchar(255) default null,
	`password` varchar(255) default null,
	primary key (`user_id`)
)
- 在src/main/java/com/test/mapper下创建mapper接口UserMapper.java
package com.test.mapper;

import com.test.model.User;
import org.apache.ibatis.annotations.Param;

import java.util.List;

public interface UserMapper {
    int addUser(User user);
    List<User> getUserInfo();
    User getUserById(@Param("userId") int userId);
}
- 在src/main/resources/mybatis/mapper下创建sql映射文件userMapper.xml,其中每个sql语句的id和mapper接口UserMapper.java中的方法名相同。
<mapper namespace="com.test.mapper.UserMapper">


    <resultMap id="userResultMap" type="com.test.model.User">
        <result column="user_id" property="userId" />
        <result column="user_name" property="userName" />
        <result column="password" property="password" />
    resultMap>

    <select id="getUserInfo" resultMap="userResultMap">
        select user_id, user_name, password from user
    select>

    <select id="getUserById" resultMap="userResultMap">
        select user_id, user_name, password
        from user where user_id=#{userId}
    select>

    <insert id="addUser" parameterType="com.test.model.User"
            useGeneratedKeys="true" keyProperty="userId">
        insert into user(user_name, password)
        value(#{userName}, #{password})
    insert>
mapper>
- 在应用的主程序类上加注解@MapperScan(“com.test.mapper”),表示将自动扫描mapper接口。
@MapperScan("com.test.mapper")
@SpringBootApplication
public class HelloWorldMainApplication {
    public static void main(String[] args){
        SpringApplication.run(HelloWorldMainApplication.class,args);
    }
}
- 在HelloWorldController中加入如下代码进行测试:
@RequestMapping("/user/addUser")
public int addUser(@RequestBody User user){
    return userMapper.addUser(user);
}

@RequestMapping("/user/getUserInfo")
public List<User> getUserInfo(){
    return userMapper.getUserInfo();
}

@RequestMapping("/user/getUserById")
public User getUserInfo(int userId){
    return userMapper.getUserById(userId);
}
- 首先使用Postman调用addUser方法添加两个用户:
请求链接:http://localhost:8080/user/addUser
请求参数(用下面两个参数分别请求两次):
参数1:
{
    "userName": "jack",
    "password": "123456"
}
参数2:
{
    "userName": "mary",
    "password": "ABCDEFG"
}
执行完车后查看数据库中的信息,可以看到数据被成功插入进数据库了:
SELECT * FROM `user`
userId  userName  paaword
------  --------  ---------
     1  jack      123456
     2  mary      ABCDEFG
- 调用getUserInfo和getUserById方法在浏览器中查看用户信息:
浏览器请求:http://localhost:8080/user/getUserInfo
将会得到下面的结果:
[
  {
    "userId": 1,
    "userName": "jack",
    "password": "123456",
    "phoneNum": null,
    "event": null
  },
  {
    "userId": 2,
    "userName": "mary",
    "password": "ABCDEFG",
    "phoneNum": null,
    "event": null
  }
]
浏览器请求:http://localhost:8080/user/getUserById?userId=2
将会得到下面的结果:
{
  "userId": 2,
  "userName": "mary",
  "password": "ABCDEFG",
  "phoneNum": null,
  "event": null
}
到此一个简单的SpringBoot应用和MyBatis的整合就完成了。
1.2.4 MyBatis映射文件探究
- 插入数据后自动生成主键赋予传入参数中的主键字段
useGeneratedKeys="true" keyProperty="userId"
<insert id="addUser" parameterType="com.test.model.User"
        useGeneratedKeys="true" keyProperty="userId">
    insert into user(userName, password)
    value(#{userName}, #{password})
insert>
在插入一个user后会把user中的userId字段设置成插入数据库中主键。
修改HelloWorldController中的addUser方法,使得方法的返回值是新插入用户的id:
    @RequestMapping("/user/addUser")
    public int addUser(@RequestBody User user){
        userMapper.addUser(user);
        return user.getUserId();
    }
重新运行程序后使用postman发送请求http://localhost:8080/user/addUser
请求参数:
{
    "userName": "tom",
    "password": "@#$%%^^&**"
}
结果:
2. 参数传入
- 单个参数
可以接受基本类型,对象类型,集合类型的值。这种情况MyBatis可直接使用这个参数,不需要经过任何处理。
如在userMapper.xml中直接使用user对象中的属性:int addUser(User user);<insert id="addUser" parameterType="com.test.model.User" useGeneratedKeys="true" keyProperty="userId"> insert into user(userName, password) value(#{userName}, #{password}) insert> - 多个参数
任意多个参数,都会被MyBatis重新包装成一个Map传入。Map的key是param1,param2…,值就是参数的值。
在UserMapper.java中添加根据用户名和密码获取用户信息的方法
User getUserByNameAndPsd(String userName, String password);
在userMapper.xml中添加SQL
<select id="getUserByNameAndPsd" resultMap="userResultMap">
    select user_id, user_name, password from `user`
    where user_name=#{param1} and password=#{param2}
select>
#{param1}的值就是传入的userName,#{param2}的值就是传入的password
最后在HelloWorldController.java中添加代码进行请求测试
@RequestMapping("user/getUserInfoByNameAndPsd")
public User getUserInfo(String userName, String password) {
    return userMapper.getUserByNameAndPsd(userName, password);
}
运行程序后使用post请求:http://localhost:8080/user/getUserInfoByNameAndPsd?userName=jack&password=123456
输出结果为:

#{param1}和#{param2}亦可以换成#{arg0}和#{arg1},结果相同
- 命名参数
为参数使用@Param起一个名字,MyBatis就会将这些参数封装进map中,key就是我们自己指定的名字
为上面的方法getUserByNameAndPsd添加命名参数
User getUserByNameAndPsd(@Param("userName") String userName,
                         @Param("password") String password);
修改userMapper.xml中的SQL
<select id="getUserByNameAndPsd" resultMap="userResultMap">
    select user_id, user_name, password from `user`
    where user_name=#{userName} and password=#{password}
select>
重新运行程序后可得到和上面相同的结果
- POJO
当这些参数属于我们业务POJO时,我们直接传递POJO - Map
我们也可以封装多个参数为map,直接传递
- 参数处理
#{key}:获取参数的值,预编译到SQL中,安全。
${key}:获取参数的值,直接拼接到SQL中。有SQL注入问题。#{userName}, #{password} - 结果返回
对于简单类型的数据直接返回,复杂类型可自定义resultMap进行接收。resultMap将查询的结果与POJO中的属性对于起来,这样在执行完SQL后就可以在POJO中得到结果。
使用自定义的resultMap作为结果,将在数据库中查询结果的列名和对象属性名进行一一映射<resultMap id="userResultMap" type="com.test.model.User"> <result column="user_id" property="userId" /> <result column="user_name" property="userName" /> <result column="password" property="password" /> resultMap>
resultMap还支持继承、定义数组、结果集嵌套和分步查询等
假设现在我们需要在查询用户信息结果中添加用户号码信息,我们需要将用户的电话号码信息保存到数据库中,为此在数据库中创建电话表并且插入数据:
CREATE TABLE `phone` (
  `id` BIGINT(20) UNSIGNED NOT NULL AUTO_INCREMENT,
  `user_id` BIGINT(20) UNSIGNED DEFAULT NULL,
  `phone_num` VARCHAR(255) DEFAULT NULL,
  PRIMARY KEY (`id`)
);

INSERT INTO phone(user_id, phone_num)
VALUES
(1,'123456789'),
(1,'14567'),
(1,'213123'),
(2,'123213'),
(2,'33256'),
(3,'3333333');
定义获取用户号码的SQL
<select id="getPhoneNum" resultType="java.lang.String">
    select phone_num from phone where user_id=#{userId}
select>
定义新的resultMap继承自userResultMap并新增获取用户电话号码集合
<resultMap id="newUserResultMap" extends="userResultMap"
		   type="com.test.model.User">
    <collection property="phoneNum" column="{userId=user_id}"
                select="getPhoneNum" />
resultMap>
使用newUserResultMap作为获取用户信息的结果映射
<select id="getUserInfo" resultMap="newUserResultMap">
    select user_id, user_name, password from user
select>
最后需要在User实体类上添加注解@JsonIgnoreProperties({“handler”}),否则会报错
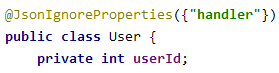
重新运行程序使用postman发送请求:http://localhost:8080/user/getUserInfo
查询结果为:

1.2.5 MyBatis动态SQL
动态SQL是MyBatis强大特性之一。极大的简化我们拼装SQL的操作。MyBatis 采用功能强大的基于OGNL 的表达式来简化操作
- If
若传入的userId为空或为空字符串,查询的sql语句将不会被执行
<select id="getUserById" resultType="com.test.model.User">
	<if test="userId!=null and userId!=''">
		select userId, userName, password from user where userId=#{userId}
	if>
select>
- choose(when,otherwise)
和if相似,相当于if-else,满足条件执行一个分支,否则执行另一个分支
<select id="getUserById" resultType="com.test.model.User">
    select userId,userName,password
    from user
    <where>
        <choose>
            <when test="userId!=null and userId!=''">userId=#{userId}when>
            <otherwise>userId=-1otherwise>
        choose>
    where>
select>
- foreach
动态SQL 的另外一个常用的必要操作是需要对一个集合进行遍历,通常是在构建IN 条件语句的时候
根据多个id查询用户信息,传入的参数应为List ids:
<select id="getUserByIds" resultType="com.test.model.User">
    select userId,userName,password
    from user where userId in
    <foreach collection="ids" item="userId" separator="," open="(" close=")">
        #{userId}
    foreach>
select>
- trim (where, set)
主要为了去除动态SQL语句中多余的符号,如(and,or,逗号等),使SQL能够正确执行
<update id="updateUserInfoById" parameterType="com.test.model.User">
    update `user`
    <trim prefix="set" suffixOverrides=",">
        <if test="userName!=null">user_name=#{userName},if>
        <if test="password!=null">password=#{password},if>
    trim>
    where user_id=#{userId}
update>
上面的update语句不管userName或password是否为空,都会在后面多出一个逗号,但是 suffixOverrides="," 配置会将多余的逗号给去掉,不会影响SQL的正常执行
更多信息可以参考mybatis官方文档
2 开发工具
2.1 Apache Maven
2.1.1 简介
- Maven是基于项目对象模型(POM project object model),可以通过一小段描述信息(配置)来管理项目的构建,报告和文档的软件项目管理工具
- Maven的核心功能便是合理叙述项目间的依赖关系,通俗点讲,就是通过pom.xml文件的配置获取jar包,而不用手动去添加jar包
- 在pom.xml中添加以下代码就可以给项目导入mysql-connector-java.jar的依赖包,提供访问MySql数据库的功能

2.1.2 与IDEA整合使用
- 首先应该安装与配置maven,可参考百度,上面一堆教程。
- 安装配置好maven以后,在IDEA中点击File-settings,然后搜索maven即可找到maven的配置,选择maven的安装目录即可。配置完成后我们就可以在IDEA中创建maven项目了。

- Maven的项目结构:

2.2 Postman
2.2.1 简介
- Postman是一款强大的接口测试工具,可以模拟各种Http方法,如Post、Get、Put、Delete等,可以传给后台各种类型的数据,数据的可视化也非常不错,比用浏览器测试要好上太多。
2.2.2 简单使用
- text简单参数

- json参数

- 返回结果展示,结果若是json会自动美化,方面查看
2.3 Git
参考百度~~
最后附上源码链接:https://pan.baidu.com/s/1R8l0UK0_KqLch5WgYEZyrw 提取码:dfj7