vue学习总结(六--黑马买买买项目--附源码)
今天开始用vue-cli做黑马买买项目:
步骤:
一.开始创建项目
1.创建命令:
vue create heimabuy
2.打开命令
cd heimabuy
3.删掉hello-world多余文件
4.在App.vue里导入首和尾(中间放router-view路由的出口),和引入样式(在素材里有);
样式:记得在main.js里写,采用import,公共的文件都写在这里.
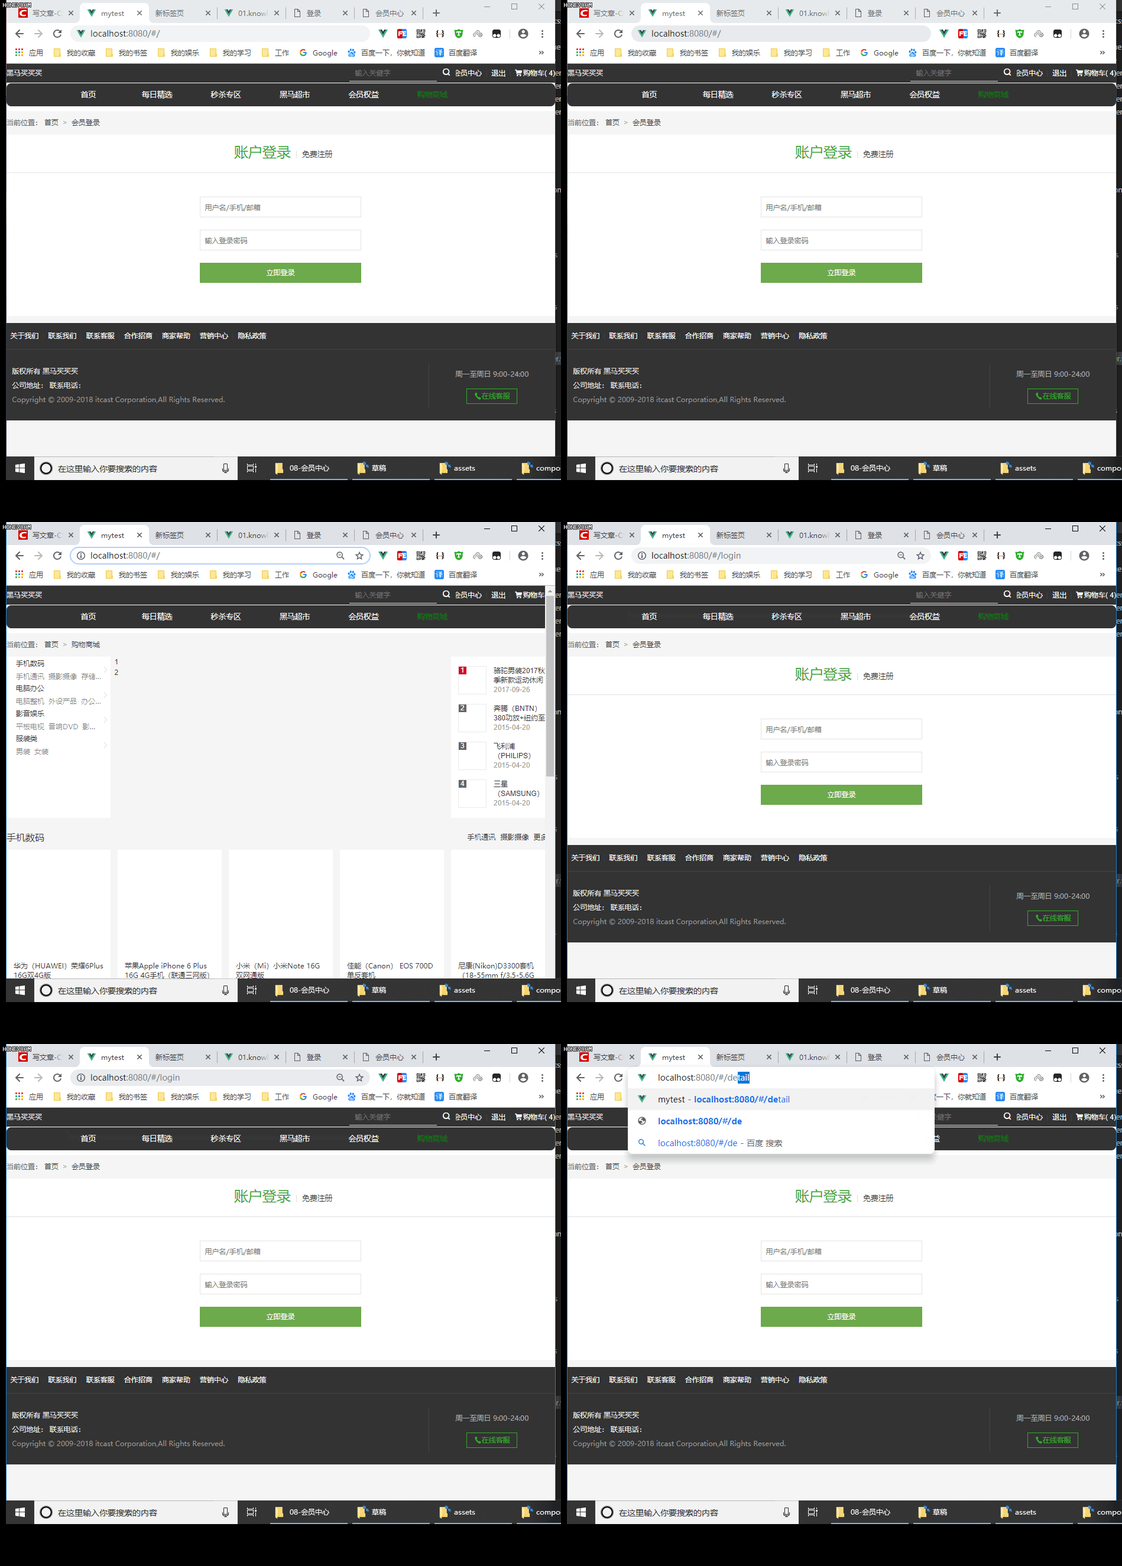
完成后效果如下:

5.创建分支,终端上执行如下命令:(默认已初始化)
   git add .
   git commit -m"init"
   git branch dev 创建开发分支
   git checkout dev 切换开发分支
查看命令:
git status
	查看git的状态
git log --oneline
	输出commit的内容
git branch
	查看分支信息
6.安装和导入路由
安装命令
cnpm install vue-router --save
导入(安装)是在main里写
import Vue from 'vue' //默认已导入

import VueRouter from 'vue-router'//导入路由,官方统一的,不需要更改

Vue.use(VueRouter)//use一下,不需要更改
7.导入额外的组件
//导入需要引入的组件
import index from './components/index.vue';
import detail from './components/03.detail.vue';
import login from './components/02.login.vue';
import userCenter from './components/04.userCenter.vue'
8.实例化路由,和导入规则
new Vue({
  render: h => h(App),
  //4.挂载路由对象
  router:new VueRouter({
    routes:[
      // 主目录:给两个的原因是两个地址都能渲染到页面
      {
        path:'/',//这是给一个打开的默认地址
        component:index
      }
      // 上面简写为下面
      // {
      //    path: '/', redirect: '/index'
      // }
      ,
    {
      path:'/index',//这是再给一个打开/index也显示的地址
      component:index
    } ,
// 详情
{
  path:'/detail',
  component:detail
} ,
// 登录
{
  path:'/login',
  component:login
} ,
{
  path:'/userCenter',
  component:userCenter
}


  ]
  })


}).$mount('#app')
完成后效果如下:(里面依次可以打开login,detail,和userCenter页面)

9.用户中心添加嵌套路由操作(使用了嵌套路由)
嵌套路由总结:准备一个router-view路由出口,然后在路由配置里加上children关键字,里面跟上path路径和component组件即可,需要留意的是children里面的path路径不用写斜杠/,直接写路径名即可,它会自动拼接上一层路径的url.
a.把结构抽取出来;

b.在main里导入组件;
c.路由对象里添加children
{
        path: '/userCenter',
        component: userCenter,
        children: [
          {
            //跟上数组数组里是对象
            path: 'userCenterPerson', //注意二层组件这里不用/,它自动会和上面进行拼接
            // path:"useCentergeren",//注意二层组件这里不用/
            component: userCenterPerson,
            //别名的使用,别名是写在里面,重定向是再写一个path
            alias: 'geren'
          },
          // 重定向使用
          {
            path: 'index',
            redirect: 'userCenterPerson' //这里是字符串,写path名
          },
          {
            path: 'order',
            component: order
          },
          {
            path: 'orderDetail',
            component: orderDetail
          }
        ]
      }
10.使用axios请求网络数据,index.vue页面操作过程如下
a.安装axios命令
cnpm i axios --save
b.导入axios(这里是全局导入,后面更改了,改为局部导入)
// 1.导入axios
import axios from 'axios';
c.准备data数据,记得传入函数返回对象
 data(){
        return{
            catelist:[],//分类
            slidelist:[],//轮播图
            toplist:[]//热卖

        }
    }
d.创建生命周期函数(与data平级),发送请求
  created() {
    this.$axios
      .get('http://111.230.232.110:8899/site/goods/gettopdata/goods')
      .then(res => {
       // console.log(res)
       // console.log(res.data.message.catelist)

        this.catelist = res.data.message.catelist
        this.sliderlist = res.data.message.sliderlist
        this.toplist = res.data.message.toplist
      })
  }
11.过滤器处理时间
a.在html结构中使用{{ | }}
<span>{{item.add_time | capitalize }}span>
b./使用过滤器(与data,created平级)
 //使用过滤器(与data平级)
 filters:{
        capitalize:function(value){
            // console.log(value);//打印html结构里的item.add_time的值
          let newTime= value.split('T');//字符串以T的方式分割成两个值的数组

        //   console.log(newTime[0]);//取到了
          return newTime[0];


        }
 }
过滤器参考资料:https://cn.vuejs.org/v2/guide/filters.html#ad
12.element.ui的使用
a.安装
cnpm i element-ui -S
s是save缩写
b.在main.js中引入
import Vue from 'vue';//已有,可以省略
import App from './App.vue';//已有,可以省略
import ElementUI from 'element-ui';
import 'element-ui/lib/theme-chalk/index.css';
//use一下
Vue.use(ElementUI);
13.使用el,轮播图
在主页中间位置html结构中创建即可
	<el-carousel height="341px">
		<el-carousel-item v-for="item in sliderlist" :key="item.id">
		<img :src="item.img_url" alt="">
		el-carousel-item>
 	el-carousel>
14.抽取axios,不抽取的话axios在每个文件都要导入一次,这样很麻烦,但是我们又不能直接写在main.js文件里(直接写会报错: axios is not defined),所有我们建议写在原型里,这样在其它界面都可以访问
a.在main.js里,往Vue原型中添加$axios
// axios部分
//1.导入axios
import axios from 'axios';
// 2.把axios设置在Vue的原型上
Vue.prototype.$axios=axios;
b.在其它页面访问
  //在原型中访问axios
   this.$axios.get('http://111.230.232.110:8899/site/goods/gettopdata/goods')
15.使用基地址
什么是基地址?基地址是将一个完整的api抽取前面的通用部分保存在主页面中,让其它重复要访问的请求可以不用写完整的api地址,只需要跟后面的地址即可.
a.设置
//axios设置基地址
axios.defaults.baseURL='http://111.230.232.110:8899/' //记得URL都是大写
b.访问
   this.$axios.get('site/goods/gettopdata/goods')
      .then(response => {
        //   console.log(response);//成功打印对象
      })
本来完整的api地址是:
http://111.230.232.110:8899/site/goods/gettopdata/goods
使用axios基地址后前面内容可以省略了.
完整源码地址:
https://github.com/huanggengzhong/heimabuybuybuy-20190111-