Android学习笔记------进程间通信AIDL学习和深入理解
想要直接看效果的可以直接去看 #5.4
想要源代码的可以直接去末尾
1.AIDL(Android 接口定义语言)是什么?
官网说明:https://developer.android.com/guide/components/aidl

简单来说就是让处于不同进程间的数据可以交互,可以通信。比如A,B2个独立的App,A的数据可以告诉B,B的数据可以告诉A。
2.常见的几种进程间通信有哪些?
1.管道(Socket) (传输效率低,开销大,主要用于跨网络的进程间通信和本机上进程间的低速通信)
2.Messager(消息队列,采用存储-转发的方式,先把数据从发送方拷贝到内核,开辟的缓存中,
  然后再从内核缓存中拷贝到接受方的内存缓存区,至少有2次拷贝过程)
3.共享内存(虽然无需拷贝,操作复杂,难以使用)
4.Binder (只需要一次数据拷贝,性能上仅次于内存共享)
3.AIDL和IPC是什么关系?
AIDL只是我们去实现IPC进程间通信的一种实现方式
4.学习之前要知道哪些内容
1.客户端,服务端
2.bindService
3.Parcelable
5.开始学习
以下都是Demo实现。
1.场景重现:
假设我们这里有一个Service App和Client App 这2个App,大家都有共同的一个Person对象,Client App 里面有一个注册入口,
注册的Person我们需要发送给Service App保存记录(这个时候排除掉上传服务器等其他操作哈,嘻嘻,以下简称S 和 C App)。
5.1 首先定义AIDL接口
1.首先我们要一个Person类, 因为S 和 C 都是需要的。并且应该以S App为准。
  所以 S创建好了Person类以后,C App只需要拷贝就行了。

2.类对象创建好了以后,要实现Parcelable接口 (Android Studio 有对应的插件,不会写的直接插件生成就好啦,
  哈哈,因为我也不会,写太麻烦啦。)

3.定义AIDL接口:
  3.1 首先分析我们需要做什么操作?
      首先有一个AddPerson的方法,把Person添加到S App中,然后我们在提供一个getPersons方法,
      这样添加完以后我们再获取一下所有的Person。那么我们看实现的代码和AIDL代码是怎样
以下操作都是在S app中进行的
1.首先是Person类(就是一个实体类,不用太在意):
package com.xiaxiayige.service;

import android.os.Parcel;
import android.os.Parcelable;

public class Person implements Parcelable {

private String userName;
private int age;

public Person(String userName, int age) {
    this.userName = userName;
    this.age = age;
}

@Override
public int describeContents() {
    return 0;
}

@Override
public void writeToParcel(Parcel dest, int flags) {
    dest.writeString(this.userName);
    dest.writeInt(this.age);
}

protected Person(Parcel in) {
    this.userName = in.readString();
    this.age = in.readInt();
}

public static final Creator CREATOR = new Creator() {
    @Override
    public Person createFromParcel(Parcel source) {
        return new Person(source);
    }

    @Override
    public Person[] newArray(int size) {
        return new Person[size];
    }
};

@Override
public String toString() {
    return "Person{" +
            "userName='" + userName + '\'' +
            ", age=" + age +
            '}';
}
}
2.创建定义的AIDL文件
1.首先创建一个Person.AIDL的文件

// Person.aidl
package com.xiaxiayige.service;


parcelable Person;
2.然后定义传输方法
// IMyAidlInterface.aidl
package com.xiaxiayige.service;


//导入Person包 如果是其他基本类型则不需要导入
import com.xiaxiayige.service.Person;

interface IMyAidlInterface {
//定义一个AddPerson的方法 这里方法中有一个in 参数 表示传入的,如果是其他基本类型则不需要in参数
void addPerson(in Person person);

//添加一个getPersons的方法获取Person
List getPersons();

}
3.然后将上面的类和AIDL拷贝到C App,保持包名和S App中的完全一致。这样才能找到对应的方法和数据类型
5.2 完成Service App编码
上面我们已经完成了在Service的一些基本操作,包括Person对象的创建,AIDL文件的创建,接下来我们需要完成其他方法。
1.首先我们要有一个Service,并且重写onBinder方法
public class PersonAIDLService extends Service {

   //创建一个list,保存从client App进来的Person对象
	ArrayList personArrayList;

	@Override
	public IBinder onBind(Intent intent) {
 	   personArrayList = new ArrayList<>();
   	 return binder;
  }

  //IMyAidlInterface 这个类后面会讲到,定义了AIDL后会自动生成这样一个类供我们调用
 //这里我们先通过new IMyAidlInterface的Stub内部类创建一个Binder对象,
  //后面我们在去分析生成的IMyAidlInterface类做了什么
	Binder binder = new IMyAidlInterface.Stub() {
 	   @Override
   	 public void addPerson(Person person) throws RemoteException {

       	 Log.e("<===", person.toString());
       	 personArrayList.add(person);
   	 }

    	@Override
    	public List getPersons() throws RemoteException {
       	 return personArrayList;
    	}
	};
}
2.有了Service,我们就直接去MainActivity中startService
 Intent serviceIntent = new Intent(this, PersonAIDLService.class);
 startService(serviceIntent);
3.别忘记在Manifest文件中注册一下
5.3 完成Client App编码
1.上面我们已经完成了Person.java Person.aidl, IMyAidlInterface.aidl几个文件的创建,
然后拷贝到Client App,保持和App包名信息一致即可
2.然后我们在Client App中绑定S App中创建的Service
 public class MainActivity extends AppCompatActivity {
 //AIDL自动生成的IMyAidlInterface类文件
 private IMyAidlInterface iMyAidlInterface;


ServiceConnection serviceConnection = new ServiceConnection() {
    @Override
    public void onServiceConnected(ComponentName name, IBinder service) {
        iMyAidlInterface = IMyAidlInterface.Stub.asInterface(service);
    }

    @Override
    public void onServiceDisconnected(ComponentName name) {
        iMyAidlInterface = null;
    }
};

@Override
protected void onCreate(Bundle savedInstanceState) {
    super.onCreate(savedInstanceState);
    setContentView(R.layout.activity_main);
    Intent serviceIntent = new Intent();

    //绑定启动Service 通过制定S app中的包名和具体的包名+类名全路径
    serviceIntent.setComponent(new ComponentName("com.example.ipc_demo_s",
												"com.example.ipc_demo_s.PersonAIDLService"));

    bindService(serviceIntent, serviceConnection, Context.BIND_AUTO_CREATE);

    Button btn = findViewById(R.id.btn);
    btn.setOnClickListener(new View.OnClickListener() {
        @Override
        public void onClick(View v) {
            if(iMyAidlInterface!=null){
                try {
                    //通过按钮调用Person方法,添加数据
                    iMyAidlInterface.addPerson(new Person("xiaxiayige",18));
                    //调用AIDL里面的getPerson方法获取Person数据
                    List persons = iMyAidlInterface.getPersons();
                   //日志数据打印
                    Log.e("===>",persons.toString());
                } catch (RemoteException e) {
                    e.printStackTrace();
                }
            }
        }
    });
 }
}
终于,写了这么久,先看看效果吧我们再去分析下生成的代码里面做了什么操作。
5.4 成果展示
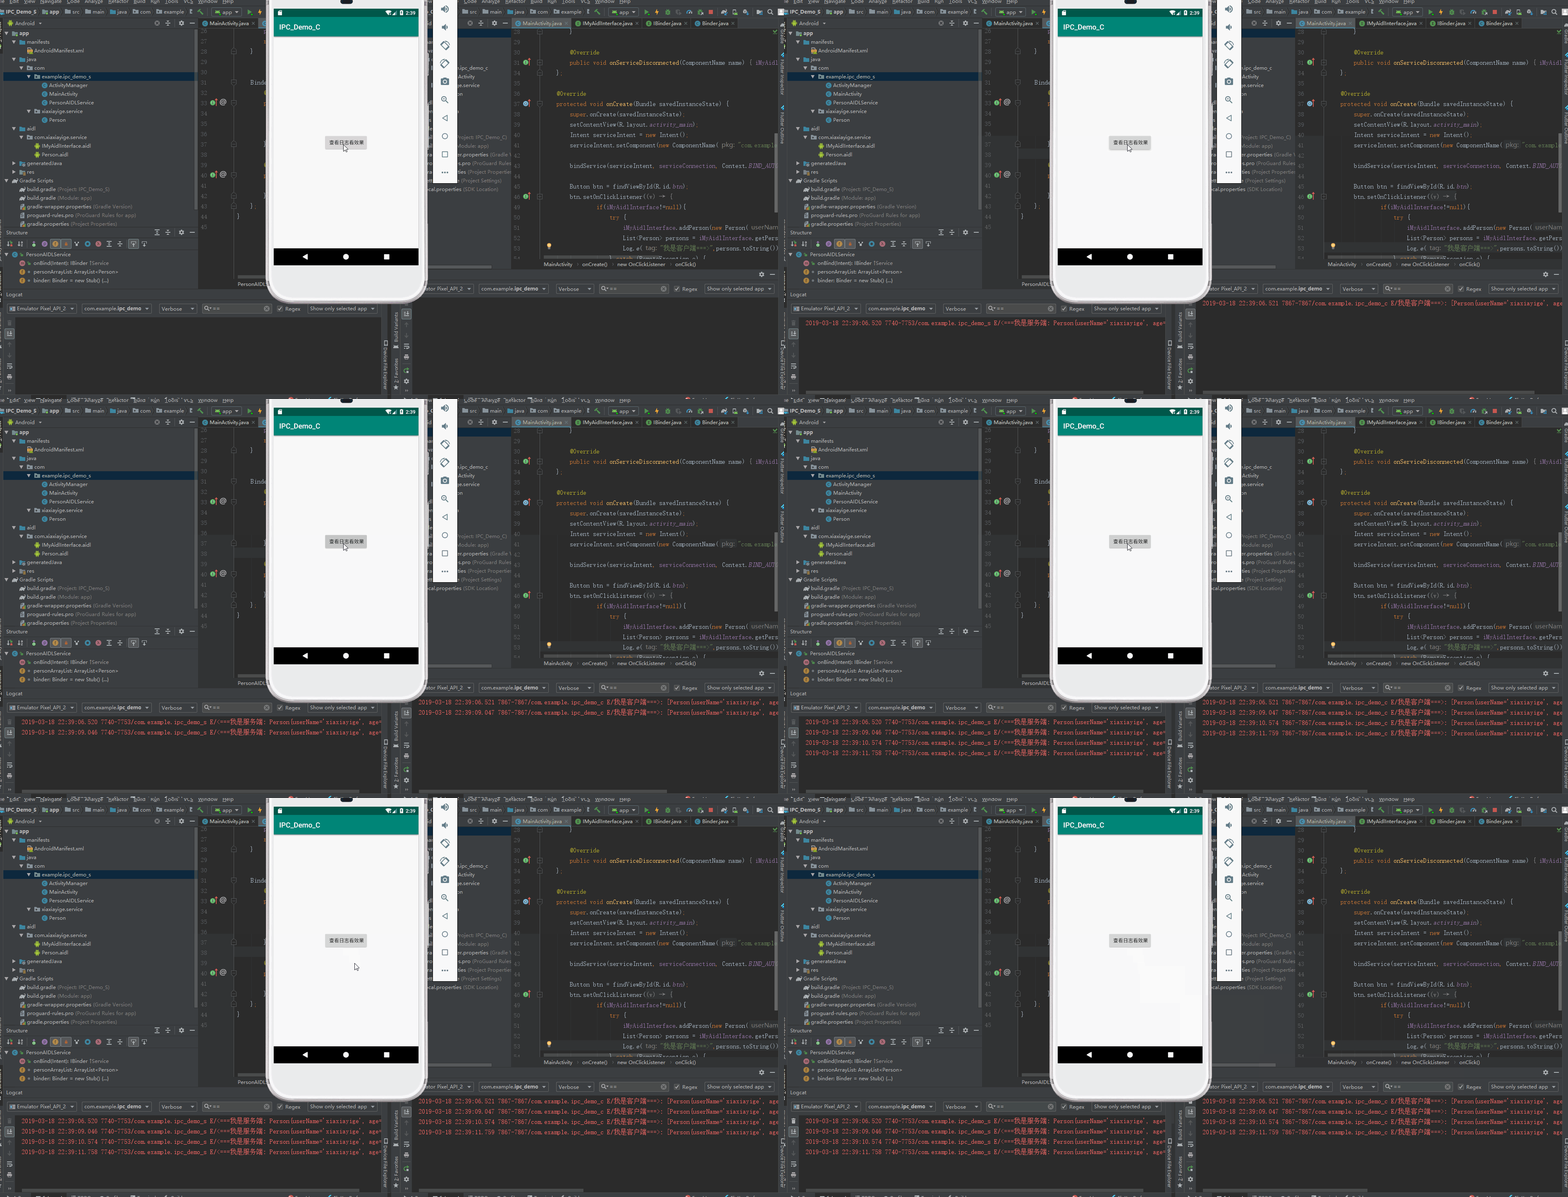
通过上面的代码编写,我们最后的效果 如下所示
连接如果看不到,看不清效果的就点击连接看吧 https://raw.githubusercontent.com/xiaxiayige/LearingProJect/master/img/aidl_a.gif),可以看见打印的时间基本上是同一时间打印出来的。
6.0 AIDL深入理解
6.1 AIDL分析
1.通过我们上面编写的AIDl代码,我们来看看生成的对应的java代码是什么样的。
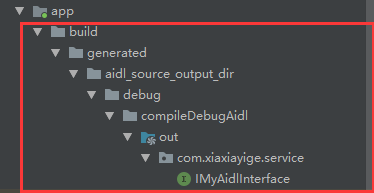
代码文件路径在下图的地方:
然后打开看看里面的代码具体分析。
`public interface IMyAidlInterface extends android.os.IInterface {
/**
 * Local-side IPC implementation stub class.
 */
public static abstract class Stub extends android.os.Binder implements com.xiaxiayige.service.IMyAidlInterface {

    private static final java.lang.String DESCRIPTOR = "com.xiaxiayige.service.IMyAidlInterface";

    /**
     * Construct the stub at attach it to the interface.
     *
     */
    public Stub() {
        this.attachInterface(this, DESCRIPTOR);
    }

    /**
     * Cast an IBinder object into an com.xiaxiayige.service.IMyAidlInterface interface,
     * generating a proxy if needed.
     */
    public static com.xiaxiayige.service.IMyAidlInterface asInterface(android.os.IBinder obj) {
        if ((obj == null)) {
            return null;
        }
        android.os.IInterface iin = obj.queryLocalInterface(DESCRIPTOR);
        if (((iin != null) && (iin instanceof com.xiaxiayige.service.IMyAidlInterface))) {
            return ((com.xiaxiayige.service.IMyAidlInterface) iin);
        }
        return new com.xiaxiayige.service.IMyAidlInterface.Stub.Proxy(obj);
    }

    @Override
    public android.os.IBinder asBinder() {
        return this;
    }

    @Override
    public boolean onTransact(int code, android.os.Parcel data, android.os.Parcel reply, int flags) throws android.os.RemoteException {
        java.lang.String descriptor = DESCRIPTOR;
        switch (code) {
            case INTERFACE_TRANSACTION: {
                reply.writeString(descriptor);
                return true;
            }
            case TRANSACTION_addPerson: {
                data.enforceInterface(descriptor);
                com.xiaxiayige.service.Person _arg0;
                if ((0 != data.readInt())) {
                    _arg0 = com.xiaxiayige.service.Person.CREATOR.createFromParcel(data);
                } else {
                    _arg0 = null;
                }
                this.addPerson(_arg0);
                reply.writeNoException();
                return true;
            }
            case TRANSACTION_getPersons: {
                data.enforceInterface(descriptor);
                java.util.List _result = this.getPersons();
                reply.writeNoException();
                reply.writeTypedList(_result);
                return true;
            }
            default: {
                return super.onTransact(code, data, reply, flags);
            }
        }
    }

    private static class Proxy implements com.xiaxiayige.service.IMyAidlInterface {
        private android.os.IBinder mRemote;

        Proxy(android.os.IBinder remote) {
            mRemote = remote;
        }

        @Override
        public android.os.IBinder asBinder() {
            return mRemote;
        }

        public java.lang.String getInterfaceDescriptor() {
            return DESCRIPTOR;
        }

        @Override
        public void addPerson(com.xiaxiayige.service.Person person) throws android.os.RemoteException {
            android.os.Parcel _data = android.os.Parcel.obtain();
            android.os.Parcel _reply = android.os.Parcel.obtain();
            try {
                _data.writeInterfaceToken(DESCRIPTOR);
                if ((person != null)) {
                    _data.writeInt(1);
                    person.writeToParcel(_data, 0);
                } else {
                    _data.writeInt(0);
                }
                mRemote.transact(Stub.TRANSACTION_addPerson, _data, _reply, 0);
                _reply.readException();
            } finally {
                _reply.recycle();
                _data.recycle();
            }
        }

        @Override
        public java.util.List getPersons() throws android.os.RemoteException {
            android.os.Parcel _data = android.os.Parcel.obtain();
            android.os.Parcel _reply = android.os.Parcel.obtain();
            java.util.List _result;
            try {
                _data.writeInterfaceToken(DESCRIPTOR);
                mRemote.transact(Stub.TRANSACTION_getPersons, _data, _reply, 0);
                _reply.readException();
                _result = _reply.createTypedArrayList(com.xiaxiayige.service.Person.CREATOR);
            } finally {
                _reply.recycle();
                _data.recycle();
            }
            return _result;
        }
    }

    static final int TRANSACTION_addPerson = (android.os.IBinder.FIRST_CALL_TRANSACTION + 0);

    static final int TRANSACTION_getPersons = (android.os.IBinder.FIRST_CALL_TRANSACTION + 1);

}

public void addPerson(com.xiaxiayige.service.Person person) throws android.os.RemoteException;

public java.util.List getPersons() throws android.os.RemoteException;

}`
6.1.1 Stub
1.首先我们创建的AIDL文件为我们自动生成了IMyAidlInterface这样一个类文件,并且继承了 IMyAidlInterface接口。 可以看一下这个类源码文件
·
IInterface.java
	/**
	 * Base class for Binder interfaces.  When defining a new interface,
	 * you must derive it from IInterface.
	 */
	public interface IInterface
	{
	    /**
	     * Retrieve the Binder object associated with this interface.
	     * You must use this instead of a plain cast, so that proxy objects
	     * can return the correct result.
	     */
	    public IBinder asBinder();
	}
从上面的文件可以看出来,这是一个Binder基础类接口,继承了该类的文件,基本上都是用到了Binder机制。继承该类以后实现自己的Binder在As Binder中返回。
- 里面创建了一个Stub内部抽象类,然后通过我们的AIDL中定义的方法,也生成了对应的addPerson 方法和getPerson方法。
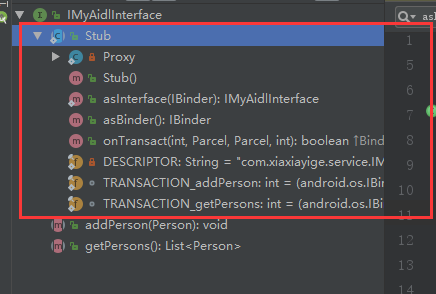
3.然后在看看Stub类有些什么东西
可以看到Stub类里面有一个内部类Proxy,还有其他几个方法,包括asBinder,返回是一个IBinder对象,就是我们实现了IInterface类里面的一个方法,我们从上往下看看,都是做了些什么操作。
 1 声明了一个静态常量 表示这个AIDL的唯一性,全路径名称
 private static final java.lang.String DESCRIPTOR = "com.xiaxiayige.service.IMyAidlInterface";
.
2.构造方法,当Service App中的Service启动的时候。因为我们在Service中的onBinder方法中创建了了这个Stub类
  因为他也是属于一个Binder,所以在Service中的onBinder方法返回了这个Binder,将Binder绑定到了这个Service中
  ,所以在Client App中可以通过调用这个Service中的Binder进行通信交互

 public Stub() {
        this.attachInterface(this, DESCRIPTOR);
    }
.
3.看注释吧

 public static com.xiaxiayige.service.IMyAidlInterface asInterface(android.os.IBinder obj) {
     //判断出入的对象是否为空
	if ((obj == null)) {
            return null;
        }
        //检查这个Binder是否在本地进程中存在(因为有可能已经存在同样的Binder),如果存在则直接返回

        android.os.IInterface iin = obj.queryLocalInterface(DESCRIPTOR);
        if (((iin != null) && (iin instanceof com.xiaxiayige.service.IMyAidlInterface))) {
            return ((com.xiaxiayige.service.IMyAidlInterface) iin);
        }
		//如果本地没有查询到 则创建一个Proxy类返回
        return new com.xiaxiayige.service.IMyAidlInterface.Stub.Proxy(obj);
    }

4.返回当前Binder
 @Override
    public android.os.IBinder asBinder() {
        return this;
    }

5.根据在AIDL文件中定义的2个方法,在生成类文件里面也自动生成了对应的关系,
 可以看见变量名称就是TRANSACTION加上我们定义的方法名,值就是通过系统的值
 android.os.IBinder.FIRST_CALL_TRANSACTION 加上 一个顺序的值 从0开始,这样做的原因是
 因为服务端和客户端2遍生成的代码因为是一致的,这样客户端调用服务端方法的时候,就能根据这样的变量值,找到对应要执行的代码

static final int TRANSACTION_addPerson = (android.os.IBinder.FIRST_CALL_TRANSACTION + 0);
static final int TRANSACTION_getPersons = (android.os.IBinder.FIRST_CALL_TRANSACTION + 1);

5.这个方法主要是用于Client App端调用方法的具体实现。关于switch语句中的几个常量值上面已经提过了

 @Override
    public boolean onTransact(int code, android.os.Parcel data, android.os.Parcel reply, int flags) throws android.os.RemoteException {
        java.lang.String descriptor = DESCRIPTOR;
        switch (code) {
            case INTERFACE_TRANSACTION: {
                reply.writeString(descriptor);
                return true;
            }
            case TRANSACTION_addPerson: {
                data.enforceInterface(descriptor);
                com.xiaxiayige.service.Person _arg0;
                if ((0 != data.readInt())) {
                    _arg0 = com.xiaxiayige.service.Person.CREATOR.createFromParcel(data);
                } else {
                    _arg0 = null;
                }
                //调用我们的方法
                this.addPerson(_arg0);
                //告诉没有异常
                reply.writeNoException();
                return true;
            }
            case TRANSACTION_getPersons: {
                data.enforceInterface(descriptor);
                 //调用我们的方法
                java.util.List _result = this.getPersons();
                //告诉没有异常
                reply.writeNoException();
                reply.writeTypedList(_result);
                return true;
            }
            default: {
                return super.onTransact(code, data, reply, flags);
            }
        }
    }
6.1.2 Proxy
主要看注释吧
 private static class Proxy implements com.xiaxiayige.service.IMyAidlInterface {
        private android.os.IBinder mRemote;

        //这里传入了Stub类的实例 ,可以看到在上面Stub asInterface的时候 传入了一个Binder对象 因为这个主要是在
		Client中调用的,所以传入的就是Service App 中的 Binder对象 也就是Stub这个实例
        Proxy(android.os.IBinder remote) {
            mRemote = remote;
        }

        @Override
        public android.os.IBinder asBinder() {
            return mRemote;
        }

        public java.lang.String getInterfaceDescriptor() {
            return DESCRIPTOR;
        }

       //这就是具体实现的方法在Client调用的
        @Override
        public void addPerson(com.xiaxiayige.service.Person person) throws android.os.RemoteException {
            android.os.Parcel _data = android.os.Parcel.obtain();
            android.os.Parcel _reply = android.os.Parcel.obtain();
            try {
                _data.writeInterfaceToken(DESCRIPTOR);
                if ((person != null)) {
                    _data.writeInt(1);
                    person.writeToParcel(_data, 0);
                } else {
                    _data.writeInt(0);
                }
                //调用服务端的transact方法 具体实现
                mRemote.transact(Stub.TRANSACTION_addPerson, _data, _reply, 0);
                _reply.readException();
            } finally {
                _reply.recycle();
                _data.recycle();
            }
        }

        @Override
        public java.util.List getPersons() throws android.os.RemoteException {
            android.os.Parcel _data = android.os.Parcel.obtain();
            android.os.Parcel _reply = android.os.Parcel.obtain();
            java.util.List _result;
            try {
                _data.writeInterfaceToken(DESCRIPTOR);
				//调用服务端的transact方法 具体实现
                mRemote.transact(Stub.TRANSACTION_getPersons, _data, _reply, 0);
                _reply.readException();
                _result = _reply.createTypedArrayList(com.xiaxiayige.service.Person.CREATOR);
            } finally {
                _reply.recycle();
                _data.recycle();
            }
            return _result;
        }
    }
6.2.0 综合总结
AIDL是需要启动一个Service作为绑定连接的,并且Service要运行其他进程可访问就是在配置的时候要记得添加
android:exported="true" 这样一个属性。
7.结尾
所以呢,这就是我自己的一个学习理解过程,当中可能也有自己理解错的地方,大家可以指出我也好学习学习 ,哈哈。
其实有其他很多的我们平时没有关注到的一些用到的服务也是用得AIDL,大家可以去看看,包括ActivityManagerService,再往深入了解就是需要了解内部Binder的原理。等到下次再来接着这边文章分析吧
8.Demo地址
Github:https://github.com/xiaxiayige/LearingProJect/tree/master/AIDLDemo
9. 遗留问题
如果service App没有打开,那么Client App 还能不能调用到Service App中的方法,通过AIDL? 这是为什么?


