android圆形图片,圆形背景文字的CircleTextImageView开源组件
在项目中我们经常遇到需要显示圆形头像的需求,一般我们都使用hdodenhof/CircleImageView的这个开源控件实现(简洁,没多余的东西)。
而在的项目中我经常遇到这样的一个需求:如果用户上传了头像就显示圆形头像,如果没有上传头像就在圆形背景上显示文字。或者是直接在圆形头像上添加文字。因此我就在CircleImageView基础上实现了一个CircleTextImageView的组件。
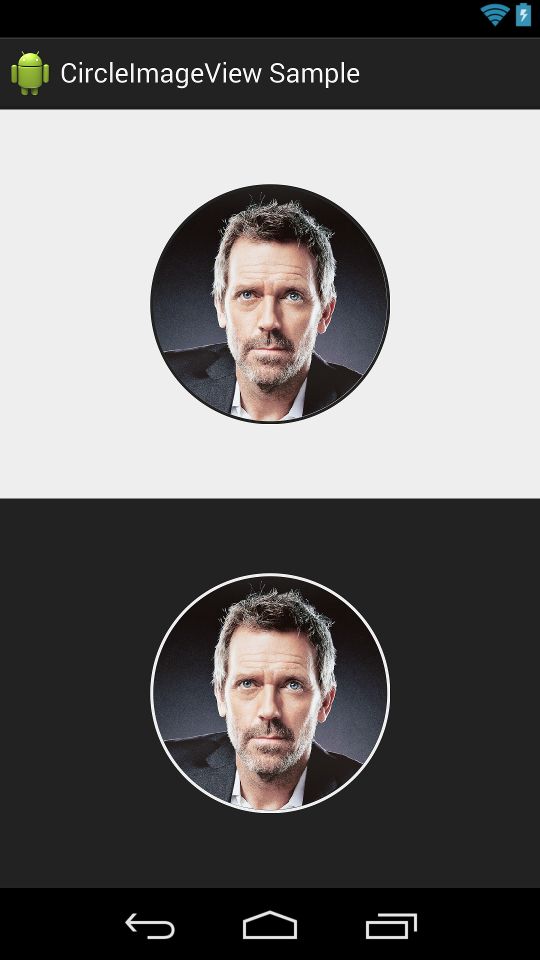
CircleTextImageView是一个什么样的组件呢,直接上图吧
1.只显示头像
2.圆形背景文字
3.头像+文字
分别的使用方法:
1.只显示头像
<com.thinkcool.circletextimageview.CircleTextImageView
        xmlns:app="http://schemas.android.com/apk/res-auto"
        android:id="@+id/profile_image"
        android:layout_width="96dp"
        android:layout_height="96dp"
        android:src="@drawable/hugh"
        app:citv_border_width="2dp"
        app:citv_border_color="#FF000000"/>
2.圆形背景文字
<com.thinkcool.circletextimageview.CircleTextImageView
            android:layout_width="wrap_content"
            android:layout_height="wrap_content"
            app:citv_border_color="@android:color/white"
            app:citv_border_width="2dp"
            android:layout_gravity="center"
            app:citv_text_text="照片"
            app:citv_text_size="32sp"
            app:citv_text_padding="35dp"
            app:citv_text_color="@android:color/white"
            app:citv_fill_color="#50555D"
            />
3.头像+文字
<com.thinkcool.circletextimageview.CircleTextImageView
            android:layout_width="96dp"
            android:layout_height="96dp"
            app:citv_border_color="@android:color/darker_gray"
            app:citv_border_width="2dp"
            android:layout_gravity="center"
            app:citv_text_text="晴朗"
            app:citv_text_size="32sp"
            app:citv_text_padding="35dp"
            android:src="@drawable/skye"
            app:citv_text_color="#ff99cc00"
            app:citv_fill_color="#50555D"
            />
最后在build.gradle中添加组件即可:
compile 'com.github.thinkcool:circletextimageview:1.0.20151218'github地址:
https://github.com/CoolThink/CircleTextImageView(还是那句话,喜欢的欢迎加星fork)
知其然知其所以然,最后说一下实现吧:
简单的说下自定义控件的流程
1.到attr.xml中declare-styleable申明自定义控件属性
2.在构造函数中获取相应属性,并实现get,set函数
3.onDraw中完成图像的绘制
4.onMeasure中处理wrap_content时控件的大小
由于该控件是基于hdodenhof/CircleImageView实现的,我们就关注下不同的地方和需要注意的就可以了:
一.绘制文字
 if (!TextUtils.isEmpty(mTextString)) {
            Paint.FontMetricsInt fm = mTextPaint.getFontMetricsInt();
            canvas.drawText(mTextString,
                    getWidth() / 2 - mTextPaint.measureText(mTextString) / 2,
                    getHeight() / 2 - fm.descent + (fm.bottom - fm.top) / 2, mTextPaint);
        }
在drawText的时候:第三个参数需要传入的是文字的baseline(基准线:用过英文本子的都知道我们需要对齐并不是底部).
关于baseline怎么求解:
先了解下FontMetricsInt的各个成员:
1.top:文字的顶部坐标
2.bottom:文字的底部坐标
3.descent:文字顶部(bottom)到baseline的距离
要求解baseline之前我们先明确下我们的目标是为了让字体在y轴上居中:由于baseline是一个对于我们来说是一个抽象的位置,那我们就以bottom为参照来进行计算。
1.字体的高度=bottom-top,为了让字体居中,所以将整个字体高度居中即可,因此有:bottom=getHeight()/2+(bottom-top)/2
2.而根据descent的意义我们知道:baseline=bottom-descent;
3.所以baseline=getHeight()/2+(bottom-top)/2-descent
二.处理wrap_content的情况的适配
为什么要处理wrap_content的情况,因为控件是继承自imageView的,因此imageView的wrap_content是指的:控件的宽高等于src中图像的宽高。而我们由于添加了新功能因此要适应以下两个场景:
1.当我们使用第二种场景(圆形背景文字)由于不需要指定src,会发现指定为wrap_content的时候控件的宽高为0.
2.当我们使用第三种场景(头像+文字)的时候,使用wrap_content时如果我们的字体较多或者字符较长时发现文字显示不下或者大小不合适,因为此时控件的宽高为src图片的宽高,而图片较小是自然显示不下了。
因此我们需要进行重新测量重写onMeasure函数:
 @Override
    protected void onMeasure(int widthMeasureSpec, int heightMeasureSpec) {
        super.onMeasure(widthMeasureSpec, heightMeasureSpec);
        int widthMeasureSpecMode=MeasureSpec.getMode(widthMeasureSpec);
        int widthMeasureSpecSize=MeasureSpec.getSize(widthMeasureSpec);
        int heightMeasureSpecMode=MeasureSpec.getMode(heightMeasureSpec);
        int heightMeasureSpecSize=MeasureSpec.getSize(heightMeasureSpec);

        if(!TextUtils.isEmpty(mTextString))
        {
            int textMeasuredSize= (int) (mTextPaint.measureText(mTextString));
            textMeasuredSize+=2*mTextPadding;
            if(widthMeasureSpecMode==MeasureSpec.AT_MOST&&heightMeasureSpecMode==MeasureSpec.AT_MOST)
            {
                if(textMeasuredSize>getMeasuredWidth()||textMeasuredSize>getMeasuredHeight())
                {
                    setMeasuredDimension(textMeasuredSize,textMeasuredSize);
                }
            }
        }

    }
在onMeasure函数里:我们先调用父类的的onMeasure进行测量,对于父类的测量:除了MeasureSpecMode为AT_MOST时其他的都遵循父类的测量。
当为AT_MOST模式的时候:
我们需要对比已经测量好的MeasureSpecSize和我们传入的文字的大小进行对比,当我们文字的大小更大时,我们就应该以文字的大小为控件的大小,当然还要加上textpadding的大小,才为控件的最终大小。


