shiro 单点登录
Shiro 1.2开始提供了Jasig CAS单点登录的支持,单点登录主要用于多系统集成,即在多个系统中,用户只需要到一个中央服务器登录一次即可访问这些系统中的任何一个,无须多次登录。此处我们使用Jasig CAS v4.0.0-RC3版本:
https://github.com/Jasig/cas/tree/v4.0.0-RC3
Jasig CAS单点登录系统分为服务器端和客户端,服务器端提供单点登录,多个客户端(子系统)将跳转到该服务器进行登录验证,大体流程如下:
1、访问客户端需要登录的页面http://localhost:9080/ client/,此时会跳到单点登录服务器https://localhost:8443/ server/login?service=https://localhost:9443/ client/cas;
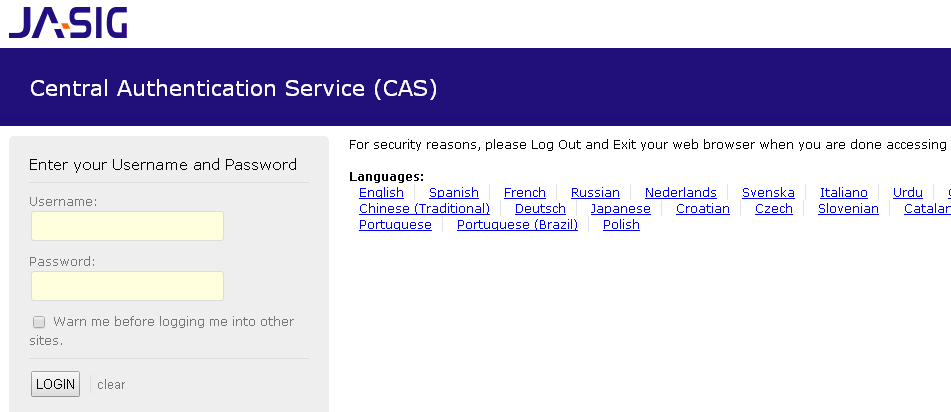
2、如果此时单点登录服务器也没有登录的话,会显示登录表单页面,输入用户名/密码进行登录;
3、登录成功后服务器端会回调客户端传入的地址:https://localhost:9443/client/cas?ticket=ST-1-eh2cIo92F9syvoMs5DOg-cas01.example.org,且带着一个ticket;
4、客户端会把ticket提交给服务器来验证ticket是否有效;如果有效服务器端将返回用户身份;
5、客户端可以再根据这个用户身份获取如当前系统用户/角色/权限信息。
本章使用了和《第十四章 SSL》一样的数字证书。
服务器端
我们使用了Jasig CAS服务器v4.0.0-RC3版本,可以到其官方的github下载:https://github.com/Jasig/cas/tree/v4.0.0-RC3下载,然后将其cas-server-webapp模块封装到shiro-example-chapter15-server模块中,具体请参考源码。
1、数字证书使用和《第十四章 SSL》一样的数字证书,即将localhost.keystore拷贝到shiro-example-chapter15-server模块根目录下;
2、在pom.xml中添加Jetty Maven插件,并添加SSL支持:
|
1
2
3
4
5
6
7
8
9
10
11
12
13
14
15
16
17
18
19
20
21
|
<
plugin
>
<
groupId
>org.mortbay.jetty
<
artifactId
>jetty-maven-plugin
<
version
>8.1.8.v20121106
<
configuration
>
<
        webAppConfig
        >
<
contextPath
>/${project.build.finalName}
<
        connectors
        >
<
connector
implementation
=
"org.eclipse.jetty.server.nio.SelectChannelConnector"
>
<
port
>8080
<
connector
implementation
=
"org.eclipse.jetty.server.ssl.SslSocketConnector"
>
<
port
>8443
<
keystore
>${project.basedir}/localhost.keystore
<
password
>123456
<
keyPassword
>123456
|
3、修改src/main/webapp/WEB-INF/deployerConfigContext.xml,找到primaryAuthenticationHandler,然后添加一个账户:
|
1
|
|
其也支持如JDBC查询,可以自己定制;具体请参考文档。
4、mvn jetty:run启动服务器测试即可:
访问https://localhost:8443/chapter15-server/login将弹出如下登录页面:
输入用户名/密码,如zhang/123,将显示登录成功页面:
到此服务器端的简单配置就完成了。
客户端
1、首先使用localhost.keystore导出数字证书(公钥)到D:\localhost.cer
|
1
|
keytool -export -alias localhost -file D:\localhost.cer -keystore D:\localhost.keystore
|
2、因为CAS client需要使用该证书进行验证,需要将证书导入到JDK中:
|
1
2
|
cd D:\jdk1.
7
.0_21\jre\lib\security
keytool -
import
-alias localhost -file D:\localhost.cer -noprompt -trustcacerts -storetype jks -keystore cacerts -storepass
123456
|
如果导入失败,可以先把security 目录下的cacerts删掉;
3、按照服务器端的Jetty Maven插件的配置方式配置Jetty插件;
4、在shiro-example-chapter15-client模块中导入shiro-cas依赖,具体请参考其pom.xml;
5、自定义CasRealm:
|
1
2
3
4
5
6
7
8
9
10
11
12
13
14
|
public
class
MyCasRealm
extends
CasRealm {
private
UserService userService;
public
void
setUserService(UserService userService) {
this
.userService = userService;
}
@Override
protected
AuthorizationInfo doGetAuthorizationInfo(PrincipalCollection principals) {
String username = (String)principals.getPrimaryPrincipal();
SimpleAuthorizationInfo authorizationInfo =
new
SimpleAuthorizationInfo();
authorizationInfo.setRoles(userService.findRoles(username));
authorizationInfo.setStringPermissions(userService.findPermissions(username));
return
authorizationInfo;
}
}
|
CasRealm根据CAS服务器端返回的用户身份获取相应的角色/权限信息。
6、spring-shiro-web.xml配置:
|
1
2
3
4
5
6
|
<
bean
id
=
"casRealm"
class
=
"com.github.zhangkaitao.shiro.chapter13.realm.MyCasRealm"
>
<
property
name
=
"userService"
ref
=
"userService"
/>
……
<
property
name
=
"casServerUrlPrefix"
value
=
"https://localhost:8443/chapter14-server"
/>
<
property
name
=
"casService"
value
=
"https://localhost:9443/chapter14-client/cas"
/>
|
casServerUrlPrefix:是CAS Server服务器端地址;
casService:是当前应用CAS服务URL,即用于接收并处理登录成功后的Ticket的;
如果角色/权限信息是由服务器端提供的话,我们可以直接使用CasRealm:
|
1
2
3
4
5
6
7
8
9
|
……
|
defaultRoles/ defaultPermissions:默认添加给所有CAS登录成功用户的角色和权限信息;
roleAttributeNames/ permissionAttributeNames:角色属性/权限属性名称,如果用户的角色/权限信息是从服务器端返回的(即返回的CAS Principal中除了Principal之外还有如一些Attributes),此时可以使用roleAttributeNames/ permissionAttributeNames得到Attributes中的角色/权限数据;请自行查询CAS获取用户更多信息。
|
1
2
3
|
<
bean
id
=
"casFilter"
class
=
"org.apache.shiro.cas.CasFilter"
>
<
property
name
=
"failureUrl"
value
=
"/casFailure.jsp"
/>
|
CasFilter类似于FormAuthenticationFilter,只不过其验证服务器端返回的CAS Service Ticket。
|
1
2
3
4
5
6
7
8
9
10
11
12
13
14
15
16
17
18
|
<
bean
id
=
"shiroFilter"
class
=
"org.apache.shiro.spring.web.ShiroFilterFactoryBean"
>
<
property
name
=
"securityManager"
ref
=
"securityManager"
/>
<
property
name
=
"loginUrl"
value
=
"https://localhost:8443/chapter14-server/login?service=https://localhost:9443/chapter14-client/cas"
/>
<
property
name
=
"successUrl"
value
=
"/"
/>
<
property
name
=
"filters"
>
<
        util:map
        >
<
entry
key
=
"cas"
value-ref
=
"casFilter"
/>
<
property
name
=
"filterChainDefinitions"
>
<
        value
        >
/casFailure.jsp = anon
/cas = cas
/logout = logout
/** = user
|
loginUrl:https://localhost:8443/chapter15-server/login表示服务端端登录地址,登录成功后跳转到?service参数对于的地址进行客户端验证及登录;
“/cas=cas”:即/cas地址是服务器端回调地址,使用CasFilter获取Ticket进行登录。
7、测试,输入http://localhost:9080/chapter15-client地址进行测试即可,可以使用如Chrome开这debug观察网络请求的变化。
如果遇到以下异常,一般是证书导入错误造成的,请尝试重新导入,如果还是不行,有可能是运行应用的JDK和安装数字证书的JDK不是同一个造成的:
|
1
2
3
4
5
6
7
8
9
10
11
12
13
14
|
Caused by: sun.security.validator.ValidatorException: PKIX path building failed: sun.security.provider.certpath.SunCertPathBuilderException: unable to find valid certification path to requested target
at sun.security.validator.PKIXValidator.doBuild(PKIXValidator.java:
385
)
at sun.security.validator.PKIXValidator.engineValidate(PKIXValidator.java:
292
)
at sun.security.validator.Validator.validate(Validator.java:
260
)
at sun.security.ssl.X509TrustManagerImpl.validate(X509TrustManagerImpl.java:
326
)
at sun.security.ssl.X509TrustManagerImpl.checkTrusted(X509TrustManagerImpl.java:
231
)
at sun.security.ssl.X509TrustManagerImpl.checkServerTrusted(X509TrustManagerImpl.java:
126
)
at sun.security.ssl.ClientHandshaker.serverCertificate(ClientHandshaker.java:
1323
)
...
67
more
Caused by: sun.security.provider.certpath.SunCertPathBuilderException: unable to find valid certification path to requested target
at sun.security.provider.certpath.SunCertPathBuilder.engineBuild(SunCertPathBuilder.java:
196
)
at java.security.cert.CertPathBuilder.build(CertPathBuilder.java:
268
)
at sun.security.validator.PKIXValidator.doBuild(PKIXValidator.java:
380
)
...
73
more
|

