GitLab与Jenkins自动部署——Devops(一)
GitLab与Jenkins自动部署
- 前言
- 1、搭建 GitLab(192.168.117.129)
- 1.1 下载 RPM 安装包
- 1.2 安装GitLab
- 1.3 修改external_url
- 1.4 自动配置GitLab
- 1.5 启动GitLab
- 1.6 访问 502 错误
- 2、Devops(192.168.117.128)
- 2.1 安装配置JDK、Tomcat、jenkins.war、Maven
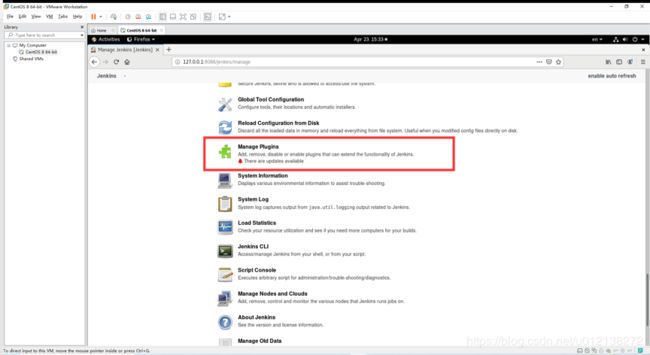
- 2.2 安装插件
- 2.3 创建管理员用户
- 2.4 汉化
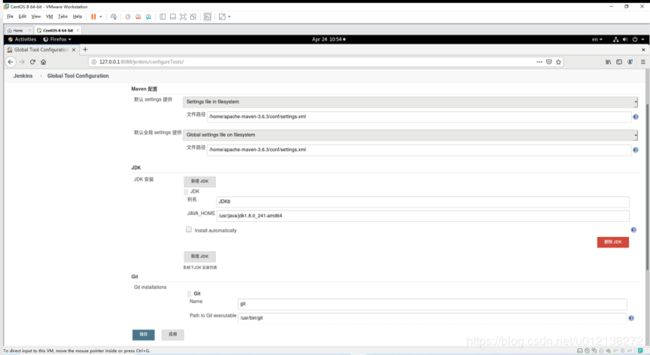
- 2.5 配置JDK、Maven、Git
- 3、配置GitLab构建项目
- 3.1 手动同步代码构建启动
- 3.2 配置Webhook触发自动构建
- 3.3 测试Webhook配置
前言
上一次某云崩溃以后,学习了一下CentOS开机自启。然后想着,如果我提交Git就可以自动发布新版本测试,那是不是又节约了一部分时间,又可以学习了,学习总是使我快乐!
出于上述的目的,了解了时下比较火热的一个概念——Devops,持续集成开发!
一般来说,Git+Jenkins+Docker这一套模式比较火,Docker之前玩过,但是这次没集成,本次从自己搭建GitLab服务端到部署Jenkins开始,之后有时间再集成Docker
1、搭建 GitLab(192.168.117.129)
1.1 下载 RPM 安装包
gitlab-ce-12.10.1-ce.0.el8.x86_64.rpm
1.2 安装GitLab
rpm -ivh gitlab-ce-12.10.1-ce.0.el8.x86_64.rpm
#安装 SSH
yum install -y openssh openssh-server
systemctl enable sshd
systemctl start sshd
# 安装邮件服务
yum install postfix
systemctl enable postfix
systemctl start postfix
一般服务器默认开启SSH,所以这里也可以省略这步
1.3 修改external_url
vi /etc/gitlab/gitlab.rb

external_url 'http://192.168.117.129:6953/gitlab’
一般不建议把端口写成8080,会与GitLab的unicorn冲突,当然也可以修改unicorn端口 unicorn[‘port’]=8888
1.4 自动配置GitLab
gitlab-ctl reconfigure
1.5 启动GitLab
gitlab-ctl start
/etc/gitlab/gitlab.rb 主配置文件
/var/log/gitlab/ 日志目录
/var/opt/gitlab/ 各个服务的主目录
/var/opt/gitlab/git-data/repositories GIT 仓库数据目录
1.6 访问 502 错误
可能是由于GitLab占据内存大,所以报错,如果是虚拟机运行的,调大内存即可。还一种说法是要分配虚拟交换内存
创建2G的空间
[root@localhost ~]# dd if=/dev/zero of=/var/swap bs=1024 count=2048000
2048000+0 records in
2048000+0 records out
2097152000 bytes (2.1 GB, 2.0 GiB) copied, 6.82497 s, 307 MB/s

if 表示infile,of表示outfile,bs=1024代表增加的模块大小,count=2048000代表2048000个模块,也就是2G空间
将目的文件设置为swap分区文件
[root@localhost ~]# mkswap /var/swap
mkswap: /var/swap: insecure permissions 0644, 0600 suggested.
Setting up swapspace version 1, size = 2 GiB (2097147904 bytes)
no label, UUID=3f3c1b4e-6444-4180-a309-4f52ea91958d

激活swap,立即启用交换分区文件
[root@localhost ~]# mkswap -f /var/swap
mkswap: /var/swap: insecure permissions 0644, 0600 suggested.
mkswap: /var/swap: warning: wiping old swap signature.
Setting up swapspace version 1, size = 2 GiB (2097147904 bytes)
no label, UUID=8d2c8fef-b7e7-4b36-849d-fe85fbd4ef78
[root@localhost ~]# reboot
2、Devops(192.168.117.128)
2.1 安装配置JDK、Tomcat、jenkins.war、Maven
将jenkins.war移动到Tomcat中的webapps路径下,修改Tomcat端口(8088),启动Tomcat
打开127.0.0.1:8088/jenkins/,从本地获取密码登陆
[root@localhost conf]# vi server.xml
[root@localhost conf]# cd ../bin/
[root@localhost bin]# sh startup.sh
Using CATALINA_BASE:   /home/apache-tomcat-9.0.34
Using CATALINA_HOME:   /home/apache-tomcat-9.0.34
Using CATALINA_TMPDIR: /home/apache-tomcat-9.0.34/temp
Using JRE_HOME:        /usr
Using CLASSPATH:       /home/apache-tomcat-9.0.34/bin/bootstrap.jar:/home/apache-tomcat-9.0.34/bin/tomcat-juli.jar
Tomcat started.
[root@localhost bin]# cat /root/.jenkins/secrets/initialAdminPassword
[root@localhost bin]#
2.2 安装插件
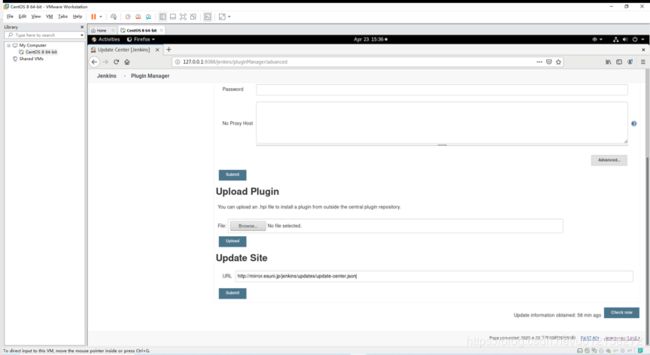
安装插件可能会失败,建议更换源
http://mirror.esuni.jp/jenkins/updates/update-center.json
2.3 创建管理员用户
2.4 汉化
下载locale插件和Localization: Chinese (Simplified),通过 Jenkins 管理设置中文
2.5 配置JDK、Maven、Git
3、配置GitLab构建项目
3.1 手动同步代码构建启动
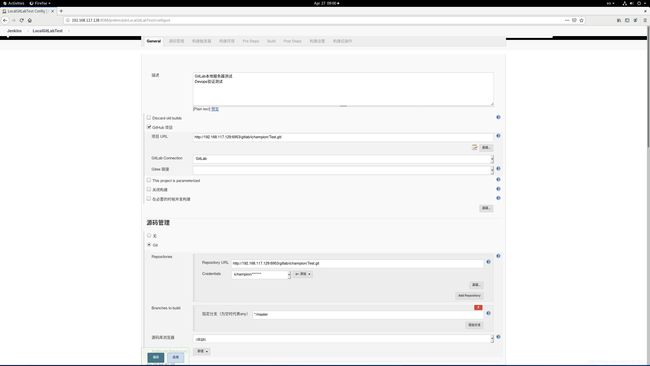
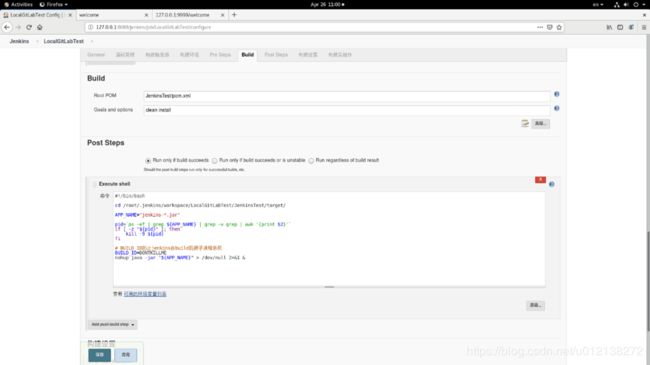
选择Git 项目,把项目地址,用户名/登录密码填上,添加启动命令,基本就可以完成手动构建项目并启动了
启动的Shell命令,是如果发现有老的版本正在运行的,将会关闭老的版本然后启动新版本。因为版本号可能会随着功能模块的更新而发生变化,所以Shell并不指定具体的版本号
cd /root/.jenkins/workspace/LocalGitLabTest/JenkinsTest/target/

APP_NAME="jenkins-*.jar"

pid=`ps -ef | grep ${APP_NAME} | grep -v grep | awk '{print $2}'`
if [ -z "${pid}" ]; then
    kill -9 ${pid}
fi

# BUILD_ID防止jenkins在build后把子进程杀死
BUILD_ID=DONTKILLME
nohup java -jar "${APP_NAME}" > /dev/null 2>&1 &
3.2 配置Webhook触发自动构建
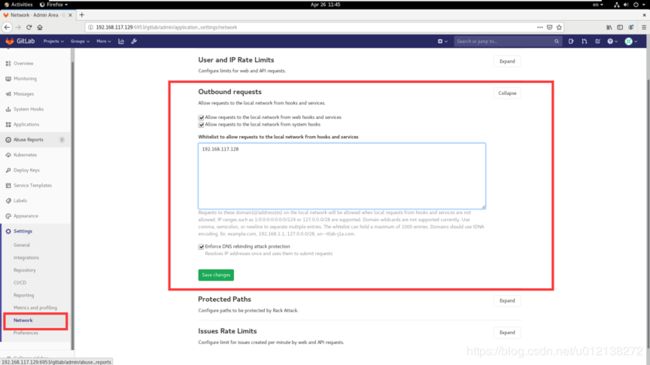
Webhook提示Requests to the local network are not allowed
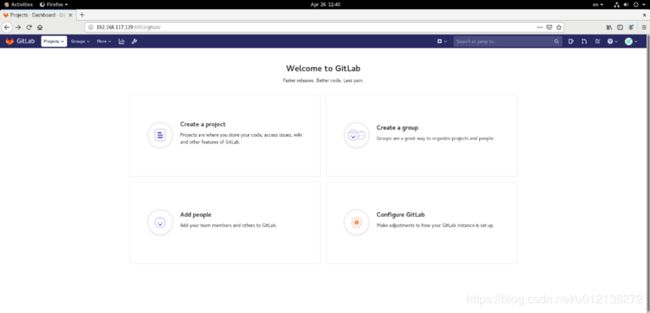
GitLab用root用户登录,进入Configure Gitlab模块
Jenkins 生成 token

将Jenkins项目token填写到GitLab Webhook的token中

创建GitLab token

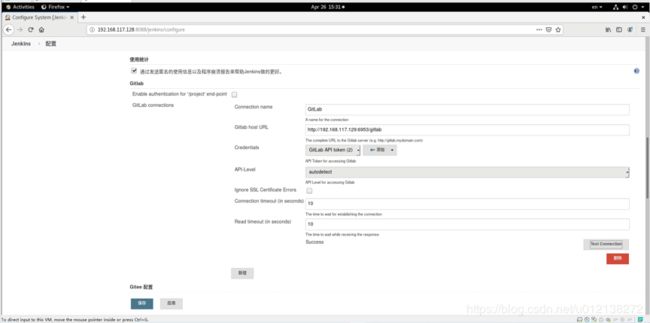
Jenkins 配置 GitLab 生成的 token
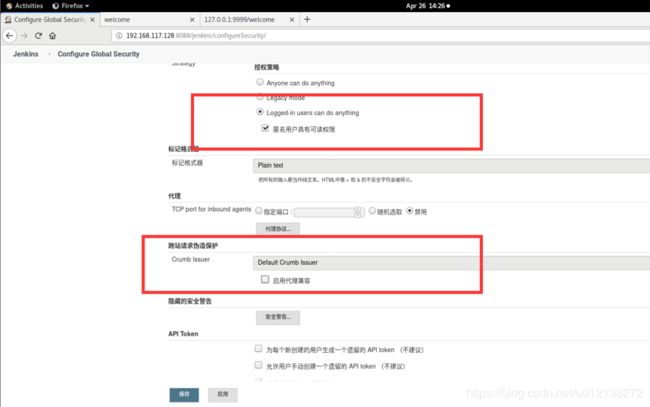
Webhook 403错误
Webhook 500错误
Jenkins安装GitLab Hook插件及其依赖
