使用IDEA搭建Dubbo入门小Demo
有任何问题加群讨论,还可以领取精美学习资料噢~
群号:733899823
加群时请备注CSDN~
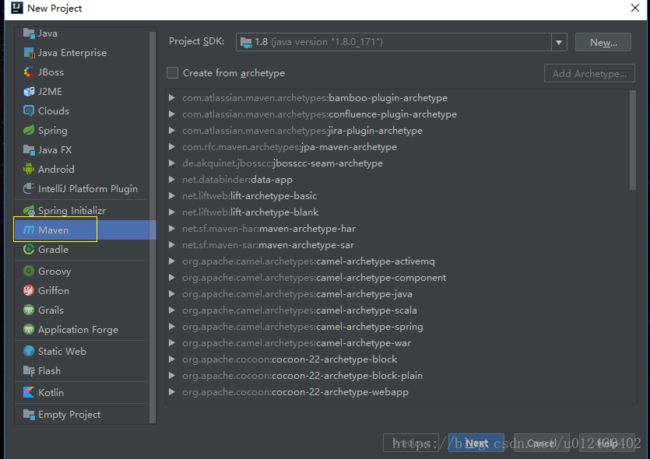
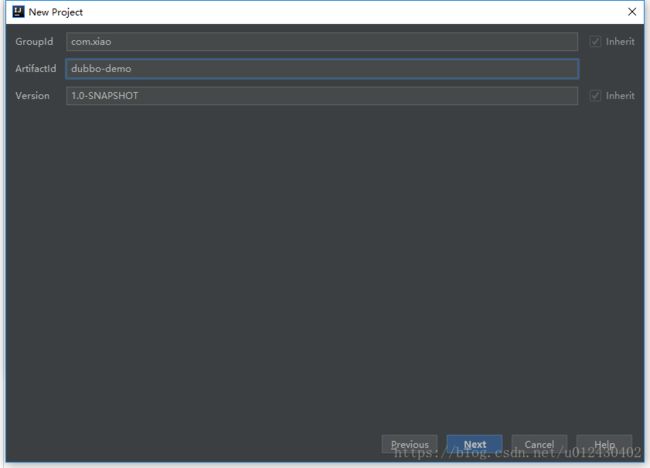
一、使用IDEA创建Maven工程
创建好工程之后,可以把src目录删除。此工程将作为聚合工程。
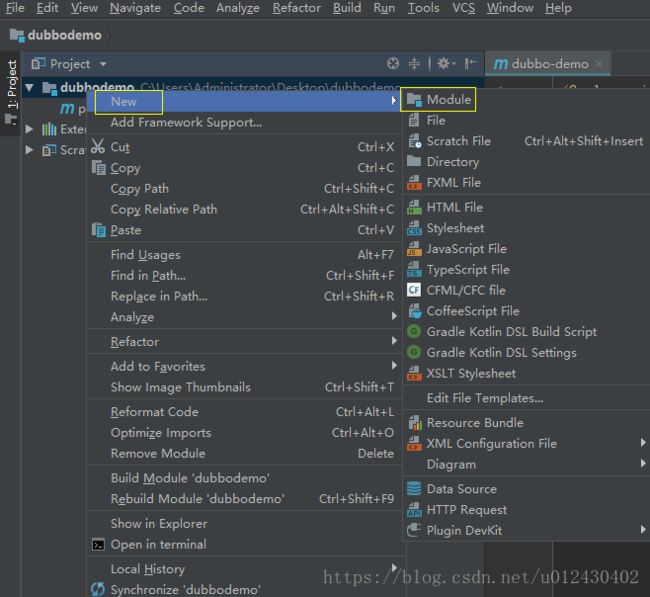
二、创建服务提供者模块dubbo-service
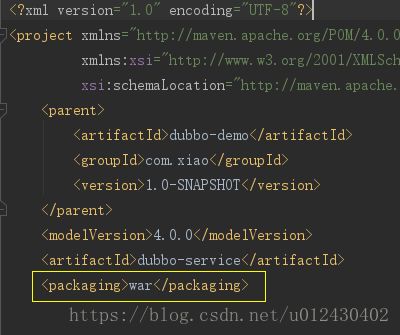
创建之后,首先在pom.xml文件中修改其打包方式为war
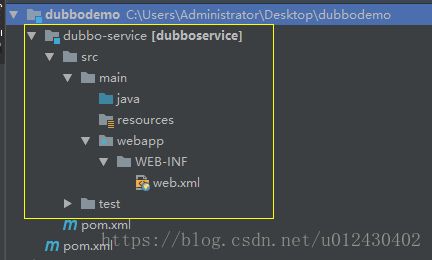
接着完善目录结构,添加web.xml文件,如下:
在web.xml中配置sping核心配置文件,及监听器,加载spring容器
	contextConfigLocation
	classpath:/spring/applicationContext*.xml


	org.springframework.web.context.ContextLoaderListener
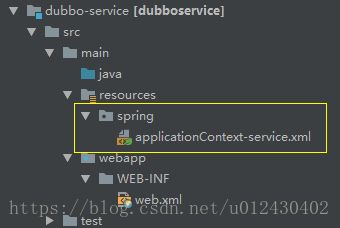
然后在resources目录下添加spring核心配置文件
该文件要配置服务名、注册中心的地址以及服务所在的包。(注册中心使用zookeeper,其安装过程我在另一篇博客中记录过,在此不再赘述,地址:https://blog.csdn.net/u012430402/article/details/82694473)
最后还需要在pom.xml中添加相关依赖,如下
        4.2.4.RELEASE


            org.springframework
            spring-context
            ${spring.version}


            org.springframework
            spring-beans
            ${spring.version}


            org.springframework
            spring-webmvc
            ${spring.version}


            org.springframework
            spring-jdbc
            ${spring.version}


            org.springframework
            spring-aspects
            ${spring.version}


            org.springframework
            spring-jms
            ${spring.version}


            org.springframework
            spring-context-support
            ${spring.version}


            com.alibaba
            dubbo
            2.5.3


            org.apache.zookeeper
            zookeeper
            3.4.12


            com.github.sgroschupf
            zkclient
            0.1


                org.apache.maven.plugins
                maven-compiler-plugin
                3.2

                    1.8
                    1.8


                org.apache.tomcat.maven
                tomcat7-maven-plugin


                    8080

                    /
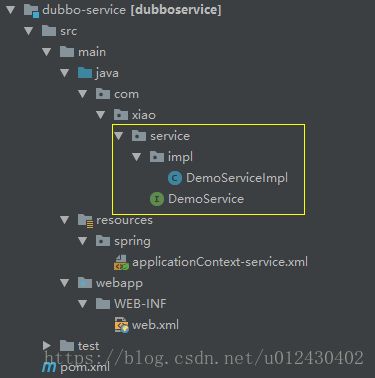
到此我们服务的提供方的工程已经创建好了,接下来去创建提供的服务的接口及其实现类,如下:
package com.xiao.service;

/**
 * @Description 服务提供方 接口
 * @Auther: 笑笑
 * @Date: 15:18 2018/9/14
 */
public interface DemoService {

    public String hello();
}
package com.xiao.service.impl;

import com.alibaba.dubbo.config.annotation.Service;
import com.xiao.service.DemoService;

/**
 * @Description 服务提供方接口 实现类
 * @Auther: 笑笑
 * @Date: 15:19 2018/9/14
 */
@Service
public class DemoServiceImpl implements DemoService {

    @Override
    public String hello() {
        return "Hello Dubbo!";
    }
}
在这里要注意一下,@Service注解一定要使用dubbo的注解。
三、创建服务消费者dubbo-controller模块
创建工程的具体过程与上面的一样,在此不再重复书写。
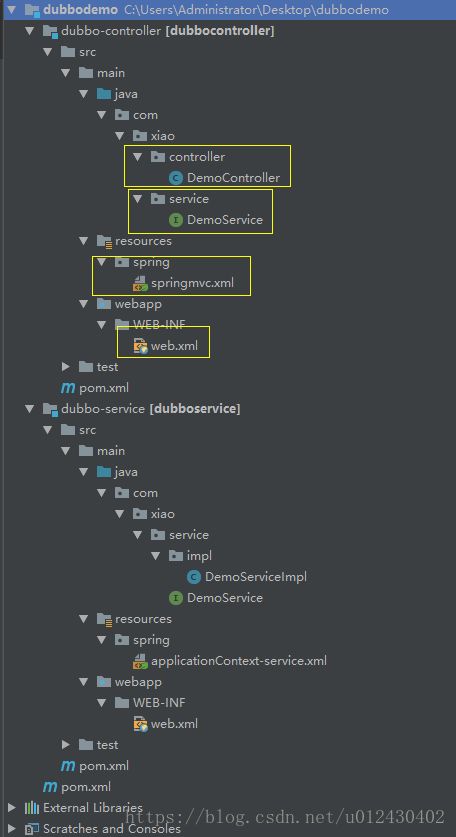
最终目录结构如下
在这里要注意一下,需要把提供者的服务接口拷贝过来!(只需要接口就可以了!)还有pom.xml中配置的端口号要区分一下,我这里改为了8081,其余的依赖相同。
web.xml如下
		CharacterEncodingFilter
		org.springframework.web.filter.CharacterEncodingFilter

			encoding
			utf-8


            forceEncoding
            true


		CharacterEncodingFilter
		/*


  	springmvc
  	org.springframework.web.servlet.DispatcherServlet


  		contextConfigLocation
  		classpath:/spring/springmvc.xml


  	springmvc
  	*.action
springmvc.xml如下
DemoController如下
package com.xiao.controller;

import com.alibaba.dubbo.config.annotation.Reference;
import com.xiao.service.DemoService;
import org.springframework.stereotype.Controller;
import org.springframework.web.bind.annotation.RequestMapping;
import org.springframework.web.bind.annotation.ResponseBody;

/**
 * @Description 服务消费方
 * @Auther: 笑笑
 * @Date: 15:35 2018/9/14
 */
@Controller
public class DemoController {

    @Reference
    private DemoService service;

    @RequestMapping(value = "/dubbo/demo")
    @ResponseBody
    public String hello(){
        return service.hello();
    }
}
四、启动工程,测试
我们以tomcat插件的方式启动工程(这个的配置自行百度吧。。我懒了)
访问地址:http://localhost:8081/dubbo/demo.action
