学习CUDA准备Win10+cmake+opencv4.1+opencv_contrib4.1+CUDA+VS2015
一、环境配置
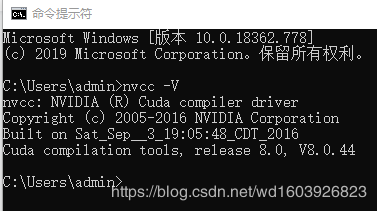
1、网上很多教程都有,安装合适自己电脑的CUDA,我已安装完毕
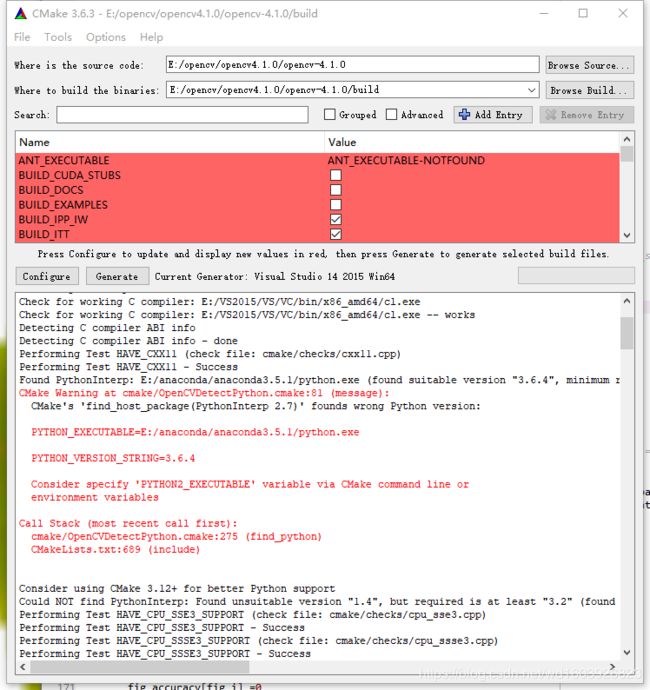
2、CMake编译opencv4.1+opencv_contrib4.1+CUDA,网上依旧很多教程。我前几次编译时,遇到外网下载、下载超时原因报错很多,但后来按照网上的办法自己线下到报错的网址下载后放到对应报错文件夹下,就解决了。中途我自己下载了这些文件:
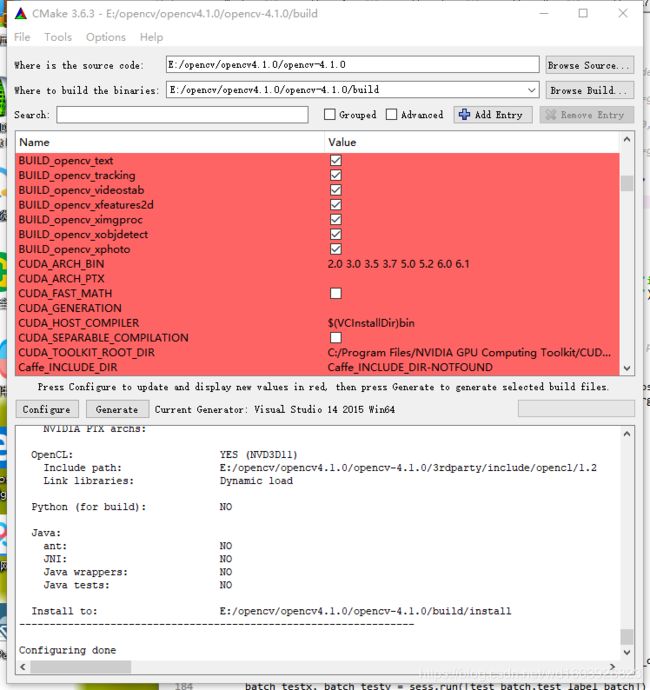
现在cmake第一次configure后,只有下面一个地方报红色:
log如下:
The CXX compiler identification is MSVC 19.0.24215.1
The C compiler identification is MSVC 19.0.24215.1
Check for working CXX compiler: E:/VS2015/VS/VC/bin/x86_amd64/cl.exe
Check for working CXX compiler: E:/VS2015/VS/VC/bin/x86_amd64/cl.exe -- works
Detecting CXX compiler ABI info
Detecting CXX compiler ABI info - done
Detecting CXX compile features
Detecting CXX compile features - done
Check for working C compiler: E:/VS2015/VS/VC/bin/x86_amd64/cl.exe
Check for working C compiler: E:/VS2015/VS/VC/bin/x86_amd64/cl.exe -- works
Detecting C compiler ABI info
Detecting C compiler ABI info - done
Performing Test HAVE_CXX11 (check file: cmake/checks/cxx11.cpp)
Performing Test HAVE_CXX11 - Success
Found PythonInterp: E:/anaconda/anaconda3.5.1/python.exe (found suitable version "3.6.4", minimum required is "2.7")
CMake Warning at cmake/OpenCVDetectPython.cmake:81 (message):
  CMake's 'find_host_package(PythonInterp 2.7)' founds wrong Python version:

  PYTHON_EXECUTABLE=E:/anaconda/anaconda3.5.1/python.exe

  PYTHON_VERSION_STRING=3.6.4

  Consider specify 'PYTHON2_EXECUTABLE' variable via CMake command line or
  environment variables

Call Stack (most recent call first):
  cmake/OpenCVDetectPython.cmake:275 (find_python)
  CMakeLists.txt:689 (include)


Consider using CMake 3.12+ for better Python support
Could NOT find PythonInterp: Found unsuitable version "1.4", but required is at least "3.2" (found C:/Users/admin/AppData/Local/Microsoft/WindowsApps/python3.exe)
Performing Test HAVE_CPU_SSE3_SUPPORT (check file: cmake/checks/cpu_sse3.cpp)
Performing Test HAVE_CPU_SSE3_SUPPORT - Success
Performing Test HAVE_CPU_SSSE3_SUPPORT (check file: cmake/checks/cpu_ssse3.cpp)
Performing Test HAVE_CPU_SSSE3_SUPPORT - Success
Performing Test HAVE_CPU_SSE4_1_SUPPORT (check file: cmake/checks/cpu_sse41.cpp)
Performing Test HAVE_CPU_SSE4_1_SUPPORT - Success
Performing Test HAVE_CPU_POPCNT_SUPPORT (check file: cmake/checks/cpu_popcnt.cpp)
Performing Test HAVE_CPU_POPCNT_SUPPORT - Success
Performing Test HAVE_CPU_SSE4_2_SUPPORT (check file: cmake/checks/cpu_sse42.cpp)
Performing Test HAVE_CPU_SSE4_2_SUPPORT - Success
Performing Test HAVE_CXX_ARCH:AVX (check file: cmake/checks/cpu_fp16.cpp)
Performing Test HAVE_CXX_ARCH:AVX - Success
Performing Test HAVE_CXX_ARCH:AVX2 (check file: cmake/checks/cpu_avx2.cpp)
Performing Test HAVE_CXX_ARCH:AVX2 - Success
Performing Test HAVE_CPU_AVX_512F_SUPPORT (check file: cmake/checks/cpu_avx512.cpp)
Performing Test HAVE_CPU_AVX_512F_SUPPORT - Failed
AVX_512F is not supported by C++ compiler
Performing Test HAVE_CPU_AVX512_SKX_SUPPORT (check file: cmake/checks/cpu_avx512skx.cpp)
Performing Test HAVE_CPU_AVX512_SKX_SUPPORT - Failed
AVX512_SKX is not supported by C++ compiler
Dispatch optimization AVX512_SKX is not available, skipped
Performing Test HAVE_CPU_BASELINE_FLAGS
Performing Test HAVE_CPU_BASELINE_FLAGS - Success
Performing Test HAVE_CPU_DISPATCH_FLAGS_SSE4_1
Performing Test HAVE_CPU_DISPATCH_FLAGS_SSE4_1 - Success
Performing Test HAVE_CPU_DISPATCH_FLAGS_SSE4_2
Performing Test HAVE_CPU_DISPATCH_FLAGS_SSE4_2 - Success
Performing Test HAVE_CPU_DISPATCH_FLAGS_FP16
Performing Test HAVE_CPU_DISPATCH_FLAGS_FP16 - Success
Performing Test HAVE_CPU_DISPATCH_FLAGS_AVX
Performing Test HAVE_CPU_DISPATCH_FLAGS_AVX - Success
Performing Test HAVE_CPU_DISPATCH_FLAGS_AVX2
Performing Test HAVE_CPU_DISPATCH_FLAGS_AVX2 - Success
Check if the system is big endian
Searching 16 bit integer
Looking for sys/types.h
Looking for sys/types.h - found
Looking for stdint.h
Looking for stdint.h - found
Looking for stddef.h
Looking for stddef.h - found
Check size of unsigned short
Check size of unsigned short - done
Using unsigned short
Check if the system is big endian - little endian
Looking for fseeko
Looking for fseeko - not found
Check size of off64_t
Check size of off64_t - failed
libjpeg-turbo: VERSION = 2.0.2, BUILD = opencv-4.1.0-libjpeg-turbo
Check size of size_t
Check size of size_t - done
Check size of unsigned long
Check size of unsigned long - done
Looking for include file intrin.h
Looking for include file intrin.h - found
Looking for assert.h
Looking for assert.h - found
Looking for fcntl.h
Looking for fcntl.h - found
Looking for inttypes.h
Looking for inttypes.h - found
Looking for io.h
Looking for io.h - found
Looking for limits.h
Looking for limits.h - found
Looking for malloc.h
Looking for malloc.h - found
Looking for memory.h
Looking for memory.h - found
Looking for search.h
Looking for search.h - found
Looking for string.h
Looking for string.h - found
Performing Test C_HAS_inline
Performing Test C_HAS_inline - Success
Check size of signed short
Check size of signed short - done
Check size of unsigned short
Check size of unsigned short - done
Check size of signed int
Check size of signed int - done
Check size of unsigned int
Check size of unsigned int - done
Check size of signed long
Check size of signed long - done
Check size of signed long long
Check size of signed long long - done
Check size of unsigned long long
Check size of unsigned long long - done
Check size of unsigned char *
Check size of unsigned char * - done
Check size of ptrdiff_t
Check size of ptrdiff_t - done
Looking for memmove
Looking for memmove - found
Looking for setmode
Looking for setmode - found
Looking for strcasecmp
Looking for strcasecmp - not found
Looking for strchr
Looking for strchr - found
Looking for strrchr
Looking for strrchr - found
Looking for strstr
Looking for strstr - found
Looking for strtol
Looking for strtol - found
Looking for strtol
Looking for strtol - found
Looking for strtoull
Looking for strtoull - found
Looking for lfind
Looking for lfind - found
Performing Test HAVE_SNPRINTF
Performing Test HAVE_SNPRINTF - Success
Check if the system is big endian
Searching 16 bit integer
Using unsigned short
Check if the system is big endian - little endian
IPPICV: Download: ippicv_2019_win_intel64_20180723_general.zip
found Intel IPP (ICV version): 2019.0.0 [2019.0.0 Gold]
at: E:/opencv/opencv4.1.0/opencv-4.1.0/build/3rdparty/ippicv/ippicv_win/icv
found Intel IPP Integration Wrappers sources: 2019.0.0
at: E:/opencv/opencv4.1.0/opencv-4.1.0/build/3rdparty/ippicv/ippicv_win/iw
Could not find OpenBLAS include. Turning OpenBLAS_FOUND off
Could not find OpenBLAS lib. Turning OpenBLAS_FOUND off
Looking for pthread.h
Looking for pthread.h - not found
Found Threads: TRUE
A library with BLAS API not found. Please specify library location.
LAPACK requires BLAS
A library with LAPACK API not found. Please specify library location.
Could NOT find JNI (missing:  JAVA_AWT_LIBRARY JAVA_JVM_LIBRARY JAVA_INCLUDE_PATH JAVA_INCLUDE_PATH2 JAVA_AWT_INCLUDE_PATH)
VTK is not found. Please set -DVTK_DIR in CMake to VTK build directory, or to VTK install subdirectory with VTKConfig.cmake file
ADE: Download: v0.1.1d.zip
OpenCV Python: during development append to PYTHONPATH: E:/opencv/opencv4.1.0/opencv-4.1.0/build/python_loader
Could NOT find PkgConfig (missing:  PKG_CONFIG_EXECUTABLE)
FFMPEG: Download: opencv_ffmpeg.dll
FFMPEG: Download: opencv_ffmpeg_64.dll
FFMPEG: Download: ffmpeg_version.cmake
Looking for mfapi.h
Looking for mfapi.h - found
Looking for d3d11_4.h
Looking for d3d11_4.h - not found
Excluding from source files list: modules/imgproc/src/sumpixels.avx512_skx.cpp
Excluding from source files list: /modules/dnn/layers/layers_common.avx512_skx.cpp

General configuration for OpenCV 4.1.0 =====================================
  Version control:               unknown

  Platform:
    Timestamp:                   2020-04-24T02:26:33Z
    Host:                        Windows 10.0.18362 AMD64
    CMake:                       3.6.3
    CMake generator:             Visual Studio 14 2015 Win64
    CMake build tool:            C:/Program Files (x86)/MSBuild/14.0/bin/MSBuild.exe
    MSVC:                        1900

  CPU/HW features:
    Baseline:                    SSE SSE2 SSE3
      requested:                 SSE3
    Dispatched code generation:  SSE4_1 SSE4_2 FP16 AVX AVX2
      requested:                 SSE4_1 SSE4_2 AVX FP16 AVX2 AVX512_SKX
      SSE4_1 (15 files):         + SSSE3 SSE4_1
      SSE4_2 (2 files):          + SSSE3 SSE4_1 POPCNT SSE4_2
      FP16 (1 files):            + SSSE3 SSE4_1 POPCNT SSE4_2 FP16 AVX
      AVX (5 files):             + SSSE3 SSE4_1 POPCNT SSE4_2 AVX
      AVX2 (29 files):           + SSSE3 SSE4_1 POPCNT SSE4_2 FP16 FMA3 AVX AVX2

  C/C++:
    Built as dynamic libs?:      YES
    C++ Compiler:                E:/VS2015/VS/VC/bin/x86_amd64/cl.exe  (ver 19.0.24215.1)
    C++ flags (Release):         /DWIN32 /D_WINDOWS /W4 /GR  /D _CRT_SECURE_NO_DEPRECATE /D _CRT_NONSTDC_NO_DEPRECATE /D _SCL_SECURE_NO_WARNINGS /Gy /bigobj /Oi      /EHa /wd4127 /wd4251 /wd4324 /wd4275 /wd4512 /wd4589 /MP6   /MD /O2 /Ob2 /DNDEBUG
    C++ flags (Debug):           /DWIN32 /D_WINDOWS /W4 /GR  /D _CRT_SECURE_NO_DEPRECATE /D _CRT_NONSTDC_NO_DEPRECATE /D _SCL_SECURE_NO_WARNINGS /Gy /bigobj /Oi      /EHa /wd4127 /wd4251 /wd4324 /wd4275 /wd4512 /wd4589 /MP6   /D_DEBUG /MDd /Zi /Ob0 /Od /RTC1
    C Compiler:                  E:/VS2015/VS/VC/bin/x86_amd64/cl.exe
    C flags (Release):           /DWIN32 /D_WINDOWS /W3  /D _CRT_SECURE_NO_DEPRECATE /D _CRT_NONSTDC_NO_DEPRECATE /D _SCL_SECURE_NO_WARNINGS /Gy /bigobj /Oi        /MP6    /MD /O2 /Ob2 /DNDEBUG
    C flags (Debug):             /DWIN32 /D_WINDOWS /W3  /D _CRT_SECURE_NO_DEPRECATE /D _CRT_NONSTDC_NO_DEPRECATE /D _SCL_SECURE_NO_WARNINGS /Gy /bigobj /Oi        /MP6  /D_DEBUG /MDd /Zi /Ob0 /Od /RTC1
    Linker flags (Release):      /machine:x64  /INCREMENTAL:NO
    Linker flags (Debug):        /machine:x64  /debug /INCREMENTAL
    ccache:                      NO
    Precompiled headers:         YES
    Extra dependencies:
    3rdparty dependencies:

  OpenCV modules:
    To be built:                 calib3d core dnn features2d flann gapi highgui imgcodecs imgproc ml objdetect photo stitching ts video videoio
    Disabled:                    world
    Disabled by dependency:      -
    Unavailable:                 java js python2 python3
    Applications:                tests perf_tests apps
    Documentation:               NO
    Non-free algorithms:         NO

  Windows RT support:            NO

  GUI:
    Win32 UI:                    YES
    VTK support:                 NO

  Media I/O:
    ZLib:                        build (ver 1.2.11)
    JPEG:                        build-libjpeg-turbo (ver 2.0.2-62)
    WEBP:                        build (ver encoder: 0x020e)
    PNG:                         build (ver 1.6.36)
    TIFF:                        build (ver 42 - 4.0.10)
    JPEG 2000:                   build (ver 1.900.1)
    OpenEXR:                     build (ver 1.7.1)
    HDR:                         YES
    SUNRASTER:                   YES
    PXM:                         YES
    PFM:                         YES

  Video I/O:
    DC1394:                      NO
    FFMPEG:                      YES (prebuilt binaries)
      avcodec:                   YES (58.35.100)
      avformat:                  YES (58.20.100)
      avutil:                    YES (56.22.100)
      swscale:                   YES (5.3.100)
      avresample:                YES (4.0.0)
    GStreamer:                   NO
    DirectShow:                  YES
    Media Foundation:            YES
      DXVA:                      NO

  Parallel framework:            Concurrency

  Trace:                         YES (with Intel ITT)

  Other third-party libraries:
    Intel IPP:                   2019.0.0 Gold [2019.0.0]
           at:                   E:/opencv/opencv4.1.0/opencv-4.1.0/build/3rdparty/ippicv/ippicv_win/icv
    Intel IPP IW:                sources (2019.0.0)
              at:                E:/opencv/opencv4.1.0/opencv-4.1.0/build/3rdparty/ippicv/ippicv_win/iw
    Lapack:                      NO
    Eigen:                       NO
    Custom HAL:                  NO
    Protobuf:                    build (3.5.1)

  OpenCL:                        YES (NVD3D11)
    Include path:                E:/opencv/opencv4.1.0/opencv-4.1.0/3rdparty/include/opencl/1.2
    Link libraries:              Dynamic load

  Python (for build):            NO

  Java:
    ant:                         NO
    JNI:                         NO
    Java wrappers:               NO
    Java tests:                  NO

  Install to:                    E:/opencv/opencv4.1.0/opencv-4.1.0/build/install
-----------------------------------------------------------------

Configuring done
有的说python版本报错没关系,可以直接忽略。
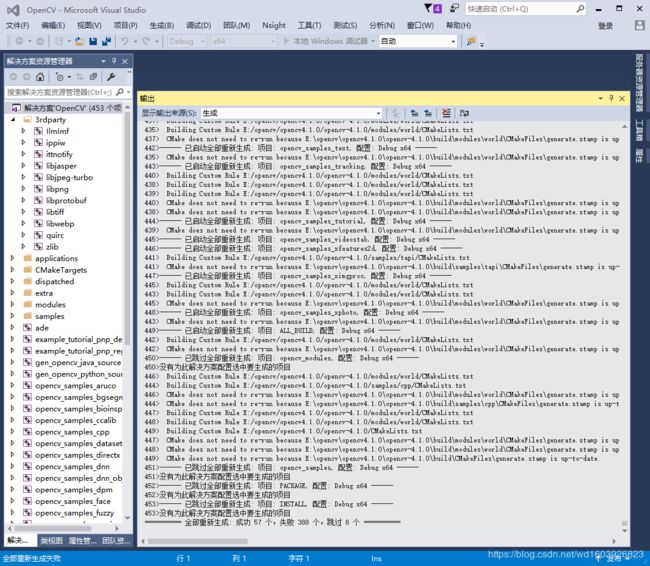
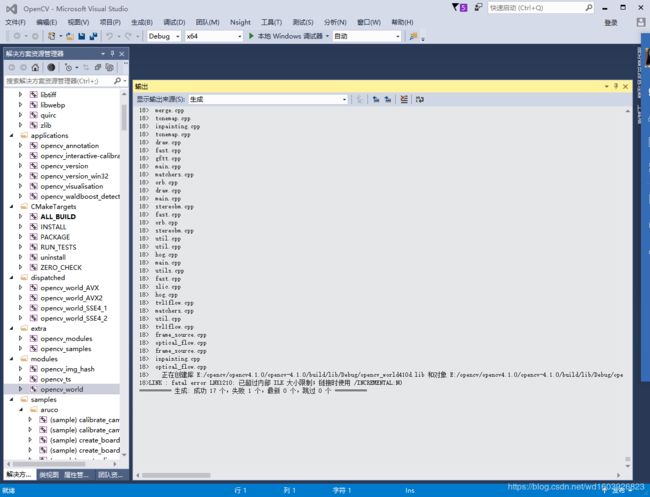
3、然后我直接打开VS2015开始生成,但始终最后有很多失败。而且没有看到生成的opencv的库:
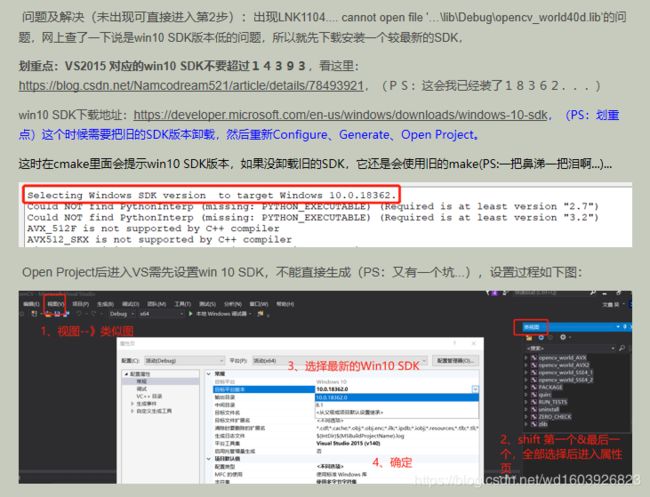
可以看到,我试过多次,依旧失败。后来终于找到 : https://www.cnblogs.com/Vince-Wu/p/11805075.html 找到这个人讲述的关于win10 SDK与VS2015的问题:
我按照他的方法准备试下,对比发现我的cmake日志中没有检测WIN10 SDK版本的相关内容,所以我准备手动下载一个版本。然后重新cmake并添加环境变量,重启VS编译出现
E:/opencv/opencv4.1.0/opencv_contrib-4.1.0/modules/cudaimgproc/src/cuda/clahe.cu(191): error : identifier "__shfl_down" is undefinedCUSTOMBUILD : nvcc warning : The 'compute_20', 'sm_20', and 'sm_21' architectures are deprecated, and may be removed in a future release (Use -Wno-deprecated-gpu-targets to suppress warning).我查了下网上很多解决办法:
将CUDA_ARCH_BIN的值改成我的显卡的6.1就可以了,重来以后VS编译时还是有问题:
18>E:\opencv\opencv4.1.0\opencv-4.1.0\modules\videoio\src\cap_msmf.cpp(804): error C2065: “ID3D11Multithread”: 未声明的标识符
18>E:\opencv\opencv4.1.0\opencv-4.1.0\modules\videoio\src\cap_msmf.cpp(804): error C2923: “`anonymous-namespace'::ComPtr”: 对于参数“T”,“ID3D11Multithread”不是有效的 模板 类型变量
18>E:\opencv\opencv4.1.0\opencv-4.1.0\modules\videoio\src\cap_msmf.cpp(804): error C2133: “D3DDevMT”: 未知的大小
18>E:\opencv\opencv4.1.0\opencv-4.1.0\modules\videoio\src\cap_msmf.cpp(804): error C2512: “`anonymous-namespace'::ComPtr”: 没有合适的默认构造函数可用
18>  E:\opencv\opencv4.1.0\opencv-4.1.0\modules\videoio\src\cap_msmf.cpp(127): note: 参见“`anonymous-namespace'::ComPtr”的声明
18>E:\opencv\opencv4.1.0\opencv-4.1.0\modules\videoio\src\cap_msmf.cpp(806): error C2100: 非法的间接寻址
18>E:\opencv\opencv4.1.0\opencv-4.1.0\modules\videoio\src\cap_msmf.cpp(806): error C2672: “IID_PPV_ARGS_Helper”: 未找到匹配的重载函数
18>E:\opencv\opencv4.1.0\opencv-4.1.0\modules\videoio\src\cap_msmf.cpp(806): error C2784: “void **IID_PPV_ARGS_Helper(T **)”: 未能从“`anonymous-namespace'::ComPtr *”为“T **”推导 模板 参数
18>  C:\Program Files (x86)\Windows Kits\10\Include\10.0.10586.0\um\combaseapi.h(231): note: 参见“IID_PPV_ARGS_Helper”的声明
18>E:\opencv\opencv4.1.0\opencv-4.1.0\modules\videoio\src\cap_msmf.cpp(806): error C2660: “IUnknown::QueryInterface”: 函数不接受 1 个参数
18>E:\opencv\opencv4.1.0\opencv-4.1.0\modules\videoio\src\cap_msmf.cpp(808): error C2678: 二进制“->”: 没有找到接受“`anonymous-namespace'::ComPtr”类型的左操作数的运算符(或没有可接受的转换)
18>  E:\opencv\opencv4.1.0\opencv-4.1.0\modules\videoio\src\cap_msmf.cpp(149): note: 可能是“T *`anonymous-namespace'::ComPtr::operator ->(void) const”
18>  E:\opencv\opencv4.1.0\opencv-4.1.0\modules\videoio\src\cap_msmf.cpp(808): note: 尝试匹配参数列表“(`anonymous-namespace'::ComPtr)”时
18>E:\opencv\opencv4.1.0\opencv-4.1.0\modules\videoio\src\cap_msmf.cpp(808): error C2039: “SetMultithreadProtected”: 不是“`anonymous-namespace'::ComPtr”的成员
18>  E:\opencv\opencv4.1.0\opencv-4.1.0\modules\videoio\src\cap_msmf.cpp(127): note: 参见“`anonymous-namespace'::ComPtr”的声明
18>E:\opencv\opencv4.1.0\opencv-4.1.0\modules\videoio\src\cap_msmf.cpp(809): error C2662: “void `anonymous-namespace'::ComPtr::Release(void)”: 不能将“this”指针从“`anonymous-namespace'::ComPtr”转换为“`anonymous-namespace'::ComPtr &”
18>  E:\opencv\opencv4.1.0\opencv-4.1.0\modules\videoio\src\cap_msmf.cpp(809): note: 原因如下: 无法从“`anonymous-namespace'::ComPtr”转换为“`anonymous-namespace'::ComPtr”
18>  E:\opencv\opencv4.1.0\opencv-4.1.0\modules\videoio\src\cap_msmf.cpp(809): note: 转换要求第二个用户定义的转换运算符或构造函数
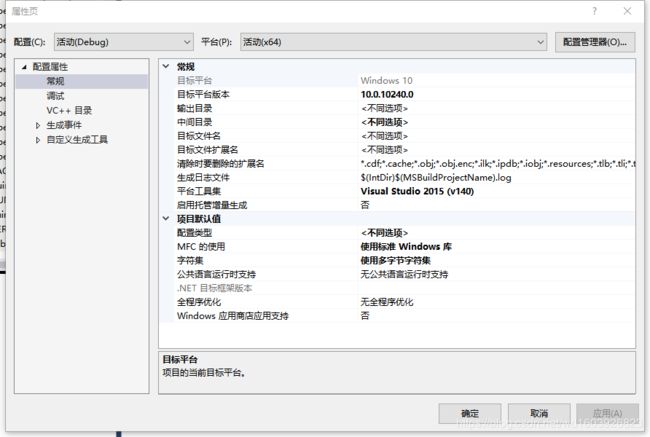
这个问题网上说是SDK版本10586带来的问题,所以我重新下载了一个比10586还低一点的版本,当然配置相应改变如下图:
然后重新编译,出现
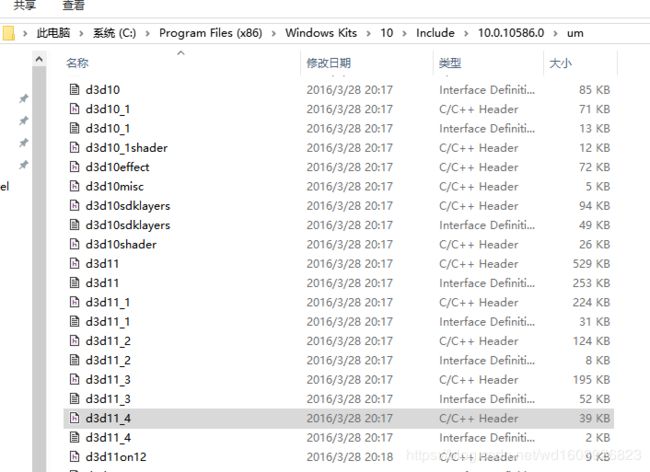
modules\videoio\src\cap_msmf.cpp(67): fatal error C1083: 无法打开包括文件: “d3d11_4.h”: No such file or directory我在10586版本下看到了这个文件,10240下的确没找到这个文件。于是我把这个文件复制到10240里了:
重新编译:出现:
C:\Program Files (x86)\Windows Kits\10\Include\10.0.10240.0\um\d3d11_4.h(57): fatal error C1083: 无法打开包括文件: “dxgi1_5.h”: No such file or directory (编译源文件 E:\opencv\opencv4.1.0\opencv-4.1.0\modules\videoio\src\cap_msmf.cpp)然后我又把10586下的这个文件拷贝到10240对应位置,重新编译,竟然又出现了之前10586那个目标平台版本错误的信息,于是我又查看属性,发现目前平台版本怎么又变成了10586,明明我已经手动设置成了10240啊。(好像是每一次编译都会改变,所以编译前一定要确认),最后又重新编译还是出现error:C2065那些错误。于是我又重新cmake:
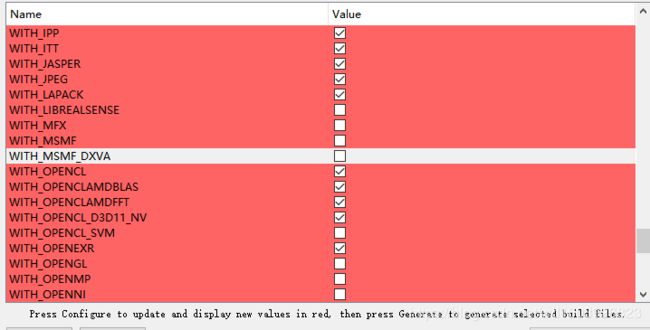
把这两个勾选的取消掉。重新编译重新来一次:
看了一下:
18>    正在创建库 E:/opencv/opencv4.1.0/opencv-4.1.0/build/lib/Debug/opencv_world410d.lib 和对象 E:/opencv/opencv4.1.0/opencv-4.1.0/build/lib/Debug/opencv_world410d.exp
18>LINK : fatal error LNK1210: 已超过内部 ILK 大小限制;链接时使用 /INCREMENTAL:NO
报的这个错好像不是大问题,所以我没有管。文件夹下生成了opencv_world的lib。
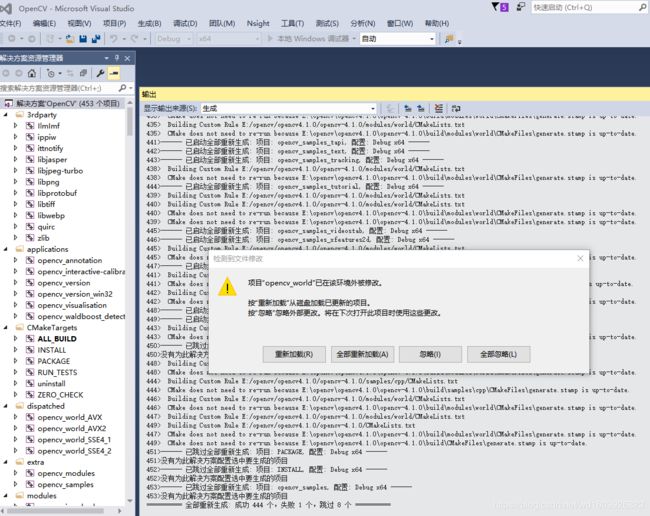
现在准备全部重新生成解决方案一次:
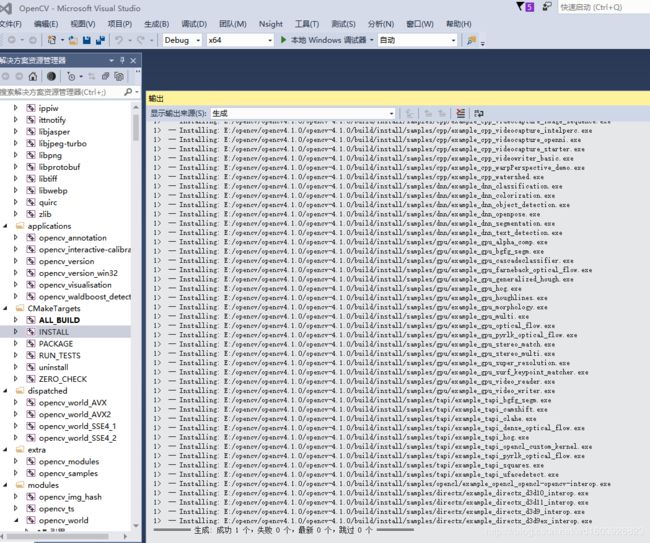
成功,只有一个错,就是上面那个超出大小限制的错,可忽略。然后我又将INSTALL生成一次:
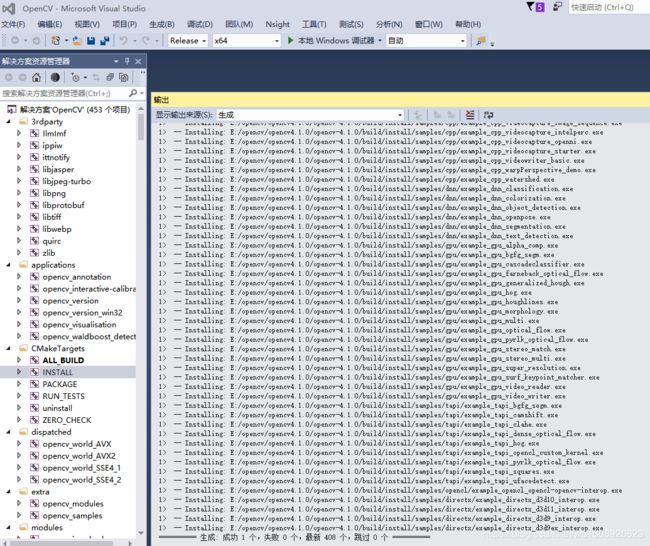
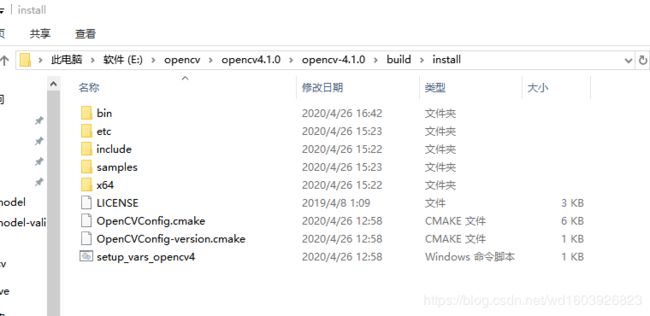
可以看到成功,同时生成了install对应文件夹。这样Debug下的编译已基本完成。
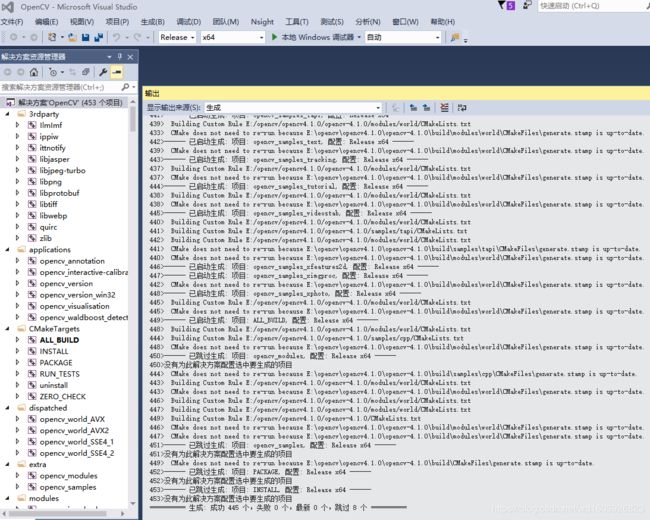
然后我将Debug换成Release重新生成解决方案以及INSTALL重新生成:
至此,环境搭建终于完毕。
但是还是看到只有opencv_world410.dll,没有opencv_world410d.dll,应该还是与那个我忽略的错误有关,即:超出ILK大小限制。可能这个错误不该忽略,导致没有生成debug下的dll。写个小例子测试时果然报错:
error LNK2019: 无法解析的外部符号 "void __cdecl cv::imshow(class std::basic_string,class std::allocator > const &,class cv::debug_build_guard::_InputArray const &)" (?imshow@cv@@YAXAEBV?$basic_string@DU?$char_traits@D@std@@V?$allocator@D@2@@std@@AEBV_InputArray@debug_build_guard@1@@Z),该符号在函数 main 中被引用
1>E:\CUDA\hellocuda\x64\Debug\hellocuda.exe : fatal error LNK1120: 1 个无法解析的外部命令
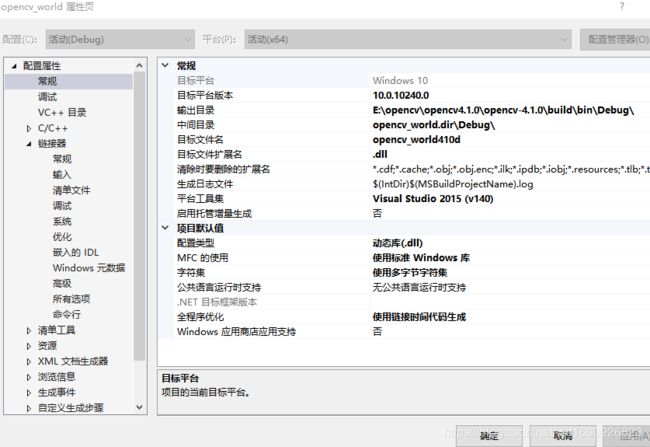
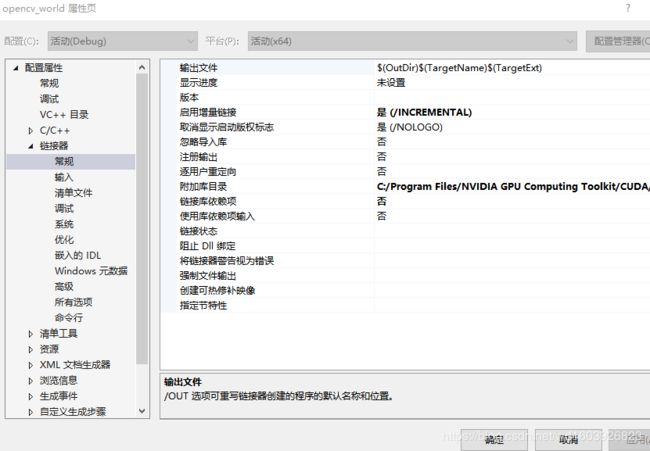
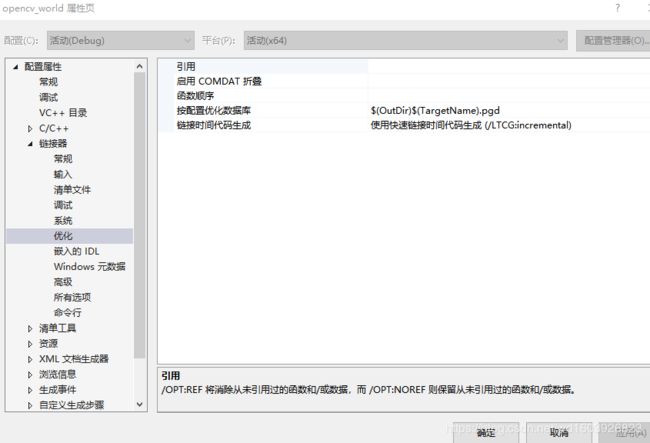
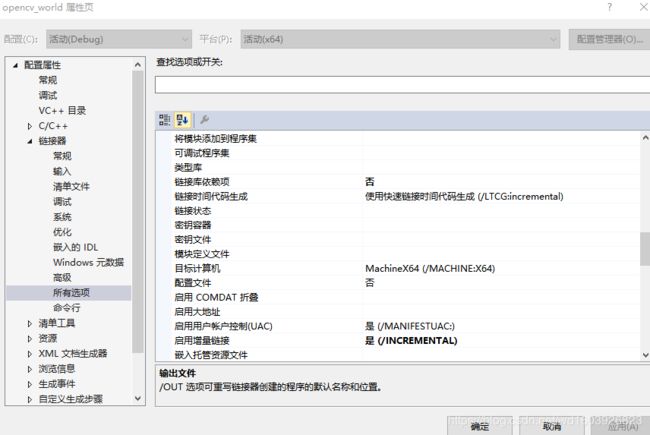
可能还是需要opencv_world410d.dll。所以我还是得编译出来debug下的库。于是根据之前那个ILK超出大小限制的报错,我按如下设置:“使用链接时间代码生成”即网上提供的解决办法LTCG
然后重新编译opencv_world410d.dll,果然成功,
18>LINK : warning LNK4075: 忽略“/INCREMENTAL”(由于“/LTCG”规范)
18>    正在创建库 E:/opencv/opencv4.1.0/opencv-4.1.0/build/lib/Debug/opencv_world410d.lib 和对象 E:/opencv/opencv4.1.0/opencv-4.1.0/build/lib/Debug/opencv_world410d.exp
18>  正在生成代码
18>  已完成代码的生成
18>  opencv_world.vcxproj -> E:\opencv\opencv4.1.0\opencv-4.1.0\build\bin\Debug\opencv_world410d.dll
========== 全部重新生成: 成功 18 个,失败 0 个,跳过 0 个 ==========
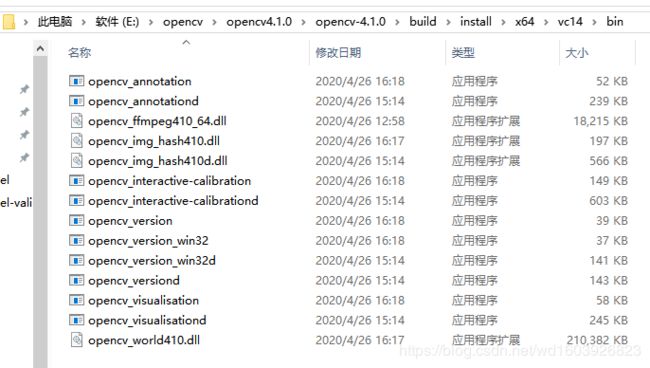
并拷贝到这里:
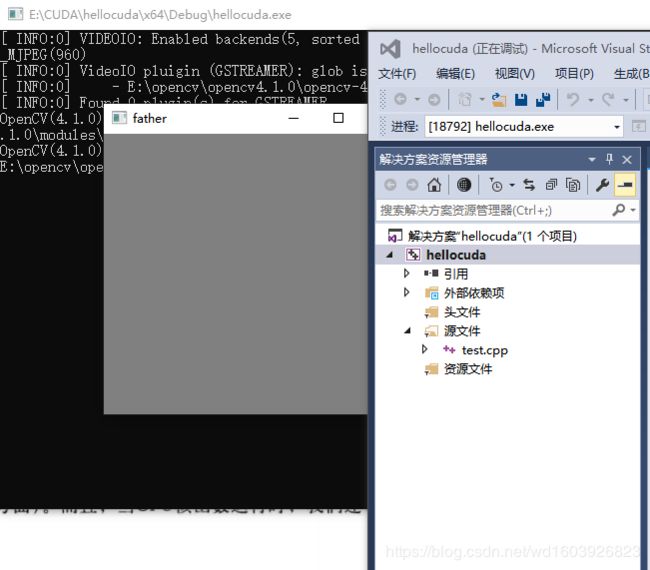
然后测试:
无论使用哪种办法,都还是有弹出下面的警告,虽然不影响运行结果。
“hellocuda.exe”(Win32): 已加载“E:\CUDA\hellocuda\x64\Debug\hellocuda.exe”。已加载符号。
“hellocuda.exe”(Win32): 已加载“C:\Windows\System32\ntdll.dll”。无法查找或打开 PDB 文件。
“hellocuda.exe”(Win32): 已加载“C:\Windows\System32\kernel32.dll”。无法查找或打开 PDB 文件。
“hellocuda.exe”(Win32): 已加载“C:\Windows\System32\KernelBase.dll”。无法查找或打开 PDB 文件。
“hellocuda.exe”(Win32): 已加载“C:\Windows\System32\vcruntime140d.dll”。无法查找或打开 PDB 文件。
“hellocuda.exe”(Win32): 已加载“C:\Windows\System32\msvcp140d.dll”。无法查找或打开 PDB 文件。
“hellocuda.exe”(Win32): 已加载“C:\Windows\System32\ucrtbased.dll”。无法查找或打开 PDB 文件。
“hellocuda.exe”(Win32): 已加载“C:\Windows\System32\ucrtbased.dll”。无法查找或打开 PDB 文件。
“hellocuda.exe”(Win32): 已卸载“C:\Windows\System32\ucrtbased.dll”
“hellocuda.exe”(Win32): 已加载“E:\opencv\opencv4.1.0\opencv-4.1.0\build\install\x64\vc14\bin\opencv_world410d.dll”。已加载符号。
“hellocuda.exe”(Win32): 已加载“C:\Windows\System32\user32.dll”。无法查找或打开 PDB 文件。
“hellocuda.exe”(Win32): 已加载“C:\Windows\System32\win32u.dll”。无法查找或打开 PDB 文件。
“hellocuda.exe”(Win32): 已加载“C:\Windows\System32\gdi32.dll”。无法查找或打开 PDB 文件。
“hellocuda.exe”(Win32): 已加载“C:\Windows\System32\gdi32full.dll”。无法查找或打开 PDB 文件。
“hellocuda.exe”(Win32): 已加载“C:\Windows\System32\msvcp_win.dll”。无法查找或打开 PDB 文件。
“hellocuda.exe”(Win32): 已加载“C:\Windows\System32\ucrtbase.dll”。无法查找或打开 PDB 文件。
“hellocuda.exe”(Win32): 已加载“C:\Windows\System32\ole32.dll”。无法查找或打开 PDB 文件。
“hellocuda.exe”(Win32): 已加载“C:\Windows\System32\combase.dll”。无法查找或打开 PDB 文件。
“hellocuda.exe”(Win32): 已加载“C:\Windows\System32\rpcrt4.dll”。无法查找或打开 PDB 文件。
“hellocuda.exe”(Win32): 已加载“C:\Windows\System32\bcryptprimitives.dll”。无法查找或打开 PDB 文件。
“hellocuda.exe”(Win32): 已加载“C:\Windows\System32\advapi32.dll”。无法查找或打开 PDB 文件。
“hellocuda.exe”(Win32): 已加载“C:\Windows\System32\msvcrt.dll”。无法查找或打开 PDB 文件。
“hellocuda.exe”(Win32): 已加载“C:\Windows\System32\sechost.dll”。无法查找或打开 PDB 文件。
“hellocuda.exe”(Win32): 已加载“C:\Windows\System32\oleaut32.dll”。无法查找或打开 PDB 文件。
“hellocuda.exe”(Win32): 已加载“C:\Windows\System32\comdlg32.dll”。无法查找或打开 PDB 文件。
“hellocuda.exe”(Win32): 已加载“C:\Windows\System32\SHCore.dll”。无法查找或打开 PDB 文件。
“hellocuda.exe”(Win32): 已加载“C:\Windows\System32\shlwapi.dll”。无法查找或打开 PDB 文件。
“hellocuda.exe”(Win32): 已加载“C:\Windows\System32\shell32.dll”。无法查找或打开 PDB 文件。
“hellocuda.exe”(Win32): 已加载“C:\Windows\System32\cfgmgr32.dll”。无法查找或打开 PDB 文件。
“hellocuda.exe”(Win32): 已加载“C:\Windows\WinSxS\amd64_microsoft.windows.common-controls_6595b64144ccf1df_5.82.18362.778_none_2a29d4a64667eb69\comctl32.dll”。无法查找或打开 PDB 文件。
“hellocuda.exe”(Win32): 已加载“C:\Windows\System32\windows.storage.dll”。无法查找或打开 PDB 文件。
“hellocuda.exe”(Win32): 已加载“C:\Windows\System32\profapi.dll”。无法查找或打开 PDB 文件。
“hellocuda.exe”(Win32): 已加载“C:\Windows\System32\powrprof.dll”。无法查找或打开 PDB 文件。
“hellocuda.exe”(Win32): 已加载“C:\Windows\System32\umpdc.dll”。无法查找或打开 PDB 文件。
“hellocuda.exe”(Win32): 已加载“C:\Windows\System32\kernel.appcore.dll”。无法查找或打开 PDB 文件。
“hellocuda.exe”(Win32): 已加载“C:\Windows\System32\cryptsp.dll”。无法查找或打开 PDB 文件。
“hellocuda.exe”(Win32): 已加载“C:\Program Files\NVIDIA GPU Computing Toolkit\CUDA\v8.0\bin\cudart64_80.dll”。模块已生成,不包含符号。
“hellocuda.exe”(Win32): 已加载“C:\Program Files\NVIDIA GPU Computing Toolkit\CUDA\v8.0\bin\nppicc64_80.dll”。模块已生成,不包含符号。
“hellocuda.exe”(Win32): 已加载“C:\Program Files\NVIDIA GPU Computing Toolkit\CUDA\v8.0\bin\nppc64_80.dll”。模块已生成,不包含符号。
“hellocuda.exe”(Win32): 已加载“C:\Program Files\NVIDIA GPU Computing Toolkit\CUDA\v8.0\bin\nppial64_80.dll”。模块已生成,不包含符号。
“hellocuda.exe”(Win32): 已加载“C:\Program Files\NVIDIA GPU Computing Toolkit\CUDA\v8.0\bin\nppidei64_80.dll”。模块已生成,不包含符号。
“hellocuda.exe”(Win32): 已加载“C:\Program Files\NVIDIA GPU Computing Toolkit\CUDA\v8.0\bin\nppig64_80.dll”。模块已生成,不包含符号。
“hellocuda.exe”(Win32): 已加载“C:\Program Files\NVIDIA GPU Computing Toolkit\CUDA\v8.0\bin\nppim64_80.dll”。模块已生成,不包含符号。
“hellocuda.exe”(Win32): 已加载“C:\Program Files\NVIDIA GPU Computing Toolkit\CUDA\v8.0\bin\nppif64_80.dll”。模块已生成,不包含符号。
“hellocuda.exe”(Win32): 已加载“C:\Program Files\NVIDIA GPU Computing Toolkit\CUDA\v8.0\bin\nppist64_80.dll”。模块已生成,不包含符号。
“hellocuda.exe”(Win32): 已加载“C:\Program Files\NVIDIA GPU Computing Toolkit\CUDA\v8.0\bin\nppitc64_80.dll”。模块已生成,不包含符号。
“hellocuda.exe”(Win32): 已加载“C:\Program Files\NVIDIA GPU Computing Toolkit\CUDA\v8.0\bin\cublas64_80.dll”。模块已生成,不包含符号。
“hellocuda.exe”(Win32): 已加载“C:\Program Files\NVIDIA GPU Computing Toolkit\CUDA\v8.0\bin\npps64_80.dll”。模块已生成,不包含符号。
“hellocuda.exe”(Win32): 已加载“C:\Windows\System32\nvcuda.dll”。无法查找或打开 PDB 文件。
“hellocuda.exe”(Win32): 已加载“C:\Windows\System32\concrt140d.dll”。无法查找或打开 PDB 文件。
“hellocuda.exe”(Win32): 已加载“C:\Windows\System32\nvcuvid.dll”。无法查找或打开 PDB 文件。
“hellocuda.exe”(Win32): 已加载“C:\Program Files\NVIDIA GPU Computing Toolkit\CUDA\v8.0\bin\cufft64_80.dll”。模块已生成,不包含符号。
“hellocuda.exe”(Win32): 已加载“C:\Windows\System32\setupapi.dll”。无法查找或打开 PDB 文件。
“hellocuda.exe”(Win32): 已加载“C:\Windows\System32\bcrypt.dll”。无法查找或打开 PDB 文件。
“hellocuda.exe”(Win32): 已加载“C:\Windows\System32\setupapi.dll”。无法查找或打开 PDB 文件。
“hellocuda.exe”(Win32): 已卸载“C:\Windows\System32\setupapi.dll”
“hellocuda.exe”(Win32): 已加载“C:\Windows\System32\ws2_32.dll”。无法查找或打开 PDB 文件。
“hellocuda.exe”(Win32): 已加载“C:\Windows\System32\version.dll”。无法查找或打开 PDB 文件。
“hellocuda.exe”(Win32): 已加载“C:\Windows\System32\winmm.dll”。无法查找或打开 PDB 文件。
“hellocuda.exe”(Win32): 已加载“C:\Windows\System32\winmmbase.dll”。无法查找或打开 PDB 文件。
“hellocuda.exe”(Win32): 已加载“C:\Windows\System32\winmmbase.dll”。无法查找或打开 PDB 文件。
“hellocuda.exe”(Win32): 已加载“C:\Windows\System32\winmmbase.dll”。无法查找或打开 PDB 文件。
“hellocuda.exe”(Win32): 已卸载“C:\Windows\System32\winmmbase.dll”
“hellocuda.exe”(Win32): 已卸载“C:\Windows\System32\winmmbase.dll”
“hellocuda.exe”(Win32): 已加载“C:\Windows\System32\imm32.dll”。无法查找或打开 PDB 文件。
“hellocuda.exe”(Win32): 已加载“C:\Windows\System32\uxtheme.dll”。无法查找或打开 PDB 文件。
“hellocuda.exe”(Win32): 已加载“C:\Windows\System32\msctf.dll”。无法查找或打开 PDB 文件。
“hellocuda.exe”(Win32): 已加载“C:\Windows\System32\TextInputFramework.dll”。无法查找或打开 PDB 文件。
“hellocuda.exe”(Win32): 已加载“C:\Windows\System32\CoreMessaging.dll”。无法查找或打开 PDB 文件。
“hellocuda.exe”(Win32): 已加载“C:\Windows\System32\CoreUIComponents.dll”。无法查找或打开 PDB 文件。
“hellocuda.exe”(Win32): 已加载“C:\Windows\System32\ntmarta.dll”。无法查找或打开 PDB 文件。
“hellocuda.exe”(Win32): 已加载“C:\Windows\System32\WinTypes.dll”。无法查找或打开 PDB 文件。
“hellocuda.exe”(Win32): 已加载“C:\Windows\System32\WinTypes.dll”。无法查找或打开 PDB 文件。
“hellocuda.exe”(Win32): 已卸载“C:\Windows\System32\WinTypes.dll”
“hellocuda.exe”(Win32): 已加载“C:\Windows\System32\iertutil.dll”。无法查找或打开 PDB 文件。
线程 0x8688 已退出,返回值为 0 (0x0)。
线程 0x9c30 已退出,返回值为 0 (0x0)。
线程 0x50e0 已退出,返回值为 0 (0x0)。
线程 0x770c 已退出,返回值为 0 (0x0)。
线程 0x10f4 已退出,返回值为 0 (0x0)。
线程 0x4580 已退出,返回值为 0 (0x0)。
线程 0x7e8c 已退出,返回值为 0 (0x0)。
线程 0x7e24 已退出,返回值为 0 (0x0)。
线程 0x4ca8 已退出,返回值为 0 (0x0)。
线程 0x5d84 已退出,返回值为 0 (0x0)。
线程 0x25d8 已退出,返回值为 0 (0x0)。
线程 0x55bc 已退出,返回值为 0 (0x0)。
线程 0x21c8 已退出,返回值为 0 (0x0)。
程序“[34632] hellocuda.exe”已退出,返回值为 0 (0x0)。
我查了下这种PDB的警告,网上https://www.cnblogs.com/andyanut/p/5599000.html给的办法都试了,比如用F5、win32控制台应用程序、在工具-option-下开启windows源以及symbol server等重启VS,结果都不行。依旧是这样的警告!!!!
很惆怅。虽然网上都说这些找不到PDB文件调试时进不到文件内部,没关系。因为可以看到opencv_world那一栏没有报这个错,所以当我调试时可以进到opencv函数内部。所以不用管这些警告。
但就是我的输出一闪而过,于是加上#include
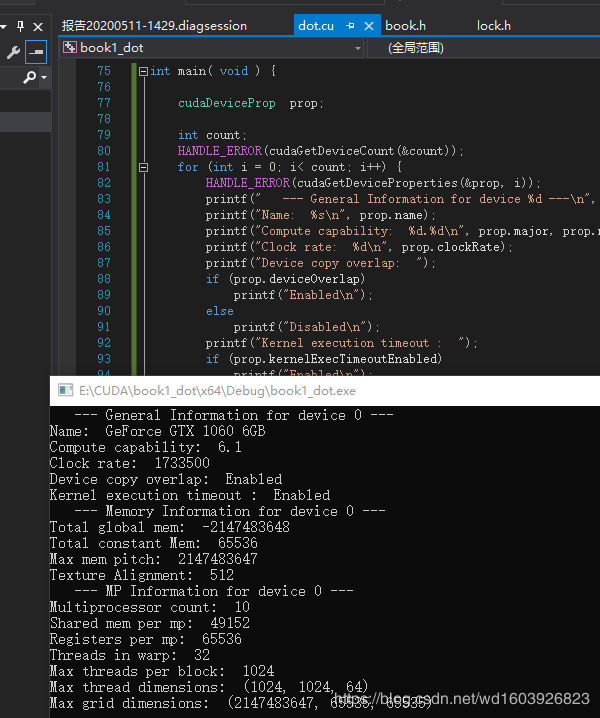
反正搭建成这样就行了。不影响我学CUDA就行了。测试程序:
int main( void ) {
    cudaDeviceProp  prop;

    int count;
    HANDLE_ERROR( cudaGetDeviceCount( &count ) );
    for (int i=0; i< count; i++) {
        HANDLE_ERROR( cudaGetDeviceProperties( &prop, i ) );
        printf( "   --- General Information for device %d ---\n", i );
        printf( "Name:  %s\n", prop.name );
        printf( "Compute capability:  %d.%d\n", prop.major, prop.minor );
        printf( "Clock rate:  %d\n", prop.clockRate );
        printf( "Device copy overlap:  " );
        if (prop.deviceOverlap)
            printf( "Enabled\n" );
        else
            printf( "Disabled\n");
        printf( "Kernel execution timeout :  " );
        if (prop.kernelExecTimeoutEnabled)
            printf( "Enabled\n" );
        else
            printf( "Disabled\n" );

        printf( "   --- Memory Information for device %d ---\n", i );
        printf( "Total global mem:  %ld\n", prop.totalGlobalMem );
        printf( "Total constant Mem:  %ld\n", prop.totalConstMem );
        printf( "Max mem pitch:  %ld\n", prop.memPitch );
        printf( "Texture Alignment:  %ld\n", prop.textureAlignment );

        printf( "   --- MP Information for device %d ---\n", i );
        printf( "Multiprocessor count:  %d\n",
                    prop.multiProcessorCount );
        printf( "Shared mem per mp:  %ld\n", prop.sharedMemPerBlock );
        printf( "Registers per mp:  %d\n", prop.regsPerBlock );
        printf( "Threads in warp:  %d\n", prop.warpSize );
        printf( "Max threads per block:  %d\n",
                    prop.maxThreadsPerBlock );
        printf( "Max thread dimensions:  (%d, %d, %d)\n",
                    prop.maxThreadsDim[0], prop.maxThreadsDim[1],
                    prop.maxThreadsDim[2] );
        printf( "Max grid dimensions:  (%d, %d, %d)\n",
                    prop.maxGridSize[0], prop.maxGridSize[1],
                    prop.maxGridSize[2] );
        printf( "\n" );
    }
}
二、《GPU高性能编程CUDA实战》的学习
因为以前稍微用过OpenCL,所以看这个稍微容易点。学到了很多知识,虽然以前也看过,完全忘了。
第一个例子dot:
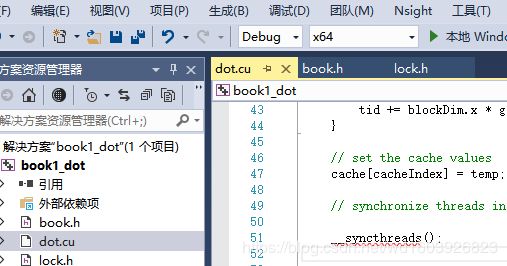
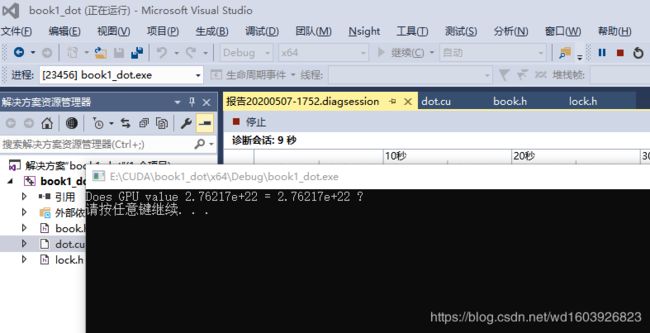
可以看到有红色提示线:未定义的标识符atomicCAS、__syncthreads。但没关系,不影响运行以及结果:
结果正确就可以,忽略提示线。
实例1:向量加法1:
#define Nnum   (32 * 1024)

__global__ void add(int *a, int *b, int *c) {
	int tid = blockIdx.x;
	while (tid < Nnum) {
		c[tid] = a[tid] + b[tid];
		tid += gridDim.x;
	}
}
add << <128, 1 >> >(dev_a, dev_b, dev_c);其实就是相当于有128组工程队,每组工程队里只有1个工人(每个工人每次只能搬一块砖),现在要将32 * 1024这么多块砖搬完(这么多砖整齐排成一行),所以第一个工程队的那个工人(编号为0)搬完第0块砖、然后去搬第128、再去搬256块砖....同时第二个工程队的那个工人(编号为1)搬完第1块砖、再去搬129、再去搬257,第三个工程队的那个工人(编号为2)搬完第2块砖、再去搬第130块...这样所有工人合作将砖搬完。
显然这样还是太慢,要么多请几个工程队,要么每个工程队里多招一些工人。所以这就有了第五章的例子:
实例2:向量加法2:
#define N   (33 * 1024)

__global__ void add( int *a, int *b, int *c ) {
    int tid = threadIdx.x + blockIdx.x * blockDim.x;
    while (tid < N) {
        c[tid] = a[tid] + b[tid];
        tid += blockDim.x * gridDim.x;
    }
}
add<<<128,128>>>( dev_a, dev_b, dev_c );现在128组工程队,每队里128个工人(每个工人每次可搬两块砖,来自于a和b)。那么第一个大队(编号block:0)里的第一个工人(thread:0)就去搬第一块砖(a[0]、b[0]),block:0里的第二个工人就去搬第二块砖(a[1]、b[1]),.....很简单不赘述。
实例3:点积
__global__ void dot(float *a, float *b, float *c) {
	__shared__ float cache[threadsPerBlock];
	int tid = threadIdx.x + blockIdx.x * blockDim.x;
	int cacheIndex = threadIdx.x;

	float   temp = 0;
	while (tid < N) {
		temp += a[tid] * b[tid];
		tid += blockDim.x * gridDim.x;
	}

	// set the cache values
	cache[cacheIndex] = temp;

	// synchronize threads in this block
	__syncthreads();

	// for reductions, threadsPerBlock must be a power of 2
	// because of the following code
	int i = blockDim.x / 2;
	while (i != 0) {
		if (cacheIndex < i)
			cache[cacheIndex] += cache[cacheIndex + i];
		__syncthreads();
		i /= 2;
	}

	if (cacheIndex == 0)
		c[blockIdx.x] = cache[0];
}
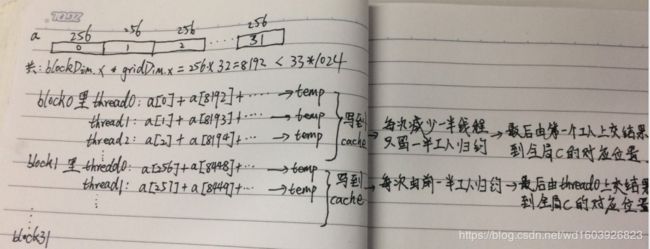
可以这样理解:
这里要特别注意:
1、__syncthreads()常伴随共享内存出现,对共享内存写完之后,如果还要读,就一定要加。
2、__syncthreads()是对block内的所有threads(不管是做事的,还是享受特权不做事的--比如if()给其特权不做事
)做同步,即等待block内所有threads做完事情。如果block内有人有特权不做事,那就相当于等待不做事的人做完事(因为不可能发现)。这就会导致永久等待,即卡死。这也就是“线程发散”问题。
实例4:常量内存某些情况下提升性能的原因可以了解下
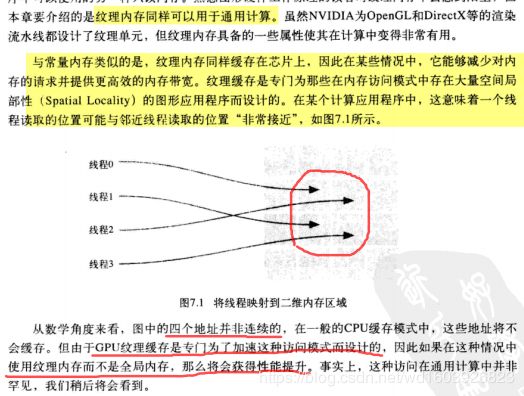
实例5:纹理内存也可用于通用计算
我觉得很适合图像处理,卷积啊滤波之类的,反正与邻域相关的。
实例6:原子操作
//////////////////////////use global memory
__global__ void histo_kernel(unsigned char *buffer,
	long size,
	unsigned int *histo) {
	// calculate the starting index and the offset to the next
	// block that each thread will be processing
	int i = threadIdx.x + blockIdx.x * blockDim.x;
	int stride = blockDim.x * gridDim.x;
	while (i < size) {
		atomicAdd(&histo[buffer[i]], 1);
		i += stride;
	}
}

//////////////////////////////////use shared memory and global memory
__global__ void histom_kernel(unsigned char *buffer,
	long size,
	unsigned int *histo) {

	// clear out the accumulation buffer called temp
	// since we are launched with 256 threads, it is easy
	// to clear that memory with one write per thread
	__shared__  unsigned int temp[256];
	temp[threadIdx.x] = 0;
	__syncthreads();

	// calculate the starting index and the offset to the next
	// block that each thread will be processing
	int i = threadIdx.x + blockIdx.x * blockDim.x;
	int stride = blockDim.x * gridDim.x;
	while (i < size) {
		atomicAdd(&temp[buffer[i]], 1);
		i += stride;
	}
	// sync the data from the above writes to shared memory
	// then add the shared memory values to the values from
	// the other thread blocks using global memory
	// atomic adds
	// same as before, since we have 256 threads, updating the
	// global histogram is just one write per thread!
	__syncthreads();
	atomicAdd(&(histo[threadIdx.x]), temp[threadIdx.x]);
}
我觉得这个例子所讲的策略(假设总线程N个,每个block内线程m个,(m< 实例7:页锁定内存 CPU和GPU都可分配主机内存,CPU-malloc()而GPU-cudahostAlloc()。书上讲了物理内存允许情况下,为什么GPU分配主机内存可以提升性能,就是因为减少了分配临时页锁定内存这个步骤。 实例8:使用单个流 我的理解是for循环内有4个语句,并不像CPU程序一样第一个语句执行完执行第二个,第二个执行完执行第三个...,而是for里这种写法只是代表一种开始执行时刻的先后,即第二个语句开始之前第一个语句已经开始执行(然而不知是否已执行完毕),第三个语句开始之前第二个语句已经开始执行(然而也不知道是否已执行完毕)....。注意cudaMemcpyAsync()只能操作页锁定内存。 注意若要确保GPU上所有任务已执行完毕使用cudaStreamSynchronize函数。 实例9:多个流 实例10:零拷贝内存 // now loop over full data, in bite-sized chunks
for (int i = 0; ifor (int i = 0; i
