2019独角兽企业重金招聘Python工程师标准>>> 
1、github毕竟试公有的,而私有仓库需要花钱买,可以使用gitlab再公司搭建一个私有仓库呢
首先需要安装 git yum install -y git
添加git 用户,并设置 shell 为 /usr/bin/git-shell ,目的不让git用户远程登录;
创建authorized_keys文件,用来存放客户端的公钥,并更改属主 属组 及权限,
mkdir .ssh
touch .ssh/authorized_keys
chown -R git.git .ssh
chmod 600 .ssh/authorized_keys
定义存储git 仓库的目录, mkdir -p /data/gitroot
创建一个裸仓库,裸仓库没有工作区,因为服务器的git 仓库纯粹是为了共享,所以不让用户登录到服务器上改工作区,并且服务器上的git仓库通常是以.git结尾的.
[root@localhost_02 ~]# mkdir -p /data/gitroot
[root@localhost_02 ~]# git init --bare sample.git ^C
[root@localhost_02 ~]# cd /data/gitroot/
[root@localhost_02 gitroot]# git init --bare sample.git
初始化空的 Git 版本库于 /data/gitroot/sample.git/
[root@localhost_02 gitroot]#  chown -R git.git sample.git
以上操作是再git服务器上做的,平时git服务器不需要开发人员登录修改代码,他只充当一个服务器的角色,就像github一样,平时的操作都是我们自己的PC上做的,
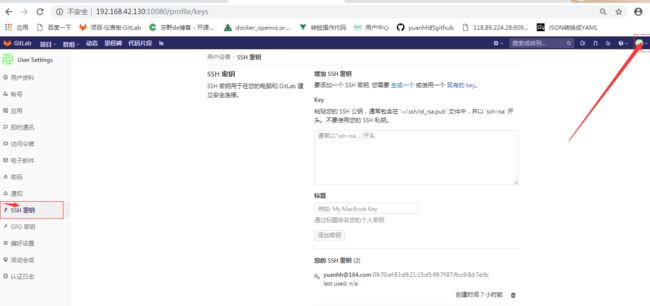
首先会把客户端的公钥放到 git 服务器上 /home/git/.ssh/authorized_keys
再客户端的上克隆远程仓库;
git clone git@ip:/data/gitroot/sample.git
此时会在当前目录下生成一个 sample 目录,这个就是我们克隆的远程仓库了,进入这个里面,可以开发一些代码,然后push到远程。
gitlab官网 https://about.gitlab.com/gitlab-com/
官方安装文档 https://about.gitlab.com/installation/?version=ce#centos-7 (ce/ee)
要求服务器内存不少于2g
首先添加 gitlab.repo 源
[root@localhost_02 gitroot]# cat /etc/yum.repos.d/gitlab.repo
[gitlab-ce]
name=Gitlab CE Repository
baseurl=https://mirrors.tuna.tsinghua.edu.cn/gitlab-ce/yum/el$releasever/
gpgcheck=0
enabled=1
安装: 需要先关闭防火墙或者放行相应端口;
yum install curl policycoreutils openssh-server openssh-clients postfix -y 一些依赖包
yum install -y gitlab-ce
配置并启动gitlab 可能时间会比较长;
gitlab-ctl reconfigure
[root@localhost_02 gitroot]# cat /etc/yum.repos.d/gitlab.repo
[gitlab-ce]
name=Gitlab CE Repository
baseurl=https://mirrors.tuna.tsinghua.edu.cn/gitlab-ce/yum/el$releasever/
gpgcheck=0
enabled=1
[root@localhost_02 gitroot]#yum install curl policycoreutils openssh-server openssh-clients postfix -y
[root@localhost_02 gitroot]#yum  install  -y  git
[root@localhost_02 gitroot]#yum  install  -y gitlab-ce
[root@localhost_02 gitroot]#gitlab-ctl  reconfigure

[root@localhost_02 gitroot]# ps aux|grep gitlab
[root@localhost_02 gitroot]# netstat -lnp|grep gitlab注释:要确保80 端口没有被占用了,占用的话建议修改gitlab端口或者用容器来部署gitlab,

[root@localhost_03 ~]# vim /etc/gitlab/gitlab.rb
external_url 'http://192.168.42.130:10080'
子模块监听端口 /var/opt/gitlab/nginx/conf/gitlab-http.conf
[root@localhost_03 ~]# vi /var/opt/gitlab/nginx/conf/gitlab-http.conf
server {
  listen *:10080;
  server_name 192.168.42.130;
.........
#相关配置.....
.......
}
保存配置: gitlab-ctl reconfigure
重启gitlab: gitlab-ctl restart
查看状态: gitlab-ctl status
查看日记: gitlab-ctl tail
[root@localhost_03 gitlab-rails]# rpm -q  gitlab-ce
gitlab-ce-11.9.7-ce.0.el7.x86_64
[root@localhost_03 gitlab-rails]# cat /opt/gitlab/embedded/service/gitlab-rails/VERSION
11.9.7
下载中午补丁包:
注释:下载的版本一定要与 gitlab的版本一致;
首先下载汉化包: 有两种方式: wget 或者用 git clone 获取最新版
[root@localhost_03 src]# wget https://gitlab.com/xhang/gitlab/repository/11-9-stable-zh/archive.tar.bz2 -O gitlab-11-9-stable-zh.tar.bz2
100%[===============================================================================>] 58,578,158   207KB/s 用时 4m 10s
2019-04-12 01:08:37 (229 KB/s) - 已保存 “gitlab-11-9-stable-zh.tar.bz2” [58578158/58578158])
由于这个包有点大,我先下载到 windows 下,然后通过 xshell 的 rz 工具上传到 linux 服务器上;
[root@localhost_03 src]# ls
gitlab-11-9-stable-zh-a2efcb146fd8829ae3b7f4391bbd7e8ede864a97.tar.bz2
[root@localhost_03 src]# ls -l  gitlab-11-9-stable-zh.tar.bz2
-rw-r--r-- 1 root root 58578158 4月  12 01:08 gitlab-11-9-stable-zh.tar.bz2
解压:解压时报错:
[root@localhost_03 src]# tar jxvf gitlab-11-9-stable-zh.tar.bz2
tar (child): bzip2:无法 exec: 没有那个文件或目录
tar (child): Error is not recoverable: exiting now
tar: Child returned status 2
#发现 bzip2这个包没有安装:
[root@localhost_03 src]# yum list|grep bzip2
bzip2-libs.x86_64                          1.0.6-12.el7                @anaconda
bzip2.x86_64                               1.0.6-13.el7                base
bzip2-devel.x86_64                         1.0.6-13.el7                base
[root@localhost_03 src]# yum  install -y bzip2
[root@localhost_03 src]# tar jxvf gitlab-11-9-stable-zh.tar.bz2
3、解压后查看起版本: 要与原来版本相同
[root@localhost_03 src]# cat gitlab-11-9-stable-zh/VERSION
11.9.6
4、先备份,避免 gitlab 汉化失败后瘫痪; /opt/gitlab/embedded/service/gitlab-rails
[root@localhost_03 src]# cp -r /opt/gitlab/embedded/service/gitlab-rails{,.ori}
[root@localhost_03 src]# ls -ld /opt/gitlab/embedded/service/gitlab-rails.ori/
drwxr-xr-x 24 root root 4096 4月  12 01:25 /opt/gitlab/embedded/service/gitlab-rails.ori/
5、把下载的汉化包 复制并覆盖这个目录: 建议使用绝对路径; 每次都提问太烦了;
[root@localhost_03 src]# /bin/cp -rf gitlab-11-9-stable-zh/* /opt/gitlab/embedded/service/gitlab-rails
/bin/cp: 无法以目录"gitlab-11-9-stable-zh/log" 来覆盖非目录"/opt/gitlab/embedded/service/gitlab-rails/log"
/bin/cp: 无法以目录"gitlab-11-9-stable-zh/tmp" 来覆盖非目录"/opt/gitlab/embedded/service/gitlab-rails/tmp"注释:这里的错误忽略:因为之前已经设置过 gitlab 的root 密码了:
6、重新配置 gitlab; 重启gitlab gitlab-ctl reconfigure gitlab-ctl restart
[root@localhost_03 gitlab_zh]# gitlab-ctl reconfigure^C
[root@localhost_03 gitlab_zh]# gitlab-ctl restart
7、再次连接gitlab http://192.168.42.130:10080
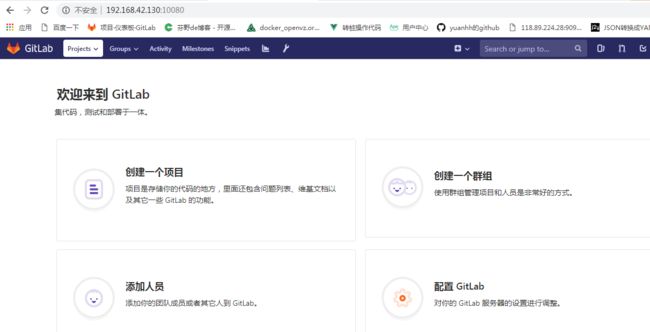
但是发现这样汉化不全,一半有一半没有,有点奇怪,但是克隆下来也没有找到对应的 版本;
[root@localhost_03 gitlab]# git clone https://gitlab.com/xhang/gitlab.git
正克隆到 'gitlab'...
remote: Enumerating objects: 951929, done.
remote: Counting objects: 100% (951929/951929), done.
remote: Compressing objects: 100% (195668/195668), done.
接收对象中: 100% (951929/951929), 379.77 MiB | 223.00 KiB/s, done.
remote: Total 951929 (delta 744518), reused 951738 (delta 744361)
处理 delta 中: 100% (744518/744518), done.
[root@localhost_03 gitlab]# ls
gitlab
[root@localhost_03 gitlab]# cd gitlab/
[root@localhost_03 gitlab]# git diff v11.9.0 v11.9.0-zh > ../11.9.0-zh.diff
error: Could not access 'v11.9.0'
#如果有的话:
#停止gitlab,并导入中文版补丁
[root@localhost_03 gitlab]# gitlab-ctl stop
[root@localhost_03 gitlab]# patch -d /opt/gitlab/embedded/service/gitlab-rails -p1 < ../v11.1.4-zh.diff
patch可能需要自行安装:yum install -y patch
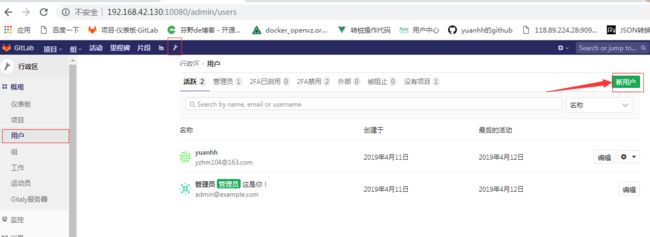
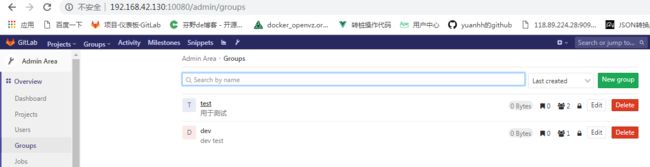
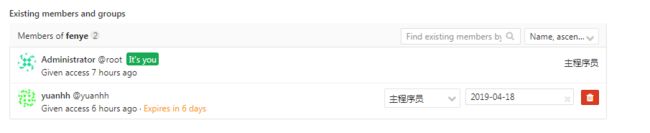
gitlab-ctl start 启动8、创建一个组:内部人员可见

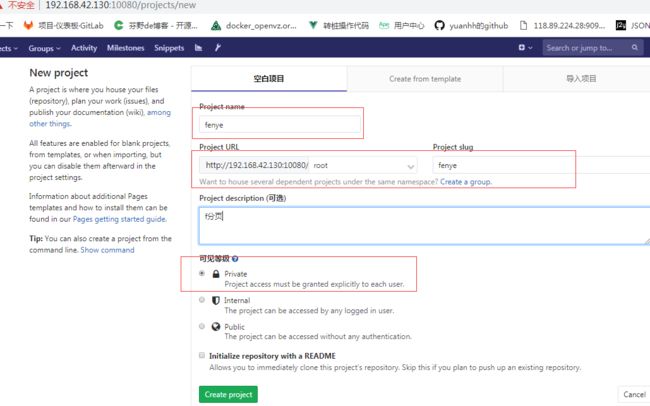
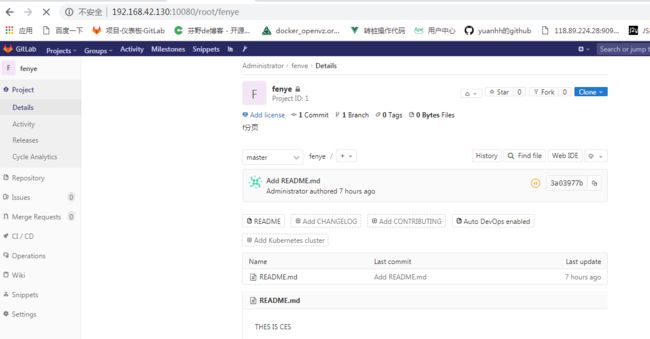
9、回到首页,在创建一个项目:
10、在创建好的项目里,点击 README.md,顺便输入文字:

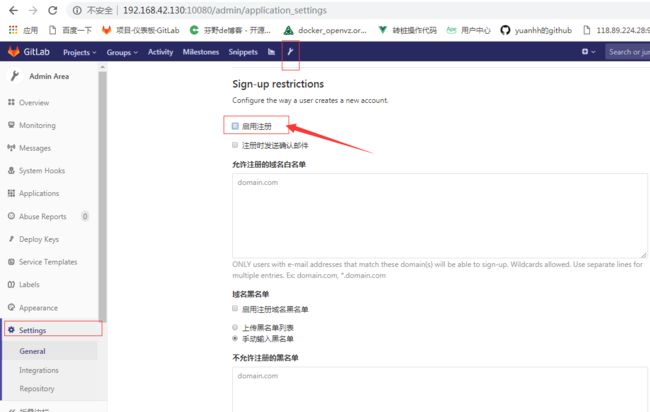
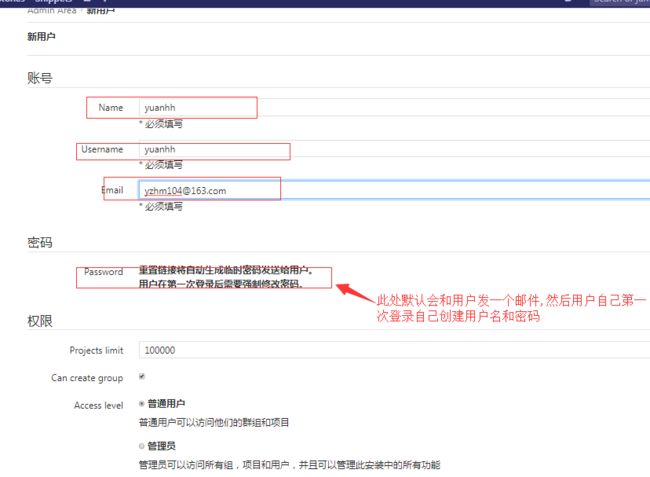
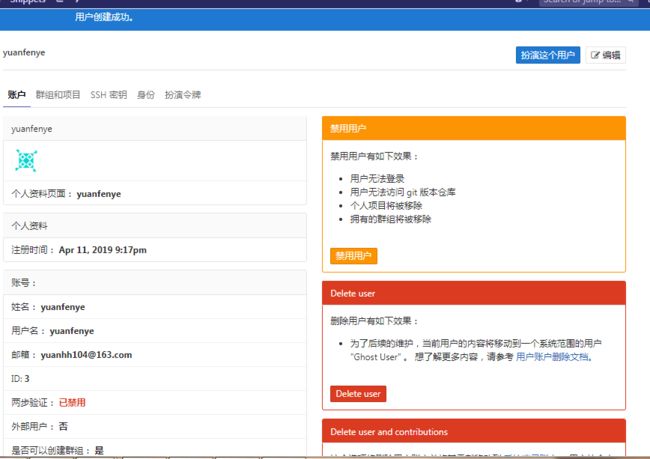
11、为了安全取消用户能够自己注册,在下面找到save保存即可;


[root@localhost_03 ~]# mkdir fenye
[root@localhost_03 ~]# cd fenye/
[root@localhost_03 fenye]# git clone [email protected]:root/fenye.git
正克隆到 'fenye'...
The authenticity of host '192.168.42.130 (192.168.42.130)' can't be established.
ECDSA key fingerprint is 1d:41:1c:9f:1f:c3:1e:c1:a1:4e:fc:99:b8:8a:72:f0.
Are you sure you want to continue connecting (yes/no)? yes
Warning: Permanently added '192.168.42.130' (ECDSA) to the list of known hosts.
remote: Enumerating objects: 6, done.
remote: Counting objects: 100% (6/6), done.
remote: Compressing objects: 100% (3/3), done.
remote: Total 6 (delta 0), reused 0 (delta 0)
接收对象中: 100% (6/6), done.
[root@localhost_03 fenye]# ll
总用量 0
drwxr-xr-x 3 root root 44 4月  12 07:52 fenye
2、创建一个index.html用来模拟开发写代码并提交;
[root@localhost_03 fenye]# cd fenye/
[root@localhost_03 fenye]# pwd
/root/fenye/fenye
[root@localhost_03 fenye]# cat index.html


    Document


测试


[root@localhost_03 fenye]# ls
index.html  README.md  test
[root@localhost_03 fenye]# git add *        #提交一下
[root@localhost_03 fenye]# git config --global user.email "[email protected]"     #设置邮箱
[root@localhost_03 fenye]#  git config --global user.name "root"          #设置用户名
[root@localhost_03 fenye]# git commit -m "add index.html"        #提交到仓库
[master c0abefb] add index.html
 1 file changed, 10 insertions(+)
 create mode 100644 index.html
[root@localhost_03 fenye]# git push origin master      #推送到远端仓库
Counting objects: 4, done.
Delta compression using up to 4 threads.
Compressing objects: 100% (3/3), done.
Writing objects: 100% (3/3), 410 bytes | 0 bytes/s, done.
Total 3 (delta 0), reused 0 (delta 0)
To [email protected]:root/fenye.git
   9e250b6..c0abefb  master -> master
注释:如上新建一个项目并推送到远端了;
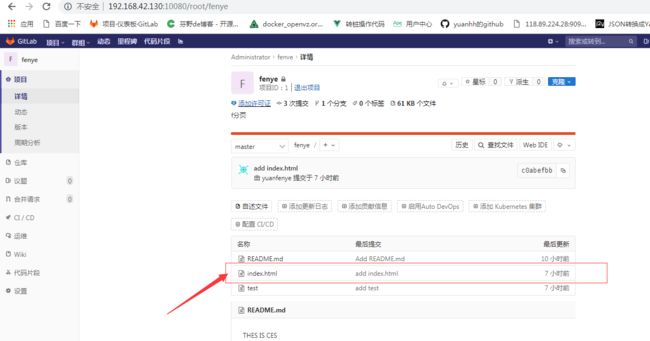
3、登录 远端 gitlab 上查看是否更新了; 查看是否有 index.html