手把手教你快速搭建 EOS 主网见证人节点(BP)
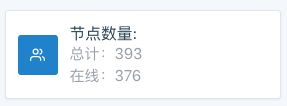
EOS主网启动至今已经超过一个月,然而截至当前,注册成为EOS Block Producer(大家习惯称为见证人)的账号仅有393个,活跃的EOS BP节点更是仅有376个,远远不如EOS主网上线前我的预期。
来源:https://eosmeta.io/
这里我们不讨论个人启动EOS BP节点是否有意义,是否有利可图。仅从技术上讲,注册成为EOS BP账号并搭建EOS BP节点的难度也让很多爱好者望而却步。同时目前网络上相关资料,我可以说是几乎都不准确,要么是东拼西凑来的,要么是翻译官方通用文档但并不适用于EOS主网。
那么本篇文章就通过实战手把手教你如何搭建一个最简单的EOS BP节点。
首先假设我们已经注册了EOS账号,账号名为 producer1111 ,且已经通过购买和抵押获得了基本的RAM,CPU和NET资源。注意,本文中 producer1111 账户以及密钥对均为虚构,应根据实际情况替换。
安装DOCKER
Docker可以理解为应用软件的运行容器,我们之后会使用Docker运行EOS的应用软件。我们需要在一台Mac或Linux主机上安装Docker,如果你只有Windows主机,那么请先安装虚拟机或购买云主机。
国外的朋友请参照Docker官网进行安装:
https://docs.docker.com/install/
国内的朋友建议使用Daocloud的服务加速Docker和EOS软件下载速度:
http://get.daocloud.io/
拉取EOS软件DOCKER镜像
$ docker pull eosio/eos
Using default tag: latest
latest: Pulling from eosio/eos
6b98dfc16071: Already exists
4001a1209541: Already exists
6319fc68c576: Already exists
b24603670dc3: Already exists
97f170c87c6f: Already exists
ca8277dae3e4: Already exists
d9de8ba6e50e: Already exists
1deb6823b375: Pull complete
9c2603092f7e: Pull complete
1300b7a5da6e: Pull complete
d2db7bdf8eb8: Pull complete
13d59df8dca8: Pull complete
Digest: sha256:cbd42518fc56a699c7e70687c34821fd505e466dc1af25fa6c671e7b4c7dbaf5
Status: Downloaded newer image for eosio/eos:latest
我们拉取官方eosio/eos镜像的最新版本,本文完成时为 v1.0.8 。
注册 PRODUCER1111 账户为EOS BP
启动并进入容器:
$ docker run -it --rm eosio/eos
root@4606b6d1b632:/#
我们使用eosio/eos镜像启动了一个临时EOS软件容器。
注意之后我们在容器中的命令均以 root@4606b6d1b632:/# 开头。
创建默认钱包:
root@4606b6d1b632:/# cleos wallet create
"/opt/eosio/bin/keosd" launched
Creating wallet: default
Save password to use in the future to unlock this wallet.
Without password imported keys will not be retrievable.
"PW5HyYPYshs9vHc8AashiSF17CMKd1ymPXEP5wJbXQHMpR69m5iPd"
导入 producer1111 账户的私钥:
root@4606b6d1b632:/# cleos wallet import 5Kg8jkyxSZ7GSAYGUJ42PugigxEKHpxEaRiWsSu8tgfUb98yxf9
imported private key for: EOS7PD3ykQtKAgkkYb4jrG5fpgZa4RPTUmyq8r31eNdgxwMjUx7sR
注册EOS BP:
root@4606b6d1b632:/# cleos -u https://mainnet.eoscannon.io system regproducer producer1111 EOS7PD3ykQtKAgkkYb4jrG5fpgZa4RPTUmyq8r31eNdgxwMjUx7sR
这条命令中,我们使用参数 -u https://mainnet.eoscannon.io 为cleos指定了远程RPC节点,因此本机不需要启动nodeos并同步数据。
为自己投票:
root@4606b6d1b632:/# cleos -u https://mainnet.eoscannon.io system voteproducer prods producer1111 producer1111
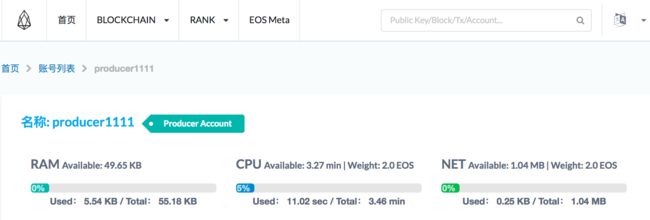
登录 https://eosmonitor.io/ ,查询 producer1111 账户,可看到已更变为 Producer Account :
来源:https://eosmonitor.io/
此容器中的数据均为临时数据,执行 exit 退出并销毁容器:
root@4606b6d1b632:/# exit
exit
配置GENESIS.JSON创世文件
主机中新建 /tmp/eos-work 目录,并在 /tmp/eos-work 目录下建立 genesis.json 文件:
$ mkdir -p /tmp/eos-work
$ cd /tmp/eos-work
$ vim genesis.json
写入以下信息:
{
  "initial_timestamp": "2018-06-08T08:08:08.888",
  "initial_key": "EOS7EarnUhcyYqmdnPon8rm7mBCTnBoot6o7fE2WzjvEX2TdggbL3",
  "initial_configuration": {
    "max_block_net_usage": 1048576,
    "target_block_net_usage_pct": 1000,
    "max_transaction_net_usage": 524288,
    "base_per_transaction_net_usage": 12,
    "net_usage_leeway": 500,
    "context_free_discount_net_usage_num": 20,
    "context_free_discount_net_usage_den": 100,
    "max_block_cpu_usage": 200000,
    "target_block_cpu_usage_pct": 1000,
    "max_transaction_cpu_usage": 150000,
    "min_transaction_cpu_usage": 100,
    "max_transaction_lifetime": 3600,
    "deferred_trx_expiration_window": 600,
    "max_transaction_delay": 3888000,
    "max_inline_action_size": 4096,
    "max_inline_action_depth": 4,
    "max_authority_depth": 6
  }
}
主网 genesis.json 文件可以在网络上找到,内容都是一致,只有使用这些配置,才能创建可以链接到EOS主网的区块链。
初始化区块链
启动并进入容器:
$ docker run -it --rm -v /tmp/eos-work:/eos-work eosio/eos
root@4606b6d1b632:/#
我们使用eosio/eos镜像启动了一个EOS软件容器,并将主机 /tmp/eos-work 目录挂载到容器的 /eos-work 目录,共享主机与容器的数据,且容器关闭后数据不会丢失,还存在主机中。我们的配置和区块链数据均会存储在此目录,上一步的 genesis.json 就在此目录。
初始化EOS主网区块链:
root@4606b6d1b632:/# nodeos --config-dir /eos-work --data-dir /eos-work --genesis-json /eos-work/genesis.json
1456650ms thread-0   chain_plugin.cpp:209          plugin_initialize    ] initializing chain plugin
1456654ms thread-0   chain_plugin.cpp:379          plugin_initialize    ] Using genesis state provided in '/eos-work/genesis.json'
1456655ms thread-0   chain_plugin.cpp:385          plugin_initialize    ] Starting up fresh blockchain with provided genesis state.
CHAINBASE:   Failed to pin chainbase shared memory (of size 1024 MB) in RAM. Performance degradation is possible.
CHAINBASE:   Failed to pin chainbase shared memory (of size 340 MB) in RAM. Performance degradation is possible.
1456692ms thread-0   http_plugin.cpp:331           plugin_initialize    ] configured http to listen on 127.0.0.1:8888
1456693ms thread-0   net_plugin.cpp:2948           plugin_initialize    ] Initialize net plugin
1456693ms thread-0   net_plugin.cpp:2972           plugin_initialize    ] host: 0.0.0.0 port: 9876
1456693ms thread-0   net_plugin.cpp:3044           plugin_initialize    ] my node_id is e3f599fdaa9ec53a0481a01200e4fab4613512dbc3b51e18f2f7c5e96d021d86
1456694ms thread-0   main.cpp:104                  main                 ] nodeos version ef654aa3
1456694ms thread-0   main.cpp:105                  main                 ] eosio root is /root/.local/share
1456694ms thread-0   controller.cpp:1212           startup              ] No head block in fork db, perhaps we need to replay
1456695ms thread-0   controller.cpp:305            initialize_fork_db   ]  Initializing new blockchain with genesis state
1456767ms thread-0   chain_plugin.cpp:450          plugin_startup       ] starting chain in read/write mode
1456767ms thread-0   chain_plugin.cpp:455          plugin_startup       ] Blockchain started; head block is #1, genesis timestamp is 2018-06-08T08:08:08.888
1456768ms thread-0   http_plugin.cpp:376           plugin_startup       ] start listening for http requests
1456768ms thread-0   net_plugin.cpp:3056           plugin_startup       ] starting listener, max clients is 25
1456768ms thread-0   producer_plugin.cpp:580       plugin_startup       ] producer plugin:  plugin_startup() begin
1456769ms thread-0   producer_plugin.cpp:607       plugin_startup       ] producer plugin:  plugin_startup() end
这个命令启动了nodeos节点程序,并传入3个参数:
--config-dir /eos-work
--data-dir /eos-work
--genesis-json /eos-work/genesis.json
nodeos启动后输出类似信息说明区块链初始化成功,我们 ctrl+c 退出nodeos,然后在容器中执行 exit 退出关闭容器。
配置EOS BP节点信息
进入主机 /tmp/eos-work 目录,查看上一步生成的目录文件:
$ cd /tmp/eos-work
$ ll
total 32
drwxr-xr-x  5 xxx  wheel   160B  7 12 23:24 blocks
-rw-r--r--  1 xxx  wheel   9.2K  7 12 23:24 config.ini
-rw-r--r--  1 xxx  wheel   816B  7 12 23:01 genesis.json
drwxr-xr-x  5 xxx  wheel   160B  7 12 23:29 state
config.ini 是由nodeos生成的默认配置文件,搭建 producer1111 账户的BP节点最少需要修改以下配置:
# BP账户名
producer-name = producer1111
# signature-provider的格式为${public_key}=KEY:${private_key}
signature-provider = EOS7PD3ykQtKAgkkYb4jrG5fpgZa4RPTUmyq8r31eNdgxwMjUx7sR=KEY:5Kg8jkyxSZ7GSAYGUJ42PugigxEKHpxEaRiWsSu8tgfUb98yxf9

# 必要插件
plugin = eosio::chain_plugin
plugin = eosio::chain_api_plugin
plugin = eosio::producer_plugin
plugin = eosio::http_plugin

# 可选支持钱包操作
# plugin = eosio::wallet_plugin
# plugin = eosio::wallet_api_plugin

# 若不希望暴露RPC端口给网外,修改为127.0.0.1:8888
http-server-address = 0.0.0.0:8888

# 可以添加多个,但是你用到的时候可能已经失效,若没有一个能用的通信节点,可在网络上查找
p2p-peer-address = bp.cryptolions.io:9876
p2p-peer-address = p2p.mainnet.eospace.io:88
p2p-peer-address = eu-west-nl.eosamsterdam.net:9876
p2p-peer-address = eosnode.fi:9888
p2p-peer-address = api.eosuk.io:12000
p2p-peer-address = fullnode.eoslaomao.com:443
p2p-peer-address = new.eoshenzhen.io:10034
p2p-peer-address = peer.eosio.sg:9876
p2p-peer-address = eos.nodepacific.com:9876
p2p-peer-address = 18.234.6.119:80
p2p-peer-address = eu1.eosdac.io:49876
p2p-peer-address = br.eosrio.io:9876
p2p-peer-address = p2p-public.hkeos.com:19875
p2p-peer-address = node.eosmeso.io:9876
p2p-peer-address = pub1.eostheworld.io:9876
p2p-peer-address = 807534da.eosnodeone.io:19872
p2p-peer-address = mainnet.eoseco.com:10010
p2p-peer-address = p2p.meet.one:9876
p2p-peer-address = node.eosflare.io:1883
p2p-peer-address = mainnet.eoscalgary.io:5222
p2p-peer-address = eos-p2p.worbli.io:33981
p2p-peer-address = 18.188.38.175:9876
p2p-peer-address = 18.221.255.38:9876
p2p-peer-address = eos.staked.us:9870
p2p-peer-address = peering.dutcheos.io:9876
p2p-peer-address = 18.188.4.97:9876
p2p-peer-address = 18.191.125.105:9876
p2p-peer-address = boot.eostitan.com:9876
p2p-peer-address = eosboot.chainrift.com:9876
启动BP节点
后台启动BP节点:
$ docker run -d -p 8888:8888 -p 9876:9876 --rm --name eosio -v /tmp/eos-work:/eos-work eosio/eos nodeos --config-dir /eos-work --data-dir /eos-work
a5f0f3332e7b4266cff0e6de9369e5df54c9d02f9a9845b373b04d2554008a6c
这一步我们使用 -p 8888:8888 -p 9876:9876 将容器中的两个端口映射到本机的对应端口,使得可以被外部访问。 -d 参数使容器直接后台启动。 --name eos 将容器命名为eosio。
因为 eos-work 目录中已经初始化了区块数据,所以启动nodeos时不能再指定 genesis.json 文件。
查看容器输出:
$ docker logs eosio
176343ms thread-0   chain_plugin.cpp:209          plugin_initialize    ] initializing chain plugin
176364ms thread-0   block_log.cpp:123             open                 ] Log is nonempty
176367ms thread-0   block_log.cpp:141             open                 ] Index is nonempty
176386ms thread-0   http_plugin.cpp:290           plugin_initialize    ] configured http to listen on 127.0.0.1:18888
176386ms thread-0   net_plugin.cpp:2948           plugin_initialize    ] Initialize net plugin
176386ms thread-0   net_plugin.cpp:2972           plugin_initialize    ] host: 0.0.0.0 port: 9876
176387ms thread-0   net_plugin.cpp:3044           plugin_initialize    ] my node_id is abf02d39810fd00b66173669f4d7031a11874e5655f984b3e797a23a7b0e01ca
176388ms thread-0   main.cpp:104                  main                 ] nodeos version 5875549c
查看BP节点运行状态:
$ docker exec -it eosio cleos get info
{
  "server_version": "5875549c",
  "chain_id": "aca376f206b8fc25a6ed44dbdc66547c36c6c33e3a119ffbeaef943642f0e906",
  "head_block_num": 979967,
  "last_irreversible_block_num": 979641,
  "last_irreversible_block_id": "000ef2b965e1dd90df22859312e82adcb59822a7b178b5c3c08a10fab282e5b9",
  "head_block_id": "000ef3ff63ad4428650bc934322c9297b49d328e5806f10008734a13a0eeb6e4",
  "head_block_time": "2018-06-16T03:12:42.500",
  "head_block_producer": "eosriobrazil",
  "virtual_block_cpu_limit": 200000000,
  "virtual_block_net_limit": 1048576000,
  "block_cpu_limit": 199900,
  "block_net_limit": 1048576
}
如果 chain_id 为 aca376f206b8fc25a6ed44dbdc66547c36c6c33e3a119ffbeaef943642f0e906 ,说明已经链接上主网,并在同步区块链数据。
这个信息显示主网区块才同步到2018-06-16T03:12:42.500。等到BP节点和主网完全同步后,便可以使用cleos进行各种操作了。
同时我们也可以在 https://eosmeta.io/ 上查看BP节点信息:
来源:https://eosmeta.io/


