以太坊私链的搭建和智能合约的部署
- 参考文献:
- https://mshk.top/2017/11/truffle-4-0-geth-1-7-2-testrpc/
- http://blog.lixf.cn/essay/2016/09/02/ethereum-1/
- http://blog.csdn.net/diandianxiyu_geek/article/details/78060195?utm_source=gold_browser_extension
- https://www.cnblogs.com/liangyue/p/6824858.html
- http://wiki.ubuntu.org.cn/Golang
- 还有很多,后面在补充。。。
首先要配置环境。。。各种下载就好啦n(≧▽≦)n
- 准备工作
1.安装curl、git
apt-get update
apt-get install git
apt-get install curl
2.安装go,配置go的环境变量
sudo apt-get install golang
mkdir -p ~/go; echo "export GOPATH=$HOME/go" >> ~/.bashrc
echo "export PATH=$PATH:$HOME/go/bin:/usr/local/go/bin" >> ~/.bashrc
source ~/.bashrc
验证go
go --v
go version
3.node.js、nmp
curl -sL https://deb.nodesource.com/setup_6.x | sudo -E bash -
apt-get install nodejs
验证是否安装成功
node -v
npm -v
4.安装ethereum
  sudo apt-get install software-properties-common
  sudo add-apt-repository -y ppa:ethereum/ethereum
  sudo add-apt-repository -y ppa:ethereum/ethereum-dev
  sudo apt-get update
  sudo apt-get install ethereum
5.安装solc编辑器
  sudo add-apt-repository ppa:ethereum/ethereum-qt
  sudo add-apt-repository ppa:ethereum/ethereum
  sudo apt-get update
  sudo apt-get install cpp-ethereum
6.安装Truffle 4.0和TestRPC
truffle依赖环境为:NodeJS 5.0+(所以按照其中一个参考博客安装的时候不小心安装成了4.0…结果truffle启动的时候一直找不到,简直醉了T T)
npm install -g truffle@4.0.0
npm install -g ethereumjs-testrpc
//检查一下版本
truffle version- 开始搭建私链 ~(@^_^@)~
1.创建创世区块(要先创建一个目录喔,我是在root下创建了一个chain)
cd /root
mkdir chain
cd chain
vi genesis.json
genesis.json
{
  "config": {
        "chainId": 10,
        "homesteadBlock": 0,
        "eip155Block": 0,
        "eip158Block": 0
    },
  "coinbase"   : "0x0000000000000000000000000000000000000000",
  "difficulty" : "0x20000",
  "extraData"  : "",
  "gasLimit"   : "0x8000000",
  "nonce"      : "0x0000000000000042",
  "mixhash"    : "0x0000000000000000000000000000000000000000000000000000000000000000",
  "parentHash" : "0x0000000000000000000000000000000000000000000000000000000000000000",
  "timestamp"  : "0x00",
  "alloc": {}
}
创世区块一定要有”config”{}项啊,不然就会挖矿不成功。本人就之前用的那个创世区块尼玛就挖不成矿,miner.start()开始后,percentage达到99后epoche变为1,Generating DAG in progress epoch=1类似这种:
INFO [11-23|12:29:22] Generating DAG in progress epoch=1 percentage=1 elapsed=44.984s 但是没有出现Successfully sealed new block等信息,查阅了很多资料,还爬到外网上面查,根本就没人遇到像我一样智障的问题,只有查到这么一条回答:
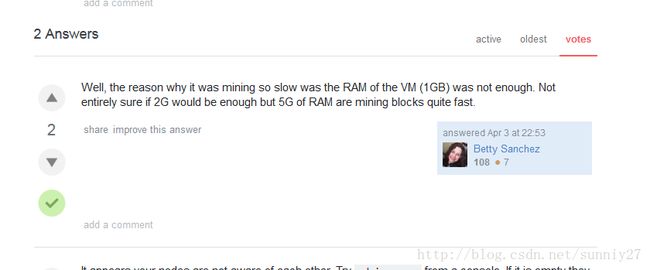
就说是内存不足比较慢,看了一下提问者的截图,人家花了一天才挖到一个矿。。。我就也等了一天结果卵也没有。。。
2.初始化创世区块
>geth init ./genesis.json --datadir "/root/chain"这里会提示你没有默认的账号~我们下面再创建。
3.这里我们用RPC方式运行Geth
geth \
  --identity "mshk.top etherum" \
  --rpcaddr 0.0.0.0 \
  --rpc \
  --rpcport 8545 \
  --maxpeers 2 \
  --rpcapi "db,eth,net,web3,debug" \
  --networkid 100 \
  --datadir "/root/chain" \
  --nodiscover
各参数说明如下:
identity :区块链的标示,随便填写,用于标示目前网络的名字
init :指定创世块文件的位置,并创建初始块
datadir :设置当前区块链网络数据存放的位置
port:网络监听端口,默认是8080
rpc:启动rpc通信,可以进行智能合约的部署和调试。它在geth中通常被默认激活。
rpcapi: 设置允许连接的rpc的客户端,一般为db,eth,net,web3
networkid: 设置当前区块链的网络ID,用于区分不同的网络,是一个数字
console:启动命令行模式,可以在Geth中执行命令
maxpeers: 网络节点的最大数量,默认是25
dev :开发者模式,带调试模式的专有网络
nodiscover:私有链地址,不会被网上看到
rpc方式启动geth以后,会一直停止在那里,没有办法在geth中进行任何输入,然后别关掉,一会这里面会看到挖矿的日志。浏览一下我们刚才创建区块链数据的文件夹,会发现有一个geth.ipc文件。
cd /root/chain
ll
//可以看到有个geth.ipc文件

//进入geth控制台
geth attach ipc://root/chain/geth.ipc
4.在geth中可以新建账号,挖矿等等操作。。
常见一个账户,并解锁用户一段时间(单位是秒),然后启动挖矿
> web3.personal.newAccount("sunyio")
//会返回hash后的密码
> personal.unlockAccount(eth.accounts[0], "sunyio", 15000)
true
> miner.start(1)
null
//日志文件可以在之前没关那个终端中看到,然后停止挖矿,看看挖了多少币
> miner.stop()
true
> acc0 = web3.eth.accounts[0]
"0xc90747b99362c41fa89d2e7dea1b5b8d9567b741"
> web3.eth.getBalance(acc0)
415000000000000000000
挖到矿很可爱,有小锄头的样子O(∩_∩)O哈哈~

我写不动了。。。先这样吧~~~改天再写n(≧▽≦)n