OpenCV C++开发 第二节:图像处理(十二、凸包)
一、凸包
代码:
#include
#include
#include


using namespace std;
using namespace cv;
Mat src, src_gray, dst;
int threshold_value = 100;
int threshold_max = 255;
const char* output_win = "convex hull demo";
void Threshold_Callback(int, void*);
RNG rng(12345);
int main(int argc, char** argv) {
	// 待检测图像
	src = imread("C:\\Users\\Administrator\\Desktop\\test.png");
	if (!src.data) {
		printf("could not load image...\n");
		return -1;
	}
	const char* input_win = "input image";
	namedWindow(input_win, CV_WINDOW_AUTOSIZE);
	namedWindow(output_win, CV_WINDOW_NORMAL);
	const char* trackbar_label = "Threshold : ";

	cvtColor(src, src_gray, CV_BGR2GRAY);
	blur(src_gray, src_gray, Size(3, 3), Point(-1, -1), BORDER_DEFAULT);
	imshow(input_win, src_gray);

	createTrackbar(trackbar_label, output_win, &threshold_value, threshold_max, Threshold_Callback);
	Threshold_Callback(0, 0);
	waitKey(0);
	return 0;
}

void Threshold_Callback(int, void*) {
	Mat bin_output;
	vector> contours;
	vector hierachy;

	threshold(src_gray, bin_output, threshold_value, threshold_max, THRESH_BINARY);
	findContours(bin_output, contours, hierachy, RETR_TREE, CHAIN_APPROX_SIMPLE, Point(0, 0));

	vector> convexs(contours.size());
	for (size_t i = 0; i < contours.size(); i++) {
		convexHull(contours[i], convexs[i], false, true);
	}

	// 绘制
	dst = Mat::zeros(src.size(), CV_8UC3);
	vector empty(0);
	for (size_t k = 0; k < contours.size(); k++) {
		Scalar color = Scalar(rng.uniform(0, 255), rng.uniform(0, 255), rng.uniform(0, 255));
		drawContours(dst, contours, k, color, 2, LINE_8, hierachy, 0, Point(0, 0));
		drawContours(dst, convexs, k, color, 2, LINE_8, empty, 0, Point(0, 0));
	}
	imshow(output_win, dst);

	return;
}
以上代码中主要的几个知识点解释下:
1.threshold(src_gray, bin_output, threshold_value, threshold_max, THRESH_BINARY);
之前的课程有讲过阀值操作。点击跳转
2.convexHull(contours[i], convexs[i], false, true);
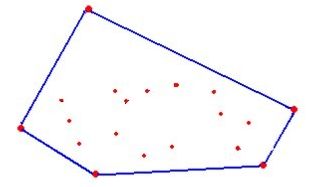
什么是凸包(Convex Hull),在一个多变形边缘或者内部任意两个点的连线都包含在多边形边界或者内部。
convexHull (
InputArray points,// 输入候选点,来自findContours
OutputArray hull,// 凸包
bool clockwise,// default true, 顺时针方向
bool returnPoints)// true 表示返回点个数,如果第二个参数是 vector
)
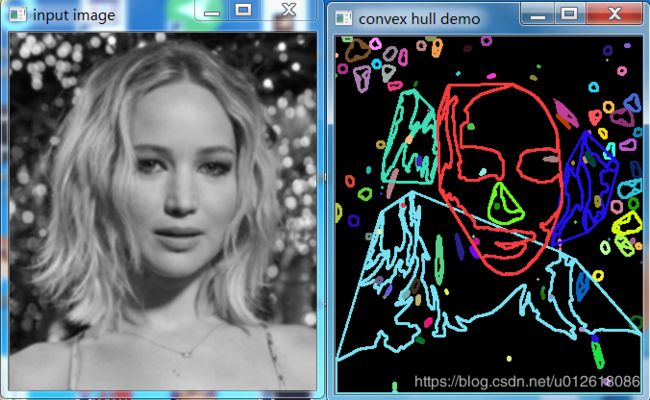
效果图如下

