springboot之thymeleaf模板和freemarker模板
1、springboot之thymeleaf模板
thymeleaf的优点:它就是html页面
相关pom依赖:
            org.springframework.boot
            spring-boot-starter-thymeleaf
thymeleaf的使用:
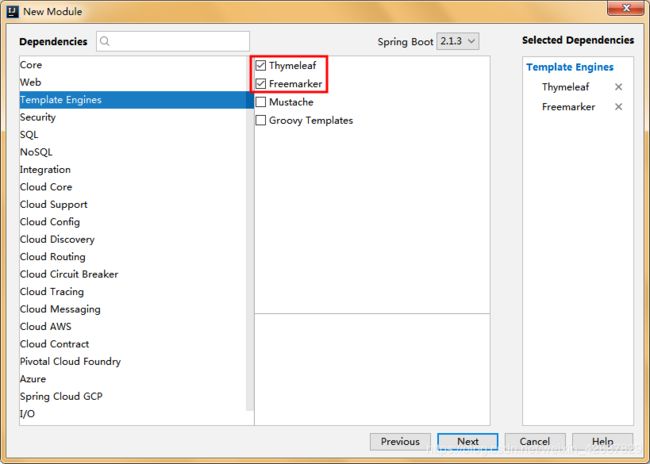
a、新建modul时勾选Thymeleaf,然后会自动添加相关pom依赖
b、配置application.yml文件
Spring Boot官方文档建议在开发时将缓存关闭,那就在application.yml文件中加入下面这行:
spring.thymeleaf.cache=false正式环境还是要将缓存开启的
server:
  servlet:
    context-path: /springboot

spring:
    thymeleaf:
      cache: false   #项目开发完后改为true
c、thymeleaf模板开发的相关指令
对应的后台代码:
package com.zking.entity;

/**
 * @author LJ
 * @site www.lijun.com
 * @Date 2019年02月18日
 * @Time 15:29
 */
public class User {
    private Integer uid;
    private String uname;
    private String pwd;

    public User(Integer uid, String uname, String pwd) {
        this.uid = uid;
        this.uname = uname;
        this.pwd = pwd;
    }

    public User() {
    }

    public Integer getUid() {
        return uid;
    }

    public void setUid(Integer uid) {
        this.uid = uid;
    }

    public String getUname() {
        return uname;
    }

    public void setUname(String uname) {
        this.uname = uname;
    }

    public String getPwd() {
        return pwd;
    }

    public void setPwd(String pwd) {
        this.pwd = pwd;
    }
}
package com.zking.controller;
import com.zking.entity.User;
import org.springframework.stereotype.Controller;
import org.springframework.web.bind.annotation.RequestMapping;
import org.springframework.web.servlet.ModelAndView;
import java.util.ArrayList;
import java.util.HashMap;
import java.util.List;
import java.util.Map;
/**
* @author LJ
* @site www.lijun.com
* @Date 2019年02月18日
* @Time 15:31
*/
@Controller
public class IndexController {
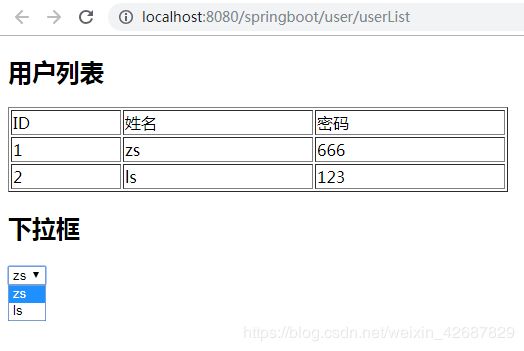
@RequestMapping("/user/userList")
public ModelAndView index(){
ModelAndView modelAndView = new ModelAndView();
modelAndView.setViewName("/user/userList");
modelAndView.addObject("msg","用户列表");
List list = new ArrayList();
list.add(new User(1,"zs","666"));
list.add(new User(2,"ls","123"));
modelAndView.addObject("userList",list);
return modelAndView;
}
}
前台HTML代码:
        ID
        姓名
        密码


下拉框
加上下面这行代码后会有提示:
运行效果:
2、springboot之freemarker模板
学习网站:http://freemarker.foofun.cn/
相关pom依赖:
	org.springframework.boot
	spring-boot-starter-freemarker
freemarker的使用:
a、添加application.yml文件的默认配置
spring:
  thymeleaf:
    cache: false
  freemarker:
    # 设置模板后缀名
    suffix: .ftl
    # 设置文档类型
    content-type: text/html
    # 设置页面编码格式
    charset: UTF-8
    # 设置页面缓存
    cache: false
    # 设置ftl文件路径,默认是/templates,为演示效果添加role
    template-loader-path: classpath:/templates/role
  mvc:
static-path-pattern: /static/**b、给idea的右键菜单添加可以创建以.ftl为后缀的文件,因为idea里默认是没有的
Settings--->Editor-->File and Code Templates
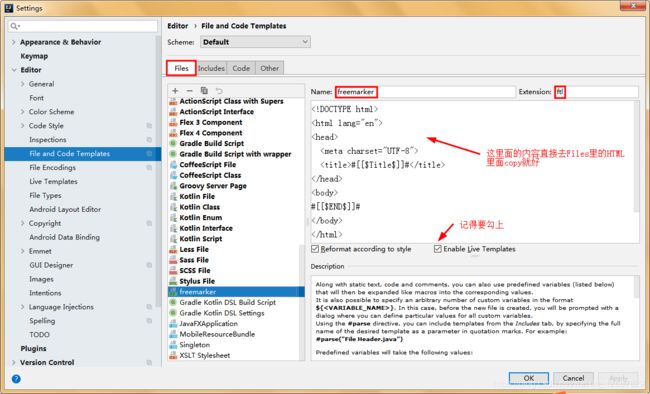
设置好后点击鼠标右键就可出现能新建以.ftl为后缀的页面:

c、freemarker模板语法的使用
对应的后台代码:
@RequestMapping("/role/roleList")
public ModelAndView roleList(){
ModelAndView modelAndView = new ModelAndView();
modelAndView.setViewName("/roleList");
modelAndView.addObject("name","zs");
modelAndView.addObject("sex","man");
List前台HTML代码:
roleList.ftl:
role列表
<#include 'common.ftl'><#--用于引入重复性代码,如公共的css、js-->
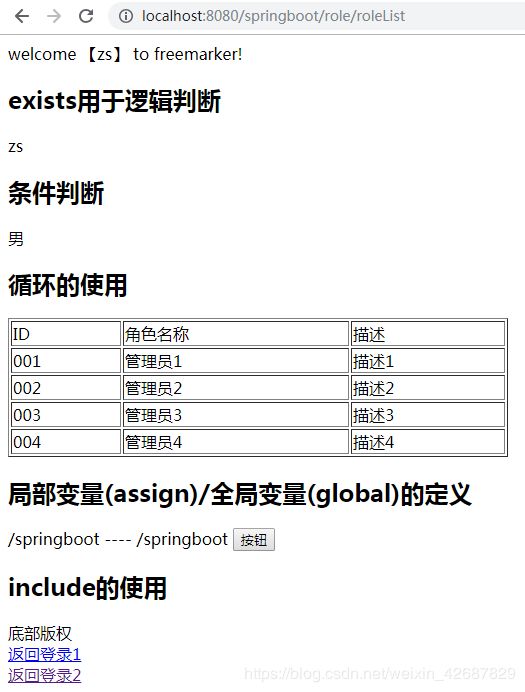
welcome 【${name!'未知'}】 to freemarker!
exists用于逻辑判断
<#if name?exists>
${name}
条件判断
<#if sex == 'man'>
男
<#elseif sex == 'woman'>
女
<#else >
保密
循环的使用
ID
角色名称
描述
<#list roles as i>
${i.id}
${i.name}
${i.mark}
局部变量(assign)/全局变量(global)的定义
<#assign ctx1>
${springMacroRequestContext.contextPath}
<#global ctx2>
${springMacroRequestContext.contextPath}
${ctx1}----${ctx2}
include的使用
<#include 'foot.ftl'>
common.ftl:
<#--项目名-->
<#assign ctx>
    ${springMacroRequestContext.contextPath}
foot.ftl:
底部版权

<#--这样是不能访问到login.ftl的,因为请求会被拦截-->
返回登录1

<#--这样可以访问到login.ftl,因为经过了后台-->
返回登录2
login.ftl:
    登录界面


欢迎来到登录页面!
xxx.js:
function ta() {
alert(666);
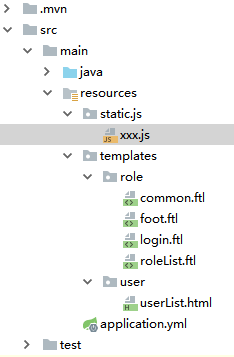
}目录结构:
访问一波的效果: