Vue插件封装,以及插件发布到npm
1、常见插件类型
插件通常会为 Vue 添加全局功能,常见的几种如下
- 添加全局方法或者属性,如: vue-custom-element
- 添加全局资源:指令/过滤器/过渡等,如 vue-touch
- 通过全局 mixin 方法添加一些组件选项,如: vue-router
- 添加 Vue 实例方法,通过把它们添加到 Vue.prototype 上实现。
- 一个库,提供自己的 API,同时提供上面提到的一个或多个功能,如 vue-router
下面是官网的示例:
Vue.js 的插件应该有一个公开方法 install。这个方法的第一个参数是 Vue 构造器,第二个参数是一个可选的选项对象:
MyPlugin.install = function (Vue, options) {
  // 1. 添加全局方法或属性
  Vue.myGlobalMethod = function () {
    // 逻辑...
  }

  // 2. 添加全局资源
  Vue.directive('my-directive', {
    bind (el, binding, vnode, oldVnode) {
      // 逻辑...
    }
    ...
  })

  // 3. 注入组件
  Vue.mixin({
    created: function () {
      // 逻辑...
    }
    ...
  })

  // 4. 添加实例方法
  Vue.prototype.$myMethod = function (methodOptions) {
    // 逻辑...
  }
}
2、插件调用方法(摘自官网)
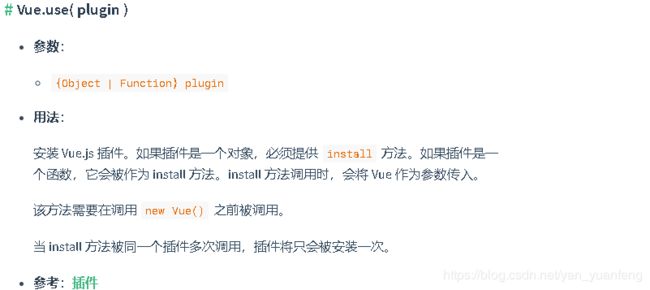
通过全局方法 Vue.use() 使用插件。它需要在你调用 new Vue() 启动应用之前完成:
// 调用 `MyPlugin.install(Vue)`
Vue.use(MyPlugin)

new Vue({
  //... options
})
也可以传入一个选项对象:
// 调用 `MyPlugin.install(Vue)`
Vue.use(MyPlugin, { someOption: true })
Vue.use 会自动阻止多次注册相同插件,届时只会注册一次该插件。
Vue.js 官方提供的一些插件 (例如 vue-router) 在检测到 Vue 是可访问的全局变量时会自动调用 Vue.use()。然而在例如 CommonJS 的模块环境中,你应该始终显式地调用 Vue.use():
// 用 Browserify 或 webpack 提供的 CommonJS 模块环境时
var Vue = require('vue')
var VueRouter = require('vue-router')

// 不要忘了调用此方法
Vue.use(VueRouter)
3、源码分析Vue.use()
Vue.use()属于Vue的公共方法,initGlobalAPI(Vue)=》 initUse(Vue)
先贴一段源码:
import { toArray } from '../util/index'

export function initUse (Vue: GlobalAPI) {
  Vue.use = function (plugin: Function | Object) {
    // vue首先判断这个插件是否被注册过,不允许重复注册。
    const installedPlugins = (this._installedPlugins || (this._installedPlugins = []))
    if (installedPlugins.indexOf(plugin) > -1) {
      return this
    }

    // additional parameters
    // 将类数组转换为数组形式,并且剔除传入的第一个参数,,。后续把Vue对象作为第一个参数传入
    const args = toArray(arguments, 1)
    args.unshift(this)
    if (typeof plugin.install === 'function') {
      plugin.install.apply(plugin, args)
    } else if (typeof plugin === 'function') {
      plugin.apply(null, args)
    }
    installedPlugins.push(plugin)
    return this
  }
}
结合和插件的调用方法

传入Vue.use(plugin)第一个参数plugin有两种情况
- 含有install方法的对象Vue.use( {install:function(Vue,options){}})
- 一个函数作为install方法Vue.use(function(Vue,options){})
当然从源码上可以看出,也可以传入第二个参数,作为函数的参数如下的调用方法可以在install方法中获取参数
//将类数组转换为数组形式,并且剔除传入的第一个参数,,。后续把Vue对象作为第一个参数传入
 const args = toArray(arguments, 1)
 //将Vue实例传入args作为调用install方法中的第一个参数
    args.unshift(this)
    if (typeof plugin.install === 'function') {
      plugin.install.apply(plugin, args)
    } else if (typeof plugin === 'function') {
      plugin.apply(null, args)
    }
所以通常插件开发时,可以得到两个参数,一个是Vue实例对象,一个是传入的自定义参数。install(Vue , options)。
4、编写一个Vue插件上传到npm
1. 创建一个简单的vuexiamgm
vue init webpack-simple yan-button
2. 编写一个插件,在项目中运行
//yan-button.vue
<template>
  <div>
    <div class="button" @click="fn1">
      click
    </div>
  </div>
</template>
<script>
export default {
  name:"yanButton",
  data(){
    return {

    }
  },
  props:['msg'],
  methods:{
    fn1(){
      alert(this.msg)
    }
  }
}
</script>
<style>
.button{
  height: 20px;
  padding: 5px 20px;
  color:#fff;
  background: green;
  border-radius: 15px;
  display: inline-block;
}
</style>
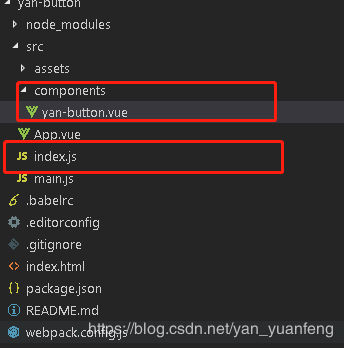
然后在index.js中封装导出Vue.use()所需要的格式。里面调用了Vue.component()是全局注册组件的方法。当然在这里只是一个示范,也可以添加各种全局的属性方法,实例方法,指令等。
//index.js
import yanButton from '../src/components/yan-button.vue'
const install =function(Vue,options){
  Vue.component(yanButton.name,yanButton)
}
export default install
封装好后就是在main.js中注册插件 ,以及在app.vue中的调动
//main.js
import Vue from 'vue'
import App from './App.vue'
import Plugin from './index.js'
Vue.use(Plugin)
new Vue({
  el: '#app',
  render: h => h(App)
})
//app.vue
<template>
  <div id="app">
    <yan-button msg="my npm Plugin"></yan-button>
  </div>
</template>

<script>
export default {
  name: 'app',
  data () {
    return {
      msg: 'Welcome to Your Vue.js App'
    }
  }
}
</script>
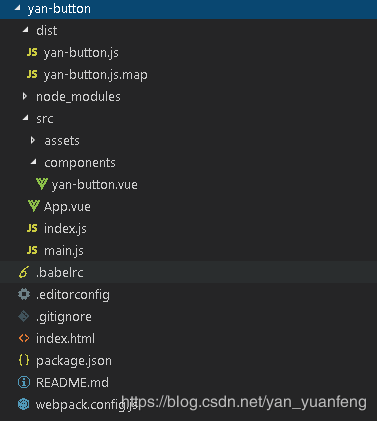
3. 修改配置 以及打包
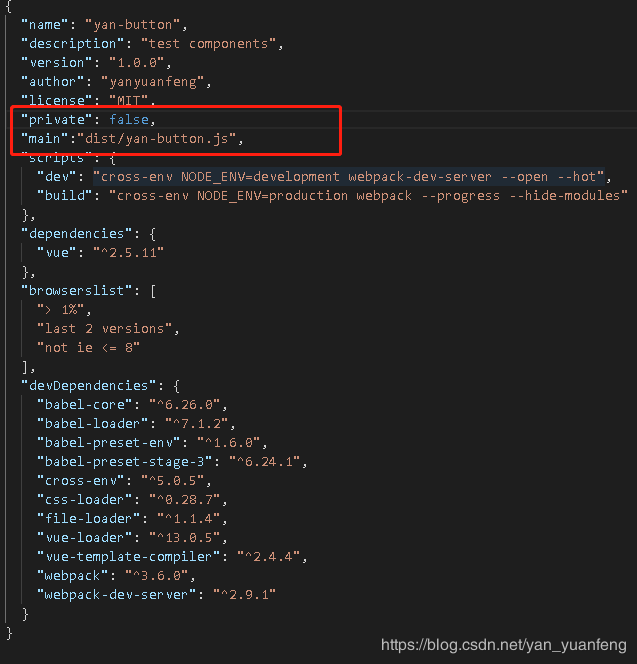
- 修改package.json的配置。因为组件包是公用的,所以private为false。 “main”:“dist/yan-button.js”,这个配置完,在其他项目中就可以通过import XX from 'yan-button’来引用了

- 修改webpack.config.js
module.exports = {
  // entry: './src/main.js',
  entry: './src/index.js',//修改打包入口文件
  output: {
    path: path.resolve(__dirname, './dist'),
    publicPath: '/dist/',
    // filename: 'build.js'
    filename: 'yan-button.js',//修改打包输出文件
    library: 'yanButton', //新增
    libraryTarget: 'umd', //新增
    umdNamedDefine: true //新增
  },
  ...
  }
- 修改.gitignore 文件
删除了原来的dist/
.DS_Store
node_modules/
npm-debug.log
yarn-error.log

# Editor directories and files
.idea
*.suo
*.ntvs*
*.njsproj
*.sln
4.上传npm 包
1.如果没有npm账号就去官网注册一个
2. cmd登录npm账号 依次输入账户信息
npm login
3 进入刚才的项目目录

运行 npm publish 就开始进行上传你编写的插件了 。
撤销删除包的发布 npm unpublish 包名 --force
更多详细命令参考 【npm】利用npm安装/删除/发布/更新/撤销发布包
5验证发布的Vue插件
在新的Vue项目中,注意是新的(因为在原来的项目中是安装不成功的,因为包名和项目名是一样的)。
新的Vue项目中执行 npm i yan-button
然后在main.js中写入
import yanbutton from 'yan-button'
Vue.use(yanbutton)
//app.vue
<template>
  <div id="app">
    <img src="./assets/logo.png">
     <yan-button msg="my npm Plugin"></yan-button>
    <router-view/>
  </div>
</template>

<script>
export default {
  name: 'App',
  data(){
    return{
      msg:'my npm plugin! '
    }
  }
}
</script>


