Oracle linux 7.4中安装Oracle 12C数据库
在Oracle linux 7.4中安装Oracle 12C数据库
1.软件要求
1.1 系统环境
操作系统:Oracle Linux 7.4
Oracle版本:Oracle 12c
1.2安装依赖软件包
安装依赖软件包原则是尽量多装,否则在安装数据库时会报丢失软件包,本文档采用yum本地安装,配置本地yum源请参考如下:
(1)挂载光盘到/mnt
[root@orac141 /]# mount /dev/cdrom /mnt
mount: /dev/sr0 写保护,将以只读方式挂载
(2)修改yum配置文件
(3)在/etc/yum.repos.d 下输入yum
[root@localhost etc]# cd yum.repos.d/
[root@localhost yum.repos.d]# cp -p public-yum-ol7.repo public-yum-ol7.repo.bak
[root@localhost yum.repos.d]# rm -rf public-yum-ol7.repo
vim oralce_linux7.4.repo
编辑内容如下:
[oracle_linux_7.4]
name=oracle_linux_7.4
baseurl=file:///mnt
enbale=1
gpgcheck=0
(4)修改完毕,保存配置文件
(5)刷新yum
#yum clean all
(6)重建yum
#yum makecache
[root@orac141 yum.repos.d]# yum repolist
已加载插件:langpacks, ulninfo
源标识 源名称 状态
oracle_linux_7.4 oracle_linux_7.4 4,970
repolist: 4,970
(7)开始安装 Oracle12 所需的依赖包如下:
适用于Oracle Linux 7的软件包(另见官方对应表)
必须安装以下软件包(或更高版本):
yum -y install bc*
yum -y install binutils-2*
yum -y install compat-libcap1*
yum -y install compat-libstdc*
yum -y install glibc*
yum -y install ksh*
yum -y install libaio*
yum -y install libX11*
yum -y install libXau*
yum -y install libXi*
yum -y install libXtst*
yum -y install libXrender*
yum -y install libgcc*
yum -y install libstdc*
yum -y install libxcb*
yum -y install make*
yum -y install smartmontools*
yum -y install sysstat*
yum -y install unixODBC*
2.创建所需的用户组(在 root 帐号下操作)
groupadd oinstall
groupadd dba
groupadd oper
3.创建所需的帐号(在 root 帐号下操作)
使用命令 id oracle; 查看 oracle 帐号是否已存在,若 oracle 帐号已存在,则使用下面命 令将其加入群组 dba 和 oper 中
usermod -a -G dba,oper oracle
若未存在则使用如下命令创建 oracle 用户。初始群组为 oinstall,有效群组为 dba、 oper。
useradd -g oinstall -G dba,oper oracle
为 oracle 帐号设置密码(安装的时候需要登录)
passwd oracle (至少8位)
Oracle用户的密码:
4.修改参数 (在 root 帐号下操作)
A.vi /etc/pam.d/login
session requviired pam_limits.so
B.vi /etc/profile
if [ $USER = "oracle" ] || [ $USER = "grid" ]; then
if [ $SHELL = "/bin/ksh" ]; then
ulimit -p 16384
ulimit -n 65536
else
ulimit -u 16384 -n 65536
fi
umask 022
fi
C.修改系统内核参数:
vi /etc/sysctl.conf
kernel.shmmax = 68719476736
kernel.shmall = 6029312
kernel.shmmni = 4096
kernel.sem =250 32000 100 128
net.core.rmem_default = 262144
net.core.rmem_max = 4194304
net.core.wmem_default = 262144
net.core.wmem_max = 1048576
net.ipv4.ip_local_port_range =9000 65500
fs.aio-max-nr=1048576
fs.file-max=6815744
执行sysctl -p 生效sys
D. 编辑系统资源限制配置文件
修改vi /etc/security/limits.conf
oracle soft nproc 2047
oracle hard nproc 16384
oracle soft nofile 1024
oracle hard nofile 65536
oracle soft stack 10240
oracle hard stack 10240
5.修改 Hostname(在 root 帐号下操作)
vi /etc/hosts
添加一行(具体的 IP 和主机名请根据自己情况设置)
10.10.13.141 orac141
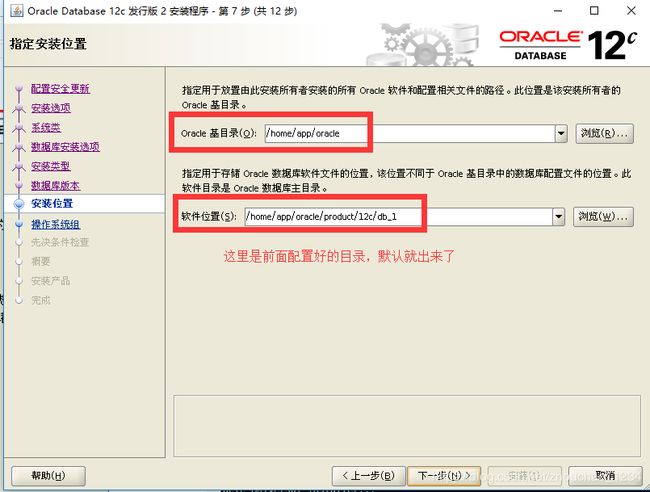
6.创建所需的目录(在 root 帐号下操作)
A.把 oracle 安装在 /home/app 目录下,所以需创建该目录:
mkdir -p /home/app/oracle
chown -R oracle:oinstall /home/app/oracle
chmod -R 775 /home/app/oracle
mkdir -p /home/app/oracle/product/12c/db_1
chown -R oracle:oinstall /home/app/oracle/product/12c/db_1
chmod -R 775 /home/app/oracle/product/12c/db_1
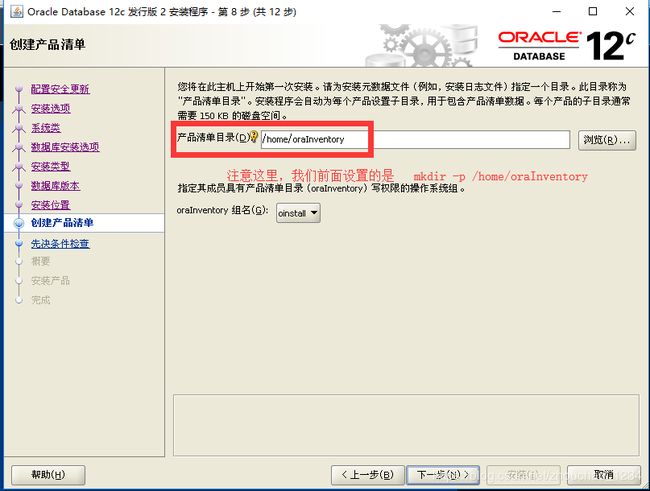
B.安装时还需要设置 Inventory 目录,所以需创建该目录:
mkdir -p /home/oraInventory
chown -R oracle:oinstall /home/oraInventory
chmod -R 775 /home/oraInventory
7.关闭SELinux
修改/etc/selinux/config文件中的SELINUX="" 为 disabled ,然后重启
如果不想重启系统,使用命令setenforce 0
注:
setenforce 1 设置SELinux 成为enforcing模式
setenforce 0 设置SELinux 成为permissive模式
8.关闭防火墙firewalld,设置开机禁止启动
[root@orac141 yum.repos.d]# systemctl status firewalld
[root@orac141 yum.repos.d]# systemctl stop firewalld
[root@orac141 yum.repos.d]# systemctl disable firewalld
Removed symlink /etc/systemd/system/multi-user.target.wants/firewalld.service.
Removed symlink /etc/systemd/system/dbus-org.fedoraproject.FirewallD1.service.
9. 解压 Oracle12C
将它们上传到安装机器上,并使用下面语句进行解 压缩,将得到一个名称为 database 的目录。这里把它放在 /home/database 中。
unzip linuxx64_12201_database.zip
chmod -R 775 /home/database;
下面的操作退出 root,
以 oracle 身份登录,可以重新在远程连接xshell中开启一个oracle的连接,下面需要用到xmanger工具,请先安装
(勿在 root 下 su oracle 切换到 oracle 用户)
10.设置 oracle 帐号登录时环境(以 oracle 身份登录) 编辑文件,
设置环境变量 vi /home/oracle/.bash_profile
添加如下行:
export TMP=/tmp
export TMPDIR=$TMP
export ORACLE_BASE=/home/app/oracle
export ORACLE_HOME=$ORACLE_BASE/product/12c/db_1
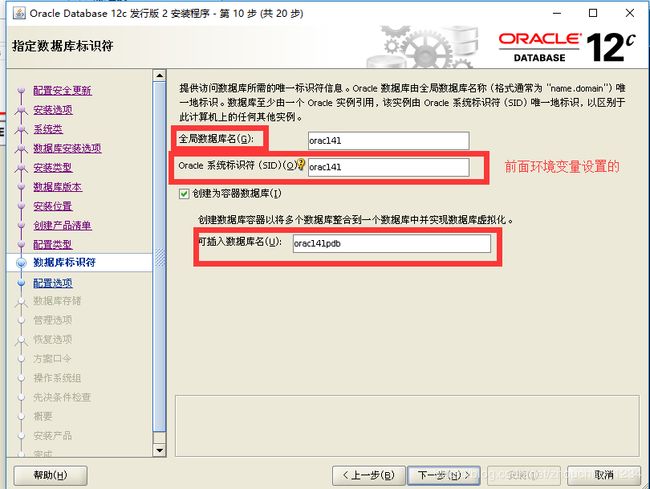
export ORACLE_SID=orac141
export ORACLE_TERM=xterm
export PATH=/usr/sbin:$PATH
export PATH=$ORACLE_HOME/bin:$PATH
export LD_LIBRARY_PATH=$ORACLE_HOME/lib:/lib:/usr/lib
export CLASSPATH=$ORACLE_HOME/JRE:$ORACLE_HOME/jlib:$ORACLE_HOME/rdbms/jlib
export EDITOR=vi
umask 022
保存退出后执行如下命令
使以上设置立即生效: source /home/oracle/.bash_profile
11.开始安装(以 oracle 身份登录)
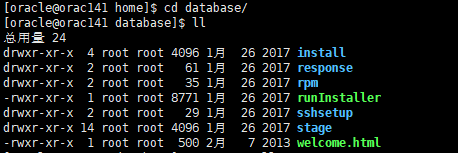
cd /home/database
[oracle@orac141 database]$ ./runInstaller
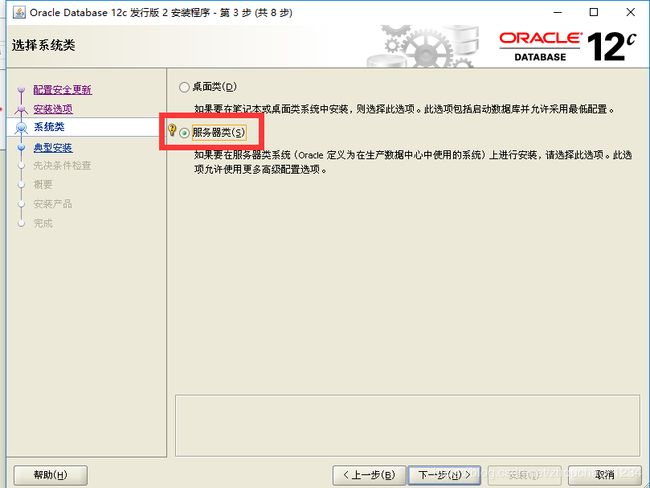
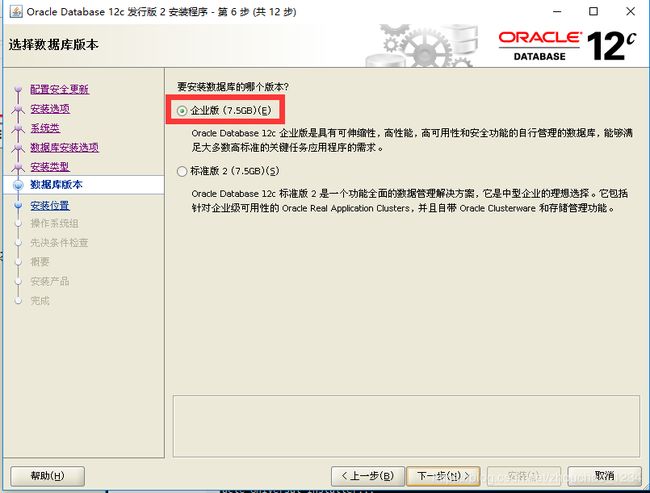
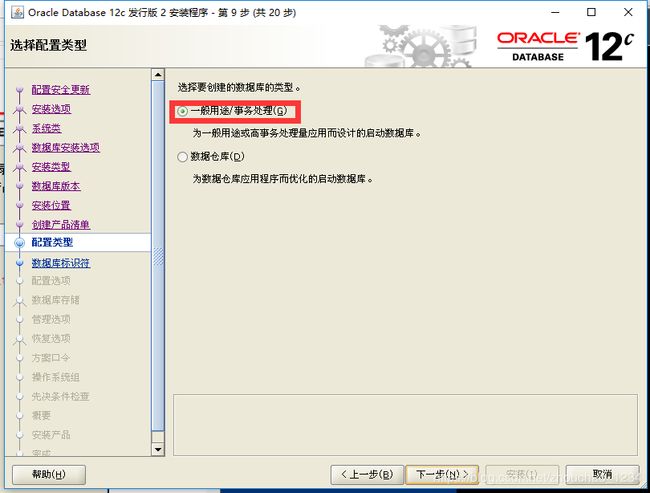
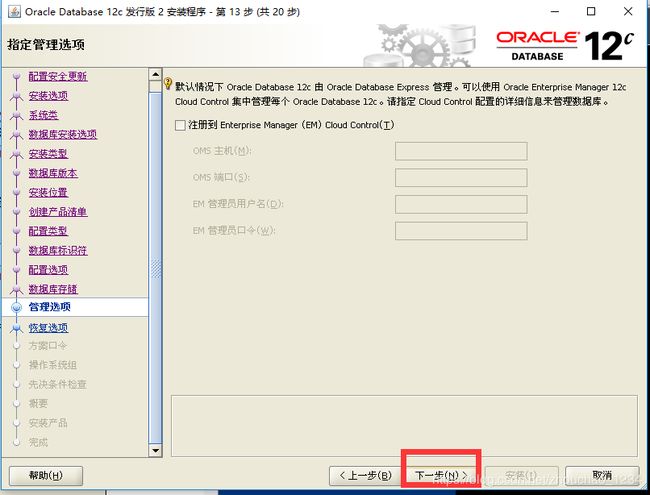
这里会弹出xmanager工具图形安装界面
取消√ 下一步,然后弹出 界面点是
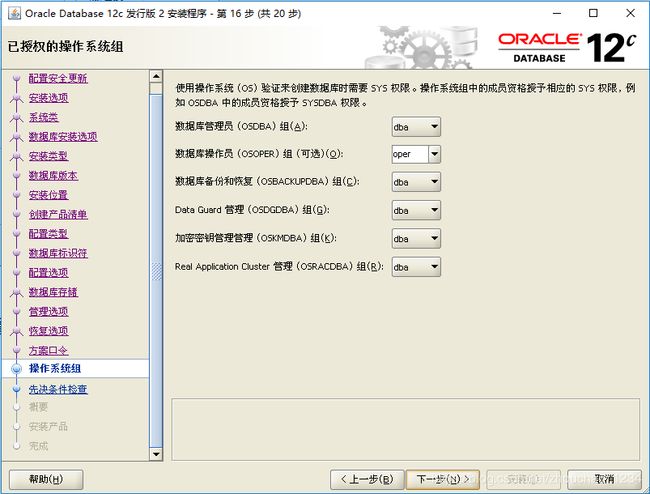
配置内存管理(物理内存大于4G),否则不勾选自动管理;选择中文字符集,下一步
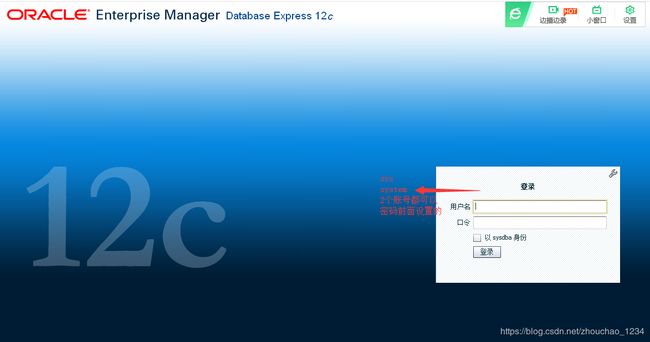
设置数据库用户密码,oracle对密码有设置要求,只允许英文字符和数字,设置完成,下一步,这里设置8位字母数字组合的密码,这2个密码是数据库用户sys、system 的首字母大写。
执行检测服务
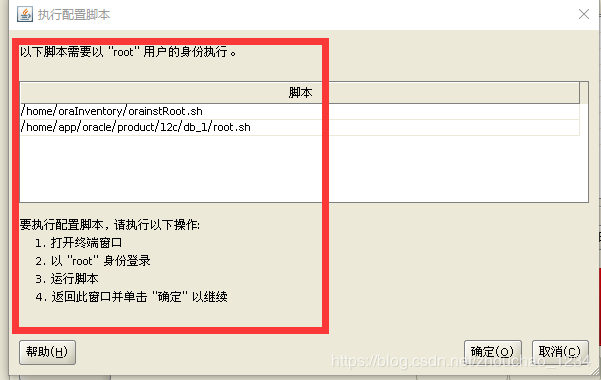
中途会弹出执行脚本的界面 ,以root身份执行
切换到root远程连接
[root@orac141 oraInventory]# cd /home/oraInventory/
[root@orac141 oraInventory]# ./orainstRoot.sh
[root@orac141 oraInventory]# cd /home/app/oracle/product/12c/db_1/
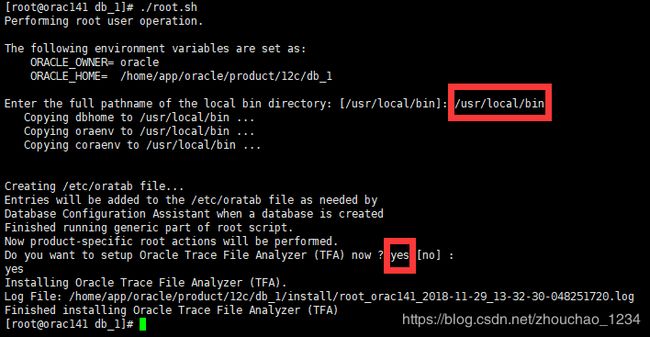
[root@orac141 db_1]# ./root.sh
中间2处设置如下图
执行完后回到安装界面 点确认 继续安装
等待安装完成
https://10.10.13.141:5500/em
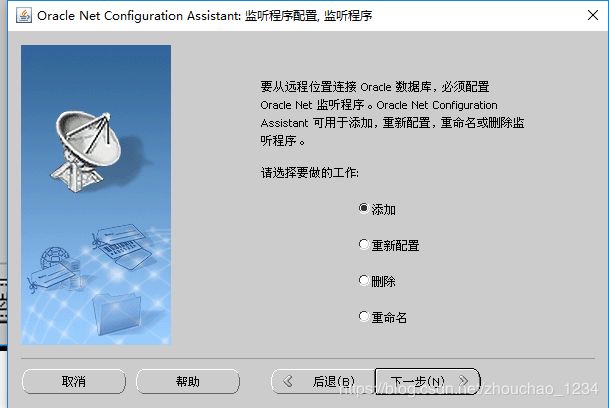
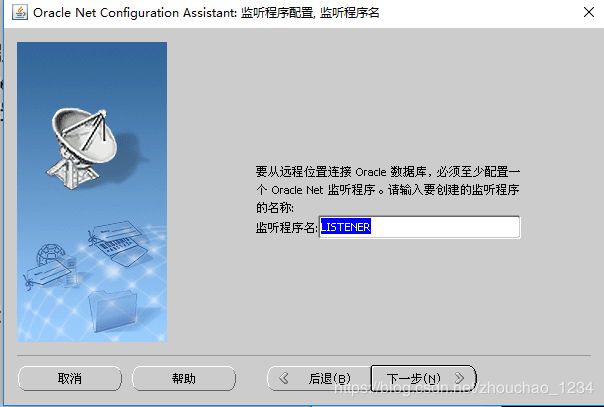
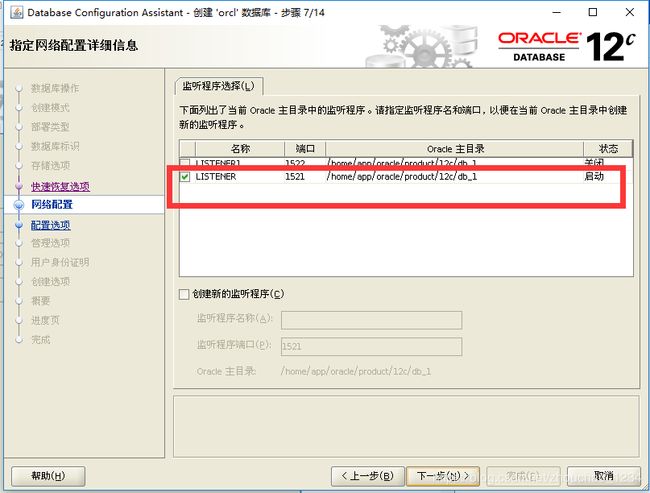
启动监听
在oracle 用户下执行
[oracle@orac141 database]$ netca
启动数据库配置(Oracle 用户)
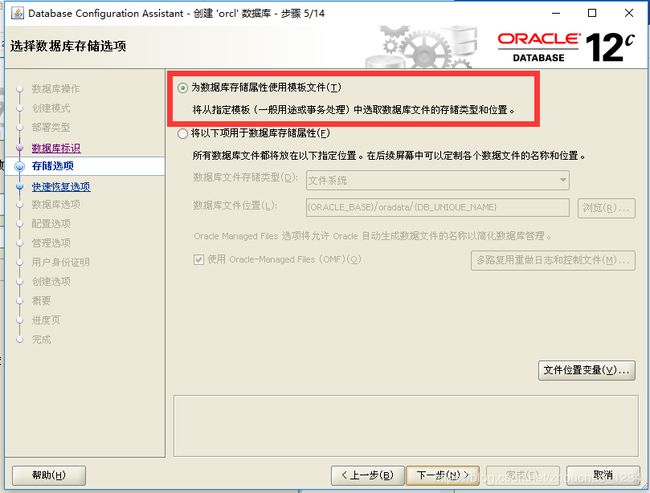
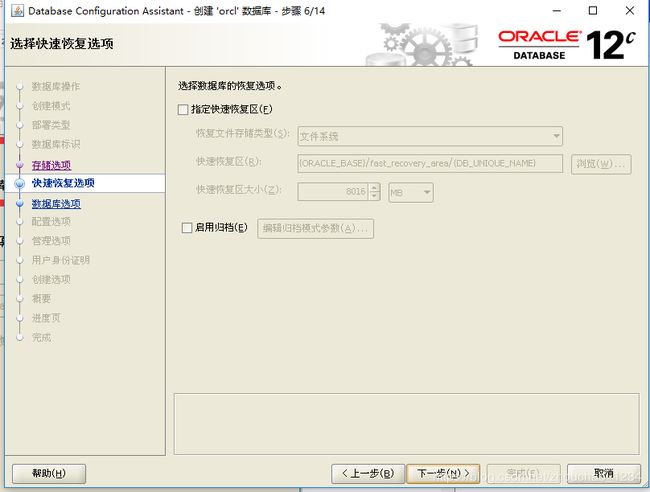
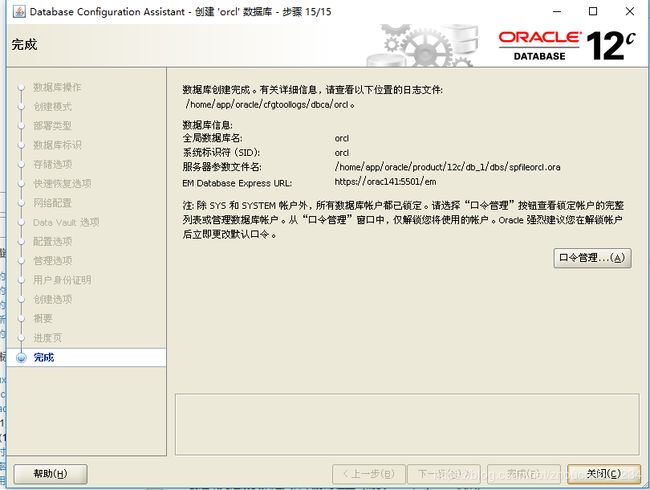
[oracle@orac141 database]$ dbca
后面默认下一步到最后。与前面创建数据库实例一样。
