WebRTC实时通信系列教程4 从摄像头获取视频流
转载地址:https://blog.csdn.net/Leytton/article/details/76704342
《WebRTC实时通信系列教程》翻译自《Real time communication with WebRTC》
示例代码下载http://download.csdn.net/detail/leytton/9923708
WebRTC实时通信系列教程1 介绍
WebRTC实时通信系列教程2 概述
WebRTC实时通信系列教程3 获取示例代码
WebRTC实时通信系列教程4 从摄像头获取视频流
WebRTC实时通信系列教程5 RTCPeerConnection传输视频
WebRTC实时通信系列教程6 使用RTCDataChannel传输数据
WebRTC实时通信系列教程7 使用Socket.IO搭建信令服务器交换信息
WebRTC实时通信系列教程8 打通P2P连接和信令通信
WebRTC实时通信系列教程9 数据通道图片传输
WebRTC实时通信系列教程10 恭喜完成本系列课程
一、译文
1、你将学到
在这一节中,你将学会:
- 从你的网络摄像头获取视频流.
- 播放视频流.
- 使用CSS和SVG操作视频.
此节代码保存在 step-01 文件夹下.
2、少量HTML代码...
添加一个video 标签和一个 script 标签到 work 目录下的 index.html 文件中:
-
-
-
-
Realtime communication with WebRTC -
-
-
-
Realtime communication with WebRTC
-
-
-
-
3、少量JavaScript代码
添加以下代码到 js 目录中的 main.js 文件中:
-
'use strict'; -
navigator.getUserMedia = navigator.getUserMedia || -
navigator.webkitGetUserMedia || navigator.mozGetUserMedia; -
var constraints = { -
audio: false, -
video: true -
}; -
var video = document.querySelector('video'); -
function successCallback(stream) { -
window.stream = stream; // stream available to console -
if (window.URL) { -
video.src = window.URL.createObjectURL(stream); -
} else { -
video.src = stream; -
} -
} -
function errorCallback(error) { -
console.log('navigator.getUserMedia error: ', error); -
} -
navigator.getUserMedia(constraints, successCallback, errorCallback);
所有的JavaScript案例代码使用 'use strict'; 来避免常见代码错误.
详情阅读 ECMAScript 5 Strict Mode, JSON, and More.
4、测试结果
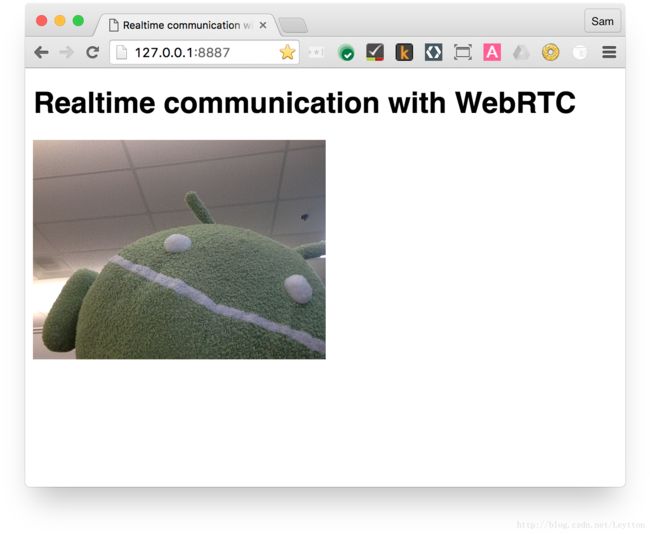
在浏览器打开 index.html 你将看到这个 (展示的是你的摄像头视图!):
更好的语法形式
你会感觉这些代码看起来有点旧.
我们现在使用 getUserMedia() 的回调函数来兼容当前浏览器.
可以查看 github.com/webrtc/samples 上的Promise版示例代码, 使用的是 MediaDevices API 并且能更好地进行错误处理. 我们后面将会使用它.
5、工作原理
getUserMedia() 调用语法为:
navigator.getUserMedia(constraints, successCallback, errorCallback);这一接口相对较新, 所以各种浏览器在getUserMedia中依然使用的是前缀名,你可以查看 main.js 文件中的顶部代码.
constraints 变量的参数可以指定获取哪些媒体资源 — 在下面的代码中, 只获取视频而不获取音频:
-
var constraints = { -
audio: false, -
video: true -
};
如果 getUserMedia() 函数执行成功, 摄像头视频流可以设置为video标签的src属性资源:
-
function successCallback(stream) { -
window.stream = stream; // stream available to console -
if (window.URL) { -
video.src = window.URL.createObjectURL(stream); -
} else { -
video.src = stream; -
} -
}
6、拓展
- 通过 getUserMedia() 获取到的 stream 对象是全局变量, 所以你可以从浏览器控制台查看它: 打开控制台, 输入 "stream" 并按回车键.
- 执行 stream.getVideoTracks() 语句会返回什么?
- 试着调用 stream.getVideoTracks()[0].stop().
- 查看 constraints 对象: 改成 {audio: true, video: true}会如何?
- video标签尺寸是多少? 你可以通过JavaScript获取视频自然尺寸而不是展示尺寸吗? 使用 Chrome Dev Tools 来检验.
- 尝试使用CSS过滤Video标签. 例如:
-
video { -
-webkit-filter: blur(4px) invert(1) opacity(0.5); -
}
- 尝试使用SVG过滤. 例如:
-
video { -
filter: hue-rotate(180deg) saturate(200%); -
-moz-filter: hue-rotate(180deg) saturate(200%); -
-webkit-filter: hue-rotate(180deg) saturate(200%); -
}
7、你学到的
在这节内容中你学习了:
- 获取摄像头视频流.
- 设置媒体约束.
- 修饰视频标签.
此节代码保存在 step-01 文件夹下.
8、提示
- 不要忘记在 video 标签添加 autoplay 属性. 否则, 你将只能看到一张图片而不是动态视频!
- getUserMedia() 函数有很多约束设置.你可以在这看到示例webrtc.github.io/samples/src/content/peerconnection/constraints. 这里也有很多其他有趣的 WebRTC 示例.
9、最佳实践
- 确保你的video标签大小不会超出父容器. 我们添加了 width 和 max-width 来设置video标签的首选尺寸和最大尺寸. 浏览器将会自动计算其高度:
-
video { -
max-width: 100%; -
width: 320px; -
}
10、下一节
你已经获取到视频了, 但如何传输视频呢? 下一节即将揭晓!
二、原文
摘自https://codelabs.developers.google.com/codelabs/webrtc-web/#3
4. Stream video from your webcam
What you'll learn
In this step you'll find out how to:
- Get a video stream from your webcam.
- Manipulate stream playback.
- Use CSS and SVG to manipulate video.
A complete version of this step is in the step-01 folder.
A dash of HTML...
Add a video element and a script element to index.html in your work directory:
-
-
-
-
Realtime communication with WebRTC -
-
-
-
Realtime communication with WebRTC
-
-
-
-
...and a pinch of JavaScript
Add the following to main.js in your js folder:
-
'use strict'; -
navigator.getUserMedia = navigator.getUserMedia || -
navigator.webkitGetUserMedia || navigator.mozGetUserMedia; -
var constraints = { -
audio: false, -
video: true -
}; -
var video = document.querySelector('video'); -
function successCallback(stream) { -
window.stream = stream; // stream available to console -
if (window.URL) { -
video.src = window.URL.createObjectURL(stream); -
} else { -
video.src = stream; -
} -
} -
function errorCallback(error) { -
console.log('navigator.getUserMedia error: ', error); -
} -
navigator.getUserMedia(constraints, successCallback, errorCallback);
All the JavaScript examples here use 'use strict'; to avoid common coding gotchas.
Find out more about what that means in ECMAScript 5 Strict Mode, JSON, and More.
Try it out
Open index.html in your browser and you should see something like this (featuring the view from your webcam, of course!):
A better API for gUM
If you think the code looks a little old fashioned, you're right.
We're using the callback version of getUserMedia() for compatibility with current browsers.
Check out the demo at github.com/webrtc/samples to see the Promise-based version, using the MediaDevices APIand better error handling. Much nicer! We'll be using that later.
How it works
getUserMedia() is called like this:
navigator.getUserMedia(constraints, successCallback, errorCallback);This technology is still relatively new, so browsers are still using prefixed names for getUserMedia. Hence the shim code at the top of main.js!
The constraints argument allows you to specify what media to get — in this example, video and not audio:
-
var constraints = { -
audio: false, -
video: true -
};
If getUserMedia() is successful, the video stream from the webcam is set as the source of the video element:
-
function successCallback(stream) { -
window.stream = stream; // stream available to console -
if (window.URL) { -
video.src = window.URL.createObjectURL(stream); -
} else { -
video.src = stream; -
} -
}
Bonus points
- The
streamobject passed togetUserMedia()is in global scope, so you can inspect it from the browser console: open the console, type stream and press Return. (To view the console in Chrome, press Ctrl-Shift-J, or Command-Option-J if you're on a Mac.) - What does
stream.getVideoTracks()return? - Try calling
stream.getVideoTracks()[0].stop(). - Look at the constraints object: what happens when you change it to
{audio: true, video: true}? - What size is the video element? How can you get the video's natural size from JavaScript, as opposed to display size? Use the Chrome Dev Tools to check.
- Try adding CSS filters to the video element. For example:
-
video { -
-webkit-filter: blur(4px) invert(1) opacity(0.5); -
}
- Try adding SVG filters. For example:
-
video { -
filter: hue-rotate(180deg) saturate(200%); -
-moz-filter: hue-rotate(180deg) saturate(200%); -
-webkit-filter: hue-rotate(180deg) saturate(200%); -
}
What you learned
In this step you learned how to:
- Get video from your webcam.
- Set media constraints.
- Mess with the video element.
A complete version of this step is in the step-01 folder.
Tips
- Don't forget the
autoplayattribute on thevideoelement. Without that, you'll only see a single frame! - There are lots more options for
getUserMedia()constraints. Take a look at the demo atwebrtc.github.io/samples/src/content/peerconnection/constraints. As you'll see, there are lots of interesting WebRTC samples on that site.
Best practice
- Make sure your video element doesn't overflow its container. We've added
widthandmax-widthto set a preferred size and a maximum size for the video. The browser will calculate the height automatically:
-
video { -
max-width: 100%; -
width: 320px; -
}
Next up
You've got video, but how do you stream it? Find out in the next step!