vue-app项目知识点总结(二)
本项目GitHub地址:https://github.com/Yue-Shang/shop-app
学做的一个商城项目,后台地址需要另行购买(添加微信coderwhy002购买即可),项目功能正在一步步完善中,商品选择功能和购物车商品删除正在进一步完善会过几天在(三)中写出来并完成git上传,有一些小bug也正在改进中,商城基本功能都有,有做相关项目的小伙伴可以看一下有没有能用到的组件你的项目可以用到,
Date:2020.05.22
vue-app项目知识点总结(一)
vue-app项目知识点总结(三)
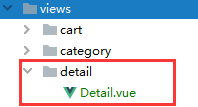
十一.跳转到详情页并且携带id
11.1简单实现根据id页面跳转
- 在GoodsListItem页面对页面div进行点击设置
itemClick(){ console.log('跳转到详情页'); this.$router.push('/detail/' + this.goodsItem.iid) }const Detail = () => import('../views/detail/Detail') const routes = [ ... { path:'/detail/:iid',//注意这里路径的写法 component: Detail }, ]- 详情页接收信息
detail.vue
<template> <!-- 详情页面--> <div> <p>详情页{{iid}}</p> </div> </template> <script> export default { name: "Detail", data() { return { iid:null } }, created() { this.iid = this.$route.params.iid console.log(this.iid); } } </script>11.2详情页添加头部导航封装
- (1)循环出title信息,并横向排列,动态绑定class点击实现颜色切换
Detail.vue
<detail-nav-bar></detail-nav-bar> ... import DetailNavBar from "./childComps/DetailNavBar"; ... components: {DetailNavBar},DetailNavBar.vue(导入NavBar)
<template> <div class="detail-navbar"> <nav-bar> <div slot="center" class="title"> <div v-for="(item,index) in title" class="title-item" :class="{active: index === isActive}" @click="titleClick(index)" > {{item}} </div> </div> </nav-bar> </div> </template> ... data(){ return{ title:['商品','参数','评论','推荐'], isActive:0 } }, methods:{ //点击不同导航显示活跃颜色 titleClick(index){ this.isActive = index } }- (2)添加返回按钮
<div slot="left" @click="backClick"><</div>点击事件
methods:{ backClick(){ this.$router.back() } }11.3根据id拿详细数据
import {request} from './request' export function getDetail(iid) { return request({ url:'/detail', params:{ iid } }) }- 详情页Detail.vue导入请求数据
import {getDetail} from "network/detail"; ... created() { ... //2.根据iid请求数据 this.getDetail() }, methods:{ getDetail(){ getDetail(this.iid).then(res => { console.log(res); }) } }- 在10.1中用到keep-alive,为了让视图不频繁的销毁创建,但是我们这个详情页里需要点击进入对应的id页面,我们就要把之前上一个视图销毁,所以在keep-alive中,我们加一个
exclude=“Detail”除detail以外都不进行销毁
11.3.1轮播图
- 拿到请求到的数据中轮播图的数据Detail.vue
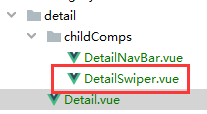
data() { return { ... topImages:[] } }, methods:{ getDetail(){ getDetail(this.iid).then(res => { // 1.获取顶部轮播图数据 this.topImages = res.result.itemInfo.topImages }) } }<template> <swiper class="dswiper"> <swiper-item v-for="(item,index) in topImages" :key="index"> <img :src="item" alt=""> </swiper-item> </swiper> </template> <script> import {Swiper, SwiperItem} from 'components/common/swiper' export default { name: "DetailSwiper", components:{ Swiper, SwiperItem }, //拿到父组件传过来的轮播图数据 props: { topImages:{ type: Array, default(){ return [] } } } } </script> <style scoped> .dswiper{ height: 300px; } .dswiper img{ padding:0 20% 0 20%; } </style>- 把DetailSwiper.vue导入到详情页Detail.vue上
<detail-swiper :top-images="topImages"/> ... import DetailSwiper from "./childComps/DetailSwiper"; ... components: {...,DetailSwiper},11.3.2商品标题以及销量等信息
- 我们发现整个的详情信息数据太多了,我们就需要抽离组件需要的数据,让一个组件只要面向着一个对象开发开发就可以了
- 原理如下
class Person { constructor(name,age) { this.name = name; this.age = age; } } const p = new Person('smy',16)- 我们在detail.js中把原数据进行抽离
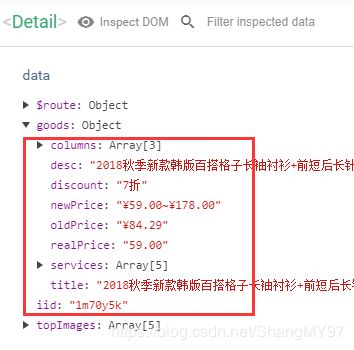
export class Goods { constructor(itemInfo,columns,services) { this.title = itemInfo.title this.desc = itemInfo.desc this.newPrice = itemInfo.price this.oldPrice = itemInfo.oldPrice this.discount = itemInfo.discountDesc //动态设置颜色 this.discountBgColor = itemInfo.discountBgColor this.columns = columns this.services = services this.realPrice = itemInfo.lowNowPrice } }Detail.vue
import {..., Goods} from "network/detail"; ... data() { return { ... goods: {} } }, methods:{ getDetail(){ getDetail(this.iid).then(res => { const data = res.result // 1.获取顶部轮播图数据 this.topImages = data.itemInfo.topImages //2.获取商品信息 this.goods = new Goods(data.itemInfo,data.columns,data.shopInfo.services) }) } }- 下面我们来把这一部分单独拿出来写一个组件
<template> <div v-if="Object.keys(goods).length !== 0" class="base-info"> <div class="info-title">{{goods.title}}</div> <div class="info-price"> <span class="n-price">{{goods.newPrice}}</span> <span class="o-price">{{goods.oldPrice}}</span> <span v-if="goods.discount" class="discount" //在这里动态设置背景颜色 :style="{backgroundColor:goods.discountBgColor}" >{{goods.discount}}</span> </div> <div class="info-other"> <span>{{goods.columns[0]}}</span> <span>{{goods.columns[1]}}</span> <span>{{goods.services[goods.services.length-1].name}}</span> </div> <div class="info-service"> <span class="info-service-item" v-for="index in goods.services.length-1" :key="index"> <img :src="goods.services[index-1].icon"> <span>{{goods.services[index-1].name}}</span> </span> </div> </div> </template> <script> export default { name: "DetailBaseInfo", props:{ goods:{ type:Object, default() { return {} } } } } </script>Detail.vue
<detail-base-info :goods="goods"/> ... import DetailBaseInfo from "./childComps/DetailBaseInfo"; ... components: {DetailBaseInfo, ...},-
v-for="item in 10"输出1,2,3,4,5,6,7,8,9,10 数字遍历 -
Object.keys(obj).length === 0判断一个对象是否为空
11.3.3商家信息
detail.js
//商家信息 export class Shop { constructor(shopInfo) { this.logo = shopInfo.shopLogo; this.name = shopInfo.name; this.fans = shopInfo.cFans; this.sells = shopInfo.cSells; this.score = shopInfo.score; this.goodsCount = shopInfo.cGoods } }DetailShopInfo.vue
<template> <div class="shop-info"> <div class="shop-top"> <img :src="shop.logo"> <span class="title">{{shop.name}}</span> </div> <div class="shop-middle"> <div class="shop-middle-item shop-middle-left"> <div class="info-sells"> <div class="sells-count"> {{shop.sells | sellCountFilter}} </div> <div class="sells-text">总销量</div> </div> <div class="info-goods"> <div class="goods-count"> {{shop.goodsCount}} </div> <div class="goods-text">全部宝贝</div> </div> </div> <div class="shop-middle-item shop-middle-right"> <table> <tr v-for="(item, index) in shop.score" :key="index"> <td>{{item.name}}</td> <td class="score" :class="{'score-better': item.isBetter}">{{item.score}}</td> <td class="better" :class="{'better-more': item.isBetter}"><span>{{item.isBetter ? '高':'低'}}</span></td> </tr> </table> </div> </div> <div class="shop-bottom"> <div class="enter-shop">进店逛逛</div> </div> </div> </template> <script> export default { name: "DetailShopInfo", props: { shop:{ type:Object, default() { return {} } } }, filters: { sellCountFilter: function (value) { if (value < 10000) return value; return (value/10000).toFixed(1) + '万' } } } </script>detail.vue
<detail-shop-info :shop="shop"/> ... import DetailShopInfo from "./childComps/DetailShopInfo"; ... components: {DetailShopInfo,...}, methods:{ getDetail(){ getDetail(this.iid).then(res => { const data = res.result ... //3.创建店铺信息的对象 this.shop = new Shop(data.shopInfo) }) } }11.3.4加入scroll滚动效果
- (1)覆盖底部导航+头部导航吸顶
<template> <div id="detail"> <detail-nav-bar class="detail-nav"></detail-nav-bar> <scroll class="content" ref="scroll"> ... </scroll> </div> </template> <script> import Scroll from "../../components/common/scroll/Scroll"; export default { name: "Detail", components: { ... Scroll }, ... } </script> <style scoped> #detail{ position: relative; z-index: 9; //背景设置为白色遮住底部导航 background-color: white; height: 100vh; } .detail-nav { position: relative; z-index: 9; background-color: #fff; } .content{ height: calc(100% - 44px); } </style>11.3.5商品照片详情
DetailGoodsInfo.vue
<template> <div v-if="Object.keys(detailInfo).length !== 0" class="goods-info"> <div class="info-desc clear-fix"> <div class="start"> </div> <div class="desc">{{detailInfo.desc}}</div> <div class="end"></div> </div> <div class="info-key">{{detailInfo.detailImage[0].key}}</div> <div class="info-list"> <img v-for="(item, index) in detailInfo.detailImage[0].list" :key="index" :src="item" @load="imgLoad" alt=""> </div> </div> </template> <script> export default { name: "DetailGoodsInfo", props:{ detailInfo:{ type: Object, default(){ return {} } } }, data() { return{ counter:0, imagesLength:0 } }, methods: { imgLoad() { // 判断, 所有的图片都加载完了, 那么进行一次回调就可以了. if (++this.counter === this.imagesLength) { this.$emit('imageLoad'); } } }, watch: { detailInfo() { // 获取图片的个数 this.imagesLength = this.detailInfo.detailImage[0].list.length } } } </script> css样式省略,看源代码detail.vue引入组件
<detail-goods-info :detail-info="detailInfo" @imageLoad="imageLoad"/> ... import DetailGoodsInfo from "./childComps/DetailGoodsInfo"; ... components: {DetailGoodsInfo,...}, data() { return { ... detailInfo:{} } }, methods:{ getDetail(){ getDetail(this.iid).then(res => { const data = res.result ... // 4.保存商品的详情数据 this.detailInfo = data.detailInfo; }) }, imageLoad() { this.$refs.scroll.refresh() } }11.3.6商品参数
detail.js
//商品参数 export class GoodsParam { constructor(info, rule) { // 注: images可能没有值(某些商品有值, 某些没有值) this.image = info.images ? info.images[0] : ''; this.infos = info.set; this.sizes = rule.tables; } }Detail.vue
data() { return { paramInfo:{} } }, ... methods:{ getDetail(){ getDetail(this.iid).then(res => { const data = res.result // 5.获取参数的信息 this.paramInfo = new GoodsParam(data.itemParams.info, data.itemParams.rule) }) }, }参数页面DetailParamInfo.vue
<template> <div class="param-info" v-if="Object.keys(paramInfo).length !== 0"> <table v-for="(table, index) in paramInfo.sizes" class="info-size" :key="index"> <tr v-for="(tr, indey) in table" :key="indey"> <td v-for="(td, indez) in tr" :key="indez">{{td}}</td> </tr> </table> <table class="info-param"> <tr v-for="(info, index) in paramInfo.infos"> <td class="info-param-key">{{info.key}}</td> <td class="param-value">{{info.value}}</td> </tr> </table> <div class="info-img" v-if="paramInfo.image.length !== 0"> <img :src="paramInfo.image" alt=""> </div> </div> </template> <script> export default { name: "DetailParamInfo", props:{ paramInfo:{ type:Object, default(){ return {} } } } } </script> css省略Detail.vue导入DetailParamInfo.vue
<detail-param-info :param-info="paramInfo"/> ... import DetailParamInfo from "./childComps/DetailParamInfo"; ... components: {DetailParamInfo,...},11.3.7商品评论
data() { return { ... commentInfo:{}, } }, methods:{ getDetail(){ getDetail(this.iid).then(res => { const data = res.result ... //6.获取评论数据 //有的商品没有评论,所以我们要判断一下 if (data.rate.cRate !== 0) { this.commentInfo = data.rate.list[0] } }) }, }新建评论信息组件DetailCommentInfo.vue
<template> <div v-if="Object.keys(commentInfo).length !== 0" class="comment-info"> <div class="info-header"> <div class="header-title">用户评价</div> <div class="header-more"> 更多 <i class="arrow-right">></i> </div> </div> <div class="info-user"> <img :src="commentInfo.user.avatar" alt=""> <div class="user-name">{{commentInfo.user.uname}}</div> </div> <div class="info-detail"> <p>{{commentInfo.content}}</p> <div class="info-other"> <span class="date">{{commentInfo.created | showDate}}</span> <span>{{commentInfo.style}}</span> </div> <div class="info-imgs"> <img :src="item" v-for="(item,index) in commentInfo.images" :key="index"> </div> </div> </div> </template> <script> import {formatDate} from "common/utils"; export default { name: "DetailCommentInfo", props:{ commentInfo:{ type:Object, default(){ return {} } } }, filters: { showDate(value) { // 1.将时间戳转成Date对象(value * 1000) const date = new Date(value * 1000) //2.将date进行格式化 return formatDate(date,'yyyy-MM-dd') } } } </script> ccs样式看源代码这里我们添加了一个过滤器,转化服务器返回的时间
如何将时间戳转成时间格式字符串?
//设置时间戳 export function formatDate(date, fmt) { //获取年份 //y+ ->1个或者多个y //y* ->0个或者多个y //y? ->0个或者1个y if (/(y+)/.test(fmt)) { //replace() 方法用于在字符串中用一些字符替换另一些字符,或替换一个与正则表达式匹配的子串。 // RegExp.$1是RegExp的一个属性,指的是与正则表达式匹配的第一个 子匹配(以括号为标志)字符串 // substr() 方法可在字符串中抽取从 start 下标开始的指定数目的字符 fmt = fmt.replace(RegExp.$1,(date.getFullYear() + '').substr(4 - RegExp.$1.length)); } let o = { 'M+': date.getMonth() + 1, 'd+': date.getDate(), 'h+': date.getHours(), 'm+': date.getMinutes(), 's+': date.getSeconds() }; for (let k in o) { if (new RegExp(`(${k})`).test(fmt)) { let str = o[k] + ''; fmt = fmt.replace(RegExp.$1, (RegExp.$1.length === 1) ? str : padLeftZero(str)); } } return fmt; } function padLeftZero (str) { return ('00' + str).substr(str.length); }这个代码我们写在common/utils.js里,再在DetailCommentInfo.vue中导入,使用的时候,再过滤器中作为函数返回值,在需要转换格式的信息后面使用,如
{{commentInfo.created | showDate}}11.3.8商品推荐
商品推荐和首页的商品列表都是一样的列表,我们只需要更换一下后台数据就可以了,
- 我们先请求商品推荐的后台数据
network/detail.js
//商品推荐 export function getRecommend() { return request({ url: '/recommend' }) }Detail.vue
<goods-list :goods="recommends"/> ... import GoodsList from "components/content/goods/GoodsList"; ... components: { ... GoodsList }, data() { return { ... recommends:[] } }, created() { ... //3.请求推荐数据 this.getRecommend() }, methods:{ ... getRecommend(){ getRecommend().then(res => { this.recommends = res.data.list }) }, }解决image地址来自不同地方,还要用一个插件的问题
但是列表中图片的信息位置不一样,我们要进行修改
GoodsListItem.vue<img :src="showImage" alt="" @load="imageLoad"><!--监听是否加载完--> ... computed: { showImage() { return this.goodsItem.image || this.goodsItem.show.img } },同时,我们不希望在这个商品推荐加载完之后首页的列表也跟着更新
- 我们去Home.vue中取消全局事件的监听
监听事件
data(){ return{ ... itemImgListener: null } }, mounted() { const refresh = debounce(this.$refs.scroll.refresh,200); //1.监听item中图片加载完成 this.itemImgListener = () =>{ refresh() }; this.$bus.$on('itemImageLoad',this.itemImgListener) },取消监听
deactivated() { //1.保存Y值 this.saveY = this.$refs.scroll.getScrollY(); //2.取消全局事件的监听 this.$bus.$off('itemImgLoad',this.itemImgListener) },在detail.vue中也添加监听
data(){ return{ ... itemImgListener: null } }, mounted(){ const refresh = debounce(this.$refs.scroll.refresh,200); this.itemImgListener = () =>{ refresh() }; this.$bus.$on('itemImageLoad',this.itemImgListener) }, destroyed(){ this.$bus.$off('itemImageLoad',this.itemImgListener) },我们发现在在这两个文件中,代码的重复太高了
- 继承减少类里面重复的代码
class Animal { run() { } } class Person extends Animal{ } class Dog extends Animal{ }混入(mixin)减少代码重复
mixin:https://cn.vuejs.org/v2/guide/mixins.html#%E5%9F%BA%E7%A1%80
- 创建混入对象:
common/mixin.js
import {debounce} from "./utils" export const itemListenerMixin = { data(){ return{ itemImgListener: null } }, mounted(){ const refresh = debounce(this.$refs.scroll.refresh,200); this.itemImgListener = () =>{ refresh() }; this.$bus.$on('itemImageLoad',this.itemImgListener) console.log('我是混入中的内容'); } }组件中重复部分删除掉
- 组件对象中:
import {itemListenerMixin} from "common/mixin"; ... mixins: [itemListenerMixin],bug问题解决
问题一:在滑动商品详情页时滑动照片出现卡顿
解决办法:监听图片加载完进行一次刷新
DetailGoodsInfo.vue


监听图片加载了多少次

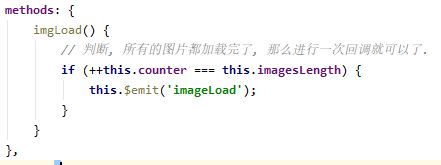
Detail.vue


就不会出现频繁调用了,在图片加载完进行一次刷新。这里不要带混入,想着我写成this.itemImgListener,不行!!!会出现卡顿

十二.详情顶部导航联动效果
12.1.点击标题,滚动到对应的主题
- 在detail中监听标题的点击,获取index
DetailNavBar.vue
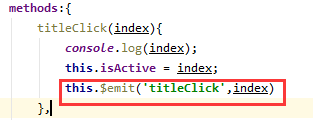
Detail.vue

点击查看导航对应索引值

- 滚动到对应的主题:
获取所有主题的offsetTop
问题:在哪里才能获取到正确的offsetTop?
■1.created肯定不行, 压根不能获取元素
■2.mounted也不行,数据还没有获取到

■3.获取到数据的回调中也不行,DOM还没有渲染完this.themeTopYs = [] this.themeTopYs.push(0); this.themeTopYs.push(this.$refs.params.$el.offsetTop)//参数的offsetTop this.themeTopYs.push(this.$refs.comment.$el.offsetTop)//评论的offsetTop this.themeTopYs.push(this.$refs.recommend.$el.offsetTop)//推荐的offsetTop console.log(this.themeTopYs);第一次获取值不对
值不对原因:this.$refs.params.$el压根没有渲染

■4.$nextTick也不行,因为图片的高度没有被计算在类
渲染完来这里回调一次
第二次获取值不对,
值不对原因:图片没有计算在内this.$nextTick(() => { // 根据最新的数据,对应的DOM是已经被渲染出来 // 但是图片依然是没有加载完 // offsetTop值不对的时候,都是因为图片的问题 this.themeTopYs = [] this.themeTopYs.push(0); this.themeTopYs.push(this.$refs.params.$el.offsetTop)//参数的offsetTop this.themeTopYs.push(this.$refs.comment.$el.offsetTop)//评论的offsetTop this.themeTopYs.push(this.$refs.recommend.$el.offsetTop)//推荐的offsetTop console.log(this.themeTopYs); })※※※※※5.在图片加载完成后,获取的高度才是正确※※※※※※
(1).先把导航的索引传给父级
DetailNavBar.vuemethods:{ titleClick(index){ this.isActive = index; this.$emit('titleClick',index) } }(2)父级接收信息
<detail-nav-bar class="detail-nav" @titleClick="titleClick"/>(3)在父级中查看点击的导航索引
methods:{ titleClick(index){ console.log(index); } }(4).设置页面距离顶端高度值
data(){ return{ themeTopYs: [0,1000,2000,3000], } }(5).在点击事件中应用
methods:{ titleClick(index){ console.log(index); this.$refs.scroll.scrollTo(0, -this.themeTopYs[index],100) } }注意y轴坐标是负数
(6).运行成功点击导航会进行相应的跳转,下面我们具体的去拿哪个位置对应的高
(7)themeTopY数组置空,传入导航的offsetTop值
给3个组件添加ref属性<detail-param-info ref="params" :param-info="paramInfo"/> <detail-comment-info ref="comment" :comment-info="commentInfo"/> <goods-list ref="recommend" :goods="recommends"/>data(){return{}}中
getThemTopY:null,在created生命周期中
//4.给getThemTopY赋值(对给getThemTopY进行赋值的操作进行防抖) this.getThemTopY = debounce(() =>{ this.themeTopYs = [] this.themeTopYs.push(0); this.themeTopYs.push(this.$refs.params.$el.offsetTop)//参数的offsetTop this.themeTopYs.push(this.$refs.comment.$el.offsetTop)//评论的offsetTop this.themeTopYs.push(this.$refs.recommend.$el.offsetTop)//推荐的offsetTop console.log(this.themeTopYs); },100)(8)运行后发现跳转到商品评论会多往上面一块
给这里加一个44,把头部导航站的位置空出来this.$refs.scroll.scrollTo(0, -this.themeTopYs[index]+44,100)(9)补充一个问题点(遇到没有评论的问题)
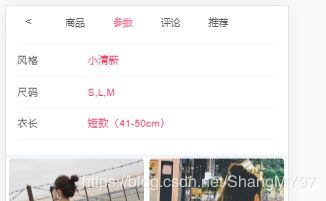
我们做一个这样的判断,没有评论时直接跳转到推荐
isNaN()内的变量值如果是NAN则是true,如果是其他数据类型则是falsetitleClick(index) { this.$refs.scroll.scrollTo(0, -this.themeTopYs[index]+44,100) // 如果有一个没有比如评论没有,我们就跳到下一个 if(isNaN(-this.themeTopYs[index])==true){ this.$refs.scroll.scrollTo(0, -this.themeTopYs[index + 1]+44,100) } console.log(-this.themeTopYs[index]); },12.2滚动数据,标题发生对应改变
方法一:
(1)Detail.vue设置滚动监听
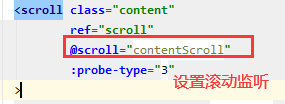
(2)data(){return{}}中currentIndex: 0
(3)methods方法中positionY和主题中值进行对比
[0, 6280, 7083, 7295]
positionY在0-6280之间,index=0
positionY在6280-7083之间,index=1
positionY在7083-7295之间,index=2
positionY超过7295,index=3contentScroll(position) { // 1.获取y值,这里加上顶部导航的宽度44,不然需要上滚一段才能切换索引值 const positionY = -position.y+44 let length = this.themeTopYs.length for (let i=0;i<length;i++) { if(this.currentIndex != i && ((i<length - 1 && positionY >= this.themeTopYs[i] && positionY < this.themeTopYs[i+1])|| (i === length - 1 && positionY >= this.themeTopYs[i]))){ this.currentIndex = i; this.$refs.nav.isActive = this.currentIndex//实现联动,让索引值等于currentIndex值 } } }positionY和主题中值进行对比
[0, 6280, 7083, 7295,100000]
positionY在0-6280之间,index=0
positionY在6280-7083之间,index=1
positionY在7083-7295之间,index=2
positionY在7295和非常大值之间,index=3(1)添加最大值Number.MAX_VALUE
this.getThemTopY = debounce(() =>{ this.themeTopYs = [] ... this.themeTopYs.push(Number.MAX_VALUE) console.log(this.themeTopYs); },100)
contentScroll(position) { const positionY = -position.y+44 let length = this.themeTopYs.length for (let i=0;i<length-1;i++) { if (this.currentIndex !== i && (positionY >= this.themeTopYs[i] && positionY < this.themeTopYs[i+1])){ this.currentIndex = i; this.$refs.nav.isActive = this.currentIndex } } }十三.详情页底部工具栏,点击即加入购物车
(1).先建一个底部导航组件DetailBottomBar.vue(先不写全,验证一下大框能不能显示,调整一下css样式先固定在底部,再调试)
<template> <div class="bottom-bar"> <div class="bar-item bar-left"> <div> <i class="icon service"></i> <span class="text">客服</span> </div> <div> <i class="icon shop"></i> <span class="text">店铺</span> </div> <div> <i class="icon select"></i> <span class="text">收藏</span> </div> </div> <div class="bar-item bar-right"> <div class="cart">加入购物车</div> <div class="buy">购买</div> </div> <!-- <sport-ball ref="ball" class="sport-ball"></sport-ball>--> </div> </template>(2)Detail.vue导入
<scroll></scroll> <detail-bottom-bar /> ... import DetailBottomBar from "./childComps/DetailBottomBar"; ... components: {...,DetailBottomBar,}, ...(3)CSS把底部导航固定在底部
.bottom-bar{ height: 58px; position: relative; background-color: #ffffff; display: flex; text-align: center; }在父组件的滚动部分scroll的class类content的height属性中减去底部导航的高度
.content{ height: calc(100% - 44px - 58px); }(4)在子组件中给购物车点击添加点击事件
<div class="cart" @click="addToCart">加入购物车</div> ... methods:{ addToCart(){ this.$emit('addCart') } }(5)父组件中接收
<detail-bottom-bar @addCart="addToCart"/> ... methods:{ addToCart() { //1.获取购物车需要展示的信息 const product = {} product.image = this.topImages[0]; product.title = this.goods.title; product.desc = this.goods.desc; product.newPrice = this.goods.realPrice; product.iid = this.iid; }, }(6)我们现在想把这些详情页detail中的信息转到购物车页面
1).下载Vuex
npm install vuex --save2)新建管理目录
import Vue from 'vue' import Vuex from 'vuex' //1.安装插件 Vue.use(Vuex) //2.创建Store对象 const store = new Vuex.Store ({ state: {}, mutations: {} }) //3.挂载到Vue实例上 export default storemain.js导入
import store from './store' new Vue({ render: h => h(App), store }).$mount('#app')3)在index.js页面
搞一个数组,到时候往这个数组里添加商品
(数组常用的方法有哪些?push/pop/unshift/shift/sort/reverse/map/filter/reduce)state: { cartList: [] } mutations: { addCart(state, payload) { let oldProduct = null; for (let item of state.cartList){ if (item.iid === payload.iid) { oldProduct = item; } // 或者直接写一个let oldProduct = state.cartList.find(item => item.iid === payload.iid) } //2.判断oldProduct if (oldProduct) { oldProduct.count += 1 } else { payload.count = 1 state.cartList.push(payload) } }在Detail.vue
addToCart() { ... //2.将商品添加到购物车中 this.$store.commit('addCart',product) },在scroll标签中做一个接收方便查看
<ul> <li v-for="item in $store.state.cartList">{{item}}</li> </ul>4).有判断逻辑的放到actions中,并进行重构
store/index.js
import Vue from 'vue' import Vuex from 'vuex' import mutations from "./mutations"; import actions from "./actions"; //1.安装插件 Vue.use(Vuex) //2.创建Store对象 const state = { cartList: [] } const store = new Vuex.Store ({ state, mutations, actions, //有判断逻辑的放到actions中 }) //3.挂载到Vue实例上 export default storeactions.js
import { ADD_COUNTER, ADD_TO_CART } from './mutation-types' export default { addCart(context, payload){ //1.查找之前数组中是否有该商品 let oldProduct = context.state.cartList.find(item => item.iid === payload.iid) console.log(oldProduct); //2.判断oldProduct if (oldProduct) { context.commit(ADD_COUNTER, oldProduct) } else { payload.count = 1 context.commit(ADD_TO_CART, payload) } } }mutations.js
import { ADD_COUNTER, ADD_TO_CART } from './mutation-types' export default { //mutations唯一的目的就是修改state中状态 //mutations中的每个方法尽可能完成的事件比较单一一点 // 数量加一 [ADD_COUNTER](state,payload) { payload.count++ }, [ADD_TO_CART](state,payload) { state.cartList.push(payload) } }mutation-types.js
export const ADD_COUNTER = 'add_counter' export const ADD_TO_CART = 'add_to_cart'Detail.vue
注意一下这个product一定要写,我就忘写了,找了半天bug[○・`Д´・ ○]addToCart() { //2.将商品添加到购物车中 this.$store.dispatch('addCart',product) },十四.将拿到的数据在购物车显示
Cart.vue
<template> <div class="cart"> <!-- 导航--> <nav-bar class="nav-bar"> <div slot="center">购物车({{length}})</div> </nav-bar> <!-- 商品列表--> <cart-list/> </div> </template>- 想在导航中显示购物车中的商品数


有很多地方可能用到这个购物车商品总数,我们就直接把它封装到getters.js中export default { cartLength(state) { return state.cartList.length } }那怎么把getters里的函数转成购物车页面这里的计算属性,我们用mapGetters辅助函数
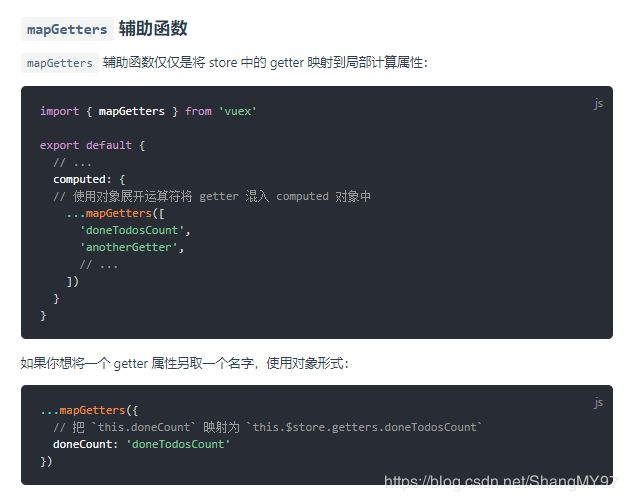
在Cart.vue中import NavBar from "components/common/navbar/NavBar"; import CartList from "./childComps/CartList"; import { mapGetters } from 'vuex'; export default { name: "Cart", components: {CartList, NavBar}, computed: { //方法一: // ...mapGetters(['cartLength','cartList',]) //方法二: ...mapGetters({ length:'cartLength' }) } }- 现在我们想在购物车显示选中的商品内容
初步我们先拿到数据(上面已经引入子组件CartList了)
getters.js中添加
export default { ... cartList(state) { return state.cartList } }CartList.vue
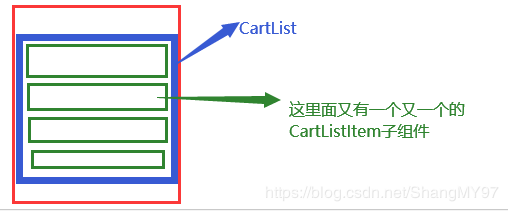
<template> <div class="cart-list"> <scroll class="content" ref="scroll"> <cart-list-item v-for="(item,index) in cartList" :product="item" :key="index"/> <li >{{item}}</li> </scroll> </div> </template> <script> import Scroll from "components/common/scroll/Scroll"; import CartListItem from "./CartListItem"; import { mapGetters } from 'vuex'; export default { name: "CartList", components: {CartListItem, Scroll}, computed: { ...mapGetters(['cartList']) }, activated() { this.$refs.scroll.refresh() } } </script> <style scoped> .cart-list{ height: calc(100% - 44px - 58px); } .content{ height: 100%; overflow: hidden; } </style>因为刚开始我们给了scroll一个高度,后来我们往里添加东西,scroll不知道我们加了,它以为scrollerHeight还是=0,要刷新一下它才能知道
所以我们在购物车导航被‘’活跃‘’的时候,给它刷新一下activated() { this.$refs.scroll.refresh() }<template> <div> {{product}} </div> </template> <script> export default { name: "CartListItem", props: { product: { type: Object, default() { return{} } } } } </script>- 下面我们整理一下拿到的数据,添加一些css样式
这里注意一下{{}}里的取值,我们传给父组件的是product
<template> <div id="shop-item"> <div class="item-selector"> <!-- <CheckButton @checkBtnClick="checkedChange" :value="product.checked"></CheckButton>--> </div> <div class="item-img"> <img :src="product.image" alt="商品图片"> </div> <div class="item-info"> <div class="item-title">{{product.title}}</div> <div class="item-desc">{{product.desc}}</div> <div class="info-bottom"> <div class="item-price left">¥{{product.newPrice}}</div> <div class="item-count right">×{{product.count}}</div> </div> </div> </div> </template> <script> import Detail from "../../detail/Detail"; export default { name: "CartListItem", components: {Detail}, props: { product: { type: Object, default() { return{} } } } } </script> css样式去代码里看吧(1)购物车底部导航
<template> <div class="bottom-bar"> <div class="price"> 合计:{{totalPrice}} </div> <div class="calculate"> 去计算:{{checkLength}} </div> </div> </template> <script> import CheckButton from "components/content/checkButton/CheckButton"; import { mapGetters } from 'vuex' export default { name: "CartBottomBar", components: {CheckButton}, computed: { ...mapGetters(['cartList']), totalPrice() { return '¥' + this.cartList.filter(item => { return item.checked }).reduce((preValue, item) => { return preValue + item.lowNowPrice * item.count }, 0).toFixed(2) }, checkLength() { return this.cartList.filter(item => item.checked).length } }, } </script> css代码查看源代码注意这里的合计值哪里我们之前拿到的price数据,它不是数字,它是个有金钱符号的字符串,这我们就没有办法算合计值了,拆分再转化成字符串也很麻烦,我们去看原数据,有一个叫lowNowPrice的属性是数值格式,我们就先用这个,正常项目中,我们可以跟后端人员协商让他们直接存数据格式的数据
我们在detail.js中把这个加上export class Goods { constructor(itemInfo,columns,services) { ... this.lowNowPrice = itemInfo.lowNowPrice ... } }Detail.vue这里也是
... addToCart() { ... product.lowNowPrice = this.goods.lowNowPrice ... },(2)实现全选按钮
商品是否选中,我们在对象模型中记录。修改对象模型的某个属性,界面跟着改变
:is-checked="product.checked",也就是product.checked这个模型改变,:is-checked值跟着改变
先给商品列表添加选中按钮
CartListItem.vue<div class="item-selector"> <check-button :is-checked="product.checked" @click.native="checkClick"></check-button> </div> ... methods:{ checkClick(){ this.product.checked = !this.product.checked; } } css样式查看源代码mutation.js
product.checked的这个checked是我们在这里添加的.checked属性export default { [ADD_TO_CART](state,payload) { payload.checked = true ... }添加全选按钮
CartBottomBar.vue<div class="check-content"> <check-button class="check-button" :is-checked="isSelectAll" @click.native="checkClick"/> <span>全选</span> </div> ... computed: { ... //这里主要是如果上面全选了,下面的全选按钮就显示全选 isSelectAll() { // 最好要有这个判断条件,不然购物车为空的时候也是选中状态 if (this.cartList.length === 0) return false //方法一:使用filter 先找一下有多少个没被选中的,再取反,也就是全被选中了,‘全选’按钮就变选中 // return !(this.cartList.filter(item => !item.checked).length) // 方法二:使用find // return !this.cartList.find(item => !item.checked) // 方法三:普通遍历 for (let item of this.cartList) { if (!item.checked) { return false } } return true } }, methods:{ //这里是点击全选按钮,上面改变状态 checkClick() { if (this.isSelectAll) {//全部选中 this.cartList.forEach(item => item.checked = false) } else {//部分或全部不选中 this.cartList.forEach(item => item.checked = true) } } }十五.添加到购物车显示添加成功弹框
在Detail.vue中我们想看看下面这个操作有没有完成,可以通过让dispatch返回promise实现
addToCart() { //2.将商品添加到购物车中 this.$store.dispatch('addCart',product) },我们把action.js文件的addCart方法里面套在promise里
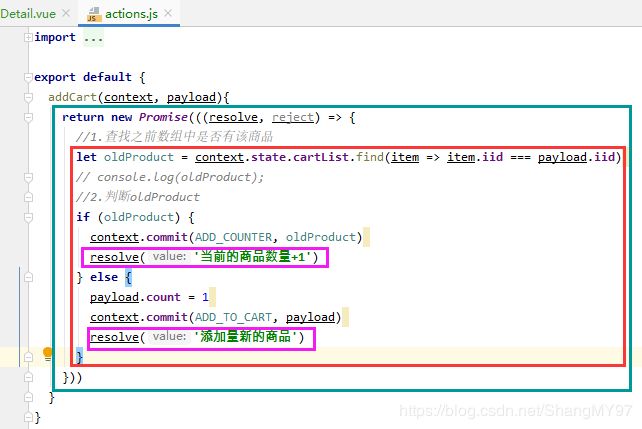
将Detail.vue的addToCart里相关内容改为//2.将商品添加到购物车中 this.$store.dispatch('addCart',product).then(res =>{ console.log(res) })如果你在vuex里完成了某些操作,你想让外面知道,就要用到promise
点击添加到购物车显示效果如下

我们还有另一种方法拿到vuex中的数据//2.将商品添加到购物车中 this.addCart(product).then(res => { console.log(res) })这么写看起来像页面自己的方法,我们需要把actions里面的这个方法映射出来,就要用到下面的这个
import { mapActions } from 'vuex' .... methods:{ ...mapActions(['addCart']), }点击可拿到信息数据后,我们开始写那个小信息提示框
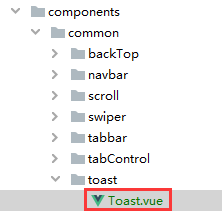
Toast.vue<template> <div class="toast" v-show="true"> <div>{{message}}</div> </div> </template> ... props:{ message:{ type:String, default: '' } }.toast{ position: fixed; top: 50%; left: 50%; border-radius: 5px; padding: 8px 10px; color: #ffffff; background-color: rgba(0,0,0,.7); /*这是我们会发现框框向右偏移,用transform调位置*/ transform: translate(-50%,-50%); }在Detail.vue中导入
<toast message="添加成功,在购物车等亲"/> ... import Toast from "components/common/toast/Toast"; ... components: {Toast,}<template> <div class="toast" v-show="isShow"> <div>{{message}}</div> </div> </template> ... props:{ ... isShow:{ type: Boolean, default: false } }在Detail.vue中,把组件中的这两个值传过来
<toast :message="message" :isShow="isShow"/> ... data() { return { message: '', isShow: false } }, ... methods:{ ... //2.将商品添加到购物车中 this.addCart(product).then(res => { // 在这里使用我们的组件 this.isShow = true; this.message = res; setTimeout(() => { this.isShow = false; this.message = '' },1500) }) }以上实现点击加入购物车实现小提示框框,
但是感觉有的功能页面还要用到,我还以为一步步引用,很麻烦,我们现在想一行就导入这个toast,怎么做呢?
解决方法:我们创建一个toast插件,直接$toast
我们在toast文件夹下建一个index.js文件,去main.js中导入toastimport toast from 'components/common/toast' //安装toast Vue.use(toast)index.js
const obj = {}; obj.install = function (Vue) { console.log('执行了obj的install函数', Vue); }; export default objinatall函数执行时会默认传过来一个参数Vue
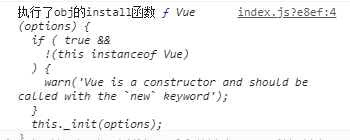
这里算是导入成功了,下面我们来完善index.js中的内容import Toast from "./Toast"; const obj = {}; obj.install = function (Vue) { document.body.appendChild(Toast.$el);//toast的el添加到body中 Vue.prototype.$toast = Toast;//Toast对象添加到原型里 }; export default obj报错:
Uncaught TypeError: Failed to execute 'appendChild' on 'Node': parameter 1 is not of type 'Node'.

报错原因:执行install的时候toast还没有挂载
修改index.js代码import Toast from "./Toast"; const obj = {}; obj.install = function (Vue) { // 1.创建组件构造器 const toastContrustor = Vue.extend(Toast); // 2.new的方式,根据组件构造器,可以创建出来一个组件对象 const toast = new toastContrustor(); // 3.将组件对象,手动挂载到某一个元素上 toast.$mount(document.createElement('div')) // 4.toast.$el对应的就是div document.body.appendChild(toast.$el);//toast的el添加到body中 Vue.prototype.$toast = toast;//Toast对象添加到原型里 }; export default obj修改Toast.vue代码
<template> <div class="toast" v-show="isShow"> <div>{{message}}</div> </div> </template> <script> export default { name: "Toast", data() { return { message: '', isShow: false } }, methods:{ show(message, duration = 1500) {//设置默认值 this.isShow = true; this.message = message; setTimeout(() => { this.isShow = false; this.message = '' },1500) } } } </script>使用时直接写
this.$toast.show(res)就可以了
我们还可以给‘去结算’按钮加一个提示弹框calcClick() { if (!this.isSelectAll) { this.$toast.show('请选购商品哦') } }十六.详情页回到顶部
这个返回按钮我们在首页做过,这时候你会发现,这也是重复代码呀,所以!!,我们把它拿到mixin.js中
import BackTop from "components/common/backTop/BackTop"; export const backTopMixin = { components: { BackTop }, data() { return { isShowBackTop:false } }, methods:{ backClick(){ this.$refs.scroll.scrollTo(0,0,300) }, listenShowBackTop(position){ this.isShowBackTop = (-position.y) > 1000; } } }在组件中引入,再调用一下就好了
<back-top @click.native="backClick" v-show="isShowBackTop"/> ... import {itemListenerMixin,backTopMixin} from "common/mixin"; ... mixins: [itemListenerMixin,backTopMixin], ... 在滚动监听事件中 contentScroll(position) { ... //3.是否显示回到顶部 this.listenShowBackTop(position) },十七.FastClick解决移动端300ms延迟
某些功能浏览器不支持,我们就可以通过poly full打一个补丁
安装
npm install fastclick --save
导入
(main.js)
import FastClick from 'fastclick'调用attach函数
FastClick.attach(document.body)十八.vue图片懒加载
什么是图片懒加载?
图片需要现在在屏幕上时,再加载这张图片
使用vue-lazyload
https://github.com/hilongjw/vue-lazyload
- 安装
cnpm install vue-lazyload --save - 导入
import VueLazyLoad from 'vue-lazyload'- Vue.use
Vue.use(VueLazyLoad,{ loading: require('./assets/img/common/placeholder.png') })- 修改img:src->v-lazy
<img v-lazy="showImage" alt="" @load="imageLoad" >十九.px2vw插件使用
https://github.com/evrone/postcss-px-to-viewport
安装插件
cnpm install postcss-px-to-viewport --save-dev
在postcss.config.js中配置
module.exports = { plugins:{ autoprefixer:{}, "postcss-px-to-viewport":{ viewportWidth: 375,//视图宽度,对应的是我们设计稿的宽度 // retina高清屏,一个点有两个像素 //750->30px在375上是15px,一般都是根据iPhone 6的屏幕宽度提供的设计稿(750x1334) viewportHeight: 667,//视窗的高度,对应的是我们设计稿的高度,(也可以不配置) unitPrecision:5,//指定‘px’转换为视窗单位值的小数位数(很多时候无法整除) viewportUnit: 'vw',//指定需要转换成的视窗单位,建议使用vw selectorBlackList:['ignore','content','home-nav'],//指定不需要的类 minPixelValue:1,//小于或者等于‘1px’不转换为视窗单位 mediaQuery: false,//允许在媒体查询中转换‘px’ exclude:[/TabBar/,/Cart/,/Bar/,/TabControl/]//包含就算 }, } }非父子组件通信:
https://www.jb51.net/article/132371.htm
