ApacheServiceComb从入门到放弃-华为开源Apache微服务顶级项目学习(一):简述与入门
文章目录
- 1.简述
- 2.HelloWorld
- 1.创建项目
- 2.下载注册中心
- 3.导入demo项目
- 4.开启注册中心
- 5.demo项目分析
- 1.yaml配置文件
- 2.HelloConsumer 服务消费者
- 3.HelloImpl服务提供者
- 4.启动类
- 6.启动项目
- 3.Maven依赖
1.简述
Apache ServiceComb
开箱即用、高性能、兼容流行生态、支持多语言的一站式开源微服务解决方案
基于SpringBoot。
2.HelloWorld
1.创建项目
使用Spring的快速创建项目网址,创建项目
http://start.servicecomb.io/
创建好之后就下载即可。
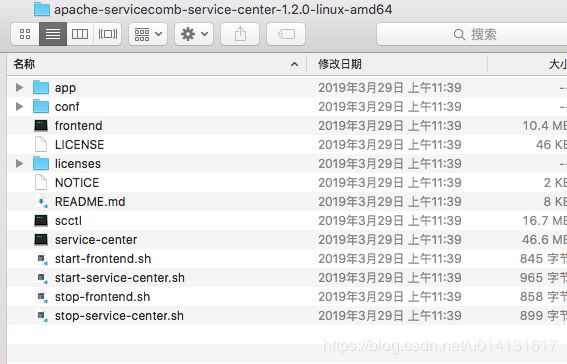
2.下载注册中心
http://mirror.bit.edu.cn/apache/servicecomb/servicecomb-service-center/1.2.0/
3.导入demo项目
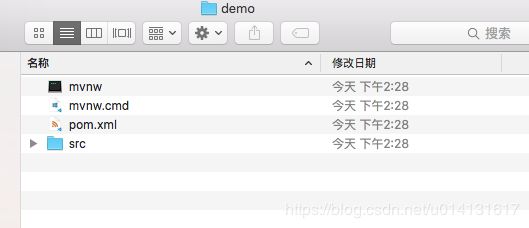
打开目录,发现目录结结构是个maven项目

这里我使用IDEA导入

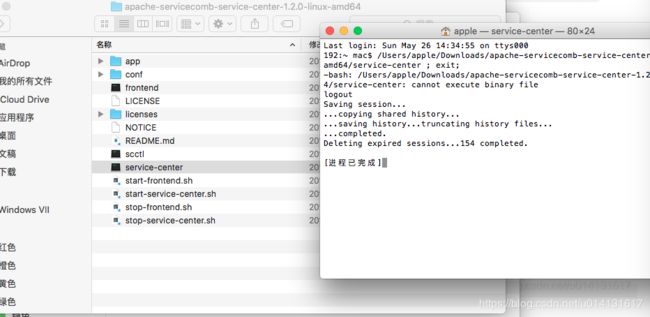
4.开启注册中心
5.demo项目分析
1.yaml配置文件
名字为:microservice.yaml 注意,该配置文件的名称不能改!
内容:
APPLICATION_ID: start.servicecomb.io  # 服务Id
service_description:                  # 服务描述
  name: HelloServiceComb              # 服务名称
  version: 0.0.1                      # 服务版本
servicecomb:                          # serviceComb的配置
  handler:
    chain:
      Provider: {}
  rest: # 本地访问的IP/PORT
    address: 0.0.0.0:9080
  service: # 服务注册
    registry: # 注册中心配置
      address: http://127.0.0.1:30100 # 注册中心端口
      autodiscovery: false
2.HelloConsumer 服务消费者
根据名字就可以发现,这个类是服务消费者
代码如下:
import org.apache.servicecomb.provider.springmvc.reference.RestTemplateBuilder;
import org.springframework.web.client.RestTemplate;

public class HelloConsumer {
    private final RestTemplate restTemplate = RestTemplateBuilder.create();

    public void invokeHello() {
        //service url is : cse://serviceName/operation
        String serviceName = "HelloServiceComb";
        restTemplate.getForObject("cse://" + serviceName + "/hello", String.class);
    }
}
要注意,这里的serviceName 是yaml文件中的service_description.name
然后注意,restTemplate使用的是org.apache.servicecomb.provider.springmvc.reference.RestTemplateBuilder
serviceComb的提供的构造器进行构造的。
3.HelloImpl服务提供者
代码如下:
package com.cxl.demo;

import org.apache.servicecomb.provider.rest.common.RestSchema;
import org.springframework.web.bind.annotation.GetMapping;
import org.springframework.web.bind.annotation.RequestMapping;

@RestSchema(schemaId = "hello")
@RequestMapping(path = "/")
public class HelloImpl {

    @GetMapping(path = "/hello")
    public String hello() {
        return "Hello World!";
    }
}
@RestSchema 这个,是指在注册中心里面注册了hello的服务,可以理解成提供了hello的这个服务。
4.启动类
先看代码:
@SpringBootApplication
@EnableServiceComb
public class DemoApplication {

	public static void main(String[] args) {
		SpringApplication.run(DemoApplication.class, args);
	}
}
@EnableServiceComb这个注解,是开启ServiceComb的服务
6.启动项目
如果我直接访问localhostL9080的话,会提示
{"message":"Not Found"}
当我访问/hello的时候
就可以发现,有了
"Hello World!"
证明我的项目跑起来了!
3.Maven依赖
最后,我们看下这个dmeo项目有什么maven依赖
<project xmlns="http://maven.apache.org/POM/4.0.0" xmlns:xsi="http://www.w3.org/2001/XMLSchema-instance"
	xsi:schemaLocation="http://maven.apache.org/POM/4.0.0 http://maven.apache.org/xsd/maven-4.0.0.xsd">
	<modelVersion>4.0.0modelVersion>

	<groupId>com.cxlgroupId>
	<artifactId>demoartifactId>
	<version>0.0.1-SNAPSHOTversion>
	<packaging>jarpackaging>

	<name>demoname>
	<description>Demo project for ServiceComb-Springdescription>

	<parent>
		<groupId>org.springframework.bootgroupId>
		<artifactId>spring-boot-starter-parentartifactId>
		<version>1.5.12.RELEASEversion>
		<relativePath/>
	parent>

	<properties>
		<project.build.sourceEncoding>UTF-8project.build.sourceEncoding>
		<project.reporting.outputEncoding>UTF-8project.reporting.outputEncoding>
		<java.version>1.8java.version>
	properties>

	<dependencies>
		<dependency>
			<groupId>org.hibernategroupId>
			<artifactId>hibernate-validatorartifactId>
		dependency>

		<dependency>
			<groupId>org.springframework.bootgroupId>
			<artifactId>spring-boot-starterartifactId>
		dependency>
		<dependency>
			<groupId>org.apache.servicecombgroupId>
			<artifactId>spring-boot-starter-providerartifactId>
		dependency>

		<dependency>
			<groupId>org.springframework.bootgroupId>
			<artifactId>spring-boot-starter-testartifactId>
			<scope>testscope>
		dependency>
	dependencies>

	<dependencyManagement>
		<dependencies>
			<dependency>
				<groupId>org.apache.servicecombgroupId>
				<artifactId>java-chassis-dependenciesartifactId>
				<version>1.0.0version>
				<type>pomtype>
				<scope>importscope>
			dependency>
		dependencies>
	dependencyManagement>

	<build>
		<plugins>
			<plugin>
				<groupId>org.springframework.bootgroupId>
				<artifactId>spring-boot-maven-pluginartifactId>
			plugin>
            <plugin>
                <groupId>org.springframework.bootgroupId>
                <artifactId>spring-boot-maven-pluginartifactId>
                <version>1.5.12.RELEASEversion>
                <executions>
                    <execution>
                        <goals>
                            <goal>repackagegoal>
                        goals>
                        <configuration>
                            <outputDirectory>target/binoutputDirectory>
                            <classifier>execclassifier>
                        configuration>
                    execution>
                executions>
            plugin>
            <plugin>
                <groupId>org.apache.maven.pluginsgroupId>
                <artifactId>maven-jar-pluginartifactId>
                <version>2.6version>
                <configuration>
                    <archive>
                        <manifestEntries>
                            <Class-Path>.Class-Path>
                        manifestEntries>
                    archive>
                configuration>
            plugin>
		plugins>
	build>


project>


