nginx实现负载均衡以及nginx的扩展模块——sticky算法
一、安装nginx
1、解压安装包
将nginx安装包传至server1:
真机:
get nginx-1.14.0.tar.gz
server1:
解压
tar zxf nginx-1.14.0.tar.gz
2、修改nginx名字
cd nginx-1.14.0/src/core/
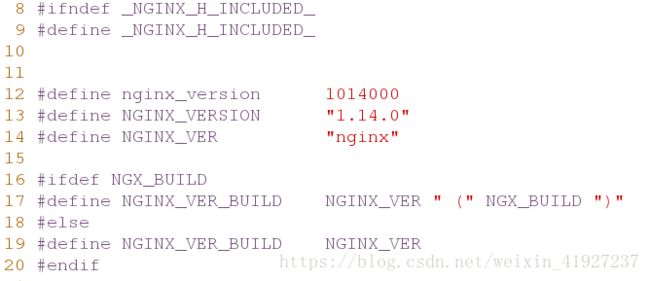
[root@server1 core]# vim nginx.h
 14 #define NGINX_VER          "nginx"    ##改名字
3、关闭debug调试
cd nginx-1.14.0/auto/cc/
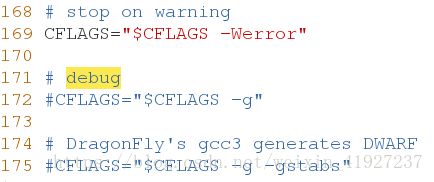
vim gcc
171 # debug
172 #CFLAGS="$CFLAGS -g"      ##关闭debug调试
4、编译、查看大小
编译
cd ..
cd ..
[root@server1 nginx-1.14.0]# yum install gcc -y
[root@server1 nginx-1.14.0]# yum install pcre-devel -y
[root@server1 nginx-1.14.0]# yum install openssl-devel -y
[root@server1 nginx-1.14.0]# ./configure --prefix=/usr/local/nginx --with-http_ssl_module --with-http_stub_status_module --with-threads --with-file-aio
[root@server1 nginx-1.14.0]# make
[root@server1 nginx-1.14.0]# make install
查看大小
cd /usr/local/nginx/
[root@server1 nginx]# du -sh
980K    .
5、制作软连接
cd sbin/
[root@server1 sbin]# ln -s /usr/local/nginx/sbin/nginx /sbin/
打开nginx
[root@server1 sbin]# nginx
6、浏览器访问
浏览器输入server1的IP查看nginx页面
172.25.10.1
二、nginx基本操作命令
nginx语法检查
[root@server1 sbin]# nginx -t
开启nginx
[root@server1 sbin]# nginx
关闭nginx
[root@server1 sbin]# nginx -s stop
[root@server1 sbin]# nginx
刷新nginx
[root@server1 sbin]# nginx -s reload
三、nginx的发布目录
cd /usr/local/nginx/html
[root@server1 html]# vim index.html
四、实现nginx负载均衡以及nginx的配置文件参数
server1:
1、cpu绑定
cpu和进程绑定
top 输入1查看有几个cpu
vim /url/local/nginx/conf/nginx.conf    ##nginx配置文件
worker_processes  1;    ##cpu数;使用1个cpu,可自定义
或者
worker_processes  auto; ##自动绑定
修改完后都要进行配置刷新
nginx -s reload
查看进程
ps ax2、最大连接数
vim /url/local/nginx/conf/nginx.conf
events {
    worker_connections  65535;
}
nginx -s reload[root@server1 conf]# sysctl -a|grep file
fs.file-nr = 480 0 98862
fs.file-max = 98862vim /etc/security/limits.conf ##限制文件
在最后写
50 # End of file
51
52 nginx - nofile 655363、nginx用户
建立用户
useradd -M -d /usr/local/nginx/ nginx
[root@server1 conf]# id nginx
uid=500(nginx) gid=500(nginx) groups=500(nginx)
vim /url/local/nginx/conf/nginx.conf
user nginx nginx;
nginx -s reload查看
ps axu
nginx 4229 0.0 2.8 75640 29552 ? S 16:47 0:00 nginx: worker process4、实现nginx负载均衡
server1:
vim /url/local/nginx/conf/nginx.conf
 17 http {
 18         upstream linux {
 19         #ip_hash;
 20         server 172.25.10.2:80;
 21         server 172.25.10.3:80;
 22         }
 23
 24     include       mime.types;
 25     default_type  application/octet-stream;
121     #}
122         server{
123                 listen 80;
124                 server_name www.linux.org;
125
126                 location / {
127                 proxy_pass http://linux;
128                 }
129         }
130 }

nginx -s reload
打开server2、server3的httpd
server2、server3:
/etc/init.d/httpd start
浏览器访问检测
浏览器输入www.linux.org检测
点刷新重复连续出现server2、server3
5、ip_hash 哈希参数
vim /url/local/nginx/conf/nginx.conf
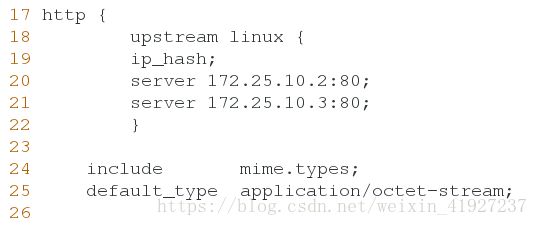
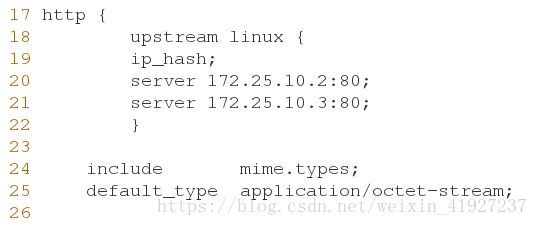
 17 http {
 18         upstream linux {
 19         ip_hash; #哈希算法:一但检测到ip,不改变后端服务器
 20         server 172.25.10.2:80;
 21         server 172.25.10.3:80;
 22         }
nginx -s reload查看访问10次地址的结果
for in in {1..10};do curl www.linux.org; done6、weight 权重参数
vim /url/local/nginx/conf/nginx.conf
 17 http {
 18         upstream linux {
 19         #ip_hash;
 20         server 172.25.10.2:80 weight=2;
 21         server 172.25.10.3:80;
 22         }
nginx -s reload7、backup参数
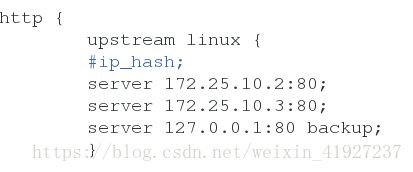
vim /url/local/nginx/conf/nginx.conf
http {
        upstream linux {
        #ip_hash;
        server 172.25.10.2:80;
        server 172.25.10.3:80;
        server 127.0.0.1:80 backup; #当2和3服务全部关掉后, 默认访问本机
        }
nginx -s reloadbackup参数打开时
把server2、server3的httpd关闭后,
浏览器输入www.linux.org
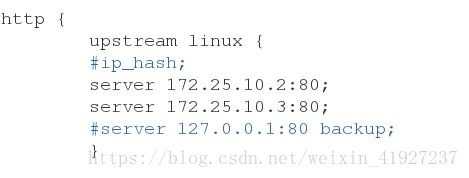
出现欢迎界面backup参数注释时
把server2、server3的httpd关闭后,
浏览器输入www.linux.org
页面502错误五、nginx 的扩展模块
sticky算法
Sticky是nginx的一个模块,它是基于cookie的一种nginx的负载均衡解决方案,通过分发和识别cookie,来使同一个客户端的请求落在同一台服务器上,默认标识名为route
1.客户端首次发起访问请求,nginx接收后,发现请求头没有cookie,则以轮询方式将请求分发给后端服务器。
2.后端服务器处理完请求,将响应数据返回给nginx。
3.此时nginx生成带route的cookie,返回给客户端。route的值与后端服务器对应,可能是明文,也可能是md5、sha1等Hash值
4.客户端接收请求,并保存带route的cookie。
5.当客户端下一次发送请求时,会带上route,nginx根据接收到的cookie中的route值,转发给对应的后端服务器。由于版本问题,前面使用的1.14版本的nginx无法调用sticky算法,所以需要再重新安装1.10版本的nginx
真机:
get nginx-1.10.1.tar.gz
get nginx-sticky-module-ng.tar.gz
将安装包发至server1server1
server1:
停止之前实验的nginx
nginx -s stop
解压安装包
tar zxf nginx-1.10.1.tar.gz
tar zxf nginx-sticky-module-ng.tar.gz
安装nginx
cd nginx-1.10.1
[root@server1 nginx-1.10.1]# ./configure --prefix=/opt/nginx --with-http_ssl_module --with-http_stub_status_module --with-threads --with-file-aio --add-module=/root/nginx-sticky-module-ng
[root@server1 nginx-1.10.1]# make
[root@server1 nginx-1.10.1]# make install
复制之前实验的1.14版本的nginx配置文件到这
cd /opt/nginx/conf
[root@server1 conf]# cp /usr/local/nginx/conf/nginx.conf .
[root@server1 nginx]# vim nginx.conf
        upstream linux {
        #ip_hash;
        sticky;                  ##sticky算法
        server 172.25.10.2:80;
        server 172.25.10.3:80;
        }
语法检查
/opt/nginx/sbin/nginx -t    #根目录调用nginx,不然会与之前安装的nginx冲突
开启服务
/opt/nginx/sbin/nginx 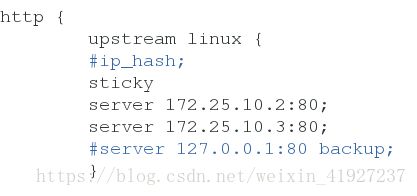
浏览器访问检测:
不会发生轮询,刷新只出现server2
在浏览器中按“F12“,点右下角“小太阳“,选项“storgae“前打勾,退出在下方页面的“Storage“可看到有内容显示失败。

