centos搭建http代理
文章目录
- 一、配置:
- 步骤:
- 1、安装openssl
- 2、安装squid
- 3、安net-tools
- 4、修改squid的配置文件squid.conf
- ①、修改端口号
- ②、开启防火墙
- 5、启动squid
- 6、本机代理访问:
- 7、修改支持所有代理访问(使用)
- 8、设置用户名+密码
- ①、设置密码文件
- ②、创建用户密码
- ③、更改配置文件:
- ④、重启服务squid:
- 9、把代理设置为高匿的代理:
- 10、我的配置文件:
- 11、设置开机自启动:
一、配置:
一台centos云服务器:
主要说下我这里的一些搭建的问题,centos的系统版本不要选的太高,不然可能设置不成功。
我这里的是设置CentOS7.2 位系统的linux阿里云服务器。
重要的事情说三遍(不然肯定踩坑,我搞了第三天才找到原因,才弄出来):CentOS7.2 位系统的linux阿里云服务器,CentOS7.2 位系统的linux阿里云服务器,CentOS7.2 位系统的linux阿里云服务器
吐槽一下啊,之前是用的是centos8系统,结果就是搭建不成功,然后我正好设置socks5尝试,结果还是不行,偶然看到一个文章说需要7.2 centos系统,我更换系统之后,然后再搜些文章,测试就成功了搭建sock5,然后想着squid搭建http不成功是不是也是系统版本的原因,然后我就用我自己的服务器测试,结果还真是系统的原因,我自己的系统更换为7.2的搭建sock5和http都成功了。
步骤:
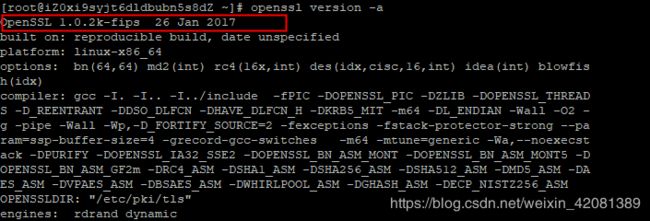
1、安装openssl
判断是否安装openssl:
openssl version -a
安装命令:
yum install openssl
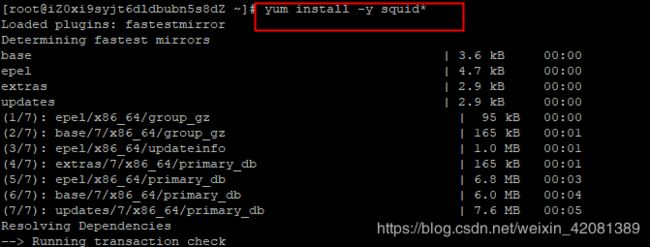
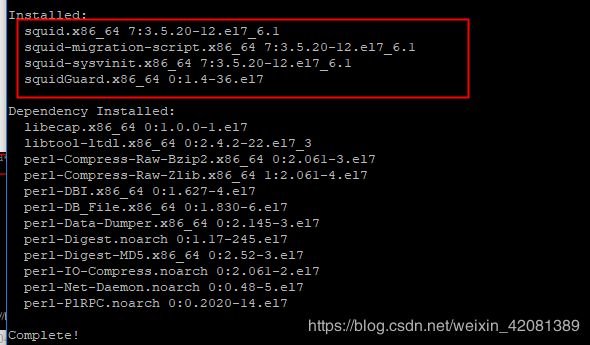
2、安装squid
安装命令:
yum install squid -y
# -y 代表自动选择y,全自动安装
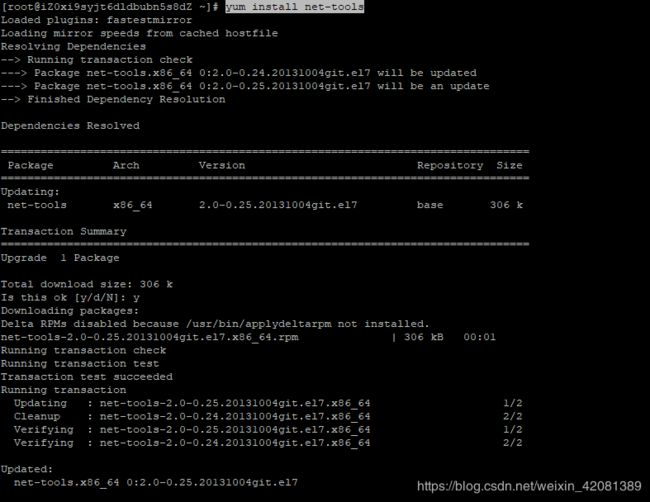
3、安net-tools
安装命令:
yum install net-tools
4、修改squid的配置文件squid.conf
①、修改端口号
参考配置内容:
cat /etc/squid/squid.conf
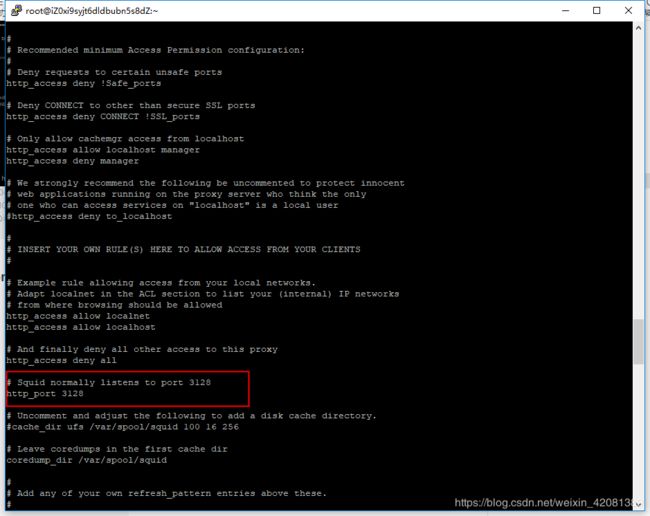
默认是3128的端口号,建议修改,防止人家扫描代理被分享
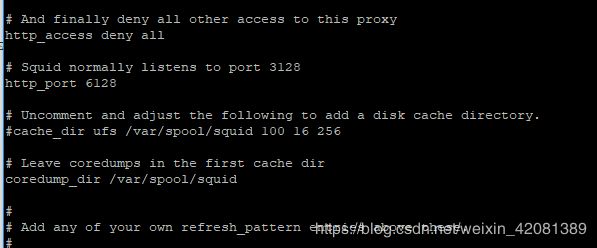
使用vi修改配置文件,找到上面端口号的位置,我这里改为6128
vi /etc/squid/squid.conf
改好端口号:
默认squid的access日志里的时间为unix时间戳,不方便阅读,可以通过在 /etc/squid/squid.conf 增加一行logformat配置:
#此行加在配置文件末尾即可
#access log time human-readable
logformat squid %tl.%03tu %6tr %>a %Ss/%03>Hs %<st %rm %ru %un %Sh/%<A %mt
②、开启防火墙
开启squid的端口号并且重新启动:
firewall-cmd –zone=public –add-port=6128/tcp –permanent
firewall-cmd –reload
如果报错:FirewallD is not running
需要下面解决方法:
以root用户身份运行以下命令:
启用防火墙
systemctl enable firewalld
动防火墙
systemctl start firewalld
查防火墙的状态
systemctl status firewalld
然后再执行上面开启squid的端口号6128(你的根据自己的设置进行更改)
5、启动squid
systemctl start squid
查看进程:
netstat -tunpl
6、本机代理访问:
本机代理访问
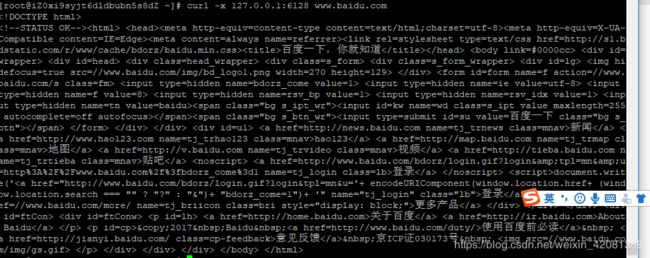
curl -x 127.0.0.1:6128 www.baidu.com
说明初步配置代理成功了。但是使用自己电脑还不能使用这个代理。
7、修改支持所有代理访问(使用)
编辑squid的配置文件,在http_access deny all的前面添加俩行:
acl client src 0.0.0.0/0
http_access allow client
可以把下图的中的http_access deny all 直接注释
如果修改并且保存:

然后重新启动squid:
systemctl restart squid
这个时候可以使用代理了,但是会是透明代理,需要设置用户名和密码,增强代理的可用性,防止被随意扫描使用,也可以加些设置字段,然后弄成高匿的代理。
8、设置用户名+密码
①、设置密码文件
#设置密码
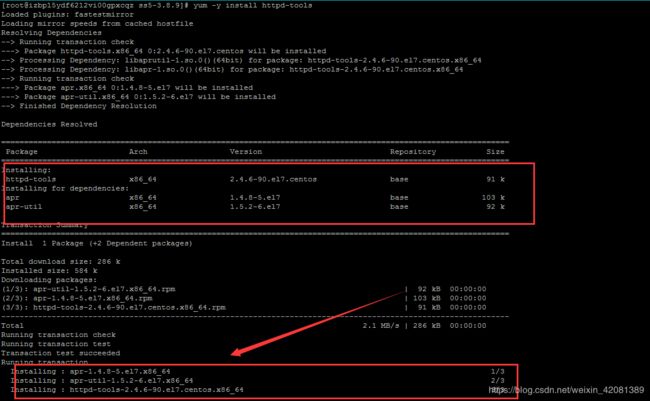
yum -y install httpd-tools
touch /etc/squid/passwd && chown squid /etc/squid/passwd
②、创建用户密码
#创建用户密码
htpasswd /etc/squid/passwd yourusername
执行命名(yourusername就是代理的用户名)之后,俩次输入密码(代理的密码)

③、更改配置文件:
vi /etc/squid/squid.con
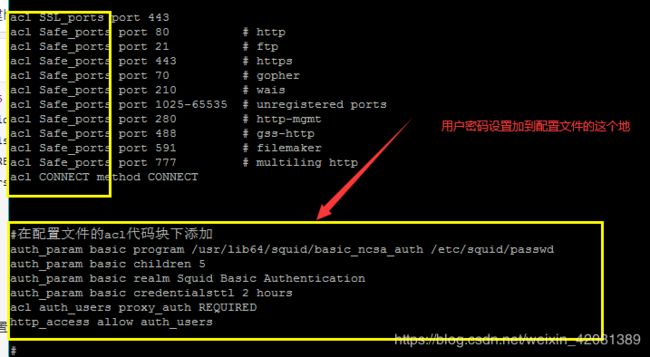
#在配置文件的acl代码块下添加
auth_param basic program /usr/lib64/squid/basic_ncsa_auth /etc/squid/passwd
auth_param basic children 5
auth_param basic realm Squid Basic Authentication
auth_param basic credentialsttl 2 hours
acl auth_users proxy_auth REQUIRED
http_access allow auth_users
#添加
http_access allow all
#或注释掉
http_access deny all
④、重启服务squid:
#进行配置后请记得重启服务
systemctl restart squid
这个时候可以使用用户名的代理进行测试了。
我这里使用的是谷歌的一个插件SwitchyOmega:
从结果中可以看出 、即使设置了用户+密码,http的代理依然不是高匿的,前面就是我的本机代理,后面是代理ip,还是不好,下面需要在配置中设置一下即可。
9、把代理设置为高匿的代理:
vi /etc/squid/squid.conf
在配置的文件中后面加入这些自段即可。
request_header_access X-Forwarded-For deny all
request_header_access From deny all
request_header_access Via deny all
更改配置文件之后记得保存:
然后重启:
systemctl restart squid
这个时候,即可变成高匿的代理。
10、我的配置文件:
我想跟多人看到的更关系这个配置文件,所以我是有winscp链接我的服务器,然后我把文件下载复制到这里了,希望能帮助的需要的小伙伴了,我当时想要完整的都没有找到,弄了第三天总算把这个弄好了,注意系统版本呀,我的是centos 7.2 64位的linux、centos 7.2 64位的linux、centos 7.2 64位的linux,重要的事情提示三遍,在看不到自己和我一样踩坑吧,我可是才坑第三天才搞出来,各种博客也没人说是版本有限制,不说了,说多了都是泪。直接上配置文件代码。
#
# Recommended minimum configuration:
#

# Example rule allowing access from your local networks.
# Adapt to list your (internal) IP networks from where browsing
# should be allowed
acl localnet src 10.0.0.0/8	# RFC1918 possible internal network
acl localnet src 172.16.0.0/12	# RFC1918 possible internal network
acl localnet src 192.168.0.0/16	# RFC1918 possible internal network
acl localnet src fc00::/7       # RFC 4193 local private network range
acl localnet src fe80::/10      # RFC 4291 link-local (directly plugged) machines

acl SSL_ports port 443
acl Safe_ports port 80		# http
acl Safe_ports port 21		# ftp
acl Safe_ports port 443		# https
acl Safe_ports port 70		# gopher
acl Safe_ports port 210		# wais
acl Safe_ports port 1025-65535	# unregistered ports
acl Safe_ports port 280		# http-mgmt
acl Safe_ports port 488		# gss-http
acl Safe_ports port 591		# filemaker
acl Safe_ports port 777		# multiling http
acl CONNECT method CONNECT


#在配置文件的acl代码块下添加
auth_param basic program /usr/lib64/squid/basic_ncsa_auth /etc/squid/passwd
auth_param basic children 5
auth_param basic realm Squid Basic Authentication
auth_param basic credentialsttl 2 hours
acl auth_users proxy_auth REQUIRED
http_access allow auth_users

#
# Recommended minimum Access Permission configuration:
#
# Deny requests to certain unsafe ports
http_access deny !Safe_ports

# Deny CONNECT to other than secure SSL ports
http_access deny CONNECT !SSL_ports

# Only allow cachemgr access from localhost
http_access allow localhost manager
http_access deny manager

# We strongly recommend the following be uncommented to protect innocent
# web applications running on the proxy server who think the only
# one who can access services on "localhost" is a local user
#http_access deny to_localhost

#
# INSERT YOUR OWN RULE(S) HERE TO ALLOW ACCESS FROM YOUR CLIENTS
#

# Example rule allowing access from your local networks.
# Adapt localnet in the ACL section to list your (internal) IP networks
# from where browsing should be allowed
http_access allow localnet
http_access allow localhost

#acl client src 0.0.0.0/0
#http_access allow client
http_access allow all
# And finally deny all other access to this proxy
#http_access deny all

# Squid normally listens to port 3128
http_port 9999

# Uncomment and adjust the following to add a disk cache directory.
#cache_dir ufs /var/spool/squid 100 16 256

# Leave coredumps in the first cache dir
coredump_dir /var/spool/squid

#
# Add any of your own refresh_pattern entries above these.
#
refresh_pattern ^ftp:		1440	20%	10080
refresh_pattern ^gopher:	1440	0%	1440
refresh_pattern -i (/cgi-bin/|\?) 0	0%	0
refresh_pattern .		0	20%	4320


request_header_access X-Forwarded-For deny all
request_header_access From deny all
request_header_access Via deny all


#此行加在配置文件末尾即可
#access log time human-readable
logformat squid %tl.%03tu %6tr %>a %Ss/%03>Hs %<st %rm %ru %un %Sh/%<A %mt
11、设置开机自启动:
突然搜到俩种方法:我也不清楚哪个正确,都粘贴这里吧:
方法1:
chkconfig --level 35 squid on
方法2:
其实当你看到上面的步骤,就知道下面的命令了,其实上面的命令就是转到下面的命令了,其实上面的就是转到下面这个命令。
systemctl enable squid
然后我把服务器重启,然后重启中测试代理是不可

![]()
等待一会重启好,我没有自己手动启动代理服务测试开启自启动称成功了。
参考文章:
https://guozh.net/centos-install-squid-proxy-server/
https://www.liquidweb.com/kb/how-to-start-and-enable-firewalld-on-centos-7/
https://zhuanlan.zhihu.com/p/95523737
https://blog.csdn.net/u011884440/article/details/78824224
https://www.cnblogs.com/zhaojingyu/p/10197411.html
https://blog.csdn.net/f365420465/article/details/100526360
https://www.cnblogs.com/NetKillWill/p/squid.html
https://www.bbsmax.com/A/ke5jR4w75r/
https://alanhou.org/centos-7-squid/
