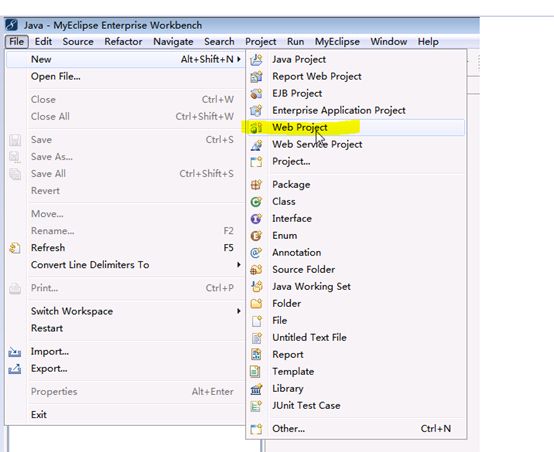
1、新建Java Web工程
2、添加Struts2.1框架支持
去除冲突包:antlr-2.7.2.jar
一般项目加上这三个包足够,后期可以视项目需求增加支持包:
2.1配置web.xml文件
增加struts2的配置,增加容器对struts2的初始化。增加代码如下:这些配置代码对于struts2是不变的,直接复制到web.xml即可。
-
-
struts2 org.apache.struts2.dispatcher.ng.filter.StrutsPrepareAndExecuteFilter -
-
struts2 -
/*
2.2配置struts.xml文件
3、添加Spring框架支持
一般添加这6个支持包
效果图:
3.1配置web.xml文件
初始化加载spring资源配置文件
contextConfigLocation - /WEB-INF/applicationContext.xml
-
-
org.springframework.web.context.ContextLoaderListener -
-
org.springframework.web.context.request.RequestContextListener
4、配置数据源
此处用oracle数据库作为数据源:
- create user ssh identified by 1234;
- grant dba to ssh with admin option;
- create table people (
- id varchar2(32) primary key,
- username varchar2(32),
- password varchar2(32)
- );
- insert into PEOPLE (ID, USERNAME, PASSWORD) values ('1', 'John', '1234');
- insert into PEOPLE (ID, USERNAME, PASSWORD) values ('2', 'Tom', '1234');
驱动包直接用oracle自带的jdbc驱动包即可,路径如上图所示。
5、添加Hibernate框架支持
删除冲突包:asm.jar和cglib-2.1.3.jar
![]()
0%
切换到MyEclipse Database Explorer视图:
选择我们建立的链接SSH,点开,找到对应的table,people,右键
6、代码设计
为了方便管理代码,先建立四个package,如下图:
在com.ssh.dao下建立一个接口,IPeopleDAO.java
- package com.ssh.dao;
- import java.util.List;
- import com.ssh.people.People;
- public interface IPeopleDAO {
- public People findById(String id);
- public List findByUsername(Object username);
- public void save(People people);
- }
把PeopleDAO拖到com.ssh.dao.impl下
PeopleDAO.java里要加implements IPeopleDAO
修改后:
在com.ssh.service下建立IPeopleService.java
- package com.ssh.service;
- import com.ssh.people.People;
- public interface IPeopleService {
- public People getPeopleById(String id);
- public People getPeopleByUsername(String username);
- public void addPeople(People people);
- }
在com.ssh.service.impl下建立PeopleService.java
- package com.ssh.service.impl;
- import java.util.List;
- import com.ssh.dao.IPeopleDAO;
- import com.ssh.people.People;
- import com.ssh.service.IPeopleService;
- public class PeopleService implements IPeopleService{
- private IPeopleDAO peopleDAO;
- public People getPeopleById(String id) {
- return peopleDAO.findById(id);
- }
- public People getPeopleByUsername(String username) {
- List list = peopleDAO.findByUsername(username);
- if(list.size() == 0){
- return null;
- }else{
- return (People)list.get(0);
- }
- }
- public void addPeople(People people) {
- peopleDAO.save(people);
- }
- public IPeopleDAO getPeopleDAO() {
- return peopleDAO;
- }
- public void setPeopleDAO(IPeopleDAO peopleDAO) {
- this.peopleDAO = peopleDAO;
- }
- }
效果图:
接着要在applicationContext.xml中添加一个bean的信息
整个applicationContext.xml的全部内容
- xmlns="http://www.springframework.org/schema/beans"
- xmlns:xsi="http://www.w3.org/2001/XMLSchema-instance"
- xmlns:p="http://www.springframework.org/schema/p"
- xsi:schemaLocation="http://www.springframework.org/schema/beans http://www.springframework.org/schema/beans/spring-beans-2.5.xsd">
- class="org.apache.commons.dbcp.BasicDataSource">
- value="oracle.jdbc.OracleDriver">
- value="jdbc:oracle:thin:@localhost:1521/orcl">
- class="org.springframework.orm.hibernate3.LocalSessionFactoryBean">
- org.hibernate.dialect.Oracle9Dialect
com/ssh/people/People.hbm.xml
创建处理action的文件,新建com.ssh.action包,新建LoginAction.java文件
- package com.ssh.action;
- import com.opensymphony.xwork2.ActionSupport;
- import com.ssh.people.People;
- import com.ssh.service.IPeopleService;
- public class LoginAction extends ActionSupport{
- private String username;
- private String password;
- private IPeopleService peopleService;
- public String getUsername() {
- return username;
- }
- public void setUsername(String username) {
- this.username = username;
- }
- public String getPassword() {
- return password;
- }
- public void setPassword(String password) {
- this.password = password;
- }
- public IPeopleService getPeopleService() {
- return peopleService;
- }
- public void setPeopleService(IPeopleService peopleService) {
- this.peopleService = peopleService;
- }
- public String execute(){
- People people = peopleService.getPeopleByUsername(username);
- if(people == null) return "error";
- if(people.getPassword().equals(password))
- return "success";
- else return "error";
- }
- public void validate(){
- if(username == null || username.length() == 0){
- super.addActionError("用户名不能为空");
- }
- if(password == null || password.length() == 0){
- super.addActionError("密码不能为空");
- }
- }
- }
配置applicationContext.xml文件:
配置struts.xml文件:
新增login.jsp文件:
- <%@ page language="java" import="java.util.*" pageEncoding="UTF-8"%>
- <%@taglib prefix="s" uri="/struts-tags"%>
- <%
- String path = request.getContextPath();
- String basePath = request.getScheme()+"://"+request.getServerName()+":"+request.getServerPort()+path+"/";
- %>
-
-
登录页面 -
-
-
-
-
6.1完整的struts.xml文件
6.2完整的web.xml文件
- xmlns="http://java.sun.com/xml/ns/javaee"
- xmlns:xsi="http://www.w3.org/2001/XMLSchema-instance"
- xsi:schemaLocation="http://java.sun.com/xml/ns/javaee
- http://java.sun.com/xml/ns/javaee/web-app_2_5.xsd">
index.jsp struts2 - org.apache.struts2.dispatcher.ng.filter.StrutsPrepareAndExecuteFilter
struts2 /* contextConfigLocation - /WEB-INF/applicationContext.xml
org.springframework.web.context.ContextLoaderListener org.springframework.web.context.request.RequestContextListener
6.3完整的applicationContext.xml
- xmlns="http://www.springframework.org/schema/beans"
- xmlns:xsi="http://www.w3.org/2001/XMLSchema-instance"
- xmlns:p="http://www.springframework.org/schema/p"
- xsi:schemaLocation="http://www.springframework.org/schema/beans http://www.springframework.org/schema/beans/spring-beans-2.5.xsd">
- class="org.apache.commons.dbcp.BasicDataSource">
- value="oracle.jdbc.OracleDriver">
- value="jdbc:oracle:thin:@localhost:1521/orcl">
- class="org.springframework.orm.hibernate3.LocalSessionFactoryBean">
- org.hibernate.dialect.Oracle9Dialect
com/ssh/people/People.hbm.xml
7、部署运行
7.1Tomcat服务器
7.2去除antlr-2.7.2.jar冲突包
apache-tomcat-7.0.54\webapps\SSH_Demo\WEB-INF\lib目录下
7.3整理jar包
把apache-tomcat-7.0.54\webapps\SSH_Demo\WEB-INF\lib目录下的jar包全部复制出来,这个就是SSH框架所需的jar包。
然后把jar.zip中的jar包导入即可。
7.4运行访问
http://localhost:8080/SSH_Demo/login.jsp
8、常见问题
1) 关于 myeclipse 里面没有 add struts capabilities 问题解决方法
高版本的 myeclipse 里面的 add struts capabilities 在如下路径中:(当你加载过一次之后,这个 add struts capabilities就不会出现。
解决方法:把 .project 文件的关于struts的配置删除掉即可
附件源码
下载地址: http://pan.baidu.com/s/1midkdCG