深入浅出SpringBoot(1)----全注解下的Spring IoC(1)
深入浅出SpringBoot 2.x
来源于深入浅出springboot书籍
序言
-
Spring最成功的的是其提出的理念,而不是技术本身
-
它所依赖的两个核心理念,一个是控制反转(Inversion of Control, loC), 另一个是面向切面编
程(Aspect Oriented Programming, AOP)。 IoC 容器是Spring的核心,可以说Spring是一种基于 loC容器编程的框架。因为Spring Boot是基于注解的开发Spring loC
loC是一种通过描述 来生成或者获取对象的技术,而这个技术不是Spring甚至不是Java独有的。对于Java初学者更多的时候所熟悉的是使用new关键字来创建对象,而在Spring中则不是,它是通过描述来创建对象。只是Spring Boot并不建议使用XML,而是通过注解的描述生成对象 -
一个系统可以生成各种对象,并且这些对象都需要进行管理。还值得一提的是, 对象之间并不是孤立的,它们之间还可能存在依赖的关系。例如,一个班级是由多个老师和同学组成的,那么班级就依赖于多个老师和同学了。为此Spring还提供了依赖注入的功能,使得我们能够通过描述来管理各个对象之间的关系。
-
为了描述上述的班级、同学和老师这3个对象关系,我们需要一个容器。 在Spring中把每一个需要管理的对象称为Spring Bean (简称Bean),而Spring管理这些Bean的容器,被我们称为SpringIoC容器(或者简称IoC容器)。IoC 容器需要具备两个基本的功能:
-
通过描述管理Bean, 包括发布和获取Bean;
-
通过描述完成Bean之间的依赖关系。
-
1. IoC容器简介
SpringIoC容器是一个管理Bean的容器,在spring的定义中,它要求所有的IoC容器都需要实现接口BeanFactory,它是一个顶级的容器接口。为了增加对它的理解,我们首先阅读其源码,并且讨论几个重要的方法,接口源码如下:
package org.springframework.beans.factory;

import org.springframework.beans.BeansException;
import org.springframework.core.ResolvableType;
import org.springframework.lang.Nullable;

public interface BeanFactory {
    String FACTORY_BEAN_PREFIX = "&";
	// 多个 getBean 方法
    Object getBean(String name) throws BeansException;

    <T> T getBean(String name, Class<T> requiredType) throws BeansException;

    Object getBean(String name, Object... ages) throws BeansException;

    <T> T getBean(Class<T> requiredType) throws BeansException;

    <T> T getBean(Class<T> requiredType, Object... args) throws BeansException;

    // 是否包含bean
    boolean containsBean(String name);
	// bean是否单例
    boolean isSingleton(String name) throws NoSuchBeanDefinitionException;
	// bean是否原型
    boolean isPrototype(String name) throws NoSuchBeanDefinitionException;
	//bean是否类型匹配
    boolean isTypeMatch(String name, ResolvableType typetoMatch) throws NoSuchBeanDefinitionException;

    boolean isTypeMatch(String name, Class<?> typetoMatch) throws NoSuchBeanDefinitionException;
	//获取bean的类型
    @Nullable
    Class<?> getType(String name) throws NoSuchBeanDefinitionException;
	//获取bean的别名
    String[] getAliases(String name);
}
这段代码中加入了中文注释,通过它们就可以理解这些方法的含义。这里值得注意的是的几个方法。首先我们看到了多个getBean方法,这也是IoC容器最重要的方法之,它的意义是从IoC容器中获取Bean。而从多个getBean方法中可以看到有按类型(by type)获取Bean的,名称(by name)获取Bean的,这就意味着在Spring IoC容器中,允许我们按类型或者名称获取bean,这对理解后面将讲到的Spring的依赖注入(Dependency Injection, DI)是十分重要的。
isSingeteon 方法则判断Bean是否在Sring loC中为单例。这里需要记住的是在Spring IoC容器中,默认的情况下,Bean 都是以单例存在的,也就是使用getBean方法返回的都是同一个对象,与isSingeteon 方法相反的是isPrototype方法,如果它返回的是true, 那么当我们使用getBean获取
Bean的时候,SpringIoC容器就会创建一个新的Bean返回给调用者,这些与后面将讨论的Bean的作用域相关。
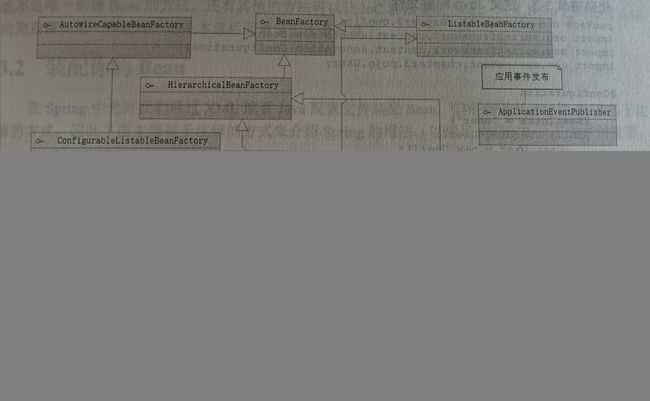
由于BeanFactory的功能还不够强大,因此Spring在BeanFactory的基础上,还设计了一个更为高级的接口ApplicationContext.它是BeanFactory的子接口之一,在Spring的体系中BeanFactory和ApplicationContext是最为重要的接口设计,在现实中我们使用的大部分Spring IoC 容器是ApplicationContext接口的实现类,它们的关系如图所示。

在图中可以看到,ApplicationContext 接口通过继承上级接口,进而继承BeanFactory 接口,但是在BeanFactory的基础上,扩展了消息国际化接口(MessageSource)、 环境可配置接口(EnvironmentCapable)、应用事件发布接口(ApplicationEventPublisher) 和资源模式解析接口( ResourcePattermResolver),所以它的功能会更为强大。
在SpringBoot当中我们主要是通过注解来装配Bean到SpringIoC容器中,为了贴近SpringBoot的需要,这里不再介绍与XML相关的IoC容器,而主要介绍一个基于注解的IoC容器,它就是AnnotationConfigApplicationContext,从名称就可以看出它是一个基于注解的 IoC容器。之所以研究它,是因为Spring Boot装配和获取Bean的方法与它如出一辙。
下面来看一个最为简单的例子。首先定义一个Java简单对象文件User.java,如代码所示。
package com.springboot.chapter3.pojo

public class User{
	private Long id;
	private String userName;
	private String note

	/** setter and getter**/
}
然后再定义一个java配置文件AppConfig.java 如代码所示:
package com.springboot.chapter3.config;
import org.springframework.context.annotation.Bean;
import org.springframework.context.annotation.Configuration;
import com.springboot.chapter3.pojo.User;


@Configuration
public class AppConfig {

	@Bean(name ="user")
    public User initUser () {
    	User user= new User();
    	user.setId (1L) ;
    	user.setUserName ("user_name_1"):
        user.setNote ("note_1" ) ;
        return user;
    }
}
这里需要注意@Configuration代表这是一个Java配置文件,Spring的容器会根据它来生成IoC容器去装配Bean;@Bean代表将initUser方法返回的POJO装配到IoC容器中,根据其属性name定义这个Bean的名称,如果没有配置它,就将方法initUser作为Bean的名称保存到SpringIoc容器。
使用AnnotationConfigApplicationContext来构建IoC容器
package com.springboot.chapter3.config;

import org.apache.log4j.Logger ;
import org.springframework.context.ApplicationContext;
import org.springframework.context.annotation.AnnotationConfigApplicationContext;
import com.springboot.chapter3.pojo.User;
public class IoCTest {
    private static Logger log= Logger . getLogger(IoCTest.class);
    public static void main (String [] args) {
        ApplicationContext ctx= new AnnotationConfigApplcationContext(AppConfig.class);
        User user= ctx.getBean(User . class);
        log.info(user.getId ());
   }
}
代码中将Java配置文件AppConfig传递给AnnotationConfigApplicationContext的构造方法,这样就可以读取配置了。然后将配置中的Bean装配给IoC容器,便可以使用getBean方法获取对应的POJO,可以看到日志打印
14:53:03.017 [main] DEBUG org . springframework. core . env . PropertySourcesPropertyResolver
Could not find key ' spring. liveBeansView . mbeanDomain' in any property source
14:53:03.018 [main] DEBUG org. springframework . beans. factory. support . DefaultListableBe
anFactory一Returning cached instance of singleton bean 'user '......
显然,配置在配置文件中的名称为user的Bean已经被装配到IoC容器中,并且可以通过getBean方法获取对应的Bean, 并将Bean 的属性信息输出出来。当然这只是很简单的方法,而注解@Bean也不是唯创建 Bean 的方法,还有其他的方法可以让loC容器装配Bean, 而且Bean 之间还有依赖的关系需要进一步处理。
2.装配你的Bean
在Spring中允许我们通过XML或者Java配置文件装配Bean,但是由于Spring Boot 是基于注解的方式,因此下面主要基于注解的方式来介绍Spring的用法,以满足Spring Boot开发者的需要。
通过扫描装配你的Bean
如果一个个的Bean使用注解@Bean注入Spring IoC 容器中,那将是件很 麻烦的事情。 好在Spring还允许我们进行扫描装配Bean到IoC容器中,对于扫描装配而言使用的注解是@Component和@ComponentScan。@Component 是标明哪个类被扫描进入Spring IoC容器,而@ComponentScan则是标明采用何种策略去扫描装配Bean。
package com.springboot.chapter3.config;

@Component("user")

public class User{
	@Value("1")
	private Long id;
	@Value("user_name_1")
	private String userName;
	@Value("note_1")
	private String note

	/** setter and getter**/
}
这里的注解@Component表明这个类将被Spring loC容器扫描装配,其中配置的“user”则是作为Bean的名称,当然你也可以不配置这个字符串,那么IoC容器就会把类名第一个字母作为小写, 其他不变作为Bean名称放入到IoC容器中;注解@Value 则是指定具体的值,使得Spring IoC给予对应的属性注入对应的值。为了让Spring IoC容器装配这个类,需要改造类AppConfig 如以下代码:
package com.springboot.chapter3.config;
import org.springframework.context.annotation.ComponentScan;
import org.springframework.context.annotation.Configuration;
import com.springboot.chapter3.pojo.User;


@Configuration
@ComponentScan
public class AppConfig {
}
这里加入了@Componentsan,意味着它会进行扫描,但是它只会扫描类AppC onfig 所在包和其子包,之前把Userjava 移到包com. sringbootot capter.config就是这个原因。这样就可之前使用@Bean标注的创建对象方法。然后进行测试,测试代码如下;
ApplicationContext ctx
=new AnnotationConfigApplicationContext{AppConfig.class) ;
User user= ctx.getBean(User.class);
log.info(user.getId());
这样就能够运行了。然而为了使得User类能够被扫描,上面我们把它迁移到了本不该放置它的包,这样显然就不太合理了。为了更加合理,@ComponentScan还允许我们自定义扫描的包 现在探讨它的配置项。
探讨@ComponentScan源码
package org.springframework.context.annotation;

import java.lang.annotation.Documented;
import java.lang.annotation.ElementType;
import java.lang.annotation.Repeatable;
import java.lang.annotation.Retention;
import java.lang.annotation.RetentionPolicy;
import java.lang.annotation.Target;
import org.springframework.beans.factory.support.BeanNameGenerator;
import org.springframework.core.annotation.AliasFor;

@Retention(RetentionPolicy.RUNTIME)
@Target({ElementType.TYPE})
@Documented
//在一个类中可重复定义
@Repeatable(ComponentScans.class)
public @interface ComponentScan {

    //定义扫描的包
    @AliasFor("basePackages")
    String[] value() default {};

    //定义扫描的包
    @AliasFor("value")
    String[] basePackages() default {};

    //定义扫描的类
    Class<?>[] basePackageClasses() default {};

    //Bean name生成器
    Class<? extends BeanNameGenerator> nameGenerator() default BeanNameGenerator.class;

    //作用域解析器
    Class<? extends ScopeMetadataResolver> scopeResolver() default AnnotationScopeMetadataResolver.class;

    //作用域代理模式
    ScopedProxyMode scopedProxy() default ScopedProxyMode.DEFAULT;

    //资源匹配模式
    String resourcePattern() default "**/*.class";

    //是否启动默认的过滤器
    boolean useDefaultFilters() default true;

    //当满足过滤条件时扫描
    ComponentScan.Filter[] includeFilters() default {};

    //当不满足过滤条件时扫描
    ComponentScan.Filter[] excludeFilters() default {};

    //是否延迟初始化
    boolean lazyInit() default false;

    //自定义过滤器
    @Retention(RetentionPolicy.RUNTIME)
    @Target({})
    public @interface Filter {

        //过滤器类型,可以按注解类型或者正则式等过滤
        FilterType type() default FilterType.ANNOTATION;

        //定义过滤的类
        @AliasFor("classes")
        Class<?>[] value() default {};

        //定义过滤的类
        @AliasFor("value")
        Class<?>[] classes() default {};

        //匹配方式
        String[] pattern() default {};
    }
}
首先可以通过配置项basePackages定义扫描的包名,在没有定义的情况下,它只会扫描当前包和其子包下的路径:还可以通过basePackageClasses定义扫描的类;其中还有includeFilters 和excludeFilters, includeFilters 是定义满足过滤器(Filter) 条件的Bean才去扫描,excludeFilters 则是排除过滤器条件的Bean,它们都需要通过一个注解@Filter去定义,它有一个type类型,这里可以定义为注解或者正则式等类型。classes定义注解类,pattern 定义正则式类。
此时我们再把User类放到包com. psrngoot.thapter3.pojo中,这样User和AppConfig就不再同包, 那么我们把AppConfig中的注解修改为:
@ComponentScan ("com. springboot. chapter3.*")
@ComponentScan (basePackages = { "com. springboot . chapter3.pojo"})
无论采用何种方式都能够使得lIoC 容器去扫描User类,而包名可以采用正则式去匹配,但县的某些Bean。比方说,现在我们有一个UsrServicee 类,为了标注它为服务类,将类标注@Service()该标准注入了@Component,所以在默认的情况下它会被Spring扫描装配到IoC容器中),这里再设我们采用了策略:
@ComponenntScan ("com. springboot . chapter3. *")
package com.springboot.chapter3.service;

import org.springframework.stereotype.Service;

import com.springboot chapter3.pojo.User;

@Service

public class UserService
public void printUser (User user){
System.out.println("编号:" +user .getId()) ;
System.out.println("用户名称:" + user.getUserName()) ;
System. out.println ("备注:" + user.getNote ()) ;
按以上的装配策略,它将会被扫描到Spring IoC容器中。为了不被装配,需要把扫描的策改为:
@ComponentScan (basePackages = "com. springboot.chapter3. *",
	excludeFilters = {@Filter (classes = {UserService.class}) } )
这样,由于加入了excludeFilters 的配置,使标注了@Service的类将不被IoC容器扫描注入样就可以把UserService类排除到Spring IoC容器中了。事实上,之前在Spring Boot上述实例中的注解@SpringBootApplication也注入了@ComponentScan,这里不妨探索其源码
SpringBootApplication 源码
package org.springframework.boot.autoconfigure;

import java.lang.annotation.Documented;
import java.lang.annotation.ElementType;
import java.lang.annotation.Inherited;
import java.lang.annotation.Retention;
import java.lang.annotation.RetentionPolicy;
import java.lang.annotation.Target;
import org.springframework.boot.SpringBootConfiguration;
import org.springframework.boot.context.TypeExcludeFilter;
import org.springframework.context.annotation.ComponentScan;
import org.springframework.context.annotation.Configuration;
import org.springframework.context.annotation.FilterType;
import org.springframework.context.annotation.ComponentScan.Filter;
import org.springframework.core.annotation.AliasFor;

@Target({ElementType.TYPE})
@Retention(RetentionPolicy.RUNTIME)
@Documented
@Inherited
@SpringBootConfiguration
@EnableAutoConfiguration
//自定义排除的扫描类
@ComponentScan(
    excludeFilters = {@Filter(
    type = FilterType.CUSTOM,
    classes = {TypeExcludeFilter.class}
), @Filter(
    type = FilterType.CUSTOM,
    classes = {AutoConfigurationExcludeFilter.class}
)}
)
public @interface SpringBootApplication {

    //通过类型排除自动配置类
    @AliasFor(
        annotation = EnableAutoConfiguration.class
    )
    Class<?>[] exclude() default {};

    //通过名称排除自动配置类
    @AliasFor(
        annotation = EnableAutoConfiguration.class
    )
    String[] excludeName() default {};

    //定义扫描包
    @AliasFor(
        annotation = ComponentScan.class,
        attribute = "basePackages"
    )
    String[] scanBasePackages() default {};

    //定义被扫描的类
    @AliasFor(
        annotation = ComponentScan.class,
        attribute = "basePackageClasses"
    )
    Class<?>[] scanBasePackageClasses() default {};

    @AliasFor(
        annotation = Configuration.class
    )
    boolean proxyBeanMethods() default true;
}
自定义第三方Bean
现实的Java的应用往往需要引入许多来自第三方的包,并且很有可能希望把第三方包的类对象也放入到Spring IoC容器中,这时@Bean注解就可以发挥作用了。
例如,要引入一个DBCP数据源,我们先在pom.xml上加入项目所需要DBCP包和数据库MySQL驱动程序的依赖,如
<dependency>

	<groupId>org.apache.commons</groupId>

	<artifactId>commons-dbcp2</artifactId>

</dependency>

<dependency>

	<groupId>mysql</groupId>

	<artifactId>mysql-connector-java</artifactId>

</dependency>
这样DBCP和数据库驱动就被加入到了项目中,接着将使用它提供的机制来生成数据源。这时候,可放置到AppConfig.java中。
使用DBCP生成数据源@Bean (name = “dataSource”)
@Bean(name = "dataSource")
public DataSource getDataSource () {
	Properties props= new Properties();

	rops.setProperty("driver","com.mysql.jdbc.Driver" );
	props.setProperty("url","jdbc:mysql://localhost:3306/chapter3");
	props.setProperty ("username","root");
	props.setProperty ("password","123456");
	DataSource dataSource = null
	try {
		dataSource = BasicDataSourceFactory.createDataSource (props);
	} catch (Exception e) {
		e.printStackTrace();
	}
	return dataSource;
}
3.依赖注入
本章的开始讲述了Sping IoC的两个作用,上一节只讨论」了如何将Bean装配到IoC容器中于如何进行获取,还有一个作用没有谈及,那就是BeanBan之间的依赖,在Spring IoC的概念中,称为依赖注入(Dependency Injection, DI)。
例如,人类(Person) 有时候利用一些动物(Animal)去完成一些事情,比方说狗(Dog)是用来看门的,猫(Cat) 是用来抓老鼠的,鹦鹉(Parrot)是用来迎客…是做一些事情就依赖于那些可爱的动物了
为了更好地展现这个过程,首先来定义两个接口,一个是人类(Person), 另外一个是(Animal)。人类是通过动物去提供一些特殊服务的
/*********人类接口******/
package com.springboot.chapter3.pojo.definition;
public interface Person{
	//使用动物服务
	public void service() ;
	//设置动物
	public void setAnimal (Animal animal) ;
}


/*********动物接口******/
package com.springboot.chapter3.pojo.definition;
	public interface Animal{
		public void use();
}
这样我们就拥有了两个接口。接下来我们需要两个实现类,如代码清单3-14所示。代码清单3-14两个实现类
/*******人类实现类*******/

packagecom.springboot.chapter3.pojo;

import org.springframework.beans.factory.annotation.Autowired;

import org.springframework.stereotype.Component;

import com.springboot.chapter3.pojo.definition.Animal;

import com.springboot.chapter3.pojo.definition.Person;


@Component

public class BussinessPerson implements Person {

	@Autowired
	private Animal animal = null;

	@Override
	public void service() {
		this. animal.use() ;
	}

	@Override
	public void setAnimal (Animal animal){
		this.animal = animal ;
	}


}

/********狗, 动物的实现类********/

package com.springboot.chapter3.pojo;

import org.springframework.stereotype .Component;

import com.springboot.chapter3.pojo.definition.Animal;
@Component
public class Dog implements Animal{
	@Override
	public void use () {
		System.out.println(" 狗[" + Dog. class.getSimpleName()+"]是开门的. ");
	}


}
这里应注意加粗的注解@Autowired,这也是我们在Spring 中最常用的注解之一,十分重要,它会根据属性的类型(by type)找到对应的Bean进行注入。这里的Dog类是动物的一种, 所以SprinigIoC容器会把Dog的实例注入BussinesPerson中。这样通过Sprig IoC容器获取BussinesPerson实例的时候就能够使用Dog实例来提供服务了,下面是测试的代码。
ApplicationContext ctx = new AnnotationConfigApplicationContext(AppConfig.class)
Person person = ctx.getBean(BussinesPerson.class)
person.service() ;
注解@Autowired
@Autowired是我们使用得最多的注解之一,因此在这里需要进一步地探讨它
它注入的机制最基本的一条是根据类型by type,我们回顾IoC容器的顶级接口BeanFactory,就可以知道IoC容器是通过getBean方法获取对应Bean的,而getBean又支持根据类型by type或者根据名称by name
autowired有4种模式,byname、bytype、constructor、autodectect
其中@Autowired注解是使用byType方式的
byType方式是根据属性类型在容器中寻找bean类
这里还要注意的是@Autowired是一个默认必须找到对应Bean的注解,如果不能确定其标注属性一定会存在并且允许这个被标注的属性为null,那么你可以配置@Autowired属性required为false,例如,像下面一样:
@Autowired(required=false)
同样,它除了可以标注属性外,还可以标注方法,如setAnimal方法,如下所示:
@Override
@Autowired
public void setAnimal (Animal animal){
	this. animal = animal;
}
消除歧义性------@Primary和@Qualifier
在上面我们发现有猫有狗的时候,为了使@Autowired能够继续使用,我们做了一个决定,将BusisessPeron的属性名称从animal修改为dog。显然这是一个憋屈的做法,好好的一个动物,却被我们定,义为了狗。产生注入失败的问题根本是按类型(by type)查找,正如动物可以有多种类型,这样会造成Spring IoC容器注入的困扰,我们把这样的一个问题称为歧义性。知道这个原因后,那么这两个注解是从哪个角,度去解决这些问题的呢?这是本节要解决的问题。
首先是一个注解@Primary,它是一个修改优先权的注解,当我们有猫有狗的时候,假设这次需要使用猫,那么只需要在猫类的定义上加入@Primary就可以了,类似下面这样:
@Component
@Primary
public class Cat implements Animal{
.........
}
这里的@Primary的含义告诉Spring IoC容器,当发现有多个同样类型的Bean时候,请优先使用我进行注入,进行注入的时候,于是再进行测试时会发现,系统将用猫为你提供服务。 因为当Spring进行注入的时候,虽然它发现存在多个动物,但因为Cat被标注为了@Primary,所以优先采用Cat的实例进行注入,这样就通过优先级的变换使得IoC容器知道注入哪个具体的实例来满足依赖注入。
有时候@Primary也可以使用在多个类上,也许无论是猫还是狗都带上@Primary注入解,其结果是IoC容器还是无法区分采用哪个Bean的实例进行注入那么@Qualifier可以满足你的这个愿望。它的配置项value需要一个字符串去定义,它将与@Autowired组合在一起,通过类型和名称一起找到Bean。我们知道Bean名称在Spring IoC容器中是唯一标识,通过这个就能消除歧义性
<T> T getBean(String name, Class<T> requiredType) throws BeansException;
通过它就能 够按照名称和类型的结合找到对象了。
下面假设猫已经标注了@Primary,而我们需要的是狗提供服务, 因此需要修改BussinessPerson属性animal的标注适合我们的需求。:
@Autowired
@Qualifier ("dog")
private Animal animal = null;
4.生命周期
请看下次博文