Java maven项目集成ueditor(百度本编辑器)插件详解
相信很多项目都要用到类似的功能,ueditor是一个非常强大的插件,当然也有直接集成好的直接引用就行了。在这里讲一下百度编辑器的集成过程,本人是走了好多弯路,在这里希望各位开发的朋友少走些弯路,节约开发时间。
1,首先需要下载ueditor包 我下载的是 ueditor1_4_3_3-utf8-jsp ,然后引入项目里面 把相关的js和css 配置到配置文件中
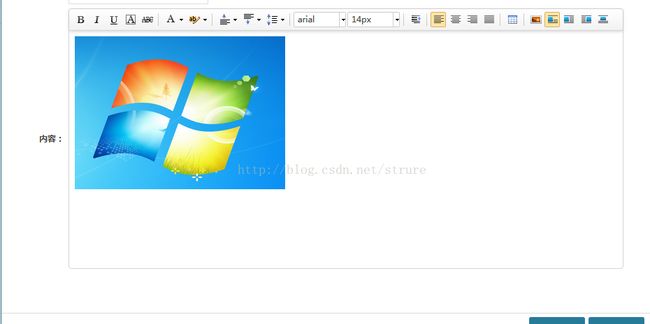
2,第一步实现了 ,那么就要在jsp页面显示出来。很简单
3,难点在于图片的上传,以及各种配置
找到jsp文件夹里面config.json ,打开需要改两项 imageActionName , imagePathFormat
/* 上传图片配置项 */
    "imageActionName": "uploadImage", /* 执行上传图片的action名称 */
    "imageFieldName": "upfile", /* 提交的图片表单名称 */
    "imageMaxSize": 2048000, /* 上传大小限制,单位B */
    "imageAllowFiles": [".png", ".jpg", ".jpeg", ".gif", ".bmp"], /* 上传图片格式显示 */
    "imageCompressEnable": true, /* 是否压缩图片,默认是true */
    "imageCompressBorder": 1600, /* 图片压缩最长边限制 */
    "imageInsertAlign": "none", /* 插入的图片浮动方式 */
    "imageUrlPrefix": "", /* 图片访问路径前缀 */
    "imagePathFormat": "/ueditor/jsp/upload/image/{yyyy}{mm}{dd}/{time}{rand:6}", /* 上传保存路径,可以自定义保存路径和文件名格式 */
                                /* {filename} 会替换成原文件名,配置这项需要注意中文乱码问题 */
                                /* {rand:6} 会替换成随机数,后面的数字是随机数的位数 */
                                /* {time} 会替换成时间戳 */
                                /* {yyyy} 会替换成四位年份 */
                                /* {yy} 会替换成两位年份 */
                                /* {mm} 会替换成两位月份 */
                                /* {dd} 会替换成两位日期 */
                                /* {hh} 会替换成两位小时 */
                                /* {ii} 会替换成两位分钟 */
                                /* {ss} 会替换成两位秒 */
                                /* 非法字符 \ : * ? " < > | */
/* 具请体看线上文档: fex.baidu.com/ueditor/#use-format_upload_filename */imagePathFormat-》上传保存路径,可以自定义保存路径和文件名格式
4,修改 ueditor.config.js 自定义编辑器的功能
  /**
     * 编辑器资源文件根路径。它所表示的含义是:以编辑器实例化页面为当前路径,指向编辑器资源文件(即dialog等文件夹)的路径。
     * 鉴于很多同学在使用编辑器的时候出现的种种路径问题,此处强烈建议大家使用"相对于网站根目录的相对路径"进行配置。
     * "相对于网站根目录的相对路径"也就是以斜杠开头的形如"/myProject/ueditor/"这样的路径。
     * 如果站点中有多个不在同一层级的页面需要实例化编辑器,且引用了同一UEditor的时候,此处的URL可能不适用于每个页面的编辑器。
     * 因此,UEditor提供了针对不同页面的编辑器可单独配置的根路径,具体来说,在需要实例化编辑器的页面最顶部写上如下代码即可。当然,需要令此处的URL等于对应的配置。
     * window.UEDITOR_HOME_URL = "/xxxx/xxxx/";
     */
    var URL = window.UEDITOR_HOME_URL || getUEBasePath();
    /**
     * 配置项主体。注意,此处所有涉及到路径的配置别遗漏URL变量。
     */
    window.UEDITOR_CONFIG = {

        //为编辑器实例添加一个路径,这个不能被注释
        UEDITOR_HOME_URL: URL
        // 服务器统一请求接口路径
        , serverUrl: URL + "jsp/controller.jsp"
        //工具栏上的所有的功能按钮和下拉框,可以在new编辑器的实例时选择自己需要的重新定义
        , toolbars: [[
            'bold', 'italic', 'underline', 'fontborder', 'strikethrough', '|', 'forecolor', 'backcolor', '|',
            'rowspacingtop', 'rowspacingbottom', 'lineheight', '|',
            'fontfamily', 'fontsize', '|',
            'indent', '|',
            'justifyleft', 'justifycenter', 'justifyright', 'justifyjustify',
            '|', 'inserttable',
            '|','simpleupload','imagenone', 'imageleft', 'imageright', 'imagecenter'
]]5,Java代码 上传图片 ,ueditor需要特定的返回值,title,original,size,state,type,url
controller里面定义名称和config.json里面imageActionName定义的一样,@RequestMapping("uploadImage")
@ResponseBody
	@RequestMapping("uploadImage")
	public Map uploadImage(@RequestParam("upfile")  CommonsMultipartFile upfile,HttpServletRequest request,Model model) throws Exception{

		//得到路径 C:/tomcat/webapps/testDemo/
        String rootPath = request.getSession().getServletContext().getRealPath("/");
		rootPath = rootPath.replaceAll("\\\\", "/");

		String path = rootPath + "/ueditor/jsp/upload/image";

		File f = new File(path);
        if (!f.exists()) {
            f.mkdirs();
        }

		FileItem item = upfile.getFileItem();
		//文件路径
		String pathFileName = item.getName();
		//字节数
		long l = item.getSize();
		String fileSize = Long.toString(l);
		//文件名
		int start = pathFileName.lastIndexOf("\\");
		String fileName = pathFileName.substring(start + 1);
		//后缀 .jpg
		int indexName = fileName.lastIndexOf('.');
		String subName = fileName.substring(indexName);
		//新文件名
		String nowName = new SimpleDateFormat("yyMMddHHmmss").format(new Date()) +"_"+ fileName;

		item.write(new File(path, nowName));

		String strBackUrl = "http://" + request.getServerName() //服务器地址
        + ":"
        + request.getServerPort()           //端口号
        + request.getContextPath();      //项目名称

		Map map = new HashMap();
		//文件原名称
		map.put("title", nowName);
		//现在文件名称
		map.put("original", fileName);
		//文件大小(字节数)
		map.put("size", fileSize);
		//是否上传成功
		map.put("state", "SUCCESS");
        //文件类型 .+后缀名
        map.put("type", subName);
        //文件路径
        map.put("url",  strBackUrl+"/ueditor/jsp/upload/image/"+nowName);

		return map;

	}
然后jsp里面需要调 uploadImage
UE.Editor.prototype._bkGetActionUrl ? "" : UE.Editor.prototype._bkGetActionUrl = UE.Editor.prototype.getActionUrl;
	UE.Editor.prototype.getActionUrl = function(action) {
		//这里很重要,很重要,很重要,要和配置中的imageActionName值一样
		if (action == 'uploadImage'){
			//这里调用后端我们写的图片上传接口
			return '${ctx}/sys/upload/uploadImage';
		}else{
			return this._bkGetActionUrl.call(this, action);
      		}
	}
这样图片就在编辑器里面显示出来了
6,保存到数据库里是带有标签的text ,在这之前要把里面图片的路径替换成服务器的路径
private final static Pattern ATTR_PATTERN = Pattern.compile("]*?\\ssrc=['\"]?(.*?)['\"]?\\s.*?>",Pattern.CASE_INSENSITIVE); if (StringUtils.isEmpty(information.getId())) {
information.setId(IdGenerator.uuid()); //得到ueditor内的内容
String content = request.getParameter("editorValue");
Matcher matcher = ATTR_PATTERN.matcher(content);
List piclist = new ArrayList();
while (matcher.find()) {
piclist.add(matcher.group(1));
}
if(piclist.size() == 0){
information.setInfoText(content);
informationService.addInformation(information,user);
}else{
String newPicPath = "";
String str = "";
for (String string : piclist) {
//得到路径名/ueditor/jsp/upload/image/....
str = string.substring(string.indexOf("/ueditor"));
//得到存图片/ueditor/jsp/upload/image/....的项目路径
String rootPath = request.getSession().getServletContext().getRealPath("/");
rootPath = rootPath.replaceAll("\\\\", "/");
//本地图片的路径
String picturePath = rootPath+str;
String folder = UserFileController.getStaticFolder(request, response);
folder = folder.replaceAll("\\\\", "/");
if(!(new File(folder+str).exists())){
new File(folder+str).mkdirs();
}
InputStream in = new FileInputStream(picturePath);
BufferedImage bi = ImageIO.read(in);
File file = new File(folder+str);
ImageIO.write(bi, "JPEG", file);
in.close();
}
String strBackUrl = "http://" + request.getServerName() //服务器地址
+ ":"
+ request.getServerPort() //端口号
+ request.getContextPath(); //项目名称
String folder = UserFileController.getImgFilesFolder(request, response);
newPicPath = content.replace(strBackUrl,folder);
information.setInfoText(newPicPath);
informationService.addInformation(information,user);
}
} end!