本文环境:win10(64)+MongoDB(3.4.5)+Robomongo(1.1)
目录:
- MongoDB的安装
- MongoDB的配置
- Robomongo的安装以及与MongoDB的连接
- 一些新出现的幺蛾子
一、MongoDB的安装
Step1. 打开MongoDB产品下载页面https://www.mongodb.com/download-center?jmp=nav#community,选择Windows Server 2008 R2 64-bit and later, with SSL support x64,点击下载。当前下载版本是mongoDB3.4.5
Step2. 双击上一步下载的安装包,根据安装向导的提示,一直next,选择complete,最后finish,即安装成功。注意mongodb的安装目录
二、MongoDB的配置
Step1. 打开mongoDB的bin,记住它的路径,我的是在C:\Program Files\MongoDB\Server\3.4\bin。接下来,win+R—cmd,打开了命令行,再 cd C:\Program Files\MongoDB\Server\3.4\bin,接下来对mongoDB的配置将在此路径中进行。
Step2. 创建数据库文件的存放位置
...\bin>mongod,这里默认指定了dbpath=C:\data\db,但需要我们提前在C盘根目录下创建data\db,否则这一步会出现"dbpath=C:\data\db not found"的错误提示。不用管这里的Warning: access is not enabled for the database
另外,我们可以自行指定dbpath=D:\my test\data\db,前提是它已经创建好,否则还是出现not found的错误提示。命令行中可以这样敲...bin>mongod --dbpath "D:\my test\data\db"。不用管这里的Warning: access is not enabled for the database
也可以指定logpath,如mongod --dbpath "D:\my test\data\db" --logpath "D:\my test\data\log\mongodb.log",那么控制台显示的内容将保存到日志中。
Step3. 在浏览器中输入网址:http://localhost:27017/ 。如果服务启动成功会看到以下一段话:
It looks like you are trying to access MongoDB over HTTP on the native driver port.
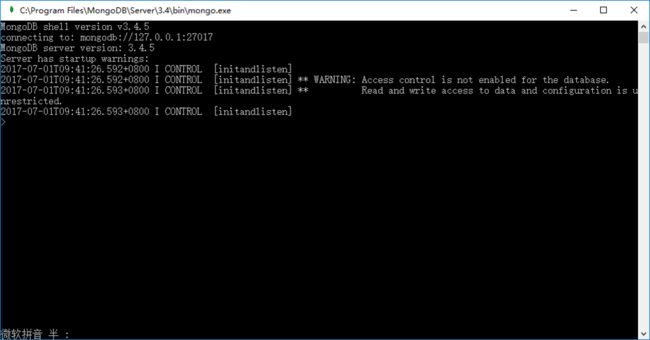
Step4. Step2.的cmd窗口不要关,回到bin文件夹下,管理员身份运行mongo.exe。
尝试敲入以下命令:db; use admin; db.auth("admin", "admin")
>db
test
>use admin
switched to db admin
当我们敲入db.auth("admin", "admin")时,返回为0,出现Error: Authentication failed。也正是这个原因导致robomongo无法连接
>db.auth("admin","admin")
Error: Authentication failed.
0
解决方法是手动添加admin账户,创建成功后,再次db.auth("admin", "admin"),返回1
>db.createUser(
  {
    user: "admin",
    pwd: "admin",
    roles: [ { role: "userAdminAnyDatabase", db: "admin" } ]
  }
)
Successfully added user: {
        "user" : "admin",
        "roles" : [
                {
                        "role" : "userAdminAnyDatabase",
                        "db" : "admin"
                }
        ]
}
>db.auth("admin","admin")
1
观察命令行中的状态,显示成功授权successfully authenticated。
三、Robomongo的安装以及与MongoDB的连接
Step1. 首先下载Robomongo,官网下载链接https://robomongo.org/download,根据下载下来的安装向导,傻瓜式安装即可。安装版本Robo 3T 1.1
Step2. 与MongoDB的连接
Robo 3T 1.1:File——connect——create——Connection: Name——Authendication: 是否勾选Perform Authendication
- 不勾选Perform Authendication——test。注意:即便第二部分Step4中db.auth("admin","admin")返回0,这里也可连接
- 勾选Perform Authendication——User Name、Password——test。注意:第二部分Step4中db.auth("admin","admin")返回0/1,影响这里的连接
第二部分Step4中db.auth("admin","admin")返回0
第二部分Step4中db.auth("admin","admin")返回1
四、新出现的幺蛾子
- 网络挂机,导致第二部分Step4已经添加的admin失效:db.auth("admin","admin")返回0,需要重新添加;
- 一旦退出mongo.exe,再次使用时需要对mongoDB重新配置(命令行的配置和管理员身份运行mongo.exe进行的配置),非常麻烦
以上幺蛾子期待大神解决!


