####Mysql主从复制 基于GDIT的主从复制和半同步复制#####
实验环境部署:selinux和firewalld 关闭
两台虚拟机:
| 主库端 | westos1 | 172.25.40.11 |
|---|---|---|
| 从库端 | westos2 | 172.25.40.12 |
####Mysql5.7的主从复制###
部署环境:
1.)主库和从库下载mysql的rpm包
tar xf mysql-5.7.24-1.el7.x86_64.rpm-bundle.tar #解压mysql5.7的安装包
安装数据库安装需要的包:
yum install -y mysql-community-client-5.7.24-1.el7.x86_64.rpm
mysql-community-common-5.7.24-1.el7.x86_64.rpm
mysql-community-libs-5.7.24-1.el7.x86_64.rpm
mysql-community-libs-compat-5.7.24-1.el7.x86_64.rpm
mysql-community-server-5.7.24-1.el7.x86_64.rpm
2.)编辑文件/etc/my.cnf(确定主从库)
负责在主、从服务器传输各种修改动作的媒介是主服务器的二进制变更日志,这个日志记载着需要传输给从服务器的各种修改动作。因此,主服务器必须激活二进制日志功能。从服务器必须具备足以让它连接主服务器并请求主服务器把二进制变更日志传输给它的权限
主库:
[root@westos1 mysql]# vim /etc/my.cnf
log-bin=mysql-bin	##文档最后加,二进制日志复制,id号来区分主机
server-id=1
从库:
[root@westos2 mysql]# vim /etc/my.cnf
server-id=2	##文件最后加
3.)启动主库和从库
systemctl start mysqld
4.)会生成一个临时密码,用于登陆数据库
cat /var/log/mysqld.log | grep password
主库生成的临时密码:
[root@westos1 mysql]# cat /var/log/mysqld.log | grep password
2019-07-04T02:19:49.406460Z 1 [Note] A temporary password is generated for root@localhost: ufAo:qfN:5%?  ##临时密码 但这个临时密码查看不了databases库
从库生成的临时密码:
[root@westos2 mysql]# cat /var/log/mysqld.log | grep password
2019-07-04T02:19:36.516081Z 1 [Note] A temporary password is generated for root@localhost: //>ef<(EM6rG
临时生成的密码尝试连接,但是发现不能查看库

5)安全初始化
mysql_secure_installation ##密码要求大于8位,有大小写,数字,特殊字符,其他全选yes
完成后可以登录数据库
[root@westos2 mysql]# mysql_secure_installation  #安全初始化

Securing the MySQL server deployment.

Enter password for user root:    ##临时生成的密码

The existing password for the user account root has expired. Please set a new password.

New password:   #输入新的密码

Re-enter new password:   #重复输入新的密码
The 'validate_password' plugin is installed on the server.
The subsequent steps will run with the existing configuration
of the plugin.
Using existing password for root.

Estimated strength of the password: 100
Change the password for root ? ((Press y|Y for Yes, any other key for No) :   #y或回车

 ... skipping.
By default, a MySQL installation has an anonymous user,
allowing anyone to log into MySQL without having to have
a user account created for them. This is intended only for
testing, and to make the installation go a bit smoother.
You should remove them before moving into a production
environment.

Remove anonymous users? (Press y|Y for Yes, any other key for No) :   #y或回车

 ... skipping.


Normally, root should only be allowed to connect from
'localhost'. This ensures that someone cannot guess at
the root password from the network.

Disallow root login remotely? (Press y|Y for Yes, any other key for No) :   #y或回车

 ... skipping.
By default, MySQL comes with a database named 'test' that
anyone can access. This is also intended only for testing,
and should be removed before moving into a production
environment.


Remove test database and access to it? (Press y|Y for Yes, any other key for No) :   #y或回车

 ... skipping.
Reloading the privilege tables will ensure that all changes
made so far will take effect immediately.

Reload privilege tables now? (Press y|Y for Yes, any other key for No) :

 ... skipping.
All done!
[root@westos2 mysql]# mysql -uroot -pWestos+001  ##-p后直接跟密码可直接进入数据库,但 这种方式不安全不建议采取,这里只是为了实验方便
mysql: [Warning] Using a password on the command line interface can be insecure.
Welcome to the MySQL monitor.  Commands end with ; or \g.
Your MySQL connection id is 5
Server version: 5.7.24 MySQL Community Server (GPL)

Copyright (c) 2000, 2018, Oracle and/or its affiliates. All rights reserved.

Oracle is a registered trademark of Oracle Corporation and/or its
affiliates. Other names may be trademarks of their respective
owners.

Type 'help;' or '\h' for help. Type '\c' to clear the current input statement.

mysql> show databases;   ##可以查看到库,注意命令结尾必须有‘;’才会执行
+--------------------+
| Database           |
+--------------------+
| information_schema |
| mysql              |
| performance_schema |
| sys                |
+--------------------+
4 rows in set (0.00 sec)

mysql>
6.)主库创建并授权用来做复制的用户
在Master的数据库中建立一个备份帐户:每个slave使用标准的MySQL用户名和密码连接master。进行复制操作的用户会授予REPLICATION SLAVE权限。用户名的密码都会存储在文本文件master.info中
mysql> grant replication slave on *.* to repl@'172.25.40.%' identified by 'Westos+001';
##规定可以复制的用户是172.25.40网段的repl用户,可以复制权限是所有,复制的密码:Westos+001
Query OK, 0 rows affected, 1 warning (0.05 sec)

mysql> show master status;##查看master状态
+------------------+----------+--------------+------------------+-------------------+
| File             | Position | Binlog_Do_DB | Binlog_Ignore_DB | Executed_Gtid_Set |
+------------------+----------+--------------+------------------+-------------------+
| mysql-bin.000002 |      691 |              |                  |                   |
+------------------+----------+--------------+------------------+-------------------+
1 row in set (0.00 sec)

mysql> show plugins;	##查看插件,因为有密码插件,所以密码必须设置为复杂的
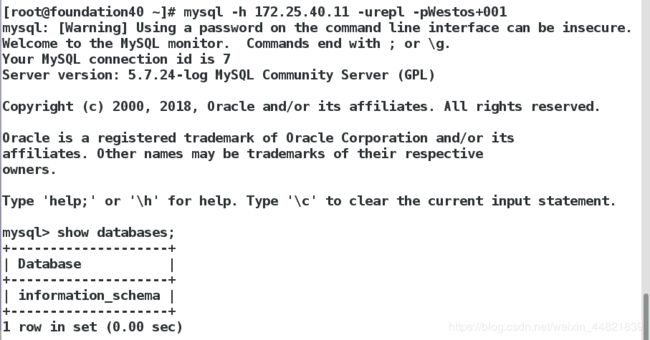
#在物理机上尝试连接master的数据库,测试repl帐号
mysql -h 172.25.40.11 -urepl -pWestoa+001
可以登录,但是查看不到任何信息,因为没有权限
从库上配置master信息:
mysql>  change master to master_host='172.25.40.11', master_user='repl', master_password='Westos+001', master_log_file='mysql-bin.000002', master_log_pos=691;  ##master_log_pos它是日志的开始位置
#其中master_log_file和master_log_pos的值为0,因为它是日志的开始位置ster_log_pos写在westos1上执行show master status看到的信息
Query OK, 0 rows affected, 2 warnings (0.25 sec)

mysql> start slave;
Query OK, 0 rows affected (0.07 sec)

mysql> show slave status\G    ##查看主从复制状态,注意此处命令后不加‘;‘
*************************** 1. row ***************************
               Slave_IO_State: Waiting for master to send event
                  Master_Host: 172.25.40.11   ##主库ip
                  Master_User: repl  #主库用户名
                  Master_Port: 3306   #端口
                Connect_Retry: 60
              Master_Log_File: mysql-bin.000002  #主库日志开始的位置
          Read_Master_Log_Pos: 691
               Relay_Log_File: westos2-relay-bin.000002  #从库日志开始复制的位置
                Relay_Log_Pos: 320
        Relay_Master_Log_File: mysql-bin.000002
             Slave_IO_Running: Yes
            Slave_SQL_Running: Yes     ##这两个参数是Yes,表示成功
7.)创建新数据测试主从同步是否生效
‘注意:写操作只能在master节点上做,因为master节点不会去同步slave节点的内容’
主库:
mysql> create database linux;   ##创建linux库
Query OK, 1 row affected (0.38 sec)

mysql> use linux;  #进入linux库
Database changed
mysql> create table usertb (  #建立表
    -> username varchar(10) not null,
    -> password varchar(15) not null);
Query OK, 0 rows affected (0.68 sec)

mysql> desc usertb;  ##查看表信息
+----------+-------------+------+-----+---------+-------+
| Field    | Type        | Null | Key | Default | Extra |
+----------+-------------+------+-----+---------+-------+
| username | varchar(10) | NO   |     | NULL    |       |
| password | varchar(15) | NO   |     | NULL    |       |
+----------+-------------+------+-----+---------+-------+
2 rows in set (0.03 sec)

mysql> insert into usertb values ('user1','123'); ##插入数据
Query OK, 1 row affected (0.73 sec)

mysql> select * from usertb; ##查看
+----------+----------+
| username | password |
+----------+----------+
| user1    | 123      |
+----------+----------+
1 row in set (0.00 sec)
从库:
mysql> show databases;  #查看数据库
+--------------------+
| Database           |
+--------------------+
| information_schema |
| linux              |   ##linux 库可见
| mysql              |
| performance_schema |
| sys                |
+--------------------+
5 rows in set (0.00 sec)

mysql> use linux;  #进入linux库
Reading table information for completion of table and column names
You can turn off this feature to get a quicker startup with -A

Database changed
mysql> desc usertb; ##查看表信息
+----------+-------------+------+-----+---------+-------+
| Field    | Type        | Null | Key | Default | Extra |
+----------+-------------+------+-----+---------+-------+
| username | varchar(10) | NO   |     | NULL    |       |
| password | varchar(15) | NO   |     | NULL    |       |
+----------+-------------+------+-----+---------+-------+
2 rows in set (0.00 sec)

mysql> select * from usertb; ##查看
+----------+----------+
| username | password |
+----------+----------+
| user1    | 123      |
+----------+----------+
1 row in set (0.00 sec)
######基于GTID的主从复制 + 半同步#####
由于同一事务的GTID在所有节点上的值一致
我们都不需要知道GTID的具体值
‘前提:需要做好前面的binlog复制’
在传统的复制里面,当发生故障,需要主从切换,需要找到binlog和pos点,然后将主节点指向新的主节点,相对来说比较麻烦,也容易出错。在MySQL 5.6里面,不用再找binlog和pos点,我们只需要知道主节点的ip,端口,以及账号密码就行,因为复制是自动的,MySQL会通过内部机制GTID自动找点同步
从服务器连接到主服务器之后,把自己执行过的GTID(Executed_Gtid_Set)
show variables like ‘log_%’; #查看二进制日志
1)先在主库上添加配置
[root@westos1 mysql]# vim /etc/my.cnf
log-bin=mysql-bin
server-id=1
gtid_mode=ON
enforce-gtid-consistency=true
mysql> select * from gtid_executed;	##是空的,因为还没重启  ##在slave上面看
Empty set (0.00 sec)

[root@westos1 mysql]#  mysqlbinlog mysql-bin.000002	##可以看到之前做的操作都在里面

[root@westos1 mysql]#  cat auto.cnf 	##看到westos的uuid
[auto]
server-uuid=f84e8de1-38a2-11e9-b78c-5254009afece

[root@westos1 mysql]# systemctl restart mysqld   ##重启
从库:
[root@westos2 mysql]# systemctl stop mysqld
[root@westos2 mysql]# vim /etc/my.cnf
server-id=2
gtid_mode=ON
enforce-gtid-consistency=true
[root@westos2 mysql]# systemctl restart mysqld
[root@westos2 mysql]# cd /var/lib/mysql
[root@westos2 mysql]# ls
auto.cnf         ib_logfile0  mysql.sock.lock     sys
ca-key.pem       ib_logfile1  performance_schema  westos2-relay-bin.000004
ca.pem           ibtmp1       private_key.pem     westos2-relay-bin.000005
client-cert.pem  linux        public_key.pem      westos2-relay-bin.index
client-key.pem   master.info  relay-log.info
ib_buffer_pool   mysql        server-cert.pem
ibdata1          mysql.sock   server-key.pem
[root@westos2 mysql]# cat relay-log.info   #查看relay-log
7
./westos2-relay-bin.000005
367
mysql-bin.000003
154
0
0
1
[root@westos2 mysql]# mysql -uroot -pWestos+001
mysql> stop slave;  ##先停止复制
Query OK, 0 rows affected (0.05 sec)

mysql>  CHANGE MASTER TO  ##修改master信息
    -> MASTER_HOST = '172.25.40.11',
    -> MASTER_USER = 'repl',
    ->  MASTER_PASSWORD = 'Westos+001',
    -> MASTER_AUTO_POSITION = 1;  ##启用gtid,它是自动的
Query OK, 0 rows affected, 2 warnings (0.12 sec)

mysql> start slave;
Query OK, 0 rows affected (0.04 sec)

mysql> show slave status\G  ##查看状态,可以看到下面两个参数是空的
           Retrieved_Gtid_Set:
            Executed_Gtid_Set:
在主库上插入数据
[root@westos1 mysql]# mysql -uroot -pWestos+001

mysql> show databases;
+--------------------+
| Database           |
+--------------------+
| information_schema |
| linux              |
| mysql              |
| performance_schema |
| sys                |
+--------------------+
5 rows in set (0.00 sec)
mysql> use linux;
Reading table information for completion of table and column names
You can turn off this feature to get a quicker startup with -A
Database changed
mysql> insert into usertb values ('user2','123');  ##插入数据
Query OK, 1 row affected (0.23 sec)

mysql> insert into usertb values ('user3','456');
Query OK, 1 row affected (0.40 sec)
mysql> select * from usertb;
+----------+----------+
| username | password |
+----------+----------+
| user1    | 123      |
| user2    | 123      |
| user3    | 456      |
+----------+----------+
3 rows in set (0.00 sec)
从库查看状态:
mysql> show slave status\G ## 这两个参数变了,从1位置开始复制的

Retrieved_Gtid_Set: 32e426a2-9e02-11e9-93da-525400807d36:1-2 Executed_Gtid_Set: 32e426a2-9e02-11e9-93da-525400807d36:1-2
mysql> use linux;
Reading table information for completion of table and column names
You can turn off this feature to get a quicker startup with -A

Database changed
mysql> select * from usertb;
+----------+----------+
| username | password |
+----------+----------+
| user1    | 123      |
| user2    | 123      |
| user3    | 456      |
+----------+----------+
3 rows in set (0.00 sec)
mysql> use mysql;    查看gtid模式复制的起始和结束位置
Reading table information for completion of table and column names
You can turn off this feature to get a quicker startup with -A

Database changed
mysql> select * from gtid_executed;
+--------------------------------------+----------------+--------------+
| source_uuid                          | interval_start | interval_end |
+--------------------------------------+----------------+--------------+
| 32e426a2-9e02-11e9-93da-525400807d36 |              1 |            1 |
| 32e426a2-9e02-11e9-93da-525400807d36 |              2 |            2 |
+--------------------------------------+----------------+--------------+
2 rows in set (0.00 sec)
##########mysql半同步#########
异步复制(Asynchronous replication)
MySQL默认的复制即是异步的,主库在执行完客户端提交的事务后会立即将结果返给给客户端,并不关心从库是否已经接收并处理。这样就会有一个问题:主库如果crash掉了,此时主库上已经提交的事务可能并没有传到从库上,如果此时强行将从库提升为主库,可能导致新主库上的数据不完整。
全同步复制(Fully synchronous replication)
指当主库执行完一个事务,所有的从库都执行了该事务才返回给客户端。因为需要等待所有从库执行完该事务才能返回,所以全同步复制的性能必然会收到严重的影响。
半同步复制(Semisynchronous replication)
介于异步复制和全同步复制之间,主库在执行完客户端提交的事务后不是立刻返回给客户端,而是等待至少一个从库接收到并写到relay log中才返回给客户端。相对于异步复制,半同步复制提高了数据的安全性,同时它也造成了一定程度的延迟,这个延迟最少是一个TCP/IP往返的时间。所以,半同步复制最好在低延时的网络中使用。
在2010年MySQL 5.5版本之前,一直采用的是这种异步复制的方式。主库的事务执行不会管备库的同步进度,如果备库落后,主库不幸crash,那么就会导致数据丢失。于是在MySQL在5.5中就顺其自然地引入了半同步复制,主库在应答客户端提交的事务前需要保证至少一个从库接收并写到relay log中
对照官方文档 https://dev.mysql.com/doc/refman/5.7/en/replication-semisync-installation.html
1)正常的复制为:事务一(t1)写入binlog buffer;dumper线程通知slave有新的事务t1;binlog buffer进行checkpoint;slave的io线程接收到t1并写入到自己的的relay log;slave的sql线程写入到本地数据库。 这时,master和slave都能看到这条新的事务,即使master挂了,slave可以提升为新的master。
2)异常的复制为:事务一(t1)写入binlog buffer;dumper线程通知slave有新的事务t1;binlog buffer进行checkpoint;slave因为网络不稳定,一直没有收到t1;master挂掉,slave提升为新的master,t1丢失。
3)很大的问题是:主机和从机事务更新的不同步,就算是没有网络或者其他系统的异常,当业务并发上来时,slave因为要顺序执行master批量事务,导致很大的延迟。
为了弥补以上几种场景的不足,MySQL从5.5开始推出了半同步复制。相比异步复制,半同步复制提高了数据完整性,因为很明确知道,在一个事务提交成功之后,这个事务就至少会存在于两个地方。即在master的dumper线程通知slave后,增加了一个ack(消息确认),即是否成功收到t1的标志码,也就是dumper线程除了发送t1到slave,还承担了接收slave的ack工作。如果出现异常,没有收到ack,那么将自动降级为普通的复制,直到异常修复后又会自动变为半同步复制。
1.)在主数据库上安装插件
mysql> INSTALL PLUGIN rpl_semi_sync_master SONAME 'semisync_master.so';  在主库上(server1)安装插件
Query OK, 0 rows affected (0.43 sec)

mysql> SELECT PLUGIN_NAME, PLUGIN_STATUS FROM INFORMATION_SCHEMA.PLUGINS WHERE PLUGIN_NAME LIKE '%semi%'; 查看插件是否安装
+----------------------+---------------+
| PLUGIN_NAME          | PLUGIN_STATUS |
+----------------------+---------------+
| rpl_semi_sync_master | ACTIVE        |
+----------------------+---------------+
1 row in set (0.00 sec)
mysql> SET GLOBAL rpl_semi_sync_master_enabled =1; .激活插件
Query OK, 0 rows affected (0.00 sec)
2.)在slave节点上(westos2)也安装插件
mysql> INSTALL PLUGIN rpl_semi_sync_slave SONAME 'semisync_slave.so';    #安装插件
Query OK, 0 rows affected (0.36 sec)

mysql> SET GLOBAL rpl_semi_sync_slave_enabled =1;  #激活插件
Query OK, 0 rows affected (0.00 sec)
3.)从库重启IO线程使半同步生效
mysql> STOP SLAVE IO_THREAD;
Query OK, 0 rows affected (0.33 sec)

mysql> START SLAVE IO_THREAD;
Query OK, 0 rows affected (0.00 sec)
4.)主库在master节点上查看
mysql> show status like '%rpl%';
+--------------------------------------------+-------+
| Variable_name                              | Value |
+--------------------------------------------+-------+
| Rpl_semi_sync_master_clients               | 1     |
| Rpl_semi_sync_master_net_avg_wait_time     | 0     |
| Rpl_semi_sync_master_net_wait_time         | 0     |
| Rpl_semi_sync_master_net_waits             | 0     |
| Rpl_semi_sync_master_no_times              | 0     |
| Rpl_semi_sync_master_no_tx                 | 0     |
| Rpl_semi_sync_master_status                | ON    |   ##表示已开启
| Rpl_semi_sync_master_timefunc_failures     | 0     |
| Rpl_semi_sync_master_tx_avg_wait_time      | 0     |
| Rpl_semi_sync_master_tx_wait_time          | 0     |
| Rpl_semi_sync_master_tx_waits              | 0     |
| Rpl_semi_sync_master_wait_pos_backtraverse | 0     |
| Rpl_semi_sync_master_wait_sessions         | 0     |
| Rpl_semi_sync_master_yes_tx                | 0     |
+--------------------------------------------+-------+
14 rows in set (0.01 sec)

mysql> show variables like '%rpl%';
+-------------------------------------------+------------+
| Variable_name                             | Value      |
+-------------------------------------------+------------+
| rpl_semi_sync_master_enabled              | ON         |是否开启半同步
| rpl_semi_sync_master_timeout              | 10000      |切换复制的timeout
| rpl_semi_sync_master_trace_level          | 32         |用于开启半同步复制模式时的调试级别,默认是32
| rpl_semi_sync_master_wait_for_slave_count | 1          | 至少有N个slave接收到日志
| rpl_semi_sync_master_wait_no_slave        | ON         |是否允许master 每个事物提交后都要等待slave的receipt信号。默认为on
| rpl_semi_sync_master_wait_point           | AFTER_SYNC |等待的point
| rpl_stop_slave_timeout                    | 31536000   |制stop slave 的执行时间,在重放一个大的事务的时候,突然执行stop slave,命令 stop slave会执行很久,这个时候可能产生死锁或阻塞,严重影响性能
+-------------------------------------------+------------+
7 rows in set (0.01 sec)
https://dev.mysql.com/doc/refman/5.6/en/server-system-variables.html #具体参数可以看官方文档
默认延迟10s
5.)在slave节点上查看
mysql> show variables like '%rpl%';
+---------------------------------+----------+
| Variable_name                   | Value    |
+---------------------------------+----------+
| rpl_semi_sync_slave_enabled     | ON       |是否开启半同步
| rpl_semi_sync_slave_trace_level | 32       |用于开启半同步复制模式时的调试级别,默认是32
| rpl_stop_slave_timeout          | 31536000 |
+---------------------------------+----------+
3 rows in set (0.01 sec)
6).停止slave上的io线程再测试
mysql> STOP SLAVE IO_THREAD;
在master上插入数据
mysql> use linux;
Reading table information for completion of table and column names
You can turn off this feature to get a quicker startup with -A

Database changed
mysql> insert into usertb values ('user4','456');
Query OK, 1 row affected (10.06 sec)#等待10s才成功,因为上面超时时间是10s,10s后如果没有收到slave节点的返回,就会切换到异步复制


mysql> show status like '%rpl%'; 查看半同步状态也是off,待同步的事务也是1
+--------------------------------------------+-------+
| Variable_name                              | Value |
+--------------------------------------------+-------+
| Rpl_semi_sync_master_clients               | 0     |
| Rpl_semi_sync_master_net_avg_wait_time     | 0     |
| Rpl_semi_sync_master_net_wait_time         | 0     |
| Rpl_semi_sync_master_net_waits             | 0     |
| Rpl_semi_sync_master_no_times              | 1     |
| Rpl_semi_sync_master_no_tx                 | 1     |
| Rpl_semi_sync_master_status                | OFF   |
| Rpl_semi_sync_master_timefunc_failures     | 0     |
| Rpl_semi_sync_master_tx_avg_wait_time      | 0     |
| Rpl_semi_sync_master_tx_wait_time          | 0     |
| Rpl_semi_sync_master_tx_waits              | 0     |
| Rpl_semi_sync_master_wait_pos_backtraverse | 0     |
| Rpl_semi_sync_master_wait_sessions         | 0     |
| Rpl_semi_sync_master_yes_tx                | 0     |
+--------------------------------------------+-------+
14 rows in set (0.00 sec)
mysql> insert into usertb values ('user5','456'); #再次插入时就不会延迟,因为已经是异步了
Query OK, 1 row affected (0.10 sec)
7.)slave上开启io线程
mysql> START SLAVE IO_THREAD;
Query OK, 0 rows affected (0.00 sec)

mysql> show processlist;查看进程
+----+-------------+-----------+-------+---------+------+--------------------------------------------------------+------------------+
| Id | User        | Host      | db    | Command | Time | State                                                  | Info             |
+----+-------------+-----------+-------+---------+------+--------------------------------------------------------+------------------+
|  4 | root        | localhost | mysql | Query   |    0 | starting                                               | show processlist |
|  6 | system user |           | NULL  | Connect | 5800 | Slave has read all relay log; waiting for more updates | NULL             |
|  8 | system user |           | NULL  | Connect |   36 | Waiting for master to send event                       | NULL             |
+----+-------------+-----------+-------+---------+------+--------------------------------------------------------+------------------+
3 rows in set (0.00 sec)

mysql> use linux;
Database changed
mysql> select * from usertb;查看表信息,已经复制过来
+----------+----------+
| username | password |
+----------+----------+
| user1    | 123      |
| user2    | 123      |
| user3    | 456      |
| user4    | 456      |
| user5    | 456      |
+----------+----------+
5 rows in set (0.00 sec)
8.)master上查看进程
mysql> show processlist;
+----+------+---------------+-------+------------------+------+---------------------------------------------------------------+------------------+
| Id | User | Host          | db    | Command          | Time | State                                                         | Info             |
+----+------+---------------+-------+------------------+------+---------------------------------------------------------------+------------------+
|  5 | root | localhost     | linux | Query            |    0 | starting                                                      | show processlist |
|  7 | repl | westos2:47054 | NULL  | Binlog Dump GTID |  685 | Master has sent all binlog to slave; waiting for more updates | NULL             |
+----+------+---------------+-------+------------------+------+---------------------------------------------------------------+------------------+
2 rows in set (0.00 sec)
说明各列的含义和用途
id列:一个标识
user列: 显示当前用户,如果不是root,这个命令就只显示你权限范围内的sql语句
host列:显示这个语句是从哪个ip 的哪个端口上发出的。可用来追踪出问题语句的用户
db列:显示这个进程目前连接的是哪个数据库
command列:显示当前连接的执行的命令,一般就是休眠(sleep),查询(query),连接(connect)
time列:此这个状态持续的时间,单位是秒
state列:显示使用当前连接的sql语句的状态