05.Spring Boot 实战~Spring Boot整合JDBC
05.Spring Boot 实战~Spring Boot整合JDBC
本文是上一篇文章的后续,详情点击该链接
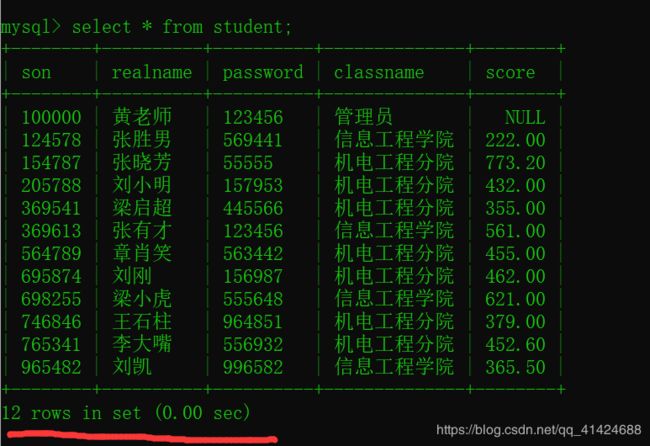
本文用到的数据库表
【声明:本文数据库内的信息是随机添加用来学习,如有雷同,纯属巧合】
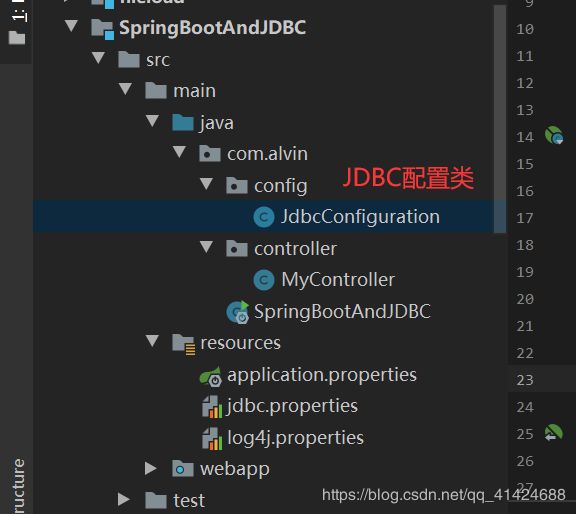
搭建项目框架
整合JDBC所需要的依赖
<project xmlns="http://maven.apache.org/POM/4.0.0" xmlns:xsi="http://www.w3.org/2001/XMLSchema-instance"
         xsi:schemaLocation="http://maven.apache.org/POM/4.0.0 https://maven.apache.org/xsd/maven-4.0.0.xsd">
  <modelVersion>4.0.0modelVersion>

  <groupId>com.alvingroupId>
  <artifactId>SpringBootAndJDBCartifactId>
  <version>0.0.1-SNAPSHOTversion>
  <name>SpringBootAndJDBCname>
  <description>Demo project for Spring Bootdescription>

  <properties>
    <java.version>1.8java.version>
  properties>


  <parent>
    <groupId>org.springframework.bootgroupId>
    <artifactId>spring-boot-starter-parentartifactId>
    <version>2.2.0.RELEASEversion>
    <relativePath/>
  parent>

  <dependencies>
    <dependency>
      <groupId>org.springframework.bootgroupId>
      <artifactId>spring-boot-starter-webartifactId>
    dependency>


    <dependency>
      <groupId>org.springframework.bootgroupId>
      <artifactId>spring-boot-starter-thymeleafartifactId>
    dependency>

    <dependency>
      <groupId>org.springframework.bootgroupId>
      <artifactId>spring-boot-starter-jdbcartifactId>
    dependency>

    <dependency>
      <groupId>mysqlgroupId>
      <artifactId>mysql-connector-javaartifactId>
      <version>8.0.20version>
    dependency>


    <dependency>
      <groupId>com.alibabagroupId>
      <artifactId>druidartifactId>
      <version>1.1.12version>
    dependency>
    <dependency>
      <groupId>org.springframework.bootgroupId>
      <artifactId>spring-boot-starter-testartifactId>
      <scope>testscope>
      <exclusions>
        <exclusion>
          <groupId>org.junit.vintagegroupId>
          <artifactId>junit-vintage-engineartifactId>
        exclusion>
      exclusions>
    dependency>
  dependencies>

  <build>
    <plugins>
      <plugin>
        <groupId>org.springframework.bootgroupId>
        <artifactId>spring-boot-maven-pluginartifactId>
      plugin>
    plugins>
  build>
project>
JDBC配置类
//jdbc的配置类
@Configuration
public class JdbcConfiguration {
    //实例化Druid
    @Bean
    public DataSource getDataSoure(){
        DruidDataSource source = new DruidDataSource();
        source.setDriverClassName("com.mysql.cj.jdbc.Driver");
        source.setUrl("jdbc:mysql://127.0.0.1:3306/mydb?useSSL=false&useUnicode=true&characterEncoding=utf8&serverTimezone=Asia/Shanghai");
        source.setUsername("root");
        source.setPassword("root");
        return source;
    }
}
也可以使用通过扫描properties
//jdbc的配置类
@Configuration
@PropertySource("classpath:/jdbc.properties")//加载指定的Properties配置文件
public class JdbcConfiguration {
    @Value("${jdbc.driverClassName}")
    private String driverClassName;
    @Value("${jdbc.url}")
    private String url;
    @Value("${jdbc.username}")
    private String username;
    @Value("${jdbc.password}")
    private String password;

    //实例化Druid
    @Bean
    public DataSource getDataSoure(){
        DruidDataSource source = new DruidDataSource();
        source.setDriverClassName(driverClassName);
        source.setUrl(url);
        source.setUsername(username);
        source.setPassword(password);
        return source;
    }
}
这种写法看起来是挺不错的,但是也有一个弊端,那就是写的太死。假如我要在其他类里面需要用到以上定义的四个属性,则又需要重写,代码的复用性不高。那么怎么办呢?我们再来看看另一种方法
首先还是在刚刚那个包下创建一个JDBCProperties类
@ConfigurationProperties(prefix = "jdbc")
public class JDBCProperties {
    //属性名字必须和配置项后缀一模一样, jdbc.driverClassName
    private String driverClassName;
    private String url;
    private String username;
    private String password;
}//get  set  就不写在文章里面了
修改刚刚的类
//jdbc的配置类
@Configuration
@EnableConfigurationProperties(JDBCProperties.class)    //通过这个注解来指定需要加载的配置属性类
public class JdbcConfiguration {
    @Autowired
    private JDBCProperties jdbcProperties;
    //实例化Druid
    @Bean
    public DataSource getDataSoure(){
        DruidDataSource source = new DruidDataSource();
        source.setDriverClassName(this.jdbcProperties.getDriverClassName());
        source.setUrl(this.jdbcProperties.getUrl());
        source.setUsername(this.jdbcProperties.getUsername());
        source.setPassword(this.jdbcProperties.getPassword());
        return source;
    }
}
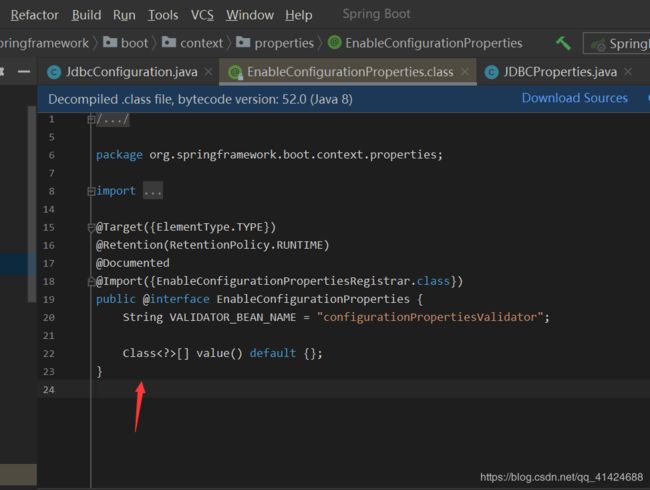
我们点进@EnableConfigurationProperties源码可以看到
它这里返回的是一个Class,所以以后我们如果有多个配置文件,或者有多个需要这个配置文件的类,就不需要每次都重复写代码,直接复用就好了~
最简单的配置类
public class JdbcConfiguration{
/** * 实 例 化 Druid */
@Bean
@ConfigurationProperties(prefix = "jdbc")
 public DataSource getDataSource(){
 	DruidDataSource source = new DruidDataSource();
  	return source;
 }
}
这样一来我们连实体类都可以不需要了~
通过 SpringBoot 配置文件配置数据源
在 Spring Boot1.x版本中的spring-boot-starter-jdbc启动器中默认使用的是org.apache.tomcat.jdbc.pool.DataSource 作为数据源
在 Spring Boot2.x版本中的spring-boot-starter-jdbc启动器中默认使用的是com.zaxxer.hikariDataSource作为数据源
使用 SpringBoot 默认的 HikariDataSource 数据源
spring.datasource.driver-class-name=com.mysql.cj.jdbc.Driver
spring.datasource.url=jdbc:mysql://127.0.0.1:3306/mydb?useSSL=false&useUnicode=true&characterEncoding=utf8&serverTimezone=Asia/Shanghai
spring.datasource.username=root
spring.datasource.password=root
使用第三方的 Druid 数据源
spring.datasource.type=com.alibaba.druid.pool.DruidDataSource
添加学生信息
先创建一个POJO
public class Student implements Serializable{
    private String son;
    private String realname;
    private String password;
    private String classname;
    private Double score;
}//get set就不再文章里面啰嗦了
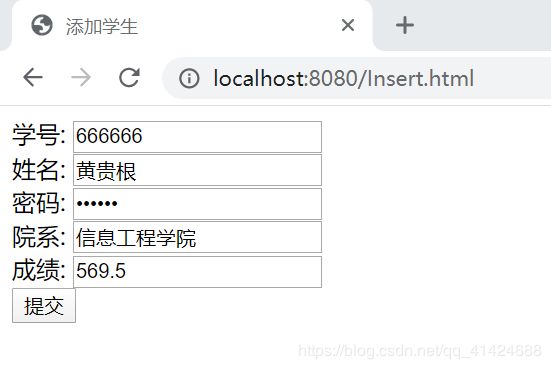
编写Insert.html前台页面
<html lang="en" xmlns:th="http://www.thymeleaf.org">
<link rel="shortcut icon" href="../resources/favicon.ico" th:href="@{/static/favicon.ico}"/>
    <head>
        <meta charset="UTF-8">
        <title>添加学生title>
    head>
    <body>
        <form action="/student/MyControllerInsert" method="post">
            学号: <input type="text" name="son"/><br/>
            姓名: <input type="text" name="realname"/><br/>
            密码: <input type="password" name="password"/><br/>
            院系: <input type="text" name="classname"/><br/>
            成绩: <input type="text" name="score"/><br/>
            <input type="submit" value="提交"/>
        form>
    body>
html>
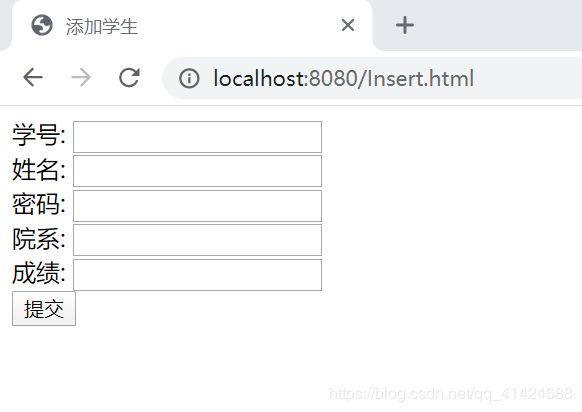
直接访问时
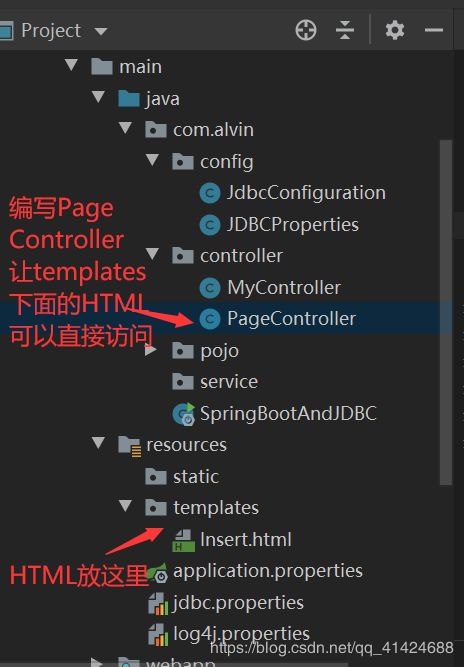
现在来看看showPage的作用
编写showPage
@Controller
public class PageController {
    //页面跳转方法
    @RequestMapping("/{page}")
    public String showPage(@PathVariable String page){
        return page;
    }
}
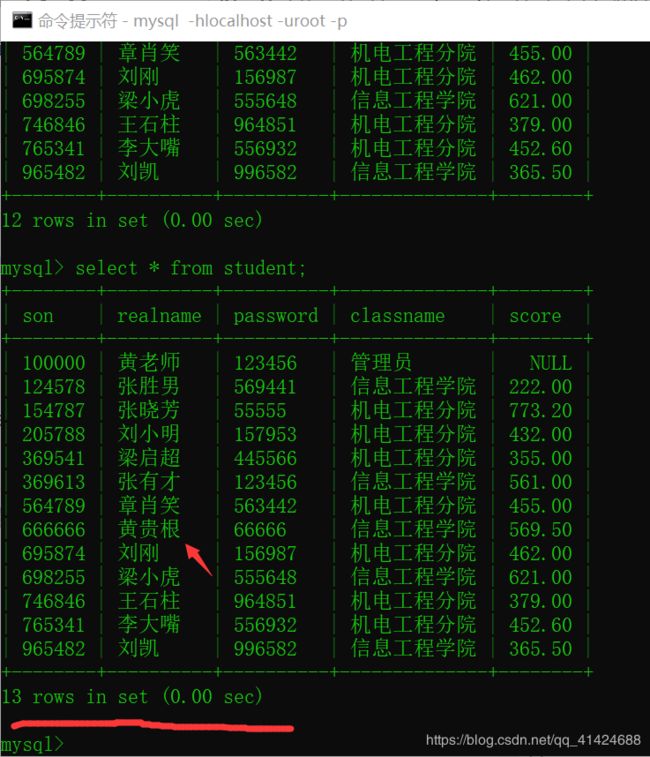
可以直接访问了~
然后我们增加Dao和Service
Dao层代码
@Repository
public class StudentDaoImpl implements StudentDao {

    @Autowired
    private JdbcTemplate jdbcTemplate;

    //添加用户
    @Override
    public void insertStudent(Student student) {
        String sql = "insert into student values(?,?,?,?,?)";
        this.jdbcTemplate.update(sql,student.getSon(),student.getRealname()
                ,student.getPassword(),student.getClassname(),student.getScore());
    }
}
Service层
@Service
public class StudentServiceImpl implements StudentService {

    @Autowired
    private StudentDao studentDao;

    //添加学生信息
    @Override
    @Transactional  //事务注解
    public void addStudent(Student student) {
        this.studentDao.insertStudent(student);
    }
}
Controller
@Controller
@RequestMapping("/student") //前缀
public class MyController {

    @Autowired
    private StudentService studentService;

    @RequestMapping("/MyControllerInsert")
    public String Insert(Student student){
        System.out.println(student);
        try{
            this.studentService.addStudent(student);
        }catch(Exception e){
            e.printStackTrace();
            return"redirect:/error";//跳转失败页面
        }
        return"redirect:/succeed";  //跳转成功页面
    }
}

