安装ubantu之后搭建适合开发的环境
安装ubantu之后搭建适合开发的环境
一、英文版ubuntu的汉化
system setting—->>>>luange support
二、中国版firefox的安装
前言、安装原因
在Ubuntu系统自带的或者软件中心下的Firefox版本下创建一个账号,再在Windows的Firefox下登录发现此账号不存在,原因是Firefox有个全球服务和本地服务,Ubuntu下的Firefox是国际版,属于全球服务,而Windows下的Firefox是本地服务的,两个系统下默认的存储服务器不是一个,无法同步。解决办法就是卸载掉Ubuntu系统下原来firefox,安装Firefox中国版。
安装Firefox中国版步骤如下:
1、下载Firefox中国版:http://firefox.com.cn/download\
2、删除原来的Firefox,在终端输入如下命令
sudo apt-get remove firefox
3、解压Firefox,并且将其放到/usr/local/lib/下
sudo cp -rf firefox /usr/local/lib/
4、创建链接到/usr/bin/里面
在终端输入:
cd /usr/bin/
sudo ln -s /usr/local/lib/firefox/firefox
5、创建Firefox桌面快捷方式
在任意位置新建文档,粘贴以下内容:
[Desktop Entry]
Name=firefox
Name[zh_CN]=火狐浏览器
Comment=火狐浏览器
Exec=”/usr/local/lib/firefox/firefox”
Icon=/usr/local/lib/firefox/browser/icons/mozicon128.png
Terminal=false
Type=Application
Categories=Application;
Encoding=UTF-8
StartupNotify=true*
将此文档命名为firefox.desktop
将firefox.desktop复制到/usr/share/applications文件夹下,在终端输入:
sudo cp firefox.desktop /usr/share/applications/
火狐同步
用户名:
密码:
三、安装搜狗输入法
https://pinyin.sogou.com/linux/
sudo dpkg -i sogoupinyin_2.2.0.0102_amd64.deb
忽略其中的error
选择语言支持选择fcit
reboot即可
四、安装wps
wps下载网址:http://community.wps.cn/download/
关于Ubuntu16.04中WPS不能输入中文的问题:参考
http://blog.csdn.net/duxu24/article/details/52711693
五、安装byondcompare
http://www.scootersoftware.com/download.php
六、安装Visual Studio Code
参考链接
a、安装Ubuntu Make:
sudo add-apt-repository ppa:ubuntu-desktop/ubuntu-make
sudo apt-get update
sudo apt-get install ubuntu-make
b、安装Visual Studio Code:
umake web visual-studio-code
c、卸载
umake web visual-studio-code –remove
七、IntelliJ IDEA
下载链接
点击该网址的绿色按钮SHA-256 checksum即可获得校验码
cd到相应的目录执行sha256sum ideaIC-*.tar.gz然后二者比对
相同则继续安装。
不同,那么我们得重新下载。
解压并安装
tar -zxvf ideaIC-*.tar.gz
cd到相应目录下
sudo chmod a=+rx bin/idea.sh
sudo bin/idea.sh
参考的文档为:中文链接
英文链接How to Install IntelliJ IDEA on Ubuntu Linux
八、安装星际译王
参考
a、install stardict
sudo apt-get install stardict
b、配置环境
下载词库链接链接1链接2
将下载的文件copy到/usr/share/stardict/dic/目录下
kuxuande zuomian酷炫的桌面系统,没有尝试过
安装compizconfig-settings-manager
命令行输入:sudo apt-get install compizconfig-settings-manager
运行compizconfig-settings-manager软件
DISPLAY=:0 ccsm
info
九、Ubuntu16 apt-get更换为阿里源
1.备份系统自带源
mv /etc/apt/sources.list /etc/apt/sources.list.bak
2.修改/etc/apt/sources.list文件
vim /etc/apt/sources.list
deb-src http://archive.ubuntu.com/ubuntu xenial main restricted #Added by software-properties
 deb http://mirrors.aliyun.com/ubuntu/ xenial main restricted
 deb-src http://mirrors.aliyun.com/ubuntu/ xenial main restricted multiverse universe #Added by software-properties
 deb http://mirrors.aliyun.com/ubuntu/ xenial-updates main restricted
 deb-src http://mirrors.aliyun.com/ubuntu/ xenial-updates main restricted multiverse universe #Added by software-properties
 deb http://mirrors.aliyun.com/ubuntu/ xenial universe
 deb http://mirrors.aliyun.com/ubuntu/ xenial-updates universe
 deb http://mirrors.aliyun.com/ubuntu/ xenial multiverse
 deb http://mirrors.aliyun.com/ubuntu/ xenial-updates multiverse
 deb http://mirrors.aliyun.com/ubuntu/ xenial-backports main restricted universe multiverse
 deb-src http://mirrors.aliyun.com/ubuntu/ xenial-backports main restricted universe multiverse #Added by software-properties
 deb http://archive.canonical.com/ubuntu xenial partner
 deb-src http://archive.canonical.com/ubuntu xenial partner
 deb http://mirrors.aliyun.com/ubuntu/ xenial-security main restricted
 deb-src http://mirrors.aliyun.com/ubuntu/ xenial-security main restricted multiverse universe #Added by software-properties
 deb http://mirrors.aliyun.com/ubuntu/ xenial-security universe
 deb http://mirrors.aliyun.com/ubuntu/ xenial-security multiverse
3.更新生效
sudo apt-get update
十、ubuntu 下的录屏软件
参考
添加源:sudo add-apt-repository ppa:maarten-baert/simplescreenrecorder

更新源:sudo apt-get update

安装:sudo apt-get install simplescreenrecorder
在ubuntu17.10可以直接在ubuntu software获取,其他ubuntu版本不知道
十一、系统还原
使用systemback制作Ubuntu自定义系统镜像和系统备份
**
安装
**
sudo add-apt-repository ppa:nemh/systemback#ubuntu17.10可能不适用
sudo apt-get update && sudo apt-get install systemback unionfs-fuse
当在执行时sudo add-apt-repository ppa:nemh/systemback#ubuntu17.10可能不适用
Currently supported Ubuntu releases:
- 14.04.X LTS
- 15.04
- 15.10
- 16.04.X LTS
- 16.10
------等到找到ubuntu17.10
十二、搭建github
参考
一.检查是否安装了git
二.如果没有安装,则使用如下的命令
git version
sudo apt-get install git git-core
三:进行SSH认证
ssh -T [email protected]
如果没有会报一下错误
The authenticity of host 'github.com (52.74.223.119)' can't be established.
RSA key fingerprint is SHA256:nThbg6kXUpJWGl7E1IGOCspRomTxdCARLviKw6E5SY8.
Are you sure you want to continue connecting (yes/no)? yes
Warning: Permanently added 'github.com,52.74.223.119' (RSA) to the list of known hosts.
Permission denied (publickey).
四.配置信息
git config --global user.name "xiaohui"
git config --global user.email "[email protected]"
git config --list
user.name=xiaohui
user.email=1406744100@qq.com
五.
配置完成后,需要创建验证用的公钥,因为git是通过ssh的方式访问资源库的,所以需要在本地创建验证用的文件。使用命令ssh-keygen -C ‘you email [email protected]’ -t rsa(注意ssh与-keygen之间没有空格),会在用户目录~/.ssh/下建立相应的密钥文件。
ssh-keygen -C ‘1406744100@qq.com’ -t rsa
xiaohui@xiaohui:/usr/local/lib/firefox$ ssh-keygen -C ‘1406744100@qq.com’ -t rsaGenerating public/private rsa key pair.
Enter file in which to save the key (/home/xiaohui/.ssh/id_rsa):
Enter passphrase (empty for no passphrase):
Enter same passphrase again:
Your identification has been saved in /home/xiaohui/.ssh/id_rsa.
Your public key has been saved in /home/xiaohui/.ssh/id_rsa.pub.
The key fingerprint is:
SHA256:MU+kIbZECp5M10DLOSWGeGRMhwZ90uJd59jf08qxous ‘1406744100@qq.com’
The key's randomart image is:
+---[RSA 2048]----+
|.B*=B+* . .      |
|.=XBoOoo.+       |
| ++=*..=+ .      |
|  . ... o=       |
|        S... .   |
|          . + .  |
|           . =   |
|          . +    |
|       .Eo .     |
+----[SHA256]-----+
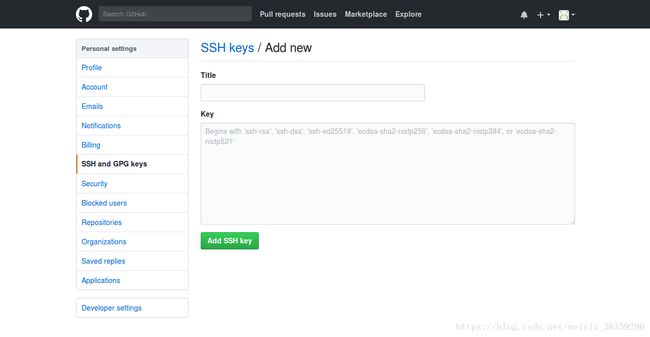
创建完公钥后,需要上传。使用命令cd ~/.ssh进入~/.ssh文件夹,输入gedit id_rsa.pub打开id_rsa.pub文件,复制其中所有内容。
cd ~/.ssh
gedit id_rsa.pubEND:再次验证
ssh -T [email protected]
 Hi progressTogether! You've successfully authenticated, but GitHub does not provide shell access.