JS单元测试简单的项目实例(mocha+unit.js+istanbul)
MochaPro项目实例
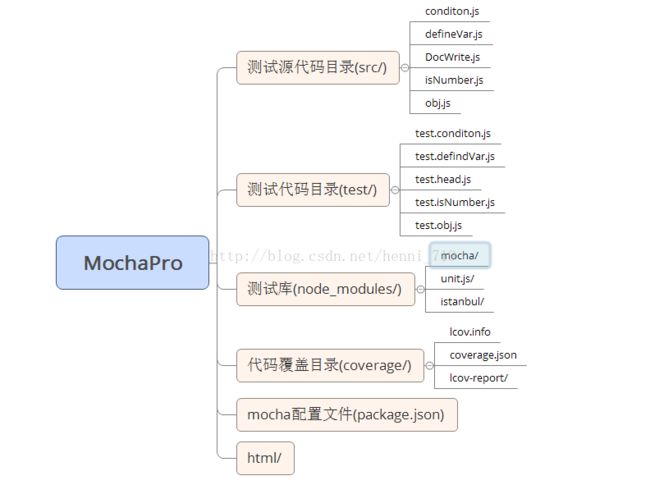
整体MochaPro项目框架图:
项目测试设计的库文件:mocha、unit.js、istanbul
第一步,确定项目测试的源代码,MochaPro项目的测试源代码放在,src路径下
condition.js
function judge(a,b)
{
	if(a>10 && b<15){
		if(!(a==b)){
			return (a>b)?a:b;
		}
		else{
			return a;
		}
	}
	else if(a===11 || b===16){
		return a+b;
	}
    else{
		return -1;
	}
}

module.exports=judge;exports.x=2;
exports.y=3;
exports.str='hell0';
exports.arr=['hell','obj'];var head=function(hello){
return hello;
};
module.exports=head;var isNumber=function(num){
if(!isNaN(num))
{
return num;
}
else
{
return "it is not number";
}
}
module.exports=isNumber;var person={
firstname : "Bill",
lastname : "Gates",
id : 5566,
sex : ['male','female'],
date : '2016/1/18'
};
module.exports=person;第二步,安装单元测试所依赖的库
安装库的方式有两种,不管是哪种安装方式,最好都在MochaPro根目录下,我的是在E:/MochaPro,单个安装执行的命令如下:
E:
cd  MochaPro
npm install mocha --save-dev
npm install unit.js  --save-dev
npm install istanbul --save-dev

或者执行如下命令:
E:
cd  MochaPro
npm install mocha
npm install unit.js
npm install istanbul {
"dependencies": {
"mocha": "^3.2.0",
"istanbul": "^0.4.5",
"unit.js": "2.0.0"
},
"devDependencies": {
"mocha": "^3.2.0",
"istanbul": "^0.4.5",
"unit.js": "2.0.0"
}
}E:
cd MochaPro
npm install
进入到MochaPro目录创建测试目录test,在test文件夹添加测试源码,测试源码文件如下:
test.conditon.js
var judge=require("../src/condition.js");
var test=require("unit.js");
describe("if else",function(){
	it("a=12 and b=13 return b",function(){
		test.should(judge(12,11)).be.equal(12);
	});
	it("a=12 and b=12 return a",function(){
		test.should(judge(12,12)).be.equal(12);
	});
	it("a=11 and b=16 return a+b",function(){
		test.should(judge(11,16)).be.equal(27);
	});
	it("a=10 and b=16 return a+b",function(){
		test.should(judge(10,16)).be.equal(26);
	});
	it("a=9 and b=15 return -1",function(){
		test.should(judge(9,15)).be.equal(-1);
	});
	it("a=11 and b=12 return -1",function(){
		test.should(judge(11,12)).be.equal(12);
	});
})
test.defindVar.js
var test=require('unit.js');
/*
var x=2;
var y=3;
var z=x+y;
var str='hell0';
var arr=['hell','obj'];
*/
var Var=require("../src/defineVar.js")
describe('variable define',function(){
	it('array',function(){
		test.object(Var.arr).isArray;
	});
	it('string',function(){
		test.should(Var.str).be.type('string');
	});
	it('number',function(){
		test.should(Var.x).be.equal(2);
		test.should(Var.y).be.equal(3);
	});

})
test.head.js
var head=require("../src/DocWrite.js");
var test=require("unit.js");
describe("head function",function(){
	it("#head",function(){
		var cont="This is a heading";
		test.should(head("This is a heading")).be.equal(cont);
	});
	it("input type is string",function(){
		test.should(head("This is a heading")).be.type("string");
	});
});
test.isNumber.js
var isNumber=require("../src/isNumber.js");
var test=require("unit.js");
describe("test isNumber",function(){
	it("the input is positive interger",function(){
		test.must(isNumber(4)).be.equal(4);
		test.must(isNumber(11111)).be.equal(11111);
	});
	it("the input is zero",function(){
		test.must(isNumber(0)).be.equal(0);
	});
	it("the input is negtive interger",function(){
		test.must(isNumber(-4)).be.equal(-4);
		test.must(isNumber(-11111)).be.equal(-11111);
	});
	it("the input is string",function(){
		test.must(isNumber("hello world")).be.a.string();
		test.must(isNumber("hello world")).be.equal("it is not number");
	});
})
test.obj.js
var person=require("../src/obj.js");
var test=require("unit.js");
describe("obj type",function(){
	it("use hasProperty",function(){
		test.object(person).hasProperty('firstname');
		test.object(person).hasProperty('lastname','Gates');
	});
	it("use isArray and isDate",function(){
		test.object(person).isArray;
		test.object(person).isDate;
	});
	it("use hasKey and hasValue",function(){
		test.object(person).hasValue('Gates');
		test.object(person).hasKey('sex');
	});
})
第四步,执行测试用例
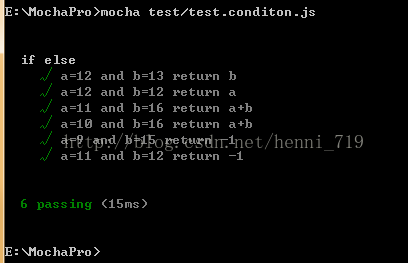
通过mocha命令执行测试用例,执行测试用例的方式有两种,执行单条测试用例的命令如下:
E:
cd  MochaPro
mocha test/test.conditon.js
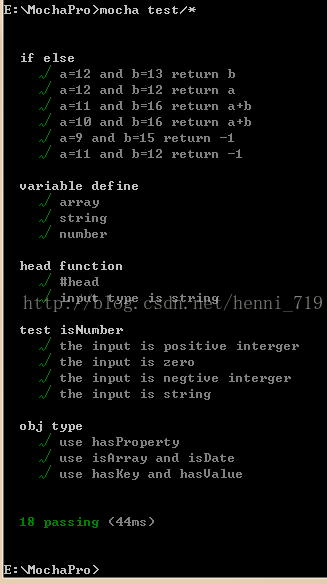
执行批量操作是,src没有其他的文件,为了能更好的执行测试用例,可以通过更改配置文件package.json:
{
  "dependencies": {
    "mocha": "^3.2.0",
	"istanbul": "^0.4.5",
    "unit.js": "2.0.0"
  },
  "devDependencies": {
	"mocha": "^3.2.0",
	"istanbul": "^0.4.5",
    "unit.js": "2.0.0"
  },
  "scripts": {
    "test/*": "mocha",
  }
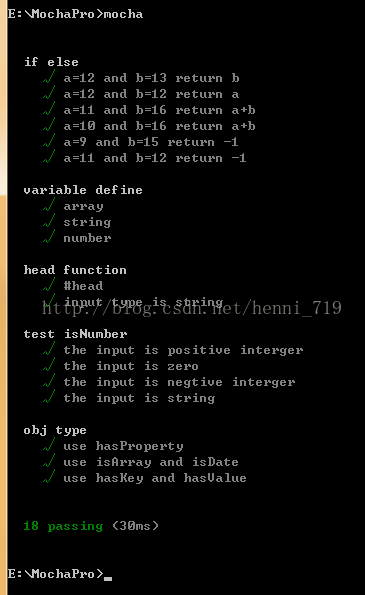
}E:
cd MochaPro
mocha
如果上述都不成功,可以返回到MochaPro的上一层,执行命令:mocha init MochaPro
在目录下会出现如下红色标注的文件:
本人习惯,是都删除,不然mocha.js会出很多问题,根据个人炒作习惯。
第五步,代码覆盖
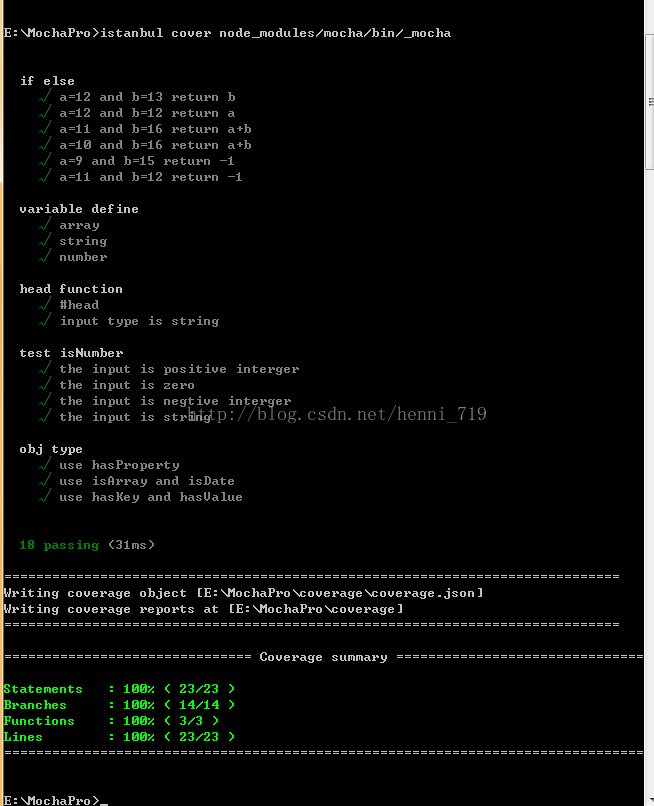
在根目录E:\MochaPro执行命令:istanbul cover node_modules/mocha/bin/_mocha
命令执行成功会出现如下图所示:
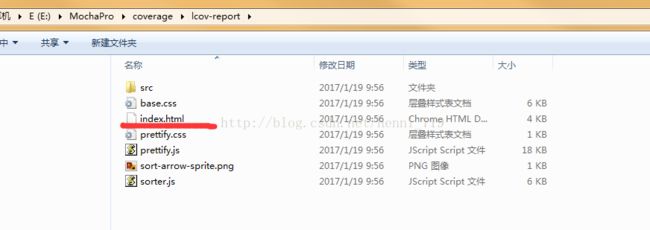
且在E:/MochaPro目录下生成代码覆盖报告文件:
coverage/lcov-report
在该目录下可以看到代码覆盖的html文件,打开index.html,会出现如下图所示:
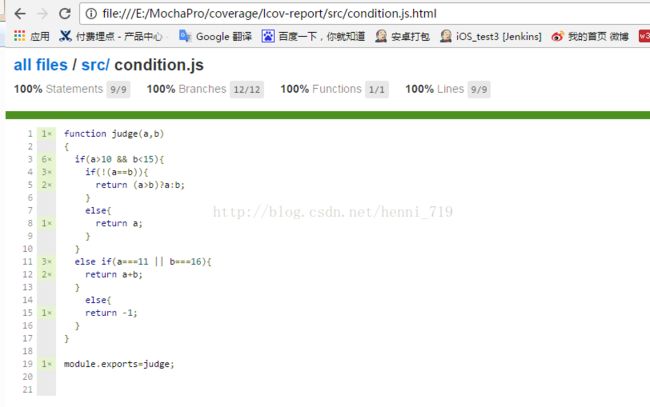
点击src/
点击conditon.js
这些文件中会显示代码的覆盖率,如果覆盖不完全,会有颜色标注,可以通过在测试代码中,增加或修改测试用例,来实现代码覆盖的百分比
