简易双人坦克大战制作流程(二)
8、在Hierarchy中Create Empty一个名字为FirePosition用来设计子弹发射动画,将FirePsition设置成与炮口位置和朝向相同的位置。

9、在Tank上Add Component上添加一个c#名为TankAttact,代码如下:
 private Transform firePosition;

    public GameObject shellPrefab;
    public KeyCode fireKey = KeyCode.Space;
    public float shellSpeed = 20;

	// Use this for initialization
	void Start () {
        firePosition = transform.Find("FirePosition");
	}

	// Update is called once per frame
	void Update () {
        if (Input.GetKeyDown(fireKey))
        {
            GameObject go = GameObject.Instantiate(shellPrefab, firePosition.position, firePosition.rotation);
            go.GetComponent().velocity = go.transform.forward * shellSpeed;
        }
	}
然后将Shell模型放到shellPrefab里,并在shell上Add component一个rigid body


10、这时我们就要给子弹触发爆炸设计粒子效果了,、首先在Shell模型的Capsule collider中勾选Is Trigger触发校验。
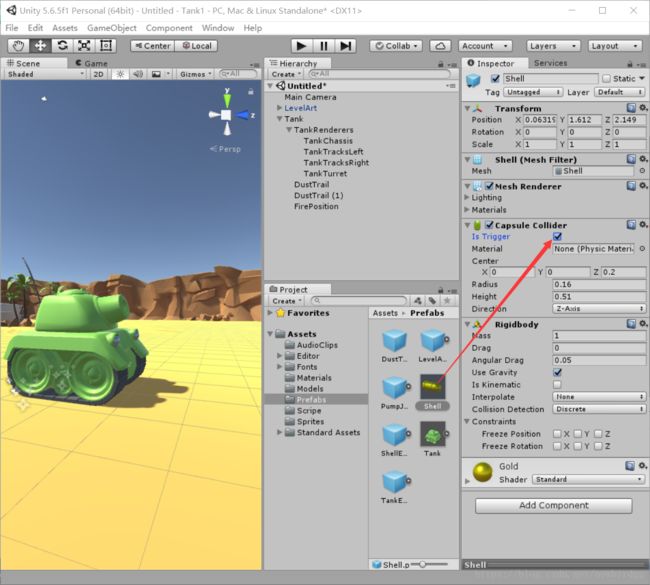
然后在shell模型中Add Comnent一个C#名为Shell用来控制子弹爆炸特效。代码如下:
public GameObject shellExplorePrefab;
// Use this for initialization
public void OnTriggerEnter(Collider collider)
{
GameObject.Instantiate(shellExplorePrefab, transform.position, transform.rotation);
GameObject.Destroy(this.gameObject);
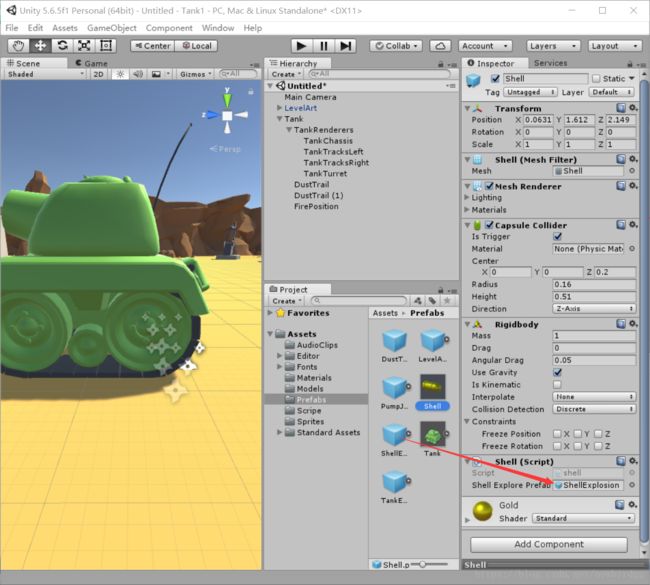
}找到Prefab中的shellExplosion,在shellExplosion中点击Play on Awake不勾选的话是不会有爆炸效果的还会报错。然后将shellExplosion添加到shell.cs里
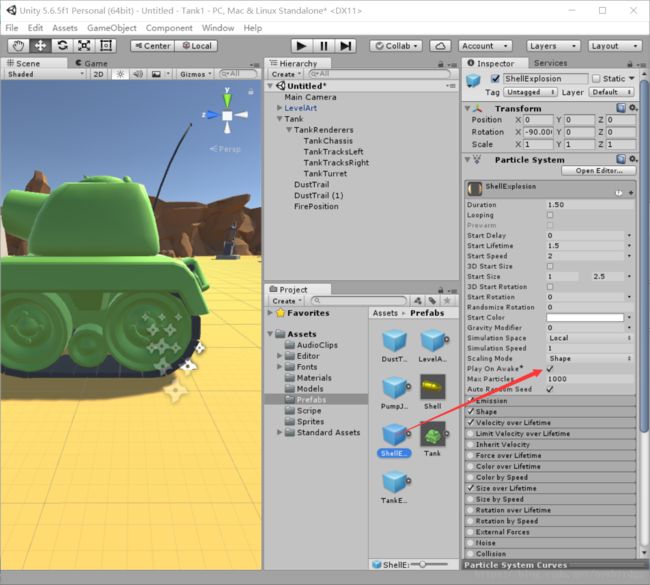
这样飞出去的子弹就会有爆炸特效了。
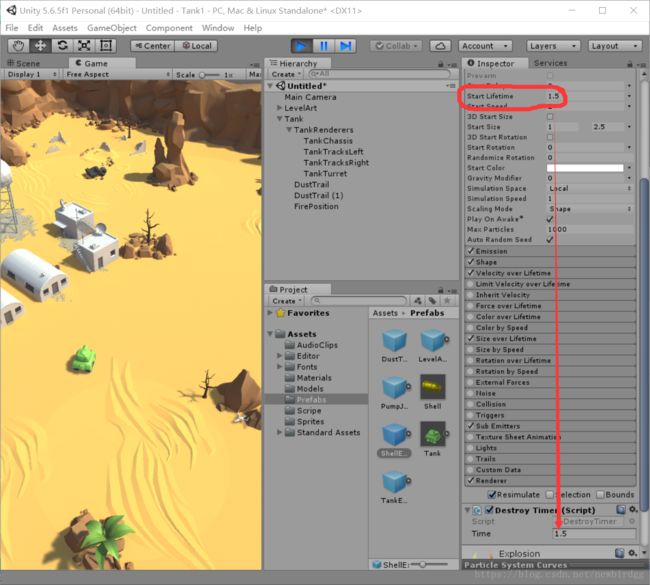
11、为了让特效触发后不再停留在游戏里,我们还需要给shellExplosion设置生命周期。在prefab中的shellExplosion里Add Component一个名叫DestroyTimer的C#文件,具体代码如下:
public float time;

	// Use this for initialization
	void Start () {
        Destroy(this.gameObject, time);
	}
因为爆炸特效的播放时间是1.5s,所以我们把它的生命周期也设置为1.5s
12、现在我们就要制作另一个坦克,并赋予坦克编号,利用编号实现键盘区分控制坦克
首先我们点击Hierarchy中的坦克并ctrl+D复制出另一个坦克。在菜单栏点击Edit/Project Setting里的Input找到Horizon和vertical分别右键点第一个复制出各自的另一个,并改名为:
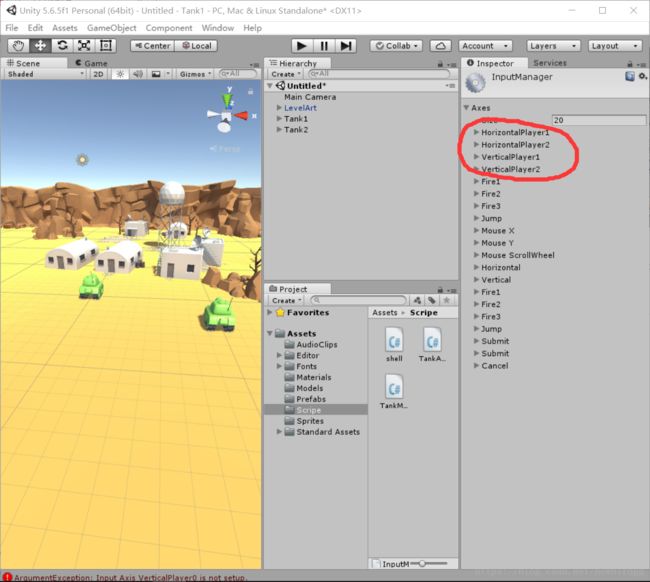
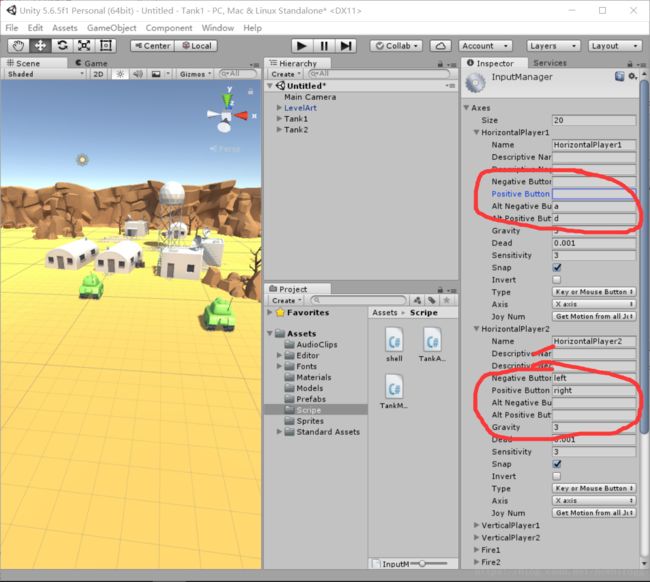
在HiorizontalPlayer1中删掉left和right ,Player2中删掉a、d,在verticalPlayer1中删掉up、down,player2 中删掉w、s
再找到Tank中的TankMove.cs打开修改一下代码,添加上Player+number的操控方式,代码如下:
 public float speed = 15;
    public float turnSpeed = 10;
    private Rigidbody rigidbody;
    public float number;
	// Use this for initialization
	void Start () {
        rigidbody = this.GetComponent();
	}

    // Update is called once per frame
 void FixedUpdate()
    {
        float v = Input.GetAxis("VerticalPlayer"+number);
        rigidbody.velocity = transform.forward * v * speed;
        float h = Input.GetAxis("HorizontalPlayer"+number);
        rigidbody.angularVelocity = transform.up * h * turnSpeed;
    }
并在Tank2中的TankAttact上的fireKey修改成小键盘的Enter键

这样就实现了tank1和tank2的不同移动转向和开火方式。
13、控制子弹对坦克的伤害
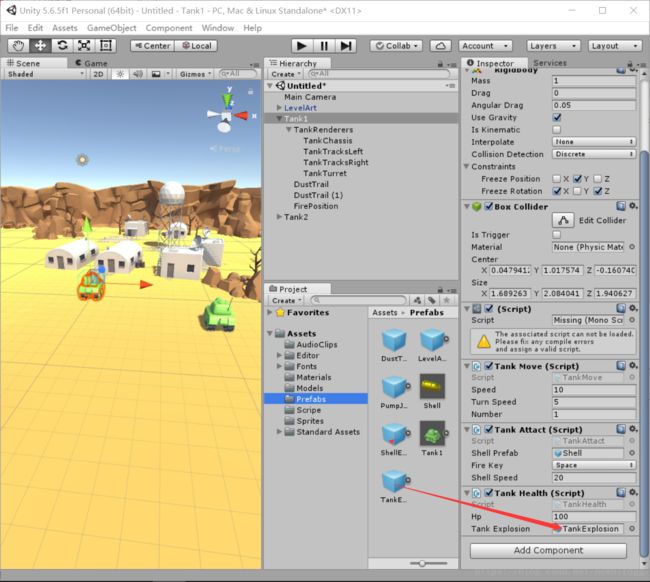
首先在Tank上Add component一个TankHealth.cs来控制坦克血量,并在血量为0时触发坦克爆炸特效TankExplosion代码如下:
 public float hp = 100;
    public GameObject tankExplosion;

    private int hpTotal;
	// Use this for initialization
	void Start () {
        hpTotal = 100;
	}

    void TakeDamage()
    {
        if (hp <= 0) return;
        hp -= Random.Range(10, 20);
        if (hp<=0)
        {
            GameObject.Instantiate(tankExplosion, transform.position+Vector3.up,transform.rotation);
            GameObject.Destroy(this.gameObject);
        }

    }
添加坦克爆炸特效
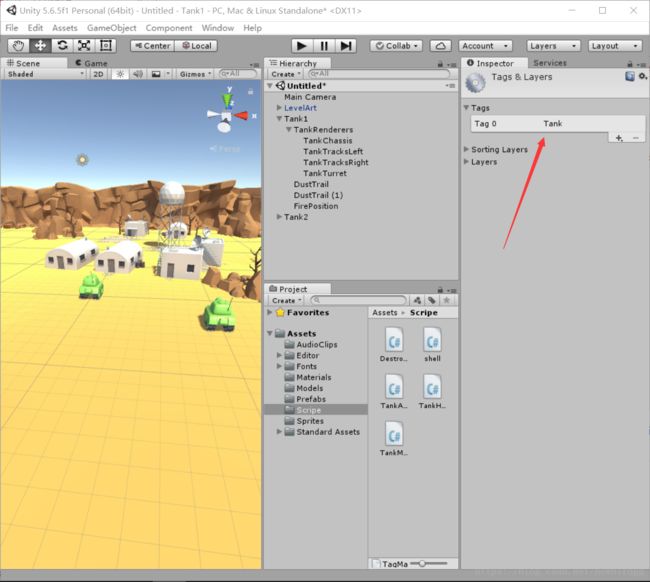
然后我们需要子弹碰撞到坦克的时候给坦克一个讯息告诉坦克该掉血了。这时我们需要给坦克一个标签,在坦克的inspector窗口中有一个Tag里面有个AddTag添加一个Tank标签
tank2也添加一个,然后再shell中的OnTriggerEnter函数中添加触发传递伤害信息的代码,如下:
public GameObject shellExplorePrefab;
    // Use this for initialization
    public void OnTriggerEnter(Collider collider)
    {
        GameObject.Instantiate(shellExplorePrefab, transform.position, transform.rotation);
        GameObject.Destroy(this.gameObject);
        if (collider.tag == "Tank")
        {
            collider.SendMessage("TakeDamage");
        }
    }
}
此时当子弹触碰到坦克时就会触发掉血状态,血量为0坦克爆炸。
我们还可以通过改变坦克材质来区分坦克

将每一项都改成红色就可以了。
14、我们运行游戏时会发现坦克有时会跑出画面,这怎么办呢,我们可以通过改变Main camera来同时获取两个坦克移动时的全部视野。我们在Main camera上Add component一个FollwTarget.cs 别忘了先给摄像机调整到一个可以俯视到两个坦克的位置,然后将projection设置为正交模式
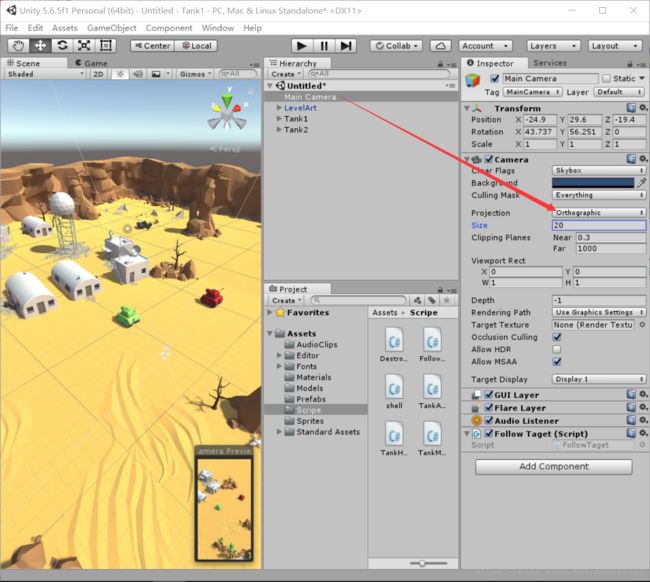
附上FollowTarget的代码
    public Transform player1;
    public Transform player2;

    private Camera camera;
    private Vector3 offset;
    // Use this for initialization
    void Start () {
        offset = transform.position - (player1.position + player2.position)/2;
        camera = this.GetComponent();
	}

	// Update is called once per frame
	void Update () {
        if (player1==null||player2==null)
        {
            return;
        }
        transform.position = (player1.position + player2.position) / 2 + offset;
        float distence = Vector3.Distance(player1.position, player2.position);
        float size = distence * 1;
        camera.orthographicSize = size;
    }
再把Tank1、Tank2加入到Main camera的player1和player2里就实现了镜头的跟随

坦克大战就先到这吧,我的unity竟然bug了,我先去修修unity去