本文内容是如何在阿里云学生服务器下搭建TensorFlow
OS Ubuntu 16.04 64位 python 3.5
1.更新软件源
$ apt-get update
2.安装Python 3.5
$ apt-get install python3.5
$ cp /usr/bin/python /usr/bin/python_bak #备份
$ rm /usr/bin/python #删除
$ ln -s /usr/bin/python3.5 /usr/bin/python #设置默认为Python 3.5
输入python命令查看当前默认python版本
3.安装TensorFlow
$ apt-get install python3-pip
$ pip3 install tensorflow  # Python 3.n; CPU support (no GPU support)
在用pip3安装TensorFlow时可能遇到 locale.Error: unsupported locale setting问题(语言环境配置问题)
解决方案
Step 1
$ locale
locale: Cannot set LC_ALL to default locale: No such file or directory
LANG=en_US.UTF-8
LANGUAGE=
LC_CTYPE="en_US.UTF-8"
LC_NUMERIC=zh_CN.UTF-8
LC_TIME=zh_CN.UTF-8
LC_COLLATE="en_US.UTF-8"
LC_MONETARY=zh_CN.UTF-8
LC_MESSAGES="en_US.UTF-8"
LC_PAPER=zh_CN.UTF-8
LC_NAME=zh_CN.UTF-8
LC_ADDRESS=zh_CN.UTF-8
LC_TELEPHONE=zh_CN.UTF-8
LC_MEASUREMENT=zh_CN.UTF-8
LC_IDENTIFICATION=zh_CN.UTF-8
LC_ALL=
Step 2
$ export LC_ALL=C
root@ubuntu:~# locale
LANG=en_US.UTF-8
LANGUAGE=
LC_CTYPE="C"
LC_NUMERIC="C"
LC_TIME="C"
LC_COLLATE="C"
LC_MONETARY="C"
LC_MESSAGES="C"
LC_PAPER="C"
LC_NAME="C"
LC_ADDRESS="C"
LC_TELEPHONE="C"
LC_MEASUREMENT="C"
LC_IDENTIFICATION="C"
LC_ALL=C
Step 4 验证TensorFlow安装
$ python #进入python
import tensorflow as tf
hello = tf.constant('Hello TensorFlow!')
sess = tf.Session()
print(sess.run(hello))
exit() #退出
使用Tensorboard可视化工具
1.给阿里云服务器安装图形化界面
$ apt-get install x-window-system-core
$ apt-get install gnome-core
$ apt-get install gdm
$ startx  #阿里云控制台远程连接可以看到图形化界面
图形化界面
安装vim来编辑文档
$ apt-get install vim
如果apt-get安装时出现E: Sub-process /usr/bin/dpkg returned an error code
解决方案
sudo mv /var/lib/dpkg/info /var/lib/dpkg/info.bak //现将info文件夹更名
sudo mkdir /var/lib/dpkg/info //再新建一个新的info文件夹
sudo apt-get update
2.在home目录底下新建TensorFlow文件夹,放入tensorboard.py文件
$ mkdir TensorFlow
$ cd TensorFlow
$ vim tensorboard.py
tensorboard.py文件
"""
Please note, this code is only for python 3+. If you are using python 2+, please modify the code accordingly.
"""
from __future__ import print_function
import tensorflow as tf
import numpy as np


def add_layer(inputs, in_size, out_size, n_layer, activation_function=None):
    # add one more layer and return the output of this layer
    layer_name = 'layer%s' % n_layer
    with tf.name_scope(layer_name):
        with tf.name_scope('weights'):
            Weights = tf.Variable(tf.random_normal([in_size, out_size]), name='W')
            tf.summary.histogram(layer_name + '/weights', Weights)
        with tf.name_scope('biases'):
            biases = tf.Variable(tf.zeros([1, out_size]) + 0.1, name='b')
            tf.summary.histogram(layer_name + '/biases', biases)
        with tf.name_scope('Wx_plus_b'):
            Wx_plus_b = tf.add(tf.matmul(inputs, Weights), biases)
        if activation_function is None:
            outputs = Wx_plus_b
        else:
            outputs = activation_function(Wx_plus_b, )
        tf.summary.histogram(layer_name + '/outputs', outputs)
    return outputs


# Make up some real data
x_data = np.linspace(-1, 1, 300)[:, np.newaxis]
noise = np.random.normal(0, 0.05, x_data.shape)
y_data = np.square(x_data) - 0.5 + noise

# define placeholder for inputs to network
with tf.name_scope('inputs'):
    xs = tf.placeholder(tf.float32, [None, 1], name='x_input')
    ys = tf.placeholder(tf.float32, [None, 1], name='y_input')

# add hidden layer
l1 = add_layer(xs, 1, 10, n_layer=1, activation_function=tf.nn.relu)
# add output layer
prediction = add_layer(l1, 10, 1, n_layer=2, activation_function=None)

# the error between prediciton and real data
with tf.name_scope('loss'):
    loss = tf.reduce_mean(tf.reduce_sum(tf.square(ys - prediction),
                                        reduction_indices=[1]))
    tf.summary.scalar('loss', loss)

with tf.name_scope('train'):
    train_step = tf.train.GradientDescentOptimizer(0.1).minimize(loss)

sess = tf.Session()
merged = tf.summary.merge_all()

writer = tf.summary.FileWriter("logs/", sess.graph)

init = tf.global_variables_initializer()
sess.run(init)

for i in range(1000):
    sess.run(train_step, feed_dict={xs: x_data, ys: y_data})
    if i % 50 == 0:
        result = sess.run(merged,
                          feed_dict={xs: x_data, ys: y_data})
        writer.add_summary(result, i)

# direct to the local dir and run this in terminal:
# $ tensorboard --logdir logs
运行命令
$ python tensorboard.py #产生一个logs文件夹,输入tensorboard命令来查看tensorboard网址
$ tensorboard --logdir logs
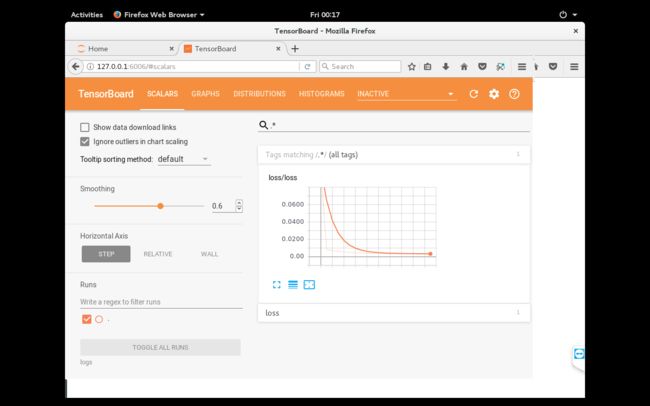
在浏览器输入127.0.0.1:6006访问tensorflow.py的Tensorboard可视化页面
Tensorboard错误 TensorBoard attempted to bind to port 6006, but it was already in use 解决方法
$ lsof -i:6006
root@iZ2ze2v60tavfuwqu1ipvzZ:~/TensorFlow# lsof -i:6006
COMMAND    PID USER   FD   TYPE DEVICE SIZE/OFF NODE NAME
tensorboa 1635 root    3u  IPv4  19343      0t0  TCP *:x11-6 (LISTEN)
杀死进程
root@iZ2ze2v60tavfuwqu1ipvzZ:~/TensorFlow# kill -9 1635
[1]+  Killed                  tensorboard --logdir logs
再次运行
$ tensorboard --logdir logs
jupyter notebook 安装配置
$ pip install jupyter
$ jupyter notebook –generate-config –allow-root
$ ipython

Python 3.5.2 (default, Aug  4 2017, 02:13:48)
Type 'copyright', 'credits' or 'license' for more information
IPython 6.1.0 -- An enhanced Interactive Python. Type '?' for help.

In [1]: from notebook.auth import passwd
In [2]: passwd()
Enter password:
Verify password:
Out[2]: 'token' //token指代生成的一串文本,后面需要用上
In [3]: exit()
修改jupyter notebook 配置文件
$ vim ~/.jupyter/jupyter_notebook_config.py

c.NotebookApp.ip='*'
c.NotebookApp.password = u'token'
c.NotebookApp.open_browser = False
c.NotebookApp.port =8888    #随便指定一个端口,使用默认8888也可以
访问jupyter notebook
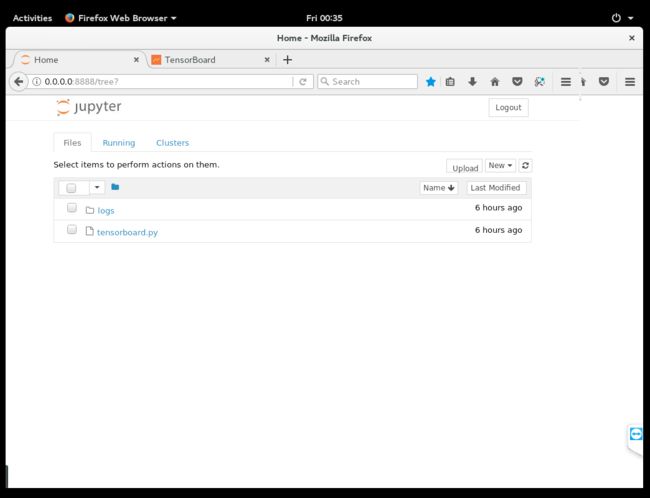
$ jupyter notebook --ip=0.0.0.0 --no-browser --allow-root


