Django第四章 探究FBV视图
文章目录
- 1.设置响应方式
- 1.1 返回响应内容
- 1.2 设置重定向
- 1.3 异常响应
- 1.4 文件下载功能
- 2.HTTP请求对象
- 2.1 获取请求信息
- 2.2 文件上传功能
- 2.3 Cookie实现反爬虫
- 2.4 请求头实现反爬虫
使用视图函数处理HTTP请求,即在视图中定义def函数,这种方式称为FBV(Function Base View)
1.设置响应方式
HTTP协议分为HTTP请求和HTTP响应,HTTP响应方式也成为HTTP状态嘛,分为5种:消息、成功、重定向、请求错误和服务器错误。
1.1 返回响应内容
视图函数是通过return方式返回响应的内容,若要设置不同的相应方式,需要使用内置的响应类。
| 响应类型 | 说明 |
|---|---|
| HttpResponse("Hello world’) | 状态码200,请求已成功被服务器接收 |
| HttpResponseRedirect() | 状态码 302,重定向首页地址 |
| HttpResponsePermanentRedirect() | 状态码301,永久重定向首页地址 |
| HutpResponseBadRequest(‘400’) | 状态码400,访问的页面不存在或请求错误 |
| HttpResponseNotFound(‘404’) | 状态码404,网页不存在或网页的URL失效 |
| HttpResponseForbidden('403) | 状态码403,没有访问权限 |
| HttpResponseNotAllowed(‘405’) | 状态码405,不允许使用该请求方式 |
| HttpResponseServerError(‘500’) | 状态码500,服务器内容错误 |
| JsonResponse({‘foo’:‘bar’}) | 默认状态码200,响应内容为JSON数据 |
| StreamingHttpResponse() | 默认状态码200,响应内容以流式输出 |
一般使用函数render()
def render(request, template_name, context=None, content_type=None, status=None, using=None):
    """
    Return a HttpResponse whose content is filled with the result of calling
    django.template.loader.render_to_string() with the passed arguments.
    """
    content = loader.render_to_string(template_name, context, request, using=using)
    return HttpResponse(content, content_type, status)
request和template时必需参数,其余参数时可选参数。
- request:浏览器向服务器发送的请求对象,包含用户信息、请求内容和请求方式。
- template_name:设置模板文件名,用于生成网页内容。
- context:对模板上下文赋值,以字典格式表示,默认情况下是空字典。
- context_type:响应内容的数据格式,一般情况下使用默认值即可。
- status:HTTP状态码,默认为200.
- using:设置模板引擎,用于解析模板文件,生成网页内容。
1.2 设置重定向
HttpResponseRedirect、HttpResponsePermanentRedircte、重定向函数redirect
重定向的状态码分为301和302,301永久性跳转,搜索引擎在抓取新内容的同时会将旧的网址替换为重定向之后的网址。302是临时跳转,搜索引擎在抓取新内容而保留旧网址。
上述两者只支持路由地址而不支持路由命名的传入,因此定义了重定向函数redirect()
ef redirect(to, *args, permanent=False, **kwargs):
    """
    Return an HttpResponseRedirect to the appropriate URL for the arguments
    passed.

    The arguments could be:

        * A model: the model's `get_absolute_url()` function will be called.

        * A view name, possibly with arguments: `urls.reverse()` will be used
          to reverse-resolve the name.

        * A URL, which will be used as-is for the redirect location.

    Issues a temporary redirect by default; pass permanent=True to issue a
    permanent redirect.
    """
    redirect_class = HttpResponsePermanentRedirect if permanent else HttpResponseRedirect
    return redirect_class(resolve_url(to, *args, **kwargs))
1.3 异常响应
异常响应是指HTTP状态码为404或500的响应状态。同一个网站的每种异常响应所返回的页面都是相同的,因此网站的异常响应必须适用于整个项目的所有应用。在项目名的urls.py文件里配置路由,在应用文件的views.py中定义视图函数。
1.4 文件下载功能
文件下载功能分别是:HttpResponse、StreamingHttpResponse和FileResponse
- HttpResponse:是所有响应过程的核心类,它的底层功能类是HttpResponseBase。
- StreamingResponse:是在HttpResponseBase的基础上进行继承与重写的,它实现流式响应输出,使用于大规模数据响应和文件传输。
- FileResponse:是在StreamingResponse的基础上进行继承和重写的,它实现文件的流式响应输出,只适用于文件传输响应。
#MyDjango 的urls.py
from django.urls import path

from user import views

urlpatterns = [
    path('', views.user, name = 'user'),
]

#My的urls.py
from django.urls import path, re_path
from . import views

urlpatterns = [
    path('', views.hello ,name = 'hello'),
    path('download/file1',views.download1, name = 'download1'),
    path('download/file2',views.download2, name = 'download2'),
    path('download/file3',views.download3, name = 'download3')
]
#My的views.py
from django.http import HttpResponse, HttpResponseNotFound, Http404
from django.shortcuts import render, redirect

def hello (request):
      return render(request,'hello.html')
def download1 (request):
    file_path = 'E:\MyDjango\media\monkey.jpg'
    try:
        r = HttpResponse(open(file_path,'rb'))
        r['content_type'] = 'application/octet-stream'
        r['Content-Disposition'] = 'attachment;filename = monkey.jpg'
        return r
    except  Exception:
        raise Http404('Download error')


def download2 (request):
    file_path = 'E:\MyDjango\My\MyStatic\cow.jpg'
    try:
        r = StreamingHttpResponse(open(file_path,'rb'))
        r['content_type'] = 'application/octet-stream'
        r['Content-Disposition'] = 'attachment;filename = cow.jpg'
        return r
    except  Exception:
        raise Http404('Download error')

def download3 (request):
    file_path = 'E:\MyDjango\static\duck.jpg'
    try:
        f = open(file_path,'rb')
        r = FileResponse(f,as_attachment=True,filename= 'duck.jpg')
        return r
    except  Exception:
        raise Http404('Download error')
#template的hello.html
<!DOCTYPE html>
<html lang="en">
<head>
    <meta charset="UTF-8">
    <title>Download</title>
</head>
<body>
<a href="{% url 'hello:download1' %}">HttpResponse-下载</a>
<br>
<a href="{% url 'hello:download2' %}">StreamingResponse-下载</a>
<br>
<a href="{% url 'hello:download3' %}">FileResponse-下载</a>
</body>
</html>
结果

推荐使用StreamingResponse和FileResponse方式
2.HTTP请求对象
2.1 获取请求信息
HTTP请求分为8种请求方式
| 请求方式 | 说明 |
|---|---|
| OPTIONS | 返回服务器针对特定资源所支持的请求方法 |
| GET | 向特定资源发出请求(访问网页) |
| POST | 向指定资源提交数据处理请求(提交表单、上传文件) |
| PUT | 向指定资源位置上传数据内容 |
| DELETE | 请求服务器删除request-URL 所标示的资源 |
| HEAD | 与GET请求类似,返回的响应中没有具体内容,用于获取报头 |
| TRACE | 回复和显示服务器收到的请求,用于测试和诊断 |
| CONNECT | HTTP/1.1协议中能够将连接改为管道方式的代理服务器 |
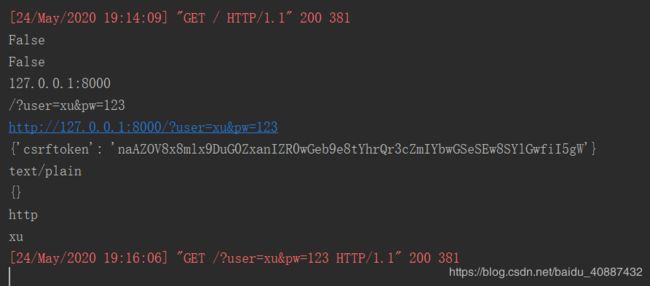
在上述的HTTP请求方式里,最基本的是GET请求和POST请求,网站开发者关心的也只有GET 请求和POST请求。GET请求和POST请求是可以设置请求参数的,两者的设置方式如下:
- GET 请求的请求参数是在路由地址后添加“?”和参数内容,参数内容以key=value 形式表示,等号前面的是参数名,后面的是参数值,如果涉及多个参数,每个参数之间就使用“&”隔开,如127.0.0.1:8000/?user=xy&pw=123.
- POST 请求的请求参数一般以表单的形式传递,常见的表单使用HTML 的 form标签,并且form 标签的 method 属性设为 POST.
#在My的views.py
def hello (request):
    if request.method == 'GET':
        #类方法的使用
        print(request.is_secure())
        print(request.is_ajax())
        print(request.get_host())
        print(request.get_full_path())
        print(request.get_raw_uri())
        #属性使用
        print(request.COOKIES)
        print(request.content_type)
        print(request.content_params)
        print(request.scheme)
        #获取GET请求的参数
        print(request.GET.get('user',''))
        return render(request,'hello.html')
    elif request.method == 'POST':
        print(request.POST.get('user',''))
        return render(request,'hello.html')
#templates 的hello.py
<!DOCTYPE html>
<html lang="en">
<head>
    <meta charset="UTF-8">
    <title>Download</title>
</head>
<body>
{#<a href="{% url 'hello:download1' %}">HttpResponse-下载</a>#}
{#<br>#}
{#<a href="{% url 'hello:download2' %}">StreamingResponse-下载</a>#}
{#<br>#}
{#<a href="{% url 'hello:download3' %}">FileResponse-下载</a>#}
<from action = "" method = "POST">
    {% csrf_token %}
    <input type="text" name = "user"/>
    <input type="submit" value= "提交"/>
</from>
</body>
</html>
2.2 文件上传功能
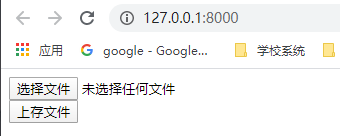
无论上传的文件是什么格式,上传原理都是将文件以二进制的数据格式读取并写入网站指定的文件夹里。
#My urls.py
urlpatterns = [

    path('',views.upload,name = 'uploaded')
]


#My views.py
def upload(request):
    if request.method == "POST":
        #获取上传文件,如果没有文件,就默认为None
        myFile = request.FILES.get("myfile",None)
        if not myFile:
            return HttpResponse("no files for upload!!")
        #打开指定的文件进行二进制的写操作
        f = open(os.path.join("E:\\upload",myFile.name),'wb+')
        #分块写入文件
        for chunk in myFile.chunks():
            f.write(chunk)
        f.close()
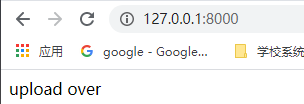
        return  HttpResponse("upload over")
    else:
        #请求方法为GET时,生成文件上传页面
        return render(request,"upload.html")

templates 中upload.html
<!DOCTYPE html>
<html lang="en">
<head>
    <meta charset="UTF-8">
    <title>Title</title>
</head>
<body>
<from enctype = "multipart/form-data" action = "" method = "post">
    {% csrf_token %}
    <input type="file" name="myfile"/>
    <br>
    <input type="submit" value="上传文件"/>
</from>
</body>
</html>
2.3 Cookie实现反爬虫
Cookie是从浏览器向服务器传递数据,让服务器能够识别当前用户,而服务器对Cookie的识别机制是通过Session实现的,Session存储了当前用户的基本信息,如姓名、年龄、性别等,由于Cookie存储在浏览器里面,而且Cookie夫人数据是由服务器提供的,如果服务器将用户信息直接保存在浏览器里,就很容易信息泄露,因此需要一种机制在服务器的某个域中存储用户的数据,这个域就是Session.
#设置Cookie
def set_cookie(self,key,value='',max_age = None,expires = None, path = '/',domain =  None,secure = Falese,httponly = False,samesite = None)
常见的反爬虫主要是设置参数max_age、expires和path。参数max_age或expires用于设置Cookie的有效性,使爬虫程序无法长时间爬取网站数据;参数path用于将Cookie的生成过程隐藏起来,不容易让爬虫开发者找到。
Cookie的数据信息一般都是经过加密处理的,加密方法set_signed_cookie函数。加密数据由set_signed_cookie的参数key,参数value、参数salt、配置文件settings.py的SECRET_KEY、get_cookie_signer字符串和TimestaSigner的时间戳函数timestamp组成。
如何实现反爬虫技术:
#My urls.py
urlpatterns = [

    path('',views.index,name = 'index'),
    path('create',views.create,name = 'create'),
    path('myCookie',views.myCookie, name = 'myCookie')
]
#My views.py
def index(request):
    return render(request,'index.html')

def create(request):
    from django.urls import reverse
    r = redirect(reverse('My:index'))
    # 添加Cookie
    #response.set_cookie('uid', 'Cookie_Value')
    r.set_signed_cookie('uuid', 'id', salt='MyDj', max_age=10)
    return r

def myCookie(request):
    cookieExist = request.COOKIES.get('uuid','')
    if cookieExist:
    #验证加密后的Cookie是否有效
        try:
            request.get_signed_cookie('uuid',salt='MyDj')
        except:
            raise Http404('当前Cookie无效!')
        return HttpResponse('当前Cookie为:'+cookieExist)
    else:
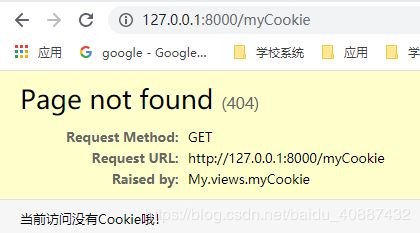
        raise Http404('当前访问没有Cookie哦!')
#templates index.html
<!DOCTYPE html>
<html lang="en">
<head>
    <meta charset="UTF-8">
    <title>Title</title>
</head>
<body>
<h3>Hello Cookies</h3>
<a href="{% url 'My:create' %}">创建Cookie</a>
<br>
<a href="{% url 'My:myCookie' %}">查看Cookie</a>
</body>
</html>
首次访问没有Cookie信息

创建Cookie后在开发者Network中会看到请求信息create


2.4 请求头实现反爬虫
Django获取请求头是由戈丁的格式,必须为“HTTP_XXX”,其中XXX代表请求头的某个属性,而且必须为大写字母。一般情况下,自定义请求头必须有一套完整的加密机制,前端的AJAX负责数据加密,服务器后台数据解密,从而提高爬虫开发者的破解难度。


