一、为什么使用JWT
1.跨语言使用。
2.服务器端无需再保存任何东西,只需要客户端保存token就可以。
3.实现简单。
4.统一认证方式,如果是移动端也要验证的话,jwt也支持就无需修改,否则客户端 服务器一套,移动端 服务器又是一套
当然缺陷也是很明显,就是退出登录后,已发放的token无法销毁,可以继续访问。就是令牌给你了,如果别人盗取了你的令牌,我也是认的,我只认令牌不认人。也可以设置令牌有效期,假如设置过期有效时间为10分钟,就算你拿到了令牌想用也已经过期了,但是这就要求客户端每次想要做什么,先去申请令牌,然后在去操作,这就很麻烦。内部系统的话是可以用这种模式的,如果对外的不建议使用。对外的可以使用传统的签名认证方法。
二、在.net core webApi 搭建jwt并且使用
第一步:首先要在程序中读取appSettings配置文件信息
创建一个AppSettings.cs类,存放读取配置信息的函数 代码如下,使用Nuget 安装Microsoft.Extensions.Configuration和Microsoft.Extensions.Configuration.Json,Microsoft.Extensions.Configuration.Binder
using Microsoft.Extensions.Configuration;using Microsoft.Extensions.Configuration.Json;using System;using System.Collections.Generic;using System.Linq;namespace WebApi.Core.Common{ public class AppSettings { static IConfiguration Configuration { get; set; } static string contentPath { get; set; } public AppSettings(string contentPath) { string Path = "appsettings.json"; //如果你把配置文件 是 根据环境变量来分开了,可以这样写 //Path = $"appsettings.{Environment.GetEnvironmentVariable("ASPNETCORE_ENVIRONMENT")}.json"; Configuration = new ConfigurationBuilder() .SetBasePath(contentPath) .Add(new JsonConfigurationSource { Path = Path, Optional = false, ReloadOnChange = true })//这样的话,可以直接读目录里的json文件,而不是 bin 文件夹下的,所以不用修改复制属性 .Build(); } public AppSettings(IConfiguration configuration) { Configuration = configuration; } /// /// 封装要操作的字符 /// /// 节点配置 /// /// 递归获取配置信息数组 /// /// app(params string[] sections) { List list = new List(); Configuration.Bind(string.Join(":", sections), list); return list; } }}
找到webApi项目,打开Startup类,在ConfigureService函数 注册AppSettings
编辑appsettings.json,新增红色框子的内容。
获取调试一下
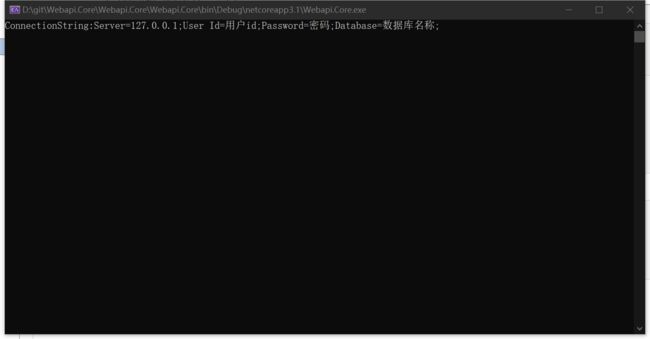
//注册appsettings读取类 services.AddSingleton(new Appsettings(Configuration)); var text = Appsettings.app(new string[] { "AppSettings", "ConnectionStringSql" }); Console.WriteLine($"ConnectionString:{text}"); Console.ReadLine();
运行后的结果
接下来,我们开始正式的在项目中,注册和使用JWT,首先配置一下jwt需要的参数,在appsettings.json中,SecretKey必须大于16个,是大于,不是大于等于
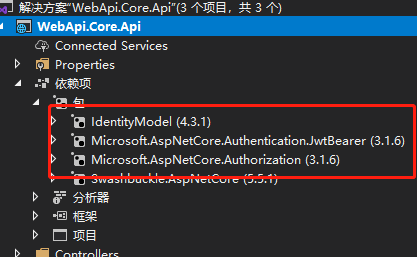
在Api项目中 添加Nuget 包 IdentityModel,Microsoft.AspNetCore.Authentication.JwtBearer,Microsoft.AspNetCore.Authorization
在model项目中添加一个tokenModel
using System;using System.Collections.Generic;using System.Text;namespace WebApi.Core.Model{ /// /// 令牌 /// public class TokenModel { /// /// Id /// public string Uid { get; set; } /// /// 角色 /// public string Role { get; set; } }}
在Api项目中新建一个文件夹 Authorization,新建一个JwtHelper 里面有生成token 和解析token 两个方法
using System.Linq;using System.Security.Claims;using System.Text;using System.Threading.Tasks;using WebApi.Core.Common;using WebApi.Core.Model;namespace WebApi.Core.Api.Authorization{ public class JwtHelper { /// /// 获取token信息 /// /// /// { /* * 特别重要: 1、这里将用户的部分信息,比如 uid 存到了Claim 中,如果你想知道如何在其他地方将这个 uid从 Token 中取出来,
请看下边的SerializeJwt() 方法,或者在整个解决方案,搜索这个方法,看哪里使用了! 2、你也可以研究下 HttpContext.User.Claims ,具体的你可以看看 Policys/PermissionHandler.cs 类中是如何使用的。 */
//nbf 生效时间 、Jti 编号、iat 签发时间、aud 受众、exp 过期时间 new Claim(JwtRegisteredClaimNames.Jti, tokenModel.Uid.ToString()), new Claim(JwtRegisteredClaimNames.Iat, $"{new DateTimeOffset(DateTime.Now).ToUnixTimeSeconds()}"), new Claim(JwtRegisteredClaimNames.Nbf,$"{new DateTimeOffset(DateTime.Now).ToUnixTimeSeconds()}") , //这个就是过期时间,目前是过期1000秒,可自定义,注意JWT有自己的缓冲过期时间 new Claim (JwtRegisteredClaimNames.Exp,$"{new DateTimeOffset(DateTime.Now.AddSeconds(1000)).ToUnixTimeSeconds()}"), new Claim(ClaimTypes.Expiration, DateTime.Now.AddSeconds(1000).ToString()), new Claim(JwtRegisteredClaimNames.Iss,iss), new Claim(JwtRegisteredClaimNames.Aud,aud), }; // 可以将一个用户的多个角色全部赋予; claims.AddRange(tokenModel.Role.Split(',').Select(s => new Claim(ClaimTypes.Role, s))); //秘钥 (SymmetricSecurityKey 对安全性的要求,密钥的长度太短会报出异常) var key = new SymmetricSecurityKey(Encoding.UTF8.GetBytes(secret)); var creds = new SigningCredentials(key, SecurityAlgorithms.HmacSha256); var jwt = new JwtSecurityToken( issuer: iss, claims: claims, signingCredentials: creds); var jwtHandler = new JwtSecurityTokenHandler(); var encodedJwt = jwtHandler.WriteToken(jwt); return encodedJwt; } /// /// 解析 /// /// ///
在UserController 新建一个login接口,获取token
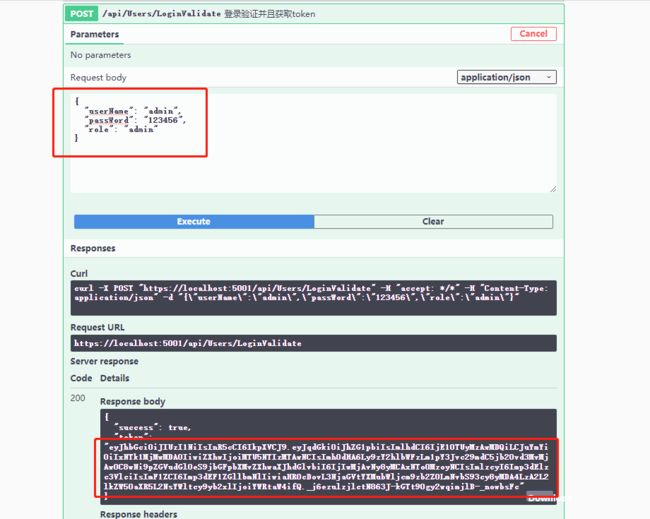
////// 登录验证并且获取token /// /// ///[HttpPost] public IActionResult LoginValidate(LoginModel loginModel) { string jwtStr = string.Empty; bool suc = false; if (loginModel != null) { //加登录验证 if (loginModel.UserName == "admin" && loginModel.PassWord == "123456") { TokenModel tokenModel = new TokenModel { Uid = loginModel.UserName, Role = loginModel.Role }; jwtStr = JwtHelper.issueJwt(tokenModel); suc = true; } } return Ok(new { success=suc, token = jwtStr }); }
按F5启动,可以看到token已经生成,客户端也已经获取到。
获取到了token我们怎么使用呢? 下一步 我们要在Swagger中开启 JWT服务,先安装包 Swashbuckle.AspNetCore.Filters
然后找到SwaggerSetUp.cs的AddSwaggerSetUp方法中增加以下代码
public static void AddSwaggerSetup(this IServiceCollection services) { if (services == null) throw new ArgumentNullException(nameof(services)); var ApiName = "Webapi.Core"; services.AddSwaggerGen(c => { c.SwaggerDoc("V1", new OpenApiInfo { // {ApiName} 定义成全局变量,方便修改 Version = "V1", Title = $"{ApiName} 接口文档——Netcore 3.0", Description = $"{ApiName} HTTP API V1", }); c.OrderActionsBy(o => o.RelativePath); // 获取 var "WebApi.Core.Api."); c.Includetrue);//默认的第二个参数是false,这个是controller的注释,记得修改 // 获取 var "WebApi.Core.Model."); c.Includetrue);//默认的第二个参数是false,这个是controller的注释,记得修改 //在 header中添加token,传递到后台 c.OperationFilter(); #region Token绑定到configureServices c.AddSecurityDefinition("oauth2", new OpenApiSecurityScheme { Description = "JWT授权(数据将在请求头中进行传输) 直接在下框中输入Bearer {token}(注意两者之间是一个空格)\"", Name = "Authorization",//jwt默认的参数名称 In = ParameterLocation.Header,//jwt默认存放Authorization信息的位置(请求头中) Type = SecuritySchemeType.ApiKey }); #endregion }); }
按F5运行 可以看到 token入口了,按要求的格式在 value中输入 token 以后的请求head 就会一直加入token了。
下面该授权token 的认证了,在SetupService 文件夹下 新建一个AuthJwtSetup.cs 类 如下
using Microsoft.AspNetCore.Authentication.JwtBearer;using Microsoft.Extensions.DependencyInjection;using Microsoft.IdentityModel.Tokens;using System;using System.Collections.Generic;using System.Linq;using System.Text;using System.Threading.Tasks;using WebApi.Core.Common;namespace WebApi.Core.Api.SetUpService{ public static class AuthJwtSetup { public static void AddAuthorizationJwtSetUp(this IServiceCollection services) { if (services == null) throw new ArgumentNullException(nameof(services)); //读取配置文件 var symmetricKeyAsBase64 = AppSettings.app(new string[] { "AppSettings", "JwtSetting", "SecretKey" }); var keyByteArray = Encoding.ASCII.GetBytes(symmetricKeyAsBase64); var signingKey = new SymmetricSecurityKey(keyByteArray); var Issuer = AppSettings.app(new string[] { "AppSettings", "JwtSetting", "Issuer" }); var Audience = AppSettings.app(new string[] { "AppSettings", "JwtSetting", "Audience" }); // 令牌验证参数 var tokenValidationParameters = new TokenValidationParameters { ValidateIssuerSigningKey = true, IssuerSigningKey = signingKey, ValidateIssuer = true, ValidIssuer = Issuer,//发行人 ValidateAudience = true, ValidAudience = Audience,//订阅人 ValidateLifetime = true, ClockSkew = TimeSpan.FromSeconds(30), //token过期后 还可以继续多访问30秒 RequireExpirationTime = true, }; //2.1【认证】、core自带官方JWT认证 // 开启Bearer认证 services.AddAuthentication("Bearer") // 添加JwtBearer服务 .AddJwtBearer(o => { o.TokenValidationParameters = tokenValidationParameters; o.Events = new JwtBearerEvents { OnAuthenticationFailed = context => { // 如果过期,则把<是否过期>添加到,返回头信息中 if (context.Exception.GetType() == typeof(SecurityTokenExpiredException)) { context.Response.Headers.Add("Token-Expired", "true"); } return Task.CompletedTask; } }; }); } }}
startup.cs的ConfigureServices 方法添加 服务注入
//jwt授权验证services.AddAuthorizationSetup();
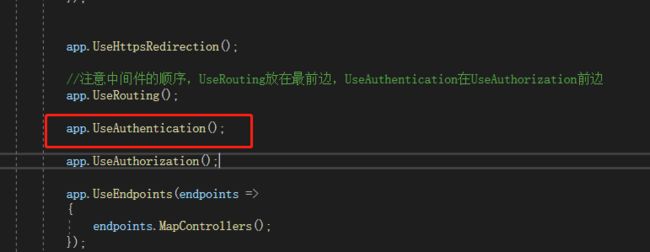
Configure方法添加 下面的代码
接口授权策略验证,在UserController里面添加一个方法
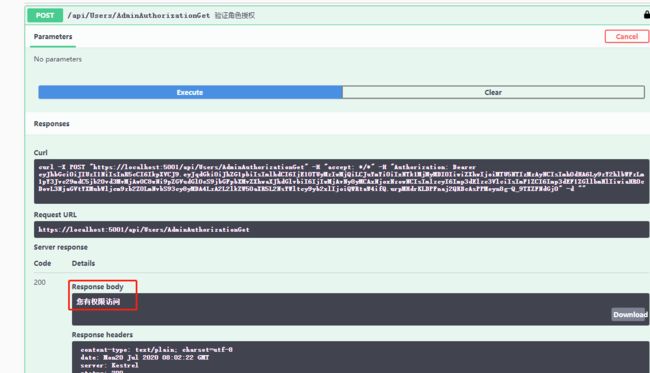
按F5启动调试,先获取Admin角色权限的token,添加token到header中,然后请求 验证角色权限那个接口,验证成功。
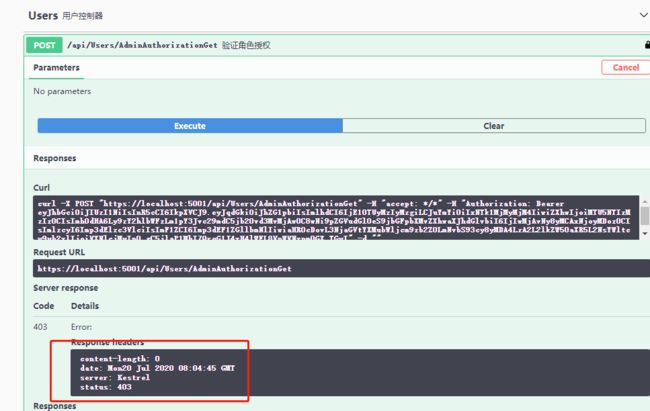
如果获取的token 不是Admin 角色权限我们再来试一下,看看是什么结果,结果就是没有访问权限。
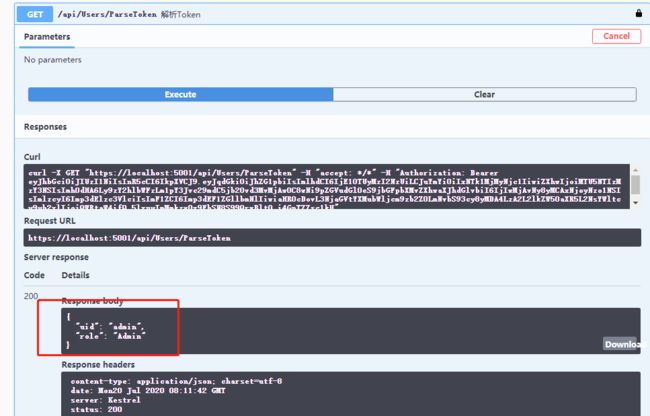
下面该解析Token 了,试一下,添加一个接口,步骤同上,先获取token,然后绑定token,最后调用一下解析接口,看结果我们已经解析成功了。
.NET core webApi 使用JWT验证签名
文章转载:http://www.shaoqun.com/a/463332.html


