表格花式效果
对于table的一些基础信息不了解的,可以参考我以前写过的一篇《关于table的一些记录》。下面演示的代码,具体的源码可以参考此处。
一、表格固定左边与顶部
公司最近要做个排期系统,当滚动表格的时候,需要将顶部和左边的分别固定起来。
1)固定顶部
原理就是用标签模拟出顶部的样式,通过脚本计算出高度,以及各个块的宽度,再将table中的thead的内容覆盖掉。
1. 样式:通过绝对定位,将ul中的内容覆盖中顶部。
<ul class="calendar-table-top-header">
  <li>li>
  <li>1li>
  <li>2li>
  <li>3li>
  <li>4li>
  <li>5li>
  <li>6li>
  <li>7li>
  <li>8li>
  <li>9li>
  <li>10li>
  <li>11li>
  <li>12li>
  <li>13li>
ul>
2. 计算尺寸:通过获取到th标签的宽和高,赋给对应的li标签。涉及到了元素的offsetHeight、offsetWidth属性,更多关于尺寸的信息可以参考《JavaScript中尺寸、坐标》
function fixedTopHeader($table) {
  $table.siblings('.calendar-table-top-header').remove();//移除原先的模拟顶部
  var $ul = $('
- ').addClass('calendar-table-top-header'),
$ths = $table.find('thead th');
$ul.width($table.find('thead')[0].offsetWidth + 1);
$.each($ths, function(key, value) {//遍历th标签,设置li的宽高
var $th = $(value);
var $child = $('
- ').css({ height: $th[0].offsetHeight, width: $th[0].offsetWidth }).html($th.html()); $ul.append($child); }); $table.before($ul); }
2)固定左边
固定左边与固定顶部的原理是一样的,代码也很类似。
1. 节流:创建元素的代码已经实现,接下来要实现执行上述代码的事件“scroll”,这里涉及到一个节流的概念,节流是一种代码优化。
如果不做节流,那么将会损耗性能,导致在滚定的时候,展示的固定元素一卡一卡的,很不流畅,在《JavaScript优化以及开发小技巧》中曾经解释过节流的概念。
二、表格中嵌套表格
嵌套的表格每一行的高度要与外面的表格一致,并且最后一行需要将滚动条的高度去除,否则会影响整个高度的展示。
1. 头部元素:头部“2016年11月”,如果用跨列colspan来做的话,每次都要计算列的个数,所以这里用了“caption”标签,不过在上下对齐方面没有th标签方便。
<table class="table table-bordered">
  <caption>2016年11月caption>
  <tbody>
    <tr>...tr>
  tbody>
table>
2. tr高度:这里的tr获取的是外面的table,不是嵌套的table。tr的高度有两个比较特殊,第一个和最后一个,分别要减去1和18,上边框与滚动条的高度。
$schedule.children('tbody').children('tr').each(function() {
    heights.push(this.getBoundingClientRect().height);
});
if (heights.length == 0)
    return;
heights[0] -= 1; //去除下边框
heights[heights.length - 1] -= 18;//去除滚动条的高度
3. 尺寸赋值:分别计算嵌套表格的宽度,算出总宽度,给包裹的div赋总宽度,再给嵌套表格的每个tr赋值。给包裹的div赋了个默认值“width: 2000px;”。
<div class="schedule-hidden">
  <div class="day-table" style="width: 2000px;">
    <table class="table table-bordered">
      <caption>2016年11月caption>
      <tbody>
        <tr>...tr>
      tbody>
    table>
    <table class="table table-bordered">
      <caption>2016年12月caption>
      <tbody>
        <tr>...tr>
      tbody>
    table>
  div>
div>
用的jQuery踩到了一个“height()”方法的小坑。
$tables.each(function() {
    var $this = $(this);
    width += this.offsetWidth;
    $this.children('caption').css('height', heights[0]); //如果用height 会将padding也算在内
    $this.find('tr').each(function(index) {
      $(this).height(heights[index + 1]);
    });
});
$dayContainer.find('.day-table').width(width);//嵌套表格的外包裹div的宽度,宽度小的话会让表格换行
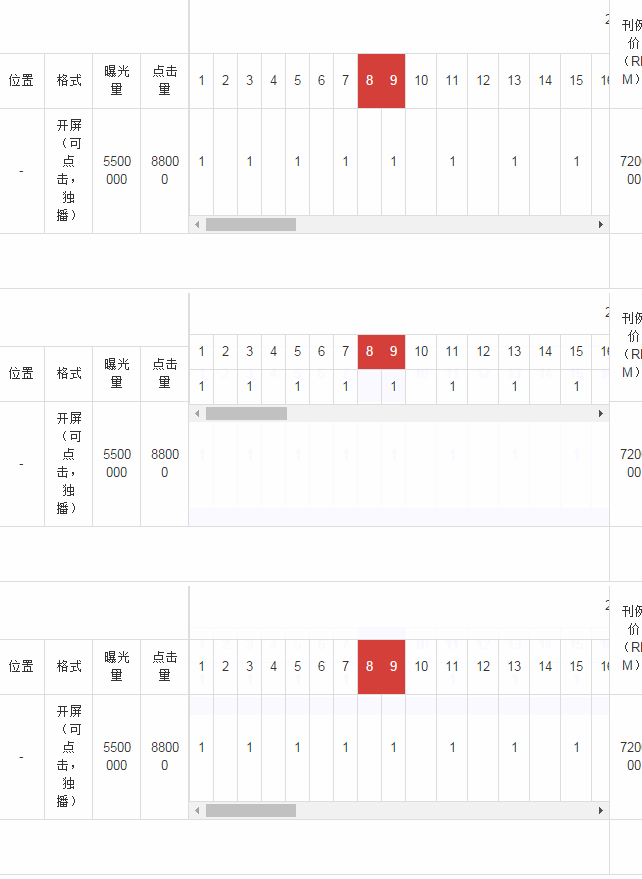
4. 初始化隐藏:上面HTML代码中用到了“schedule-hidden”,做初始化隐藏,就会向下图那样,拉伸,影响体验。
但是如果用普通的“display:none”做隐藏,就会出现包裹的div宽度“width:0”,这是因为“none”内的元素没有物理尺寸,占据的空间位置不存在。
.table-schedule .schedule-hidden {
    display: none;
}
所以就用变通的方法,“height:0”来做隐藏。或者用“position和left”组合,或用“visibility”,或者用“opacity”。
.table-schedule .schedule-hidden {
    height: 0;
    /*position: absolute;
    left:-10000px;*/
    /*opacity: 0;*/
    /*visibility: hidden;*/
}


