原文链接:https://www.fkomm.cn/article/2018/8/7/32.html
目的
Scrapy框架为文件和图片的下载专门提供了两个Item Pipeline 它们分别是:
-
FilePipeline
- ImagesPipeline
这里主要介绍ImagesPipeline!!
目标分析:
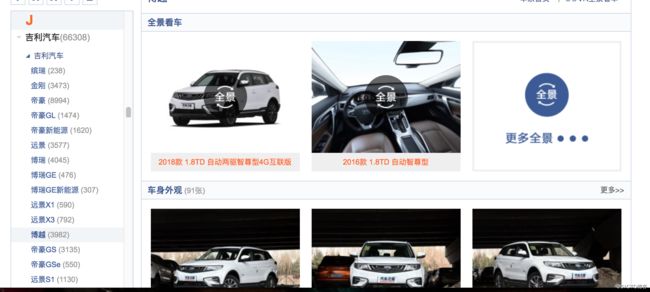
这次我们要爬的是汽车之家:car.autohome.com.cn。最近喜欢吉利博越,所以看了不少这款车的资料。
我们就点开博越汽车的图片网站:
https://car.autohome.com.cn/pic/series/3788.html
传统的Scrapy框架图片下载
Scrapy 框架的实施:
1.创建scrapy项目和爬虫:
$ scrapy startproject Geely
 $ cd Geely
 $ scrapy genspider BoYue car.autohome.com.cn
2.编写items.py:
import scrapy

 class GeelyItem(scrapy.Item):
     # define the fields for your item here like:
     # name = scrapy.Field()

     # 存储图片分类
     catagory = scrapy.Field()

     # 存储图片地址
     image_urls = scrapy.Field()

     # ImagesPipeline
     images = scrapy.Field()
3.编写Spider:
# -*- coding: utf-8 -*-
 import scrapy

 #导入CrawlSpider模块 需改写原来的def parse(self,response)方法
 from scrapy.spiders import CrawlSpider ,Rule

 #导入链接提取模块
 from scrapy.linkextractors import LinkExtractor
 from Geely.items import GeelyItem

 class BoyueSpider(CrawlSpider):
     name = 'BoYue'
     allowed_domains = ['car.autohome.com.cn']
     start_urls = ['https://car.autohome.com.cn/pic/series/3788.html']

     #如需要进行页面解释则使用callback回调函数 因为有下一页,所以我们需要跟进,这里使用follow令其为True
     rules = {
         Rule(LinkExtractor(allow=r'https://car.autohome.com.cn/pic/series/3788.+'), callback= 'parse_page', follow=True),
     }

     def parse_page(self, response):
         catagory = response.xpath('//div[@class = "uibox"]/div/text()').get()
         srcs = response.xpath('//div[contains(@class,"uibox-con")]/ul/li//img/@src').getall()

         #map(函数,参数二),将参数二中的每个都进行函数计算并返回一个列表
         srcs = list(map(lambda x:x.replace('t_',''),srcs))
         srcs = list(map(lambda x:response.urljoin(x),srcs))
         yield GeelyItem(catagory=catagory, image_urls = srcs)
4.编写PIPELINE:
    import os
     from urllib import request

     class GeelyPipeline(object):

         def __init__(self):
             #os.path.dirname()获取当前文件的路径,os.path.join()获取当前目录并拼接成新目录
             self.path = os.path.join(os.path.dirname(__file__), 'images')

             # 判断路径是否存在
             if not os.path.exists(self.path):
                 os.mkdir(self.path)

         def process_item(self, item, spider):

             #分类存储
             catagory = item['catagory']
             urls = item['image_urls']

             catagory_path = os.path.join(self.path, catagory)

             #如果没有该路径即创建一个
             if not os.path.exists(catagory_path):
                 os.mkdir(catagory_path)

             for url in urls:
                 #以_进行切割并取最后一个单元
                 image_name = url.split('_')[-1]
                 request.urlretrieve(url,os.path.join(catagory_path,image_name))

             return item
5.编写settings.py
    BOT_NAME = 'Geely'

     SPIDER_MODULES = ['Geely.spiders']
     NEWSPIDER_MODULE = 'Geely.spiders'

     # Obey robots.txt rules
     ROBOTSTXT_OBEY = False

     ITEM_PIPELINES = {
        'Geely.pipelines.GeelyPipeline': 1,
     }
6.让项目跑起来:
$ scrapy crawl BoYue
使用Images_pipeline进行图片下载
使用步骤:
-
定义好一个item,然后定义两个属性 image_urls 和 images。 image_urls是用来存储需要下载的文件的url链接,列表类型;
-
当文件下载完成后,会把文件下载的相关信息存储到item的images属性中。例如:下载路径,下载url 和文件的效验码;
-
再配置文件settings.py中配置FILES_STORE,指定文件下载路径;
- 启动pipeline,在ITEM_PIPELINES中设置自定义的中间件!!!
具体步骤
在上面的基础上修改
1.修改settings.py
    ITEM_PIPELINES = {
        # 'Geely.pipelines.GeelyPipeline': 1,
        # 'scrapy.pipelines.images.ImagesPipeline': 1,
        'Geely.pipelines.GeelyImagesPipeline': 1,
     }

     #工程根目录
     project_dir = os.path.dirname(__file__)
     #下载图片存储位置
     IMAGES_STORE = os.path.join(project_dir, 'images')
2.改写pipelines,py
    # -*- coding: utf-8 -*-

     # Define your item pipelines here
     #
     # Don't forget to add your pipeline to the ITEM_PIPELINES setting
     # See: https://doc.scrapy.org/en/latest/topics/item-pipeline.html

     import os
     from urllib import request

     from scrapy.pipelines.images import ImagesPipeline
     from Geely import settings

     # class GeelyPipeline(object):

     #     def __init__(self):
     #         #os.path.dirname()获取当前文件的路径,os.path.join()获取当前目录并拼接成新目录
     #         self.path = os.path.join(os.path.dirname(__file__), 'images')

     #         # 判断路径是否存在
     #         if not os.path.exists(self.path):
     #             os.mkdir(self.path)

     #     def process_item(self, item, spider):

     #         #分类存储
     #         catagory = item['catagory']
     #         urls = item['image_urls']

     #         catagory_path = os.path.join(self.path, catagory)

     #         #如果没有该路径即创建一个
     #         if not os.path.exists(catagory_path):
     #             os.mkdir(catagory_path)

     #         for url in urls:
     #             #以_进行切割并取最后一个单元
     #             image_name = url.split('_')[-1]
     #             request.urlretrieve(url,os.path.join(catagory_path,image_name))

     #         return item

     # 继承ImagesPipeline
     class GeelyImagesPipeline(ImagesPipeline):

         # 该方法在发送下载请求前调用,本身就是发送下载请求的
         def get_media_requests(self, item, info):

             # super()直接调用父类对象
             request_objects = super(GeelyImagesPipeline, self).get_media_requests(item, info)
             for request_object in request_objects:
                 request_object.item = item
             return request_objects

         def file_path(self, request, response=None, info=None):

             path = super(GeelyImagesPipeline, self).file_path(request, response, info)

             # 该方法是在图片将要被存储时调用,用于获取图片存储的路径
             catagory = request.item.get('catagory')

             # 拿到IMAGES_STORE
             images_stores = settings.IMAGES_STORE
             catagory_path = os.path.join(images_stores, catagory)

             #判断文件名是否存在,如果不存在创建文件
             if not os.path.exists(catagory_path):
                 os.mkdir(catagory_path)

             image_name = path.replace('full/','')
             image_path = os.path.join(catagory+'/',image_name)

             return image_path
3.让项目跑起来:
$ scrapy crawl BoYue
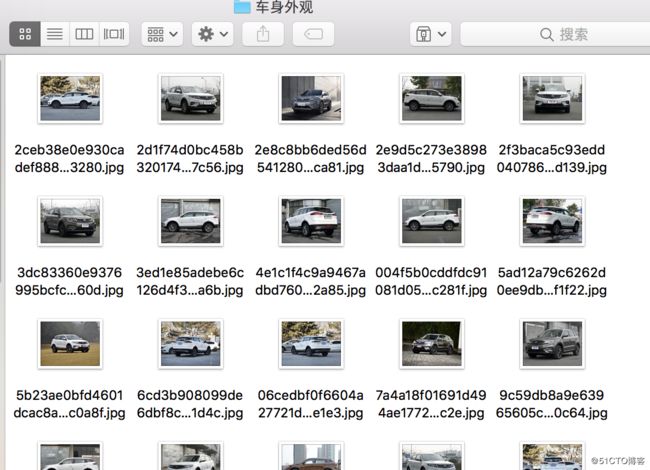
将会得到与原来相同的结果!!!!


