SpringBoot——启动配置原理
一、基于回调的监听机制
SpringBoot的启动和自动配置基于几个重要的事件回调:
1、ApplicationContextInitializer:配置在META-INF/spring.factories文件中
2、SpringApplicationRunListener:配置在META-INF/spring.factories文件中
3、ApplicationRunner:只需放在ioc容器中
4、CommandLineRunner:只需放在ioc容器中
二、启动流程
分为两大步:
1、创建SpringApplication对象:将ApplicationContextInitializer和SpringApplicationRunListener的监听保存起来
initialize(sources);

private void initialize(Object[] sources) {
	//保存主配置类
	if (sources != null && sources.length > 0) {
		this.sources.addAll(Arrays.asList(sources));
	}
	//判断当前是否是一个web应用
	this.webEnvironment = deduceWebEnvironment();
	//从类路径下找到META‐INF/spring.factories文件中配置的所有ApplicationContextInitializer,然后保存起来,后续会回调
	setInitializers((Collection)getSpringFactoriesInstances(ApplicationContextInitializer.class));
	//从类路径下找到META‐INF/spring.factories文件中配置的所有ApplicationListener,并保存起来,后续会回调
	setListeners((Collection) getSpringFactoriesInstances(ApplicationListener.class));
	//从多个配置类中找到有main方法的主配置类
	this.mainApplicationClass = deduceMainApplicationClass();
}
2、运行run方法:回调监听中的方法
public ConfigurableApplicationContext run(String... args) {
	StopWatch stopWatch = new StopWatch();
	stopWatch.start();
	ConfigurableApplicationContext context = null;
	FailureAnalyzers analyzers = null;
	configureHeadlessProperty();
	//获取SpringApplicationRunListeners:从类路径下META‐INF/spring.factories
	SpringApplicationRunListeners listeners = getRunListeners(args);
	//回调所有的获取SpringApplicationRunListener.starting()方法
	listeners.starting();
	try {
		//封装命令行参数
		ApplicationArguments applicationArguments = new DefaultApplicationArguments(args);
		//准备环境
		ConfigurableEnvironment environment = prepareEnvironment(listeners, applicationArguments);
		//创建环境完成后回调SpringApplicationRunListener.environmentPrepared();表示环境准备完成
		Banner printedBanner = printBanner(environment);
		//创建ApplicationContext:决定创建web的ioc还是普通的ioc
		context = createApplicationContext();
		analyzers = new FailureAnalyzers(context);
		//准备上下文环境:将environment保存到ioc中,而且applyInitializers();
		//applyInitializers():回调之前保存的所有的ApplicationContextInitializer的initialize方法
		//回调所有的SpringApplicationRunListener的contextPrepared();
		prepareContext(context, environment, listeners, applicationArguments, printedBanner);
		//prepareContext运行完成以后回调所有的SpringApplicationRunListener的contextLoaded();
		//刷新容器:ioc容器初始化(如果是web应用还会创建嵌入式的Tomcat),Spring注解版
		//扫描,创建,加载所有组件的地方;(配置类,组件,自动配置)
		refreshContext(context);
		//从ioc容器中获取所有的ApplicationRunner和CommandLineRunner进行回调
		//ApplicationRunner先回调,CommandLineRunner再回调
		afterRefresh(context, applicationArguments);
		//所有的SpringApplicationRunListener回调finished方法
		listeners.finished(context, null);
		stopWatch.stop();
		if (this.logStartupInfo) {
			new StartupInfoLogger(this.mainApplicationClass)
					.logStarted(getApplicationLog(), stopWatch);
		}
		//整个SpringBoot应用启动完成以后返回启动的ioc容器;
		return context;
	} catch (Throwable ex) {
		handleRunFailure(context, listeners, analyzers, ex);
		throw new IllegalStateException(ex);
	}
}
三、自定义事件监听测试
1、编写四种类型的监听
①ApplicationContextInitializer:泛型中是监听的对象,此处监听IOC容器
public class HelloApplicationContextInitializer implements ApplicationContextInitializer<ConfigurableApplicationContext> {
    @Override
    public void initialize(ConfigurableApplicationContext configurableApplicationContext) {
        System.out.println("ApplicationContextInitializer ... initialize:" + configurableApplicationContext);
    }
}
②SpringApplicationRunListener:在ioc容器创建前后等时机做一些监听操作,该类中必须提供一个有参构造器,形式如例中所示
public class HelloSpringApplicationRunListener implements SpringApplicationRunListener {

	public HelloSpringApplicationRunListener(SpringApplication application, String[] args) {
        //该有参构造器必须有,否则项目启动时会报错,传入的参数是Spring应用和命令行参数
    }

    @Override
    public void starting() {
        //在ioc容器创建之前调用
        System.out.println("SpringApplicationRunListener ... starting");
    }

    @Override
    public void environmentPrepared(ConfigurableEnvironment configurableEnvironment) {
        //在基础环境准备好之后调用
        Object o = configurableEnvironment.getSystemProperties().get("os.name");//获取当前操作系统名称
        System.out.println("SpringApplicationRunListener ... environmentPrepared:" + o);
    }

    @Override
    public void contextPrepared(ConfigurableApplicationContext configurableApplicationContext) {
        //context准备好之后调用
        System.out.println("SpringApplicationRunListener ... contextPrepared");
    }

    @Override
    public void contextLoaded(ConfigurableApplicationContext configurableApplicationContext) {
        //context整个运行完之后调用
        System.out.println("SpringApplicationRunListener ... contextLoaded");
    }

    @Override
    public void finished(ConfigurableApplicationContext configurableApplicationContext, Throwable throwable) {
        //全部加载完在最后调用
        System.out.println("SpringApplicationRunListener ... finished");
    }
}
③ApplicationRunner:接收命令行参数
@Component
public class HelloApplicationRunner implements ApplicationRunner {
    @Override
    public void run(ApplicationArguments applicationArguments) throws Exception {
        //applicationArguments是传入的命令行参数,比如发布时通过shell命令传入的参数
        System.out.println("ApplicationRunner...run...");
    }
}
④CommandLineRunner:
@Component
public class HelloCommandLineRunner implements CommandLineRunner {
    @Override
    public void run(String... strings) throws Exception {
        System.out.println("CommandLineRunner ... run:" + Arrays.asList(strings));
    }
}
2、配置1中编写的监听:将前两个监听配置在META-INF/spring.factories文件中,后两个只需要放在IOC容器中即可(加上@Component注解即可)
org.springframework.context.ApplicationContextInitializer=\
com.bdm.springboot.listener.HelloApplicationContextInitializer

org.springframework.boot.SpringApplicationRunListener=\
com.bdm.springboot.listener.HelloSpringApplicationRunListener
3、项目启动,查看日志:可以看到各个监听事件调用的顺序和时机
...
SpringApplicationRunListener ... starting
SpringApplicationRunListener ... environmentPrepared:Windows 10

  .   ____          _            __ _ _
 /\\ / ___'_ __ _ _(_)_ __  __ _ \ \ \ \
( ( )\___ | '_ | '_| | '_ \/ _` | \ \ \ \
 \\/  ___)| |_)| | | | | || (_| |  ) ) ) )
  '  |____| .__|_| |_|_| |_\__, | / / / /
 =========|_|==============|___/=/_/_/_/
 :: Spring Boot ::       (v1.5.18.RELEASE)

ApplicationContextInitializer ... initialize:org.springframework.boot.context.embedded.AnnotationConfigEmbeddedWebApplicationContext@6385cb26: startup date [Thu Jan 01 08:00:00 CST 1970]; root of context hierarchy
SpringApplicationRunListener ... contextPrepared
...
SpringApplicationRunListener ... contextLoaded
...
ApplicationRunner...run...
CommandLineRunner ... run:[]
SpringApplicationRunListener ... finished
调用顺序:
SpringApplicationRunListener.starting
SpringApplicationRunListener.environmentPrepared
ApplicationContextInitializer.initialize
SpringApplicationRunListener.contextPrepared
SpringApplicationRunListener.contextLoaded
ApplicationRunner.run
CommandLineRunner.run
SpringApplicationRunListener.finished
四、自定义starter
1、编写一个starter需要考虑两个问题:
①这个场景需要使用到的依赖是什么
②如何编写自动配置:可参考SpringBoot中已有的starter的编写模式
@Configuration //指定这个类是一个配置类
@ConditionalOnXXX //在指定条件成立的情况下自动配置类生效
@AutoConfigureAfter //指定自动配置类的顺序
@Bean //给容器中添加组件
@ConfigurationPropertie //结合相关xxxProperties类来绑定相关的配置
@EnableConfigurationProperties //让xxxProperties生效加入到容器中
//自动配置类要能加载:将需要启动就加载的自动配置类,配置在META‐INF/spring.factories
org.springframework.boot.autoconfigure.EnableAutoConfiguration=\
org.springframework.boot.autoconfigure.admin.SpringApplicationAdminJmxAutoConfiguration,\
org.springframework.boot.autoconfigure.aop.AopAutoConfiguration,\
2、编写模式:
①启动器只用来做依赖导入
②专门来写一个自动配置模块
③启动器依赖自动配置,别人只需要引入启动器(starter)
④自定义启动器的命名:自定义启动器名-spring-boot-starter(如mybatis-spring-boot-starter)
3、示例
①创建一个空的工程:springboot-starter

②添加一个模块:使用Maven工程创建该模块
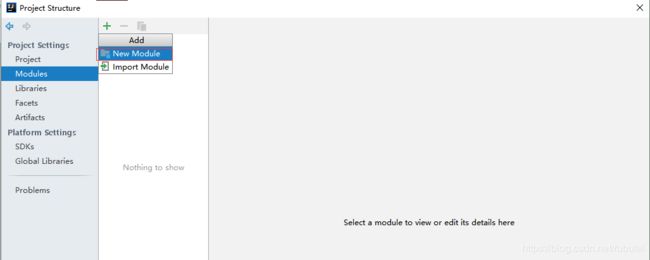

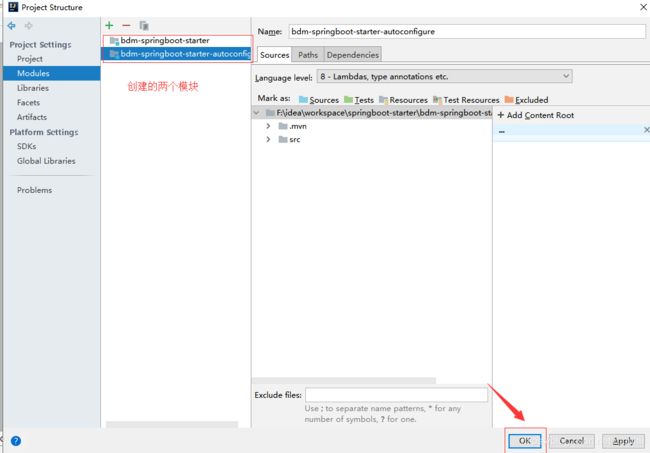
③再添加一个模块:该模块用来做starter的自动配置,使用Spring Initializr创建该模块,创建的时候不引入任何模块


创建的两个模块:
④在starter的pom.xml中引入自动配置模块:这样别人在使用时只需要引入starter模块就可以了
<project xmlns="http://maven.apache.org/POM/4.0.0"
         xmlns:xsi="http://www.w3.org/2001/XMLSchema-instance"
         xsi:schemaLocation="http://maven.apache.org/POM/4.0.0 http://maven.apache.org/xsd/maven-4.0.0.xsd">
    <modelVersion>4.0.0modelVersion>

    <groupId>com.bdm.bdm-springboot-startergroupId>
    <artifactId>bdm-springboot-starterartifactId>
    <version>1.0-SNAPSHOTversion>

    <dependencies>
        <dependency>
            <groupId>com.bdm.startergroupId>
            <artifactId>bdm-springboot-starter-autoconfigureartifactId>
            <version>0.0.1-SNAPSHOTversion>
        dependency>
    dependencies>

project>
⑤删除自动配置模块无用的目录结构和文件:

删除pom.xml文件中的spring-boot-starter-test依赖和plugin,保留spring-boot-starter(这是所有的starter都需要的依赖),删除后的pom文件如下:
<project xmlns="http://maven.apache.org/POM/4.0.0" xmlns:xsi="http://www.w3.org/2001/XMLSchema-instance"
         xsi:schemaLocation="http://maven.apache.org/POM/4.0.0 http://maven.apache.org/xsd/maven-4.0.0.xsd">
    <modelVersion>4.0.0modelVersion>

    <groupId>com.bdm.startergroupId>
    <artifactId>bdm-springboot-starter-autoconfigureartifactId>
    <version>0.0.1-SNAPSHOTversion>
    <packaging>jarpackaging>

    <name>bdm-springboot-starter-autoconfigurename>
    <description>Demo project for Spring Bootdescription>

    <parent>
        <groupId>org.springframework.bootgroupId>
        <artifactId>spring-boot-starter-parentartifactId>
        <version>1.5.18.RELEASEversion>
        <relativePath/>
    parent>

    <properties>
        <project.build.sourceEncoding>UTF-8project.build.sourceEncoding>
        <project.reporting.outputEncoding>UTF-8project.reporting.outputEncoding>
        <java.version>1.8java.version>
    properties>

    <dependencies>
        <dependency>
            <groupId>org.springframework.bootgroupId>
            <artifactId>spring-boot-starterartifactId>
        dependency>
    dependencies>
project>
⑥编写代码:实现一个打招呼的前后缀可配置的场景
a、编写一个HelloService:注意要编写helloProperties的getter和setter
public class HelloService {

    HelloProperties helloProperties;

    public String sayHello(String name) {
        return helloProperties.getPrefix() + "-" + name + "-" + helloProperties.getSuffix();
    }

    public HelloProperties getHelloProperties() {
        return helloProperties;
    }

    public void setHelloProperties(HelloProperties helloProperties) {
        this.helloProperties = helloProperties;
    }
}
b、编写一个HelloProperties,用来做自定义配置:此处用来绑定配置文件的bdm.hello开头的配置
@ConfigurationProperties(prefix = "bdm.hello")
public class HelloProperties {
    private String prefix;
    private String suffix;

    public String getPrefix() {
        return prefix;
    }

    public void setPrefix(String prefix) {
        this.prefix = prefix;
    }

    public String getSuffix() {
        return suffix;
    }

    public void setSuffix(String suffix) {
        this.suffix = suffix;
    }
}
c、编写一个自动配置类HelloServiceAutoConfiguration:将HelloService注入到容器中
@Configuration
@ConditionalOnWebApplication//只有在web应用中才启用该自动配置
@EnableConfigurationProperties(HelloProperties.class)//使属性配置类生效,这样就可以注入该属性配置了
public class HelloServiceAutoConfiguration {
    @Autowired HelloProperties helloProperties;

    @Bean
    public HelloService helloService(){
        HelloService service = new HelloService();
        //给Properties属性赋值
        service.setHelloProperties(helloProperties);
        return service;
    }
}
d、想要自动配置类能生效,需要在META-INF/spring.factories文件中配置该自动配置类的路径,在resources下创建META-INF/spring.factories文件,内容如下:
org.springframework.boot.autoconfigure.EnableAutoConfiguration=\
  com.bdm.starter.HelloServiceAutoConfiguration
⑦将编写的这两个模块安装到maven仓库中,由于starter模块依赖于autoconfigure模块,因此需要先安装autoconfigure模块:
a、安装autoconfigure模块
b、安装starter

⑧创建一个新的项目,注意引入web模块(因为在web模块我们的自定义starter的自动配置才生效):
a、在该项目中引入starter依赖,pom文件如下:引入后在maven依赖中就可以看到我们的starter和自动配置
<dependencies>
	<dependency>
		<groupId>org.springframework.bootgroupId>
		<artifactId>spring-boot-starter-webartifactId>
	dependency>


	<dependency>
		<groupId>com.bdm.bdm-springboot-startergroupId>
		<artifactId>bdm-springboot-starterartifactId>
		<version>1.0-SNAPSHOTversion>
	dependency>

	<dependency>
		<groupId>org.springframework.bootgroupId>
		<artifactId>spring-boot-starter-testartifactId>
		<scope>testscope>
	dependency>
dependencies>
b、编写controller
@RestController
public class HelloController {

    @Autowired
    HelloService helloService;//可自动注入我们在启动器中置于IOC的组件

    @GetMapping("/hello")
    public String sayHello(){
        return helloService.sayHello("bdm");
    }
}
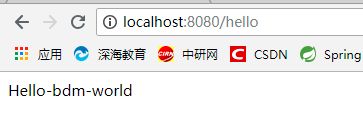
c、在主配置文件中配置前后缀:
bdm.hello.prefix=Hello
bdm.hello.suffix=world
d、启动项目并测试,结果如下:前后缀都加上了
另外:SpringBoot与各个模块的整合都有官方的示例代码:示例地址