android opencv 劝退之路第一章:环境编译
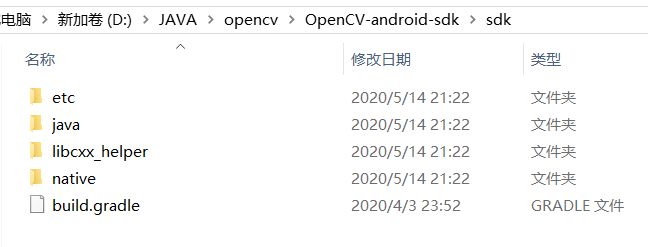
一、下载opencv源码包
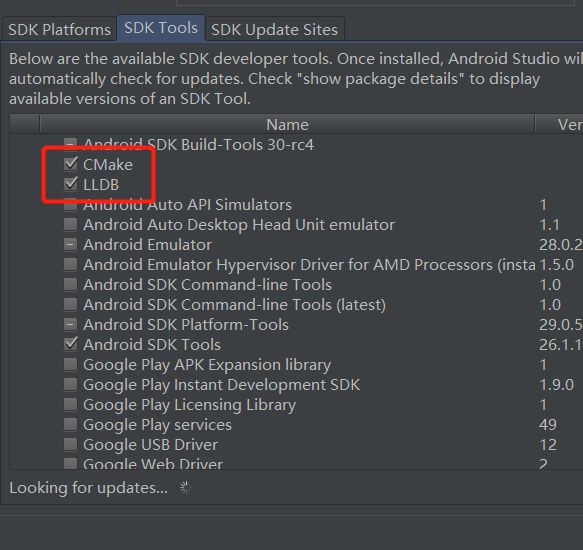
二、CMAKE构建项目
1、Android studio新建Module,命名为opencvlib
2、将“OpenCV-android-sdk\sdk\native\libs”下的文件复制到opencvlib/libs
3、opencvlib/src/main下新建文件夹cpp,cpp下新建C++文件,例如native-lib.cpp。
将“OpenCV-android-sdk\sdk\native\jni”下的整个include文件夹复制到cpp文件夹下,因为CMakeLists需要引用到该路径,头文件最好存放在项目中
4、opencvlib目录下新建文件CMakeLists.txt
5、配置当前Module下的buidl.gradle
- 节点android下添加
externalNativeBuild {
    cmake {
        path"CMakeLists.txt"
    }
}
- 节点android.defaultConfig下添加
externalNativeBuild {

    cmake {

        cppFlags "-std=c++11 -frtti -fexceptions"

        abiFilters 'x86' ,'armeabi-v7a','x86_64','arm64-v8a'   //CPU架构

        arguments  "-DANDROID_STL=c++_shared" //解决"libc++_shared.so" not found

    }

}
6、配置CMakeLists.txt
cmake_minimum_required(VERSION 3.4.1)

#支持-std=gnu++11

set(CMAKE_VERBOSE_MAKEFILE on)

set(CMAKE_CXX_FLAGS "${CMAKE_CXX_FLAGS} -std=gnu++11")

#配置加载native依赖
#以下路径就是上述第3步提到的头文件路径
include_directories(${PROJECT_SOURCE_DIR}/src/main/cpp/include)

#动态方式加载

add_library(lib_opencv STATIC IMPORTED ) #表示创建一个导入库,静态方式

#引入libopencv_java4.so文件

set_target_properties(lib_opencv

PROPERTIES

IMPORTED_LOCATION ${PROJECT_SOURCE_DIR}/libs/${ANDROID_ABI}/libopencv_java4.so

)
#自己的源文件

add_library( # Sets the name of the library.

            native-lib

            # Sets the library as a shared library.

            SHARED

            # Provides a relative path to your source file(s).

            src/main/cpp/native-lib.cpp )

# Searches for a specified prebuilt library and stores the path as a

# variable. Because CMake includes system libraries in the search path by

# default, you only need to specify the name of the public NDK library

# you want to add. CMake verifies that the library exists before

# completing its build.

find_library( # Sets the name of the path variable.

            log-lib

            # Specifies the name of the NDK library that

            # you want CMake to locate.

            log )

# Specifies libraries CMake should link to your target library. You

# can link multiple libraries, such as libraries you define in this

# build script, prebuilt third-party libraries, or system libraries.

target_link_libraries( # Specifies the target library.

            native-lib

            # Links the target library to the log library

            # included in the NDK.

${log-lib} android -ljnigraphics lib_opencv)
需要修改的地方
- include_directories 路径变量 根据实际头文件路径进行编译
- set_target_properties的libopencv_java4.so实际路径
- add_library中的native-lib.cpp实际路径
7、新建JNI工具类OpenCVUtil.java,声明native方法
private static native int[]grey(int[] pixels, int width, int height);
8、在native-lib.cpp编写C++代码
例如
 #include
 #include
 #include
 #include
 #include
using namespace cv;
using namespace std;
extern "C"
JNIEXPORT jintArray JNICALL
Java_czb_com_opencvlib_OpenCVUtil_grey(JNIEnv *env, jobject instance, jintArray buf, jint w, jint h) {
jint *cbuf = env->GetIntArrayElements(buf, JNI_FALSE );
    if (cbuf == NULL) {
    return 0;
    }
    Mat imgData(h, w, CV_8UC4, (unsigned char *) cbuf);
    uchar* ptr = imgData.ptr(0);
    for(int i =0; i < w*h; i ++){
    //计算公式:Y(亮度) = 0.299*R + 0.587*G + 0.114*B
        //对于一个int四字节,其彩色值存储方式为:BGRA
        int grayScale = (int)(ptr[4*i+2]*0.299 + ptr[4*i+1]*0.587 + ptr[4*i+0]*0.114);
        ptr[4*i+1] = grayScale;
        ptr[4*i+2] = grayScale;
        ptr[4*i+0] = grayScale;
    }
    int size = w * h;
    jintArray result = env->NewIntArray(size);
    env->SetIntArrayRegion(result, 0, size, cbuf);
    env->ReleaseIntArrayElements(buf, cbuf, 0);
    return result;
}
其中函数名 Java_czb_com_opencvlib_OpenCVUtil_grey,表示OpenCVUtil的包名为
czb.com.opencvlib,类下有grey方法,需根据实际进行改动
9、点击运行
运行成功的话,可在该路径下查看所编译的so库
app\build\intermediates\cmake\debug\obj

三、编写demo
1、工具类实现
public class OpenCVUtil {

static {

    System.loadLibrary("native-lib");

    }

    private static native int[]grey(int[] pixels_, int width, int height);


    public static Bitmap bmpGrey(Bitmap bm) {

        int width = bm.getWidth();

        int height = bm.getHeight();

        int[] ps =new int[width * height];

        bm.getPixels(ps, 0, width, 0, 0, width, height);

        long time = System.currentTimeMillis();

        int[] newPs =grey(ps, width, height);

        Log.e("CZB","C++ 执行:" + (System.currentTimeMillis() - time));

        Bitmap bitmap = Bitmap.createBitmap(width, height, Bitmap.Config.ARGB_8888);

        bitmap.setPixels(newPs, 0, width, 0, 0, width, height);

        return bitmap;

    }

}
2、在app中引用该Module
- app.gradle的节点dependencies添加
implementation project(':opencvlib')
3、调用工具类
Bitmap srcBitmap = BitmapFactory.decodeResource(getResources(), R.drawable.test);

Bitmap bm=OpenCVUtil.bmpGrey(srcBitmap);//关于图形处理步骤建议在子线程运行

imageView.setImageBitmap(bm);
最后 问题汇总(持续更新)
- 错误信息:java.lang.UnsatisfiedLinkError: dlopen failed: library “libopencv_java4.so” not found
解决办法: 手动加载libopencv_java4.so 。由于本人是放在opencvlib模块下,所以在
opencvlib/build.gradle的android节点添加
	sourceSets.main {
        jniLibs.srcDir 'libs'
        jni.srcDirs = []
    }
JAVA代码JNI类添加
	 static {
        System.loadLibrary("native-lib");
        System.loadLibrary("opencv_java4");
      }


