超简单学会使用 C++ 单元测试框架,再也不怕面试官刁难了
导读
C++ 开发时我们常有一个非常期望的愿景,那就是引用第三方库和框架时希望尽可能的简单,不然各种平台、各种编译问题可以让人焦头烂额。而Catch2就是一个只有头文件的单元测试框架。放心,这个单元测试框架完全能够支撑你的项目,且它的协议是 Boost Software License,完全可以商用。

由于Catch2只有一个头文件,因此你只需要下载这个头文件下来,添加到你的项目中就可以了。
github 下载地址:catchorg/Catch2
不能的提供csdn下载:
catchorg/Catch2
使用案例
#define CATCH_CONFIG_MAIN

#include

int Factorial( int number ) {
   return number <= 1 ? number : Factorial( number - 1 ) * number;  // fail
// return number <= 1 ? 1      : Factorial( number - 1 ) * number;  // pass
}

TEST_CASE( "Factorial of 0 is 1 (fail)", "[single-file]" ) {
    REQUIRE( Factorial(0) == 1 );
}

TEST_CASE( "Factorials of 1 and higher are computed (pass)", "[single-file]" ) {
    REQUIRE( Factorial(1) == 1 );
    REQUIRE( Factorial(2) == 2 );
    REQUIRE( Factorial(3) == 6 );
    REQUIRE( Factorial(10) == 3628800 );
}
这个例子是官方案例,演示了计算阶乘的算法。
常规测试
#define CATCH_CONFIG_MAIN 这个宏定义了catch2 的 main 函数。下面的代码是从 catch2 里面摘抄的,可以看到 main 函数定义。
#ifdef CATCH_CONFIG_MAIN
// start catch_default_main.hpp

#ifndef __OBJC__

#if defined(CATCH_CONFIG_WCHAR) && defined(WIN32) && defined(_UNICODE) && !defined(DO_NOT_USE_WMAIN)
// Standard C/C++ Win32 Unicode wmain entry point
extern "C" int wmain (int argc, wchar_t * argv[], wchar_t * []) {
#else
// Standard C/C++ main entry point
int main (int argc, char * argv[]) {
#endif

    return Catch::Session().run( argc, argv );
}
意味着你不需要自己写 main 函数。
但是如果你需要写自己的 main 函数,catch2 也支持,像下面这样:
#define CATCH_CONFIG_RUNNER
#include "catch.hpp"

int main( int argc, char* argv[] ) {
  // global setup...

  int result = Catch::Session().run( argc, argv );

  // global clean-up...
  return result;
}
大多数情况下我们都是有 main 函数的,当你运行项目时Catch::Session().run( argc, argv );这一句就启动了你的单元测试。如下:
#define CATCH_CONFIG_MAIN
#include "catch.hpp"

int main(int argc, char* argv[]) {
    // global setup...
    int result = Catch::Session().run(argc, argv);
    // global clean-up...
    return result;
}

int Factorial(int number) {
    return number <= 1 ? number : Factorial(number - 1) * number;  // fail
}

TEST_CASE("Factorial of 0 is 1 (fail)", "[single-file]") {
    REQUIRE(Factorial(0) == 1);
}

TEST_CASE("Factorials of 1 and higher are computed (pass)", "[single-file]") {
    REQUIRE(Factorial(1) == 1);
    REQUIRE(Factorial(2) == 2);
    REQUIRE(Factorial(3) == 6);
    REQUIRE(Factorial(10) == 3628800);
}
回到最上面的测试案例,我们的 test-case 是有命名的,其实 test-case 也是可以没有名字的,因为要测试的函数多了,你最终总是要命名。不命名的test-case 如下:
TEST_CASE() {
    REQUIRE(Factorial(1) == 1);
}
简单吧。 剩下的就是去补充你的单元测试文件了,直到你写完了自己需要的 test-case。
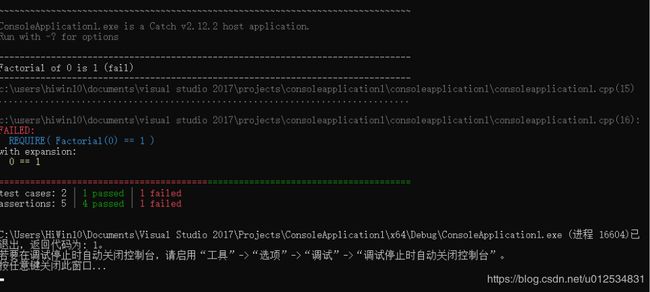
看下单元测试运行结果:
BDD 风格测试
BDD 简介:
Behavior Driven Development,行为驱动开发是一种敏捷软件开发的技术,它鼓励软件项目中的开发者、QA和非技术人员或商业参与者之间的协作,BDD 提倡的是通过将测试语句转换为类似自然语言的描述,开发人员可以使用更符合大众语言的习惯来书写测试,当别人接手/交付,或者自己修改的时候,都简单易明白,顺利很多。一个典型的 BDD 测试用例包括完整的三段式上下文,测试大多可以翻译为Given…When…Then的格式,读起来轻松惬意。
catch2 也支持像 BDD(行为驱动开发)风格的单元测试。
因为我们目前的项目是采用敏捷开发的模式,同时基于 BDD 开发,需求人员在写需求是是按照 GIVEN WHEN THEN 的方式,截张图看下(真实图片,理解打码):
所以我们的单元测试需要跟随 BDD 流程来。这样可以保证所有参与者的理解是一致的,包括代码也是跟随需求描述是一致的。
案例:
#define CATCH_CONFIG_MAIN
#include "catch.hpp"

SCENARIO( "vectors can be sized and resized", "[vector]" ) {

    GIVEN( "A vector with some items" ) {
        std::vector v( 5 );

        REQUIRE( v.size() == 5 );
        REQUIRE( v.capacity() >= 5 );

        WHEN( "the size is increased" ) {
            v.resize( 10 );

            THEN( "the size and capacity change" ) {
                REQUIRE( v.size() == 10 );
                REQUIRE( v.capacity() >= 10 );
            }
        }
        WHEN( "the size is reduced" ) {
            v.resize( 0 );

            THEN( "the size changes but not capacity" ) {
                REQUIRE( v.size() == 0 );
                REQUIRE( v.capacity() >= 5 );
            }
        }
        WHEN( "more capacity is reserved" ) {
            v.reserve( 10 );

            THEN( "the capacity changes but not the size" ) {
                REQUIRE( v.size() == 5 );
                REQUIRE( v.capacity() >= 10 );
            }
        }
        WHEN( "less capacity is reserved" ) {
            v.reserve( 0 );

            THEN( "neither size nor capacity are changed" ) {
                REQUIRE( v.size() == 4 );
                REQUIRE( v.capacity() >= 5 );
            }
        }
    }
}
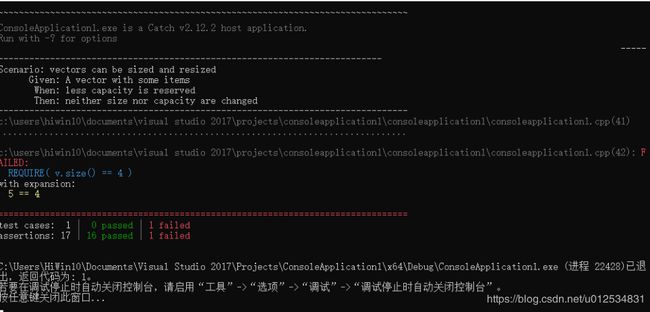
真实项目不便演示,上面的代码也是官方给的 BDD 风格的单元测试。我在 42 行故意写错,看下运行结果:

结果提示 42 行测试不通过。
结语
基于上面的小案例,我相信你已经迅速掌握了 catch2 的用法,也可以给自己的代码写单元测试了。只有当你真正的实践过,你才能知道这里面的门道。
如有帮助,请多多点赞支持。

