springboot mq监听接口中无法注入bean的四种解决方案
项目中第一次使用mq,在consumer的监听接口中收到消息调用相关的业务层接口时发现无法注入,在网上找资料以及同事的帮助下总结的几种方式来解决这个问题,供大家参考:
方式1:使用spring-mq-consumer配置文件
				xxxxx
				xxxx
				xxxxxx
				xxxxxxx
监听类,MessageListener类
package com.kd.mq;

import com.aliyun.openservices.ons.api.Action;
import com.aliyun.openservices.ons.api.ConsumeContext;
import com.aliyun.openservices.ons.api.Message;
import org.apache.log4j.Logger;
import org.springframework.beans.factory.annotation.Autowired;

public class MessageListener implements com.aliyun.openservices.ons.api.MessageListener {


	@Autowired
	private AppMqDataSyncService appMqDataSyncService;

	private Logger logger = Logger.getLogger(MessageListener.class);

	@Override
	public Action consume(Message message, ConsumeContext context) {
		logger.info("****************************MQ接收到消息开始****************************");
		logger.info("topic:" + message.getTopic());
		logger.info("tag:" + message.getTag());
		logger.info("messageId:" + message.getMsgID());
		logger.info("messageKey:" + message.getKey());
		try {
			// do something..
            appMqDataSyncService.deleteAc(message);
			logger.info("****************************给MQ回复确认消息****************************");
			return Action.CommitMessage;
		} catch (Exception e) {
			// 消费失败
			return Action.ReconsumeLater;
		}
	}
}
在web.xml文件中扫描,consumer配置文件,这种方式默认就可以注入不需要特殊处理,但需要大量配置文件
方式2 springboot 项目中处理,使用单例工具类实现间接调用
springboot默认没有web.xml文件
创建一个MqUtils类
import com.kd.modelapi.api.TestService;
import org.springframework.beans.factory.annotation.Autowired;
import org.springframework.stereotype.Component;

import javax.annotation.PostConstruct;

/**
 *
 * @date 2019/4/2 13:06
 */
@Component
public class MqUtils {

    @Autowired
    private TestService testService;

    @PostConstruct
    public void init(){
        MqUtils.getInstance().testService = this.testService;
    }

    /**
     *  实现单例 start
     */
    private static class SingletonHolder {
        private static final MqUtils INSTANCE = new MqUtils();
    }
    private MqUtils (){}
    public static final MqUtils getInstance() {
        return SingletonHolder.INSTANCE;
    }
    /**
     *  实现单例 end
     */
    public TestService getTestService(){
        return MqUtils.getInstance().testService;
    }
}
监听类
import com.aliyun.openservices.ons.api.Action;
import com.aliyun.openservices.ons.api.ConsumeContext;
import com.aliyun.openservices.ons.api.Message;
import com.aliyun.openservices.ons.api.MessageListener;
import com.kd.modelservice.filesync.service.DataAccessServiceI;
import org.slf4j.Logger;
import org.slf4j.LoggerFactory;
import org.springframework.beans.factory.annotation.Autowired;
/**
* @date 2019/4/1 17:03
*/
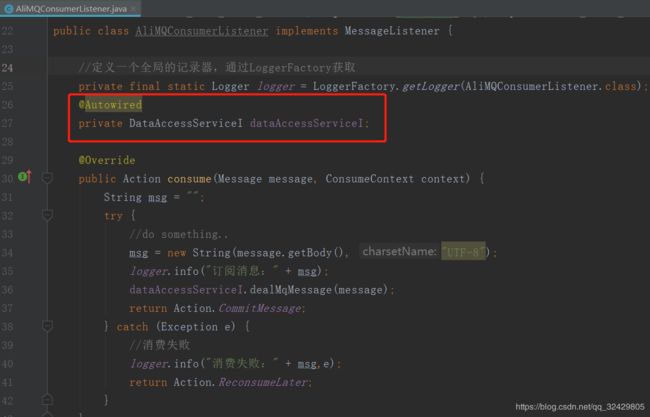
public class AliMQConsumerListener implements MessageListener {
//定义一个全局的记录器,通过LoggerFactory获取
private final static Logger logger = LoggerFactory.getLogger(AliMQConsumerListener.class);
@Override
public Action consume(Message message, ConsumeContext context) {
String msg = "";
try {
//do something..
msg = new String(message.getBody(), "UTF-8");
logger.info("订阅消息:" + msg);
//可以实例化也可以直接调用
MqUtil.getInstance().getDataAccessServiceI().dealMqMessage(message);
return Action.CommitMessage;
} catch (Exception e) {
//消费失败
logger.info("消费失败:" + msg,e);
return Action.ReconsumeLater;
}
}
}
这种方式简单易懂,AliMQConsumerListener也不需要再实现其他接口
方式3 spring脱离容器的示例注入
在创建mq consumer的Subscription时使用spring的增强注入
ConsumerFactory类如下,需要实现两个接口核心代码
MessageListener listener = (MessageListener) clazz.newInstance();
//把new出来的对象里用了@Autowrite 注解的字段自动注入
applicationContext.getAutowireCapableBeanFactory().autowireBean(listener);
map.put(subscription, listener);
import java.io.File;
import java.util.ArrayList;
import java.util.HashMap;
import java.util.List;
import java.util.Map;
import java.util.Properties;

import org.slf4j.Logger;
import org.slf4j.LoggerFactory;
import org.springframework.beans.BeansException;
import org.springframework.beans.factory.InitializingBean;
import org.springframework.context.ApplicationContext;
import org.springframework.context.ApplicationContextAware;
import org.springframework.util.StringUtils;

import com.aliyun.openservices.ons.api.MessageListener;
import com.aliyun.openservices.ons.api.PropertyKeyConst;
import com.aliyun.openservices.ons.api.bean.ConsumerBean;
import com.aliyun.openservices.ons.api.bean.Subscription;

/**
 *

* @date 2019年4月17日
 */
public class ConsumerFactory implements ApplicationContextAware, InitializingBean{

	private static HashMap consumerBeans;

	private ApplicationContext applicationContext;

    private final static Logger logger=LoggerFactory.getLogger(ConsumerFactory.class);

    private List consumerConfigs;

    private List classNames=new ArrayList<>();//监听类列表


	@Override
	public void afterPropertiesSet() throws Exception {
		consumerBeans=new HashMap<>();
		logger.info("========开始创建Consumer========");
		for(Properties properties:consumerConfigs){
			createConsumerBean(properties);
		}
		logger.info("========Consumer创建完毕========");
	}

	@Override
	public void setApplicationContext(ApplicationContext applicationContext) throws BeansException {
		this.applicationContext=applicationContext;

	}

	/**
	 * 启动
	 */
	public void start() {

		consumerBeans.forEach((consumerId, consumer) -> {
			if (!consumer.getSubscriptionTable().isEmpty()) {
				logger.info("======consumer["+consumerId+"] start======");
				consumer.start();
			}else{
				logger.info("======consumer["+consumerId+"] 无监听配置,不start======");
			}
		});
	}

	/**
	 * 关闭
	 */
	public void shutdown() {
		consumerBeans.forEach((consumerId, consumer) -> {
			logger.info("======consumer["+consumerId+"] shutdown======");
			consumer.shutdown();
		});
	}
	/**
	 * 创建消费者
	 * @param consumerConfig
	 */
	private void createConsumerBean(Properties consumerConfig) {
		logger.info("========Consumer:"+consumerConfig.get("consumerId")+"开始创建========");
        ConsumerBean consumerBean = new ConsumerBean();
        Properties properties = new Properties();
        properties.put(PropertyKeyConst.ConsumerId, consumerConfig.get("consumerId"));
        // AccessKey 阿里云身份验证,在阿里云服务器管理控制台创建
        properties.put(PropertyKeyConst.AccessKey, consumerConfig.get("accessKey"));
        // SecretKey 阿里云身份验证,在阿里云服务器管理控制台创建
        properties.put(PropertyKeyConst.SecretKey, consumerConfig.get("secretKey"));
        properties.put(PropertyKeyConst.ONSAddr, consumerConfig.get("onsAddr"));

        if(!StringUtils.isEmpty(consumerConfig.get("suspendTimeMillis"))){
            properties.put(PropertyKeyConst.SuspendTimeMillis, consumerConfig.get("suspendTimeMillis"));
        }
        if(!StringUtils.isEmpty(consumerConfig.get("maxReconsumeTimes"))){
            properties.put(PropertyKeyConst.MaxReconsumeTimes, consumerConfig.get("maxReconsumeTimes"));
        }
        consumerBean.setProperties(properties);

        Map map = new HashMap<>();
        try {
			buildSubscription(map,consumerConfig.get("consumerId").toString());
		} catch (Exception e) {
			e.printStackTrace();
		}
        consumerBean.setSubscriptionTable(map);
        consumerBeans.put(consumerConfig.get("consumerId").toString(), consumerBean);
        logger.info("========Consumer:"+consumerConfig.get("consumerId")+"创建完成========");
	}

	/**
	 * 创建监听
	 * @param map
	 * @param CID 消费者id
	 * @throws Exception
	 */
	private void buildSubscription(Map map,String CID) throws Exception {

		for(String className:this.classNames){
			Class clazz=Class.forName(className);
			if(clazz.isAnnotationPresent(MQHandler.class)){
				MQHandler mqHandler=clazz.getAnnotation(MQHandler.class);
				String topic=mqHandler.topic();
				String tag=mqHandler.tag();
				String consumerId=mqHandler.CID();

				//监听类和cid匹配起来
				if(CID.equals(consumerId)){
					Subscription subscription = new Subscription();
					subscription.setTopic(topic);
					subscription.setExpression(tag);
					logger.info("监听类配置\n\t CID:"+CID+" \n\t topic:"+topic+" \n\t tag:"+tag+" \n\t class:"+className);

					MessageListener listener = (MessageListener) clazz.newInstance();
					//把new出来的对象里用了@Autowrite 注解的字段自动注入
					applicationContext.getAutowireCapableBeanFactory().autowireBean(listener);
					map.put(subscription, listener);
				}

			}

		}
	}
	/**
	 * 设置配置
	 * @param configs
	 */
	public void setConsumerConfigs(List configs) {
		this.consumerConfigs = configs;
	}

	/**
	 * 根据包名获取包下的所有类
	 *
	 * @param packageName
	 * @return
	 */
	private List getClassName(String packageName) {
//		String filePath =this.getClass().getResource("/").getPath() + packageName.replace(".", File.separator);
		String filePath=this.getClass().getResource("/").getPath();
		File file=new File(filePath);
		filePath=file.getParent()+File.separator+"classes"+File.separator+packageName.replace(".", File.separator);
		logger.info("filePath:"+filePath);
		List fileNames = getClassName(filePath, null);
		return fileNames;
	}

	private List getClassName(String filePath, List className) {
		List myClassName = new ArrayList();
		File file = new File(filePath);
		File[] childFiles = file.listFiles();
		for (File childFile : childFiles) {
			if (childFile.isDirectory()) {
				myClassName.addAll(getClassName(childFile.getPath(), myClassName));
			} else {
				String childFilePath = childFile.getPath();
				childFilePath = childFilePath.substring(childFilePath.indexOf(File.separator+"classes") + 9,
						childFilePath.lastIndexOf("."));
				childFilePath = childFilePath.replace(File.separator, ".");
				myClassName.add(childFilePath);
			}
		}
		return myClassName;
	}

	/**
	 * 设置listener类所在包
	 * @param basePackage 包路径
	 */
	public void setBasePackage(String basePackage) {
		String[] packages=basePackage.split(",");
		String s="开始扫描包:";
		for(String str:packages){
			s+="["+str+"]";
		}
		logger.info(s);
		for(String path:packages){
			List paths=getClassName(path);
			this.classNames.addAll(paths);
		}
	}
}
可以正常注入,比较难懂
方式4 从ApplicationContext中取,网上看到的直接上地址
https://blog.csdn.net/gaoshili001/article/details/77776863