NB-IOT开发|nbiot开发教程《二》AT指令类模组驱动-STM32串口实现接收不定长度数据
嵌入式开发中我们要时刻保持代码的高效与整洁一、前言
嵌入式开发中我们要时刻保持代码的高效与整洁。上一节中AT指令模组状态机的实现需要串口实现接收不定长度数据,本文就是说明具体实现方式。
二、原理
串口实现接收不定长度数据原理:串口接收中断接收数据,每次中断时启动数据超时定时器(软件定时器),每次接收到数据更新定时器时间并将数据压到环形缓冲区中,时间可以为10ms,当定时器超时时即认为接收到完整包。
本次串口驱动的封装是基于cola_os下完成的,关于cola_os的详细介绍可以参考文章:
1.嵌入式开发--300行代码实现操作系统cola_os
2. 嵌入式开发--实现应用层和硬件层分层管理
3.嵌入式开发--STM32上实现驱动注册initcall机制(类linux)
4.嵌入式开发|高效缓冲器设计(C语言)
三、源代码
初始化串口并且初始化串口接收中断
static void uart1_gpio_init(void)
{
     GPIO_InitTypeDef GPIO_InitStructure;

    GPIO_InitStructure.GPIO_Pin   = GPIO_Pin_9;
    GPIO_InitStructure.GPIO_Speed = GPIO_Speed_50MHz;
    GPIO_InitStructure.GPIO_Mode  = GPIO_Mode_AF_PP;
    GPIO_Init(GPIOA, &GPIO_InitStructure);

    GPIO_InitStructure.GPIO_Pin = GPIO_Pin_10;
    GPIO_InitStructure.GPIO_Mode = GPIO_Mode_IN_FLOATING;
    GPIO_Init(GPIOA, &GPIO_InitStructure);
}


static void uart1_init(uint32_t bund)
{
    USART_InitTypeDef USART_InitStructure;
    USART_InitStructure.USART_BaudRate = bund;
    USART_InitStructure.USART_WordLength = USART_WordLength_8b;
    USART_InitStructure.USART_StopBits = USART_StopBits_1;
    USART_InitStructure.USART_Parity = USART_Parity_No ;
    USART_InitStructure.USART_HardwareFlowControl = USART_HardwareFlowControl_None;
    USART_InitStructure.USART_Mode = USART_Mode_Rx | USART_Mode_Tx;
    USART_Init(USART1, &USART_InitStructure);

    USART_ITConfig(USART1, USART_IT_RXNE, ENABLE);
    USART_Cmd(USART1, ENABLE);
    USART_ClearFlag(USART1,USART_FLAG_RXNE);
}
static void uart1_nvic_init(void)
{
    NVIC_InitTypeDef NVIC_InitStructure;

    NVIC_InitStructure.NVIC_IRQChannel = USART1_IRQn;
    NVIC_InitStructure.NVIC_IRQChannelPreemptionPriority = 0;
    NVIC_InitStructure.NVIC_IRQChannelSubPriority        = 0;
    NVIC_InitStructure.NVIC_IRQChannelCmd                = ENABLE;
    NVIC_Init(&NVIC_InitStructure);
}
编写串口驱动功能函数
static int uart1_write(cola_device_t *dev, int pos, const void *buffer, int size)
{
	uart1_sendnbyte((uint8_t *)buffer,size);
	return size;
}
static int uart1_read(cola_device_t *dev, int pos, void *buffer, int size)
{
	return cola_fifo_read(&uart_fifo,buffer,size);
}
static int uart1_config(cola_device_t *dev, void *args, void *var)
{
	struct serial_configure *cfg = (struct serial_configure *)args;
	if(cfg)
	{
		uart1_init(cfg->baud_rate);
	}
	return 0;
}
static struct cola_device_ops uart1_ops =
{
	.write  = uart1_write,
	.read   = uart1_read,
	.config = uart1_config,
};
串口接收中断:接收中断发生,重启定时器,将数据放到环形缓冲区中
void USART1_IRQHandler(void)
{
  uint8_t c;
  if((USART1->SR & USART_FLAG_RXNE) == USART_FLAG_RXNE)
  {
    c = (uint8_t)(USART1->DR);
    if(uart1_dev.owner)
    {
        if(uart1_write_slot( &c, 1))
        {
            cola_timer_start(&uart_timer,TIMER_ONE_SHOT,pdMS_TO_TICKS(20));
        }
    }
  }
}
初始化软件定时器;
static void uart_timer_cb(uint32_t event)
{
    if(uart1_dev.owner)
    {
        cola_set_event(uart1_dev.owner,SIG_DATA);
    }
}
初始化:
void board_setup_usart(void)
{
#ifdef USING_UART1
    uart1_configuration(115200);
    cola_fifo_init(&uart_fifo,uart_buf,sizeof(uart_buf));
    cola_timer_create(&uart_timer,uart_timer_cb);
    uart1_dev.name = "uart1";
    uart1_dev.dops = &uart1_ops;
    cola_device_register(&uart1_dev);
#endif
}
四、应用层调用与调试
  /********************************  cola os  *********************************
  * @file   : app_uart.c
  * @author : sunny.Bit(QQ 1506564994)
              Email:[email protected]
  * @brief  : cola os
  ******************************************************************************/
#include "config.h"
#include
#include "app.h"

#include "cola_device.h"
#include "cola_os.h"


static task_t uart_task;
static cola_device_t *uart_dev;


static uint8_t tmp[128] = {0};
static void uart_task_cb(uint32_t event)
{
    int err = 0;
    if(event&SIG_DATA)
    {
        err = cola_device_read(uart_dev,0,tmp,sizeof(tmp));
        if(err)
        {
            os_log("UART-RX:%d:",err);
            cola_device_write(uart_dev,0,tmp,err);
            os_log("\r\n");
        }
    }
}

static void uart_dev_init(void)
{
    uart_dev = cola_device_find("uart1");
    assert(uart_dev);
    cola_device_set_owner(uart_dev,&uart_task);
    struct serial_configure cfg;
    cfg.baud_rate = 115200;
    cola_device_cfg(uart_dev,&cfg,0);
}

void uart_task_init(void)
{
    uart_dev_init();
    cola_task_create(&uart_task,uart_task_cb);
}
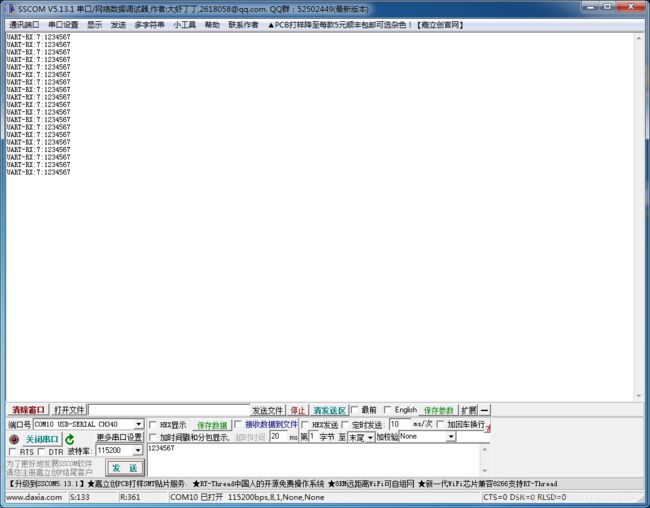
调试:
这样实现是不是很简单。
五、代码下载
https://github.com/sckuck-bit/nb-iot

