一步一步实现中后台管理平台模板-01-使用Vue CLI3快速创建项目
一,前言
去年年底到今年年中这段时间,使用Vue2.x+elementUI做了一套后台管理框架
目的是要做前端工程化的建设,对Vue-cli2.x源码做了定制修改,添加了一些功能
通过学习cli及脚手架模板的源码,我分别做了适用于admin,app,web的三类脚手架
并通过定制的cli命令实现对应脚手架模板项目的一键生成
三类脚手架根据不同的使用环境和场景,集成了一些开箱即用的功能,如
界面框架,常用组件,动态可扩展路由,Vuex配置,接口封装及常用接口,
常用工具方法及过滤器,多环境配置,单元测试和mock,性能优化等

针对前后台接口联调问题,还写了两个小工具:
根据后台Swagger接口文档,自动生成前端API调用模板,并自动生成Mock

期间也一直想找机会基于Vue cli3做重构,这次基于Vue cli3 + Ant-Design-Vue
一步一步实现一个开箱即用的中后台管理平台模板,每篇的代码会在git上创建对应的Tag

项目名称:vue-framework-admin
第一步,使用Vue CLI3来创建项目脚手架
暂时使用Vue CLI3来构建工程,对于脚手架中提供的功能配置及优化后续会进行源码分析
传送门:Vue cli2.x源码分析
https://blog.csdn.net/ABAP_Brave/article/details/84930286
二,安装Vue CLI3
安装vue-cli:
npm install -g @vue/cli
Vue CLI 3.0包命名规则使用了npm推荐的作用域包命名规则
(由2.x的vue-cli改为了@vue/cli)
安装过程的报错处理:
npm ERR! Unexpected end of JSON input while parsing near '...vAL4sFmoEpFPuXkeHiw=='
清除缓存:
npm cache clean --force
三,在指定目录下创建项目
执行vue create命令创建项目:
bogon:~ brave$ cd GitHubProjects
bogon:GitHubProjects brave$ vue create vue-framework-admin
四,脚手架配置
1)选择配置方案
Vue CLI v3.9.3
? Please pick a preset:
  default (babel, eslint)
❯ Manually select features
自定义:Manually select features
2)选择配置
? Check the features needed for your project:
 ◉ Babel
 ◯ TypeScript
 ◯ Progressive Web App (PWA) Support
 ◉ Router
 ◉ Vuex
 ◉ CSS Pre-processors
 ◉ Linter / Formatter
❯◉ Unit Testing
 ◯ E2E Testing
Babel-自动已选
不使用typeScript:vue对typeScript的支持不完善
PWA:中后台项目,不需要支持PWA
router-需要
vuex-需要
css预处理-需要
lint--自动已选
单元测试-需要
端到端测试-暂不需要
3)选择路由模式:
? Use history mode for router? (Requires proper server setup for index fallback
in production) (Y/n)
hash模式会在url中出现#,且无法再使用hash进行定位
使用history模式,url会更加简洁
4)选择CSS预处理器:
? Pick a CSS pre-processor (PostCSS, Autoprefixer and CSS Modules are supported
by default): (Use arrow keys)
  Sass/SCSS (with dart-sass)
  Sass/SCSS (with node-sass)
❯ Less
  Stylus
选择Less : ant-design-vue组件库使用了less,保持统一,方便定制主题
5)选择Lint配置:
? Pick a linter / formatter config:
  ESLint with error prevention only
  ESLint + Airbnb config
  ESLint + Standard config
❯ ESLint + Prettier
选择ESLint + Prettier
6)选择Lint触发的时机:
? Pick additional lint features:
 ◉ Lint on save
❯◉ Lint and fix on commit
代码保存时和提交代码时都进行Lint
7)选择单元测试框架:
? Pick a unit testing solution:
  Mocha + Chai
❯ Jest
选择Jest
8)选择配置文件的存储方式:
? Where do you prefer placing config for Babel, PostCSS, ESLint, etc.? (Use arro
w keys)
❯ In dedicated config files
  In package.json
放到单独文件中,而不是全放到package.json中
9)是否保存当前全部配置供下次使用
? Save this as a preset for future projects? (y/N)
是的
9)配置完成,开始生成脚手架并安装依赖
Vue CLI v3.9.3
✨  Creating project in /Users/brave/GitHubProjects/vue-framework-admin.
?  Initializing git repository...
⚙  Installing CLI plugins. This might take a while...
> [email protected] install /Users/brave/GitHubProjects/vue-framework-admin/node_modules/fsevents
> node install
[fsevents] Success: "/Users/brave/GitHubProjects/vue-framework-admin/node_modules/fsevents/lib/binding/Release/node-v57-darwin-x64/fse.node" is installed via remote
> [email protected] install /Users/brave/GitHubProjects/vue-framework-admin/node_modules/yorkie
> node bin/install.js
setting up Git hooks
done
> [email protected] postinstall /Users/brave/GitHubProjects/vue-framework-admin/node_modules/core-js
> node scripts/postinstall || echo "ignore"
added 1536 packages from 1001 contributors in 25.841s
?  Invoking generators...
?  Installing additional dependencies...
added 121 packages from 121 contributors, updated 3 packages and moved 13 packages in 16.318s
⚓  Running completion hooks...
?  Generating README.md...
?  Successfully created project vue-framework-admin.
?  Get started with the following commands:
 $ cd vue-framework-admin
 $ npm run serve
五,运行项目
进入项目文件夹,执行命令npm run serve运行工程:
bogon:vue-framework-admin brave$ npm run serve
> [email protected] serve /Users/brave/GitHubProjects/vue-framework-admin
> vue-cli-service serve
 INFO  Starting development server...
 98% after emitting CopyPlugin
 DONE  Compiled successfully in 4112ms                                                                                      13:53:29

  App running at:
  - Local:   http://localhost:8080/
  - Network: http://10.17.169.81:8080/
  Note that the development build is not optimized.
  To create a production build, run npm run build.
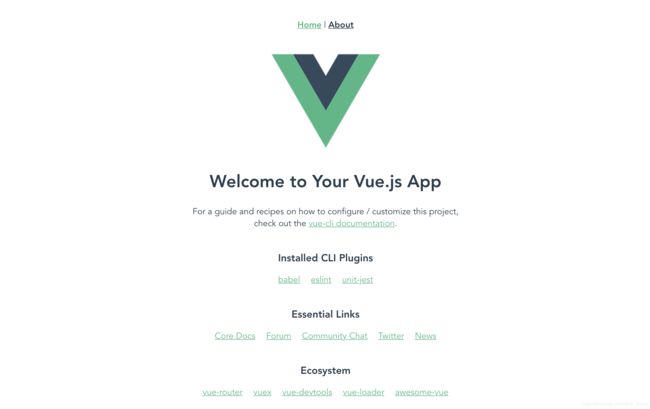
查看页面:
六,结尾
对比 CLI2,CLI3使用了webpack4,提供能更多开箱即用的功能
Vue CLI3还提供了vue ui可视化工具,CLI3提供了更多的优化和配置

下一步,集成AntDesignVue和配置
七,代码下载
传送门:CSDN下载
传送门:GitHub下载-vue-framework-admin-v0.0.1
维护记录:
20190806:
编写文章,上传代码资源
20190807:
更新CSDN资源下载链接