Web AutoTest 搭建环境:selenium3+python3+eclipse6+firefox52(win7),selenium实例
selenium+firefox环境搭配:
selenium2+firefox46以下版本(无需驱动包,firefox喜欢偷偷升级,你懂的)
selenium3+firefox47以上版本(必须下载驱动:geckodriver.exe,且添加到环境变量)本人的环境搭建:selenium3.4+python35.3+firefox52,以下操作都以此配置为准。
1. 安装eclipse(PyDev插件):
eclipse+pydev 官网下载+安装(win7)
2. 安装Python:
python 官网下载+安装(win7)
3. 安装selenium:
python 导入 selenium包(win7)
4. 安装FireFox:
站内下载Firefox
至此,开发环境搭建完成。
5. selenium实例:
5.1、创建python项目:
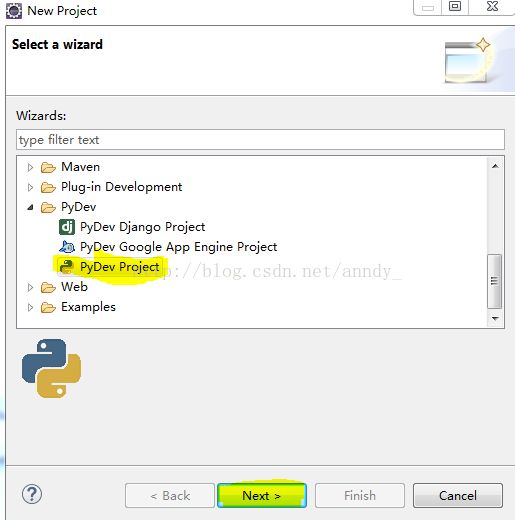
在 Eclipse 菜单栏中,选择 File > New > Project > Pydev > Pydev Project,单击 Next:
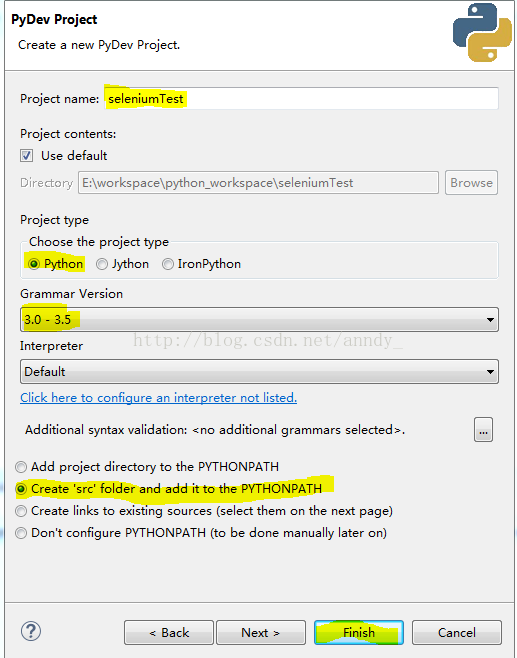
新建项目:SeleniumTest,单击 Next,如下图:
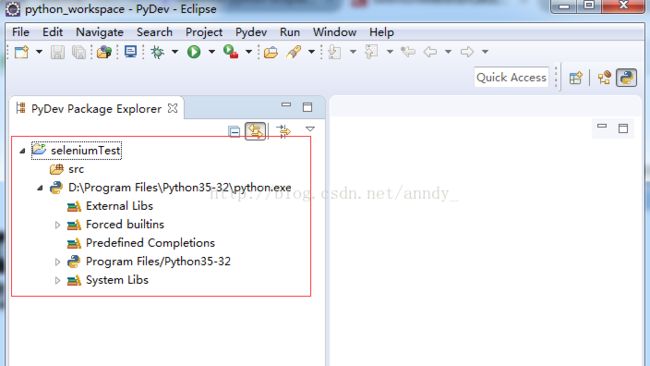
点击Finish后,完成如下图:
5.2、 创建 Python package
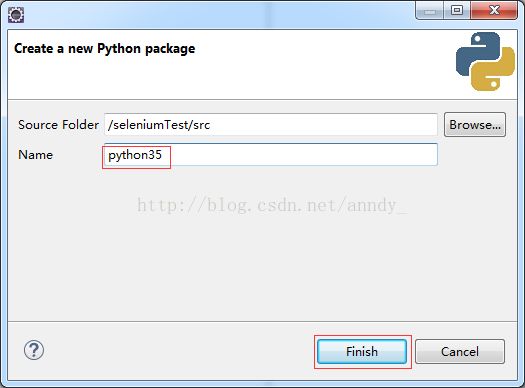
选择 PyDev 透视图(右上角Python图标),在 PyDev Package Explorer 中,右键单击 src,选择 New->Pydev Package,输入 Package 名称python35:
单击 Finish,Python 包就创建好了,此时,自动生成__init__.py 文件,该文件不包含任何内容。
注意:如果在创建项目的时候没有选中“Create default src folder and add it to the pythonpath”复选框,则需要通过 File > New > Other > Source Folder 手动创建一个源代码文件夹src。
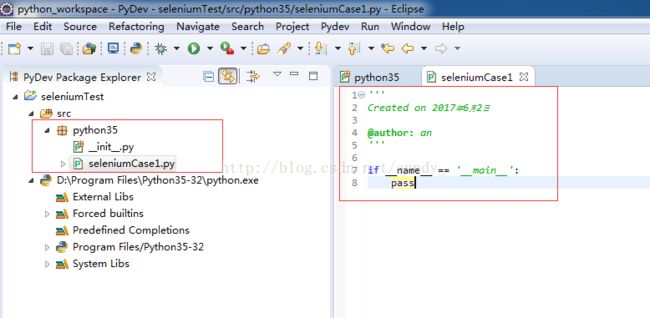
5.3、 创建 Python module右键单击创建的 Pydev Package(python35),选择 New->Pydev Module,输入模块名称SeleniumCase1.py。点击Finish,Python 模块就建成了,如下:
5.4、修改SeleniumCase1.py内容如下:
# coding = utf-8
from selenium import webdriver
browser = webdriver.Firefox()
browser.get("http://www.baidu.com")
browser.find_element_by_id("kw").send_keys("selenium")
browser.find_element_by_id("su").click()
browser.quit()
5.5、执行脚本:
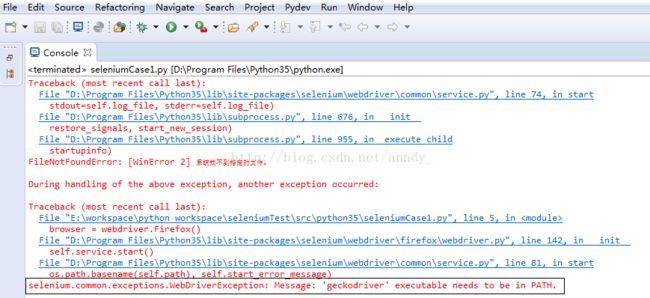
(1)右击SeleniumCase1.py,Run As->Python Run,执行结果如下:
报错原因:selenium3必须安装Firefox的“geckodriver”;
解决方案:下载geckodriver,把 geckodriver放到路径“D:\Program Files\Python35\Scripts”(这样就不用配置 geckodriver 的环境变量)。
(2)重启eclipse,再次右击SeleniumCase1.py,Run As->Python Run,执行结果如下:
报错原因:没有默认安装Firefox(默认安装路径:“C:\Program Files”或者“C:\Program Files (x86)”);
解决方案:将firefox的安装路径,直接增加到 python35\Lib\site-packages\selenium\webdriver\firefox 目录下的 firefox_binary.py文件中,如下图所示:
(3)重启eclipse,再次右击SeleniumCase1.py,Run As->Python Run,执行成功。
注意:
1. 第一次安装的是 Firefox35,将Firefox安装路径添加到 firefox_binary.py 后,依然报出“moz:firefoxoptions.binary”错误。
原因:Firefox版本太低
方案:Firefox官网下载最新版本 Firefox53
2. 第二次安装的是 Firefox53,重启eclipse,再次右击SeleniumCase1.py,Run As->Python Run,依然报错:
原因:Firefox53本身有bug
方案:降级安装为Firefox52即可。
-
Win 32版:https://ftp.mozilla.org/pub/firefox/releases/52.0.2/win32/zh-CN/Firefox%20Setup%2052.0.2.exe
-
Win 64版:https://ftp.mozilla.org/pub/firefox/releases/52.0.2/win64/zh-CN/Firefox%20Setup%2052.0.2.exe
