

def thresholding(img):
    # setting all sorts of thresholds
    # 计算x轴方向或y轴方向的颜色变化梯度导数,并以此进行阈值过滤(thresholding),得到二进制图(binary image):
    # x_thresh = utils.abs_sobel_thresh(img, orient='x', thresh_min=10 ,thresh_max=230)#通过调整阈值,获取清晰的车道线
    x_thresh = utils.abs_sobel_thresh(img, orient='x', thresh_min=40, thresh_max=230)  # 通过调整阈值,获取清晰的车道线
    x_thresh_o = np.uint8(255 * x_thresh / np.max(x_thresh))
    cv2.namedWindow('x_thresh', 0)  # 窗口大小可以改变
    cv2.imshow("x_thresh", x_thresh_o)
    cv2.waitKey(10)


    # OpenCV定义的结构元素
    kernel0 = cv2.getStructuringElement(cv2.MORPH_RECT, (1, 1))
    kernel00 = cv2.getStructuringElement(cv2.MORPH_RECT, (2, 2))
    kernel = cv2.getStructuringElement(cv2.MORPH_RECT, (3, 3))
    kernel1 = cv2.getStructuringElement(cv2.MORPH_RECT, (11, 11))
    kernel2 = cv2.getStructuringElement(cv2.MORPH_RECT, (7, 7))

    # # 腐蚀图像
    # eroded0 = cv2.erode(x_thresh_o, kernel00)
    # # 显示腐蚀后的图像
    # cv2.namedWindow('Eroded0', 0)  # 窗口大小可以改变
    # cv2.imshow("Eroded0", eroded0);
    # 膨胀图像
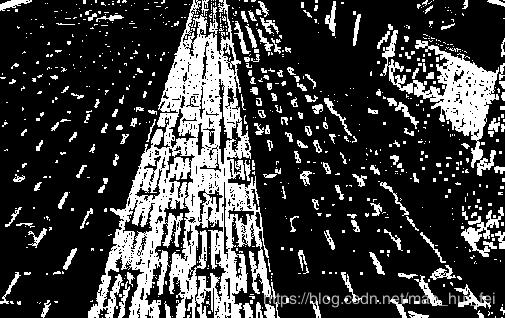
    dilated = cv2.dilate(x_thresh_o, kernel2)
    dilated_o = np.uint8( dilated /255 )
    cv2.namedWindow('dilated', 0)  # 窗口大小可以改变
    cv2.imshow("dilated", dilated);
    # pimg = Image.fromstring("RGB", cv2.GetSize(dilated), dilated.tostring())  # pimg is a PIL image
    # dilated0 = np.array(pimg)  # array is a numpy array

    # dilated_0 = np.uint8(255 * dilated / np.max(dilated))
    # dilated_1 = np.uint8(255 * dilated_0 / np.max(dilated_0))
    # cv2.namedWindow('dilated', 0)  # 窗口大小可以改变
    # cv2.imshow("dilated", dilated);
    # cv2.namedWindow('dilated_0', 0)  # 窗口大小可以改变
    # cv2.imshow("dilated_0", dilated_0);
    # cv2.namedWindow('dilated_1', 0)  # 窗口大小可以改变
    # cv2.imshow("dilated_1", dilated_1);
    # # 显示膨胀后的图像
    # cv2.namedWindow('Dilated', 0)  # 窗口大小可以改变
    # cv2.imshow("Dilated", dilated);
    # # Copy the thresholded image.
    # im_floodfill = dilated.copy()

    # Mask used to flood filling.
    # Notice the size needs to be 2 pixels than the image.
    # h, w = dilated.shape[:2]
    # mask = np.zeros((h + 2, w + 2), np.uint8)
    #
    # # Floodfill from point (0, 0)
    # cv2.floodFill(im_floodfill, mask, (0, 0), 255);
    #
    # # Invert floodfilled image
    # im_floodfill_inv = cv2.bitwise_not(im_floodfill)
    #
    # # Combine the two images to get the foreground.
    # im_out = dilated | im_floodfill_inv
    # # 显示腐蚀后的图像
    # cv2.namedWindow('im_out', 0)  # 窗口大小可以改变
    # cv2.imshow("im_out", im_out);
    # # 腐蚀图像
    # eroded = cv2.erode(im_out, kernel1)
    # # 显示腐蚀后的图像
    # cv2.namedWindow('Eroded', 0)  # 窗口大小可以改变
    # cv2.imshow("Eroded", eroded);


    mag_thresh = utils.mag_thresh(img, sobel_kernel=3, mag_thresh=(50, 150))
    mag_thresh_o = np.uint8(255 * mag_thresh / np.max(mag_thresh))
    # cv2.namedWindow('mag_thresh', 0)  # 窗口大小可以改变
    # cv2.imshow("mag_thresh", mag_thresh_o)
    # cv2.waitKey(10)

    dir_thresh = utils.dir_threshold(img, sobel_kernel=3, thresh=(0.7, 1.3))
    dir_thresh_o = np.uint8(255 * dir_thresh / np.max(dir_thresh))
    # cv2.namedWindow('dir_thresh', 0)  # 窗口大小可以改变
    # cv2.imshow("dir_thresh", dir_thresh_o)
    # cv2.waitKey(10)

    #hls_thresh = utils.hls_select(img, thresh=(25, 30))
    hls_thresh = utils.hls_select(img, thresh=(16, 22))

    hls_thresh_o = np.uint8(255 * hls_thresh / np.max(hls_thresh))
    # cv2.namedWindow('hls_thresh', 0)  # 窗口大小可以改变
    # cv2.imshow("hls_thresh", hls_thresh_o)
    # cv2.waitKey(10)

    lab_thresh = utils.lab_select(img, thresh=(121, 125))
    lab_thresh_o = np.uint8(255 * lab_thresh / np.max(lab_thresh))
    # cv2.namedWindow('lab_thresh', 0)  # 窗口大小可以改变
    # cv2.imshow("lab_thresh", lab_thresh_o)
    # cv2.waitKey(10)

    lab_thresh_0 = cv2.dilate(lab_thresh_o, kernel)
    lab_thresh_1 = np.uint8(lab_thresh_0 / 255)
    # cv2.namedWindow('lab_thresh_0', 0)  # 窗口大小可以改变
    # cv2.imshow("lab_thresh_0", lab_thresh_0);

    luv_thresh = utils.luv_select(img, thresh=(225, 255))

    luv_thresh_o = np.uint8(255 * luv_thresh / np.max(luv_thresh))
    # cv2.namedWindow('luv_thresh', 0)  # 窗口大小可以改变
    # cv2.imshow("luv_thresh", luv_thresh_o)
    # cv2.waitKey(10)

    # Thresholding combination
    threshholded = np.zeros_like(x_thresh)
    threshholded1 = np.zeros_like(x_thresh)
    threshholded2 = np.zeros_like(x_thresh)
    threshholded3 = np.zeros_like(x_thresh)
    threshholded4 = np.zeros_like(x_thresh)
    threshholded5 = np.zeros_like(x_thresh)


    threshholded[((dilated_o == 1) & (mag_thresh == 1)) | ((dir_thresh == 1) & (hls_thresh == 1)) | (lab_thresh == 1) | (
                luv_thresh == 1)] = 1

    #滞留lab和luv
    threshholded1[(lab_thresh == 1) &(luv_thresh == 1)] = 1
    threshholded5[((lab_thresh == 1) &(luv_thresh == 1))|((dilated_o == 1) &(luv_thresh == 1))] = 1

    #
    #threshholded2[(dilated == 1) & (lab_thresh == 1)| (luv_thresh == 1) ] = 1
    threshholded2[dilated_o == 1] = 1

    threshholded3[(dilated_o == 1) & (lab_thresh == 1)| (luv_thresh == 1) ] = 1
    threshholded4[(dilated_o == 1) & (lab_thresh_1 == 1) | (luv_thresh == 1)] = 1

    threshholded_3o = np.uint8(255 * threshholded3 / np.max(threshholded3))

    threshholded_o = np.uint8(255 * threshholded / np.max(threshholded))
    threshholded_1o = np.uint8(255 * threshholded1 / np.max(threshholded1))
    threshholded_2o = np.uint8(255 * threshholded2 / np.max(threshholded2))
    threshholded_4o = np.uint8(255 * threshholded4/ np.max(threshholded4))
    threshholded_5o = np.uint8(255 * threshholded5 / np.max(threshholded5))

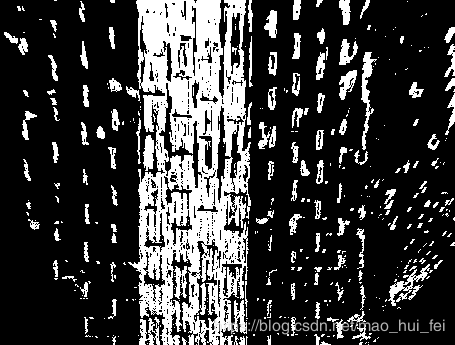
    cv2.namedWindow('threshholded_4o', 0)  # 窗口大小可以改变
    cv2.imshow("threshholded_4o", threshholded_4o)
    cv2.waitKey(10)

    # cv2.namedWindow('threshholded_o', 0)  # 窗口大小可以改变
    # cv2.imshow("threshholded_o", threshholded_o)
    # cv2.waitKey(10)

    # cv2.namedWindow('threshholded_1o', 0)  # 窗口大小可以改变
    # cv2.imshow("threshholded_1o", threshholded_1o)
    # cv2.waitKey(10)
    # cv2.namedWindow('threshholded_2o', 0)  # 窗口大小可以改变
    # cv2.imshow("threshholded_2o", threshholded_2o)
    # cv2.waitKey(10)
    # cv2.namedWindow('threshholded_3o', 0)  # 窗口大小可以改变
    # cv2.imshow("threshholded_3o", threshholded_3o)
    # cv2.waitKey(10)
    #
    # cv2.namedWindow('threshholded_5o', 0)  # 窗口大小可以改变
    # cv2.imshow("threshholded_5o", threshholded_5o)
    # cv2.waitKey(10)
    # cv2.waitKey(10)
    return threshholded4


