Centos7安装配置FTP服务器(vsftpd)
1. 安装vsftpd最新版
[lidengyin@ldy ~]$ sudo yum -y install vsftpd
2. 在根目录下新建一个文件夹ftpfile
[lidengyin@ldy /]$ sudo mkdir ftpfile
4. 添加vsftpd虚拟用户,使用上面的ftpfile作为根目录,无登录权限
[lidengyin@ldy /]$ sudo useradd ftpuser -d /ftpfile/ -s /sbin/nologin
# -d 表示默认家目录,一定要是绝对路径
# -s 后面接一个shell,若是没有则默认使用/bin/bash,这里的/sbin/nologin表示不能使用系统登录但是可以使用ftp服务
5. 修改ftpfile的拥有者
[lidengyin@ldy /]$ sudo chown -R ftpuser.ftpuser /ftpfile/
#	chown -R 账户名称:组名 文件或目录
# -R :进行递归的持续变更,亦即连同次目录下的所有文件都变更
6. 修改ftpuser的密码
[lidengyin@ldy /]$ sudo passwd ftpuser
7. 进入/etc/vsftpd/vsftpd.conf进行配置
修改欢迎文字(banner)
# You may fully customise the login banner string:
ftpd_banner=Hello Lidengyin, Welcome to blah FTP service.
- 本地目录指向创建的文件夹
#本地目录指向创建的文件夹
local_root=/ftpfile/
- 匿名登录时,指向文件夹
#匿名登录时本地用户指向文件夹
anno_root=/ftpfile/
- 是否使用本地时间
#是否使用本地时间,因为预设使用GMT时间,会比北京时间晚8个小时,一般>来说建议设置为yes
use_localtime=YES
- 允许匿名者登录
#允许匿名登录者登入
annoymous_enable=YES
- 将实体限制在自己的家目录中无法离开
#将实体限制在自己的家目录之内无法离开
chroot_list_enable=YES
# (default follows)
# 规定哪一个实体用户会被限制在自己的家目录中无法离开
chroot_list_file=/etc/vsftpd/chroot_list
-
被动式上传使用接口.防火墙我不熟悉还是使用默认把
-
新建chroot_list进行白名单配置
[lidengyin@ldy vsftpd]$ sudo vim chroot_list
该文件只需要加ftpuser一个单词即可
8. 防火墙设置
centos7.x之后必须使用filewall-cmd进行修改
- 添加21,20端口
[lidengyin@ldy vsftpd]$ sudo firewall-cmd --zone=public --add-port=21/tcp --permanent
[lidengyin@ldy vsftpd]$ sudo firewall-cmd --zone=public --add-port=20/tcp --permanent
- 添加ftp服务
[lidengyin@ldy vsftpd]$ sudo firewall-cmd --zone=public --add-port=3306/tcp --permanent
- 重载防火墙设置
[lidengyin@ldy vsftpd]$ sudo firewall-cmd --reload
9. command not found解决:
下载ftp客户端
[lidengyin@ldy vsftpd]$ sudo yum -y install ftp
10. 使用ftp连接vsftpd
[lidengyin@ldy vsftpd]$ ftp 121.36.145.230
11. 报错:530 Login incorrect.解决方法
- 首先通过/ect/passwd查看你使用ftp登录的帐号信息
[lidengyin@ldy vsftpd]$ cat /etc/passwd

tcpdump:x:72:72::/:/sbin/nologin
lidengyin:x:1000:1000::/home/lidengyin:/bin/bash
mysql:x:998:1001::/home/mysql:/bin/false
ftpuser:x:1001:1002::/ftpfile/:/sbin/nologin
- 其次查看 /ect/shells是否有你的登录shell,如果没有,那么根据/etc/passwd中最后的登录shell信息进行添加
[lidengyin@ldy vsftpd]$ cat /etc/shells

/bin/sh
/bin/bash
/usr/bin/sh
/usr/bin/bash
/sbin/nologin
12. 425 Security: Bad IP connecting.解决方法
打开 /etc/vsftpd/vsftpd.conf 添加:pasv_promiscuous=YES,保存后退出,重启vsftpd
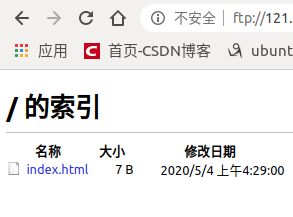
13. 浏览器无法打开ftp地址的解决办法(华为云)
安全组开启:21 20 1024/65535
14. 解决匿名账户无法创建文件夹问题
[lidengyin@ldy vsftpd]$ sudo vim /etc/selinux/config
在这个config里面设置SELINUX=disabled
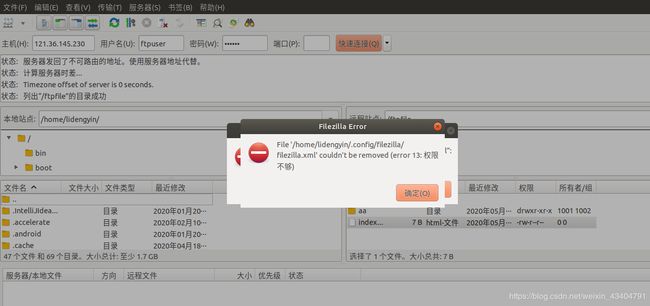
15. 使用ftp工具连接(filezilla)
使用filezilla连接,不要使用xftp和remmina


