在Kubernetes集群上基于配置清单(yaml)部署prometheus
文章目录
- 安装方式的选择
- 实例
- 集群环境:
- 具体步骤:
- 注意事项:
- 报错信息:
安装方式的选择
安装prometheus有多种方式选择:
- Promethus的官方网站中提供了最简单的部署方式:下载二进制包解压即可使用。
- k8s集群中基于Helm安装
- 根据kubernetes项目提供的资源清单部署
说明:
- 为了便于用户快速集成一个完整的 Prometheus 监控环境,Kubernetes 源代码的集群附件目录中统一提供了 Prometheus 、Alertmanager 、node_exporter 和 kube-state-metrics 相关的配置清单,路径为 cluster/addons/prometheus ,每个项目的配置清单不止一个且文件都以项目名称开起 。
命令:
- 克隆项目,找到对应的资源即可部署:
git clone https://github.com/kubernetes/kubernetes.git
最近在搭建prometheus时,遇到了不少坑,仅写出来分享给大家。
实例
集群环境:
Master:192.168.10.200
Node1:192.168.10.210
Node2:192.168.10.220
NFS服务器:192.168.10.5
具体步骤:
1.创建专用命名空间(这里为kube-ops)
2.使用YAML资源清单的方式创建PV、PVC
3.创建关于Prometheus的configMap
4.因为集群中Prometheus是以Pod的形式运行的,所以需要创建deployment
5.设置相应的rbac规则
6.创建Service,暴露Prometheus的端口。
注意事项:
- Prometheus是通过⼀个YAML配置⽂件来进⾏启动的,该配置文件中可以设置一些启动参数和路由规则。所以,为了方便配置,这里将yaml文件以configMap的形式 “植入” 到Prometheus Pod中。
1.创建新的项目文件夹和专用命令空间kube-ops
[root@master ~]# mkdir prome
[root@master ~]# cd prome
[root@master ~]# kubectl create ns kube-ops
2.创建PV和PVC
[root@master prome]# cat prome-volume.yaml
apiVersion: v1
kind: PersistentVolume
metadata:
  name: prometheus
spec:
  capacity:
    storage: 10Gi
  accessModes:
  - ReadWriteOnce
  persistentVolumeReclaimPolicy: Recycle
  nfs:
    server: 192.168.10.5
    path: /data/k8s
---
apiVersion: v1
kind: PersistentVolumeClaim
metadata:
  name: prometheus
  namespace: kube-ops
spec:
  accessModes:
  - ReadWriteOnce
  resources:
    requests:
      storage: 10Gi
3.创建configMap
[root@master prome]# cat prome-cm.yaml
apiVersion: v1
kind: ConfigMap
metadata:
  name: prometheus-config
  namespace: kube-ops
data:
  prometheus.yml: |
    global:
      scrape_interval: 15s
      scrape_timeout: 15s
    scrape_configs:
    - job_name: 'prometheus'
      static_configs:
      - targets: ['localhost:9090']
4.创建Deployment
[root@master prome]# cat prome-deploy.yaml
apiVersion: extensions/v1beta1
kind: Deployment
metadata:
  name: prometheus
  namespace: kube-ops
  labels:
    app: prometheus
spec:
  replicas: 1
  strategy:
    type: Recreate
  template:
    metadata:
      labels:
        app: prometheus
    spec:
      serviceAccountName: prometheus
      containers:
      - image: prom/prometheus:v2.4.3
        imagePullPolicy: IfNotPresent
        name: prometheus
        command:
        - "/bin/prometheus"
        args:
        - "--config.file=/etc/prometheus/prometheus.yml"
        - "--storage.tsdb.path=/prometheus"
        - "--storage.tsdb.retention=24h"
        - "--web.enable-admin-api"
        - "--web.enable-lifecycle"
        ports:
        - containerPort: 9090
          name: http
          protocol: TCP
        volumeMounts:
        - name: data
          mountPath: "/prometheus"
          subPath: prometheus
        - name: config-volume
          mountPath: "/etc/prometheus"
        resources:
          requests:
            cpu: 100m
            memory: 512Mi
          limits:
            cpu: 100m
            memory: 512Mi
      securityContext:
        runAsUser: 0
      volumes:
      - name: data
        persistentVolumeClaim:
          claimName: prometheus
      - name: config-volume
        configMap:
          name: prometheus-config
5.设置相应的RBAC规则
[root@master prome]# cat prome-rbac.yaml
apiVersion: v1
kind: ServiceAccount
metadata:
  name: prometheus
  namespace: kube-ops

---
apiVersion: rbac.authorization.k8s.io/v1
kind: ClusterRole
metadata:
  name: prometheus
rules:
- apiGroups:
  - ""
  resources:
  - nodes
  - services
  - endpoints
  - pods
  - nodes/proxy
  verbs:
  - get
  - list
  - watch
- apiGroups:
  - ""
  resources:
  - configmaps
  - nodes/metrics
  verbs:
  - get
- nonResourceURLs:
  - /metrics
  verbs:
  - get

---
apiVersion: rbac.authorization.k8s.io/v1beta1
kind: ClusterRoleBinding
metadata:
  name: prometheus
roleRef:
  apiGroup: rbac.authorization.k8s.io
  kind: ClusterRole
  name: prometheus
subjects:
- kind: ServiceAccount
  name: prometheus
  namespace: kube-ops
6.设置Service,以实现端口暴露
[root@master prome]# cat prome-svc.yaml
apiVersion: v1
kind: Service
metadata:
  name: prometheus
  namespace: kube-ops
  labels:
    app: prometheus
spec:
  selector:
    app: prometheus
  type: NodePort
  ports:
  - name: web
    port: 9090
    targetPort: http
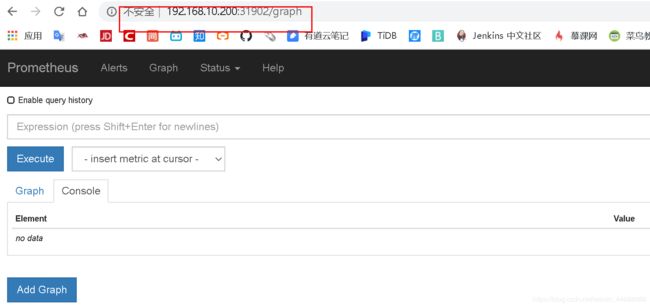
查看Pod是否运行。并查看暴露的端口,这里为31902
[root@master prome]# kubectl get pods -n kube-ops
NAME                         READY   STATUS    RESTARTS   AGE
prometheus-7c44b9f45-b64jv   1/1     Running   0          19m
[root@master prome]# kubectl get svc -n kube-ops -o wide
NAME         TYPE       CLUSTER-IP      EXTERNAL-IP   PORT(S)          AGE   SELECTOR
prometheus   NodePort   10.106.40.221   <none>        9090:31902/TCP   20m   app=prometheus
注意事项:
1.yaml文件没有做备注,看不懂的可以留言
2.因为使用NFS做持久存储,所以需要在每个节点上暗转NFS-Client端【我在这里吃了大亏】
3.各节点,包括NFS的防火墙和selinux需要永久关闭
4.nfs服务器中/etc/exports的配置内容如下:
[root@nfs ~]# vim /etc/exports
/data/k8s 192.168.10.0/24(rw,sync,no_root_squash)
5.节点间的域名解析
报错信息:
1.因为Node节点没有安装NFS-until而导致出现mount: 文件系统类型错误、选项错误、192.168.10.5:/data/k8s 上有坏超级块错误信息:
[root@master prome]# kubectl get pods -n kube-ops
NAME                         READY   STATUS              RESTARTS   AGE
prometheus-7c44b9f45-rpd6m   0/1     ContainerCreating   0          11s
[root@master prome]# kubectl describe pods -n kube-ops prometheus-7c44b9f45-rpd6m

、、、、、省略部分内容、、、、、、

Events:
  Type     Reason       Age   From               Message
  ----     ------       ----  ----               -------
  Normal   Scheduled    29s   default-scheduler  Successfully assigned kube-ops/prometheus-7c44b9f45-rpd6m to node1
  Warning  FailedMount  28s   kubelet, node1     MountVolume.SetUp failed for volume "prometheus" : mount failed: exit status 32
Mounting command: systemd-run
Mounting arguments: --description=Kubernetes transient mount for /var/lib/kubelet/pods/cf545228-c6a1-11ea-a12a-000c29524b48/volumes/kubernetes.io~nfs/prometheus --scope -- mount -t nfs 192.168.10.5:/data/k8s /var/lib/kubelet/pods/cf545228-c6a1-11ea-a12a-000c29524b48/volumes/kubernetes.io~nfs/prometheus
Output: Running scope as unit run-60646.scope.
mount: 文件系统类型错误、选项错误、192.168.10.5:/data/k8s 上有坏超级块、
       缺少代码页或助手程序,或其他错误
       (对某些文件系统(如 nfs、cifs) 您可能需要
       一款 /sbin/mount.<类型> 助手程序)

       有些情况下在 syslog 中可以找到一些有用信息- 请尝试
       dmesg | tail  这样的命令看看。
[root@node1 ~]# history
yum -y install nfs-kernel-server
yum -y install nfs-utils
systemctl restart nfs-utils
systemctl enable nfs-utils

