五十四、微信小程序云开发豆瓣电影小项目
Runsen经过学习和回忆微信小程序的开发的内容和知识点。下面,决定做一个小小的微信小程序云开发豆瓣电影的小项目。
文章目录
- 创建云开发项目
- 构建npm项目
- 小程序发送请求
- 页面编写
创建云开发项目
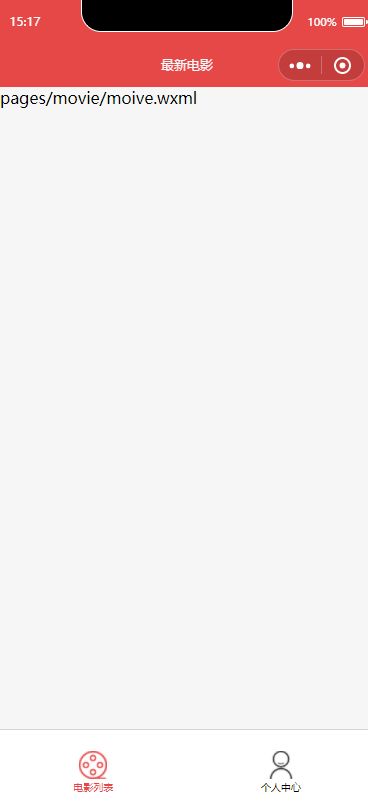
通过微信开发者创建云开发项目,第一需要设置tabBar,就是小程序的底部,这里命名为电影列表和个人中心,关于电影和用户图片可以去阿里巴巴的图标库下载。navigationBarTitleText指的是小程序的名字,具体代码如下。
{
  "pages": [
    "pages/movie/moive",
    "pages/profile/profile"
  ],
  "window": {
    "backgroundColor": "#F6F6F6",
    "backgroundTextStyle": "light",
    "navigationBarBackgroundColor": "#E54847",
    "navigationBarTitleText": "最新电影",
    "navigationBarTextStyle": "white"
  },
  "tabBar": {
    "color": "#000000",
    "selectedColor": "#E54847",
    "list": [{
      "pagePath": "pages/movie/moive",
      "text": "电影列表",
      "iconPath": "images/film.png",
      "selectedIconPath": "images/film-actived.png"
    },
    {
      "pagePath": "pages/profile/profile",
      "text": "个人中心",
      "iconPath": "images/profile.png",
      "selectedIconPath": "images/profile-actived.png"
    }
  ]
  },
  "sitemapLocation": "sitemap.json",
  "style": "v2"
}
构建npm项目
小程序对npm支持,很大程度上提高了开发效率。npm 包要求根目录下必须有构建文件生成目录(miniprogram_dist 默认),此目录可以通过在 package.json 文件中新增一个 miniprogram 字段来指定。
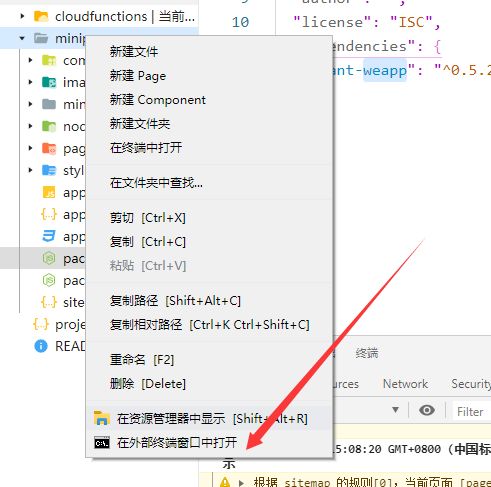
因此我们需要在项目的根目录通过npm init创建package.json
这样会生成 package.json,但是你将会看到没有找到 node_modules 目录。
我查了一下官方文档和相关的博客,需要继续安装的第三方包vant。
npm i vant-weapp -S --production
Vant 是有赞前端团队维护的移动端 Vue 组件库,提供了一整套 UI 基础组件和业务组件。通过 Vant 可以快速搭建出风格统一的页面,提升开发效率。
vant官方文档:https://youzan.github.io/ 。
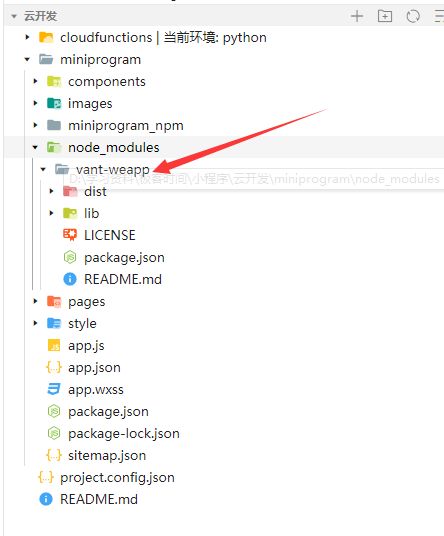
安装成功后,就可以看见vant-weapp下的文件夹
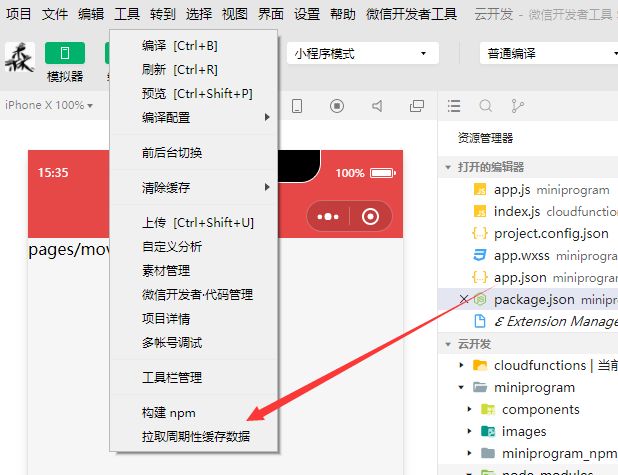
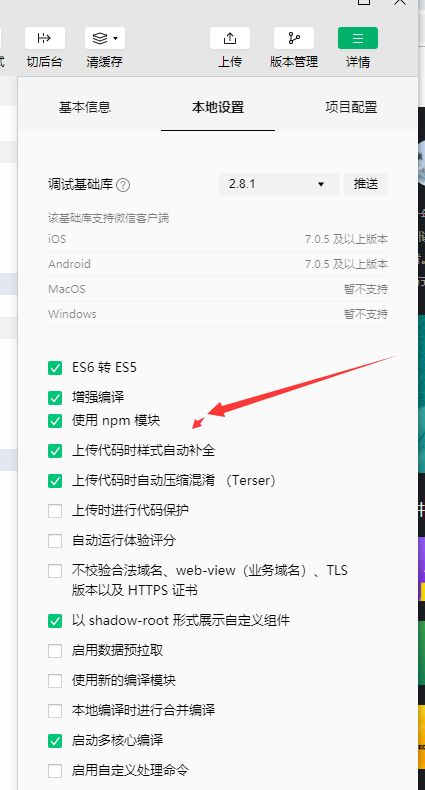
这时候就可以在开发工具:工具 -> 构建 npm
下面我们在movie的页面movie.json添加button
{
  "usingComponents": {
    "van-button" :"vant-weapp/button"
  }
}
具体的movie.wxml的代码如下。
<!--pages/movie/moive.wxml-->
-button type="danger">危险按钮</van-button>
小程序发送请求
在小程序中使用 wx.request() 发送请求
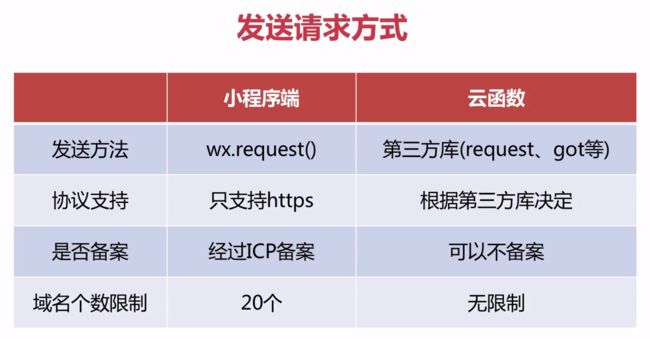
开通云开发后,还可以在云函数中发送请求
由此,可以规避很多限制,如下图所示。
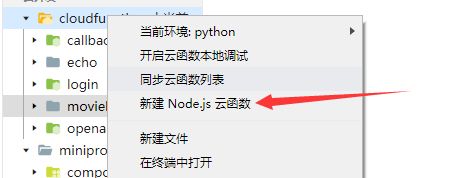
下面,创建一个名为movielist的云函数,具体如下。
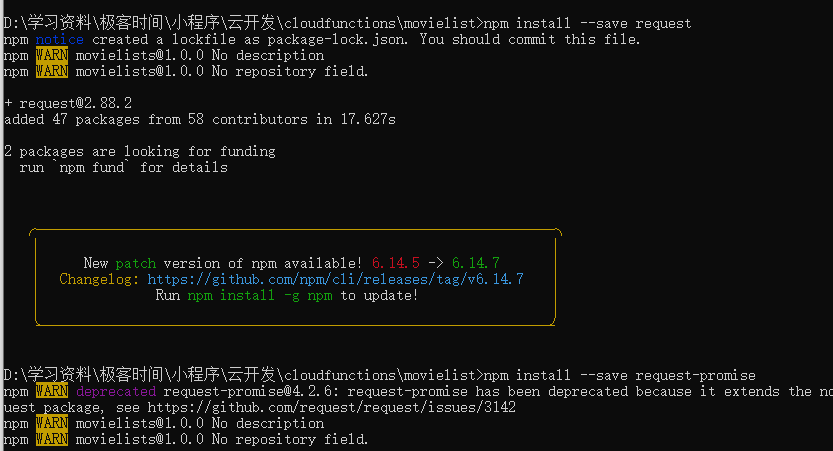
下面需要在movielist文件夹中安装request和request-promise
具体的云函数中的index.js代码如下。这里选用的API接口是https://movie.douban.com/j/search_subjects?type=movie&tag=%E7%83%AD%E9%97%A8&sort=time&page_limit=${event.count}&page_start=${event.start}。
// 云函数入口文件
const cloud = require('wx-server-sdk')
cloud.init()
var rp = require("request-promise")
// 云函数入口函数
exports.main = async (event, context) => {
  return rp(`https://movie.douban.com/j/search_subjects?type=movie&tag=%E7%83%AD%E9%97%A8&sort=time&page_limit=${event.count}&page_start=${event.start}`)
  .then(function(res){
    console.log(res)
    return res
  }).catch(function(err){
    console.err(err)
  })
}
页面编写
在movie页面中的movie.wxml代码如下
<!--pages/movie/moive.wxml-->
for = "{{movieList}}" wx:key="{{index}}">
for="{{item.subjects}}" wx:key="index" class="movie">
"{{item.cover}}" class="movie-img"></image>
class="movie-info">
  class="movie-title">{{item.title}}</view>
  观众评分:  class="movie-sorce">{{item.rate}}分</text></view>
</view>
</view>
</view
在movie页面中的movie.wxss代码如下
/* pages/movie/movie.wxss */
.movie{
  height: 300rpx;
  display: flex;
  padding: 20px;
  border-bottom: 1px solid #ccc;
}

.movie-img{
  width: 200rpx;
  height: 100%;
  margin-right:20rpx;
}
.movie-info{
  flex: 1;
}
.movie-title{
  color: #666;
  font-size:40rpx;
  font-weight:bolder;
}

.movie-sorce{
  color: red;
}
在movie页面中的movie.js代码如下
// pages/movie/moive.js
Page({
  /**
   * 页面的初始数据
   */
  data: {
    movieList:[]
  },
  getmovielist:function(){
    wx.showLoading({
      title: '正在加载中',
    })
    wx.cloud.callFunction({
      name: "movielist",
      data:{
        start:this.data.movieList.length *=10,
        count:10
      }
   }).then(res => {
     console.log(res)
     this.setData({
       movieList: this.data.movieList.concat(JSON.parse(res.result))
     })
     wx.hideLoading()
   }).catch(err=>{
     console.error(err)
     wx.hideLoading()

   })
  },
  /**
   * 生命周期函数--监听页面加载
   */
  onLoad: function (options) {
    this.getmovielist()
  },
  /**
   * 页面上拉触底事件的处理函数
   */
  onReachBottom: function () {
    this.getmovielist()

  }
})
因为个人的APPID有其他用,这里学会下拉刷新页面访问即可
