Squid代理----ACL访问控制+sarg日志分析+反向代理
文章目录
- 前言
- 一、ACL访问控制
- 1.1 ACL访问控制概述
- 1.2 ACL访问控制步骤
- 1.3 常用的访问控制列表类型
- 二、ACL配置的两种方式
- 2.1 直接在Squid的配置文件种修改
- 2.2 创建新文件,在配置文件里声明文件位置
- 三、sarg日志分析
- 3.1 sarg日志介绍
- 3.2 sarg 安装
- 3.3 验证
- 四、Squid反向代理
- 4.1 添加web服务器、设置主页内容
- 4.2 Squid服务器设置反向代理
- 4.3 使用客户端访问测试
前言
前篇博客介绍了Squid基础理论+传统代理模式与透明模式,本篇博客基于重新部署了Squid环境(传统模式),部署流程可见:squid----基础理论+传统、透明代理实验
一、ACL访问控制
1.1 ACL访问控制概述
- Squid通过了强大的代理控制机制,通过合理的设置ACL并行限制,可以针对源地址、目标地址、访问URL的路径、访问的时间等各种条件进行过滤
1.2 ACL访问控制步骤
-
在配置文件Squid.conf中,ACL访问控制通过两个步骤来实现
① 使用ACL配置项定义需要控制的条件
② 通过http_accesss配置像对以定义的列表“允许”或“拒绝”访问的控制
-
每行ACL配置可以定义一条访问控制列表,格式如下:
acl 列表名称 列表类型 列表内容
列表名称:名称是自定义的,相当于给ACL起了个名字
列表类型:必须使用Squid预定义的值,对应不同类别的控制条件
列表内容:是要控制的具体对象,不同类型的列表所对应的内容也不一样,可以有多个值(以空格分隔,为“或”的关系)
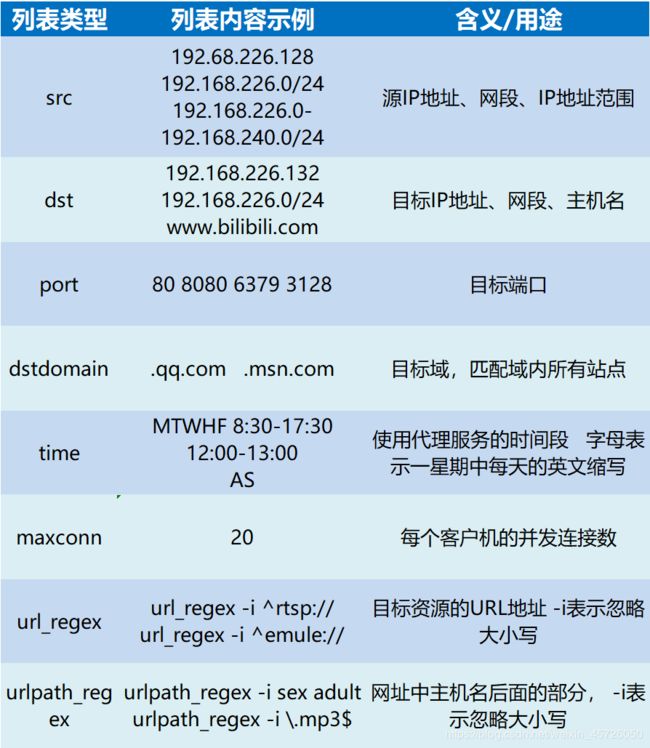
1.3 常用的访问控制列表类型
二、ACL配置的两种方式
2.1 直接在Squid的配置文件种修改
[root@squid ~]# vim /etc/squid.conf
acl localhost src 192.168.200.10/24        	#针对固定的源ip地址,此IP地址命名为“localhost”,下方配置中会针对此主机名进行权限设置
acl MYLAN src 192.168.200.0/24              #针对某一网段
acl destionhost dst 192.168.200.1/24   		#针对具体的目标ip地址
acl MC20 maxconn 20                         #访问的最大并发连接数量
acl BURL url_regex -i ^rtsp:// ^emule://    #正则表达式的访问协议
acl PURL urlpath_regex -i \.mp3$ \.mp4$ \.rmvb$   #访问的文件资源末尾
acl work time MTWHF 08:30-17:30        		#访问时间
MTWHF:周一到周五
MTWHFAS:周一到周日

http_access deny localhost     				##调用localhost,设置拒绝访问
#配置文件中acl的读取时自上而下的
2.2 创建新文件,在配置文件里声明文件位置
[root@squid ~]# cd /etc/
[root@squid etc]# vim dest.list
192.168.200.10
192.168.200.1
[root@squid etc]# vim squid.conf
#声明文件位置,命名为destionhost
acl destionhost dst "/etc/squid/dest.list"

http_access deny destionhost 				#调用destionhost名,拒绝(文件内的地址)访问
三、sarg日志分析
3.1 sarg日志介绍
Sarg(Squid Analysis Report Generator),是一款Squid 日志分析工具,采用HTML 格式,详细列出每一位用户访问Internet 的站点信息、时间占用信息、排名、连接次数、访问量等。
3.2 sarg 安装
- 环境基于上篇博客:
[root@squid ~]# yum -y install gd gd-devel httpd

[root@squid ~]# cd /mnt
[root@squid mnt]# tar zxvf sarg-2.3.7.tar.gz -C /opt/
[root@squid mnt]# cd /opt/sarg-2.3.7/
[root@squid sarg-2.3.7]# ./configure --prefix=/usr/local/sarg \
--sysconfdir=/etc/sarg \
--enable-extraprotection

[root@squid sarg-2.3.7]# make && make install- 修改配置文件
[root@squid sarg-2.3.7]# vim /etc/sarg/sarg.conf
#7行 取消注释 squid的访问日志位置
access_log /usr/local/squid/var/logs/access.log

#25行 取消注释 网页标题
title "Squid User Access Reports"

#120行 取消注释 分析报告的存放位置
output_dir /var/www/html/squid-reports

#178行 取消注释不使用IP代替用户ID
user_ip no

#184行 取消注释,删除BYTES 添加connec (可以统计连接)
topuser_sort_field connect reverse

#190行 取消注释,删除BYTES 取消字节设定,不取消可能导致报错
user_sort_field reverse

#206行 取消注释 不计入排序的站点列表文件,norepot需要手动创建
exclude_hosts /usr/local/sarg/norepot

#257行 取消注释,不进行同名覆盖

#289行 取消注释,配置默认使用额是mailx的形式,这里改成mailq.postfix(邮件传输协议)
mail_utility mailq.postfix

#434行 取消注释,字符集默认为latin1 这里改成utf-8
charset utf-8

#513行、525行 取消注释,功能为top排行的星期周期与时间周期)

#633行 取消注释 (网页根目录)
www_document_root /var/www/html
------>wq- 创建站点列表文件
[root@squid sarg-2.3.7]# touch /usr/local/sarg/norepot

#创建软链接 方便操作
[root@squid sarg-2.3.7]# ln -s /usr/local/sarg/bin/sarg /usr/local/bin

#启动sarg
[root@squid sarg-2.3.7]# sarg
SARG: Records in file: 109, reading: 100.00%
SARG: Successful report generated on /var/www/html/squid-reports/2020Mar24-2020Mar24
3.3 验证
- 创建周期性计划任务
[root@squid sarg-2.3.7]# crontab -e
*/1 * * * * /usr/local/bin/sarg
#这里为了凸显实现效果,所以将时间间隔设置为了1分钟- 使用客户端访问页面

- 添加周期性计划任务,每天生成报告
[root@squid sarg-2.3.7]# crontab -e
sarg -l /usr/local/squid/var/logs/access.log -o /var/www/html/squid-reports/ -z -d $(date -d "1 day ago" +%d/%m/%Y)-$(date +%d/%m/%Y)
四、Squid反向代理
- Squid反向代理在之前的博客中有详细介绍,可见“前言”中的链接,这里只简单介绍配置步骤
- ① DNS解析
- ② Squid 配置
- ③ 端口转发
4.1 添加web服务器、设置主页内容
- 之前的环境中,我们已经部署了
- squid服务器 IP为 192.168.226.128
- web服务器 IP为:192.168.226.132
- 一台win10作为客户机
- 现在添加一台web2服务器 IP为:192.168.226.133
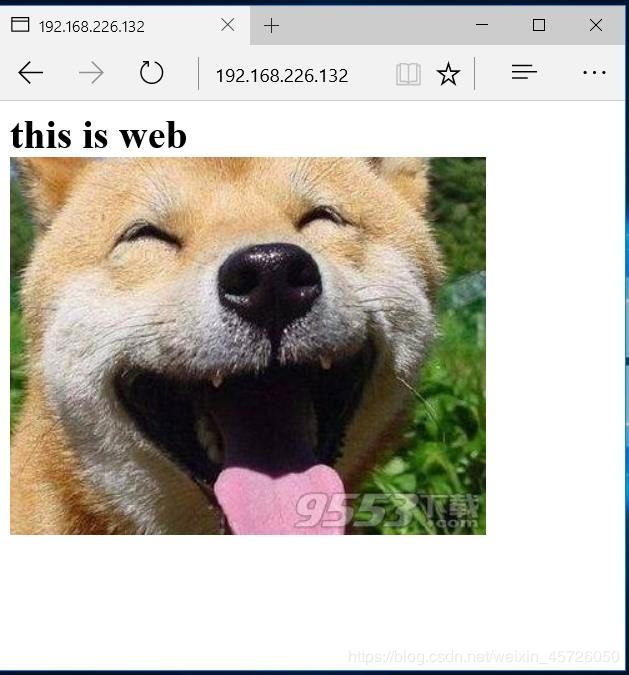
- 在web服务器上设置主页内容
#web服务器
[root@web ~]# cd /var/www/html/
[root@web html]# ls
dog.jpg
[root@web html]# vim index.html
this is web


----》wq
#这里重启以下httpd服务,确保为开启状态
[root@web html]# systemctl restart httpd


#web2服务器
[root@web2 ~]# yum install httpd -y
[root@web2 ~]# cd /var/www/html
[root@web2 html]# ls
cat.jpg
[root@web2 html]# vim index.html
this is web2


----》wq
[root@web2 html]# systemctl stop firewalld.service
[root@web2 html]# setenforce 0
[root@web2 html]# systemctl start httpd
- 使用客户机访问测试

4.2 Squid服务器设置反向代理
- 修改配置文件
#60行 监控本地地址,当客户访问到80端口,定义虚拟主机和虚拟端口
http_port 192.168.226.128:80 accel vhost vport
#61-62行 设置两个重定向,定位到2台web服务器 80端口,最大访问数量为30 设置权重为1 并设置别名为web1和web2
cache_peer 192.168.226.132 parent 80 0 no-query originserver round-robin max_conn=30 weight=1 name=web1
cache_peer 192.168.226.133 parent 80 0 no-query originserver round-robin max_conn=30 weight=1 name=web2
#63行 功能为,如果客户访问www.gongzuo.com这个域名则会匹配web1、web2站点
cache_peer_domain web1 web2 www.gongzuo.com
----》wq
[root@squid html]# service squid restart- 关闭Squid节点的httpd服务、设置防火墙规则
#关闭squid服务器的httpd服务,因为要避免与设置的虚拟80端口冲突
[root@squid html]# systemctl stop httpd
[root@squid html]# systemctl start firewalld.service
[root@squid html]# iptables -F
[root@squid html]# iptables -t nat -F
[root@squid html]# iptables -I INPUT -p tcp --dport 3128 -j ACCEPT
#允许3128端口通过
4.3 使用客户端访问测试
-
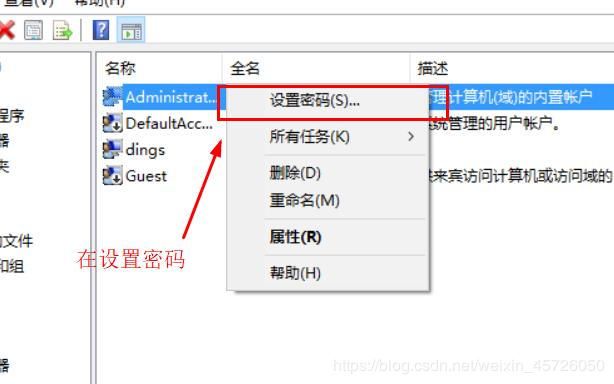
① 设置域名解析(使用超级管理员administrator用户登录)
-
② 添加Squid代理
-
③ 测试
-
设置域名解析
解禁用administrator并设置密码

-
添加域名解析
位置:C盘/Windows-system32-drivers-etc-hosts

-
添加代理

-
访问www.gongzuo.com 测试
因为有缓存的原因,可以多刷新几次
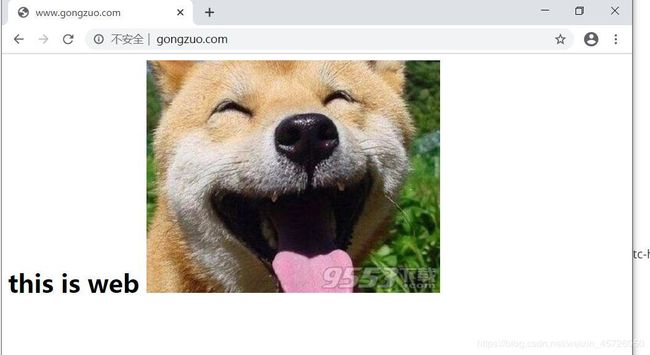
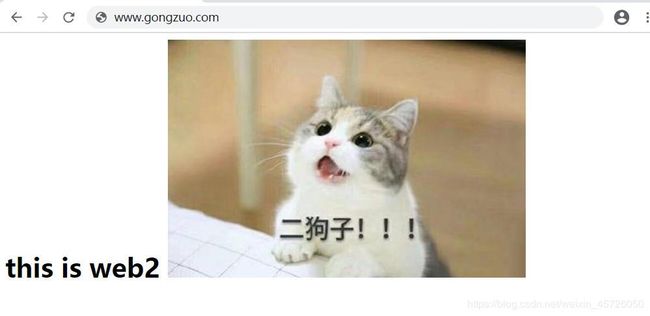
- 以上,反向代理模式设置完成