vue封装导航栏组件
在项目中,经常需要我们自己封装组件,需要对组件进行抽取至封装度最高。这样一来,使这个组件复用性变得非常高,往往可以直接把封装好的组件文件一拖拽到另外的项目就可以直接使用。现在来封装一个底部导航栏组件。
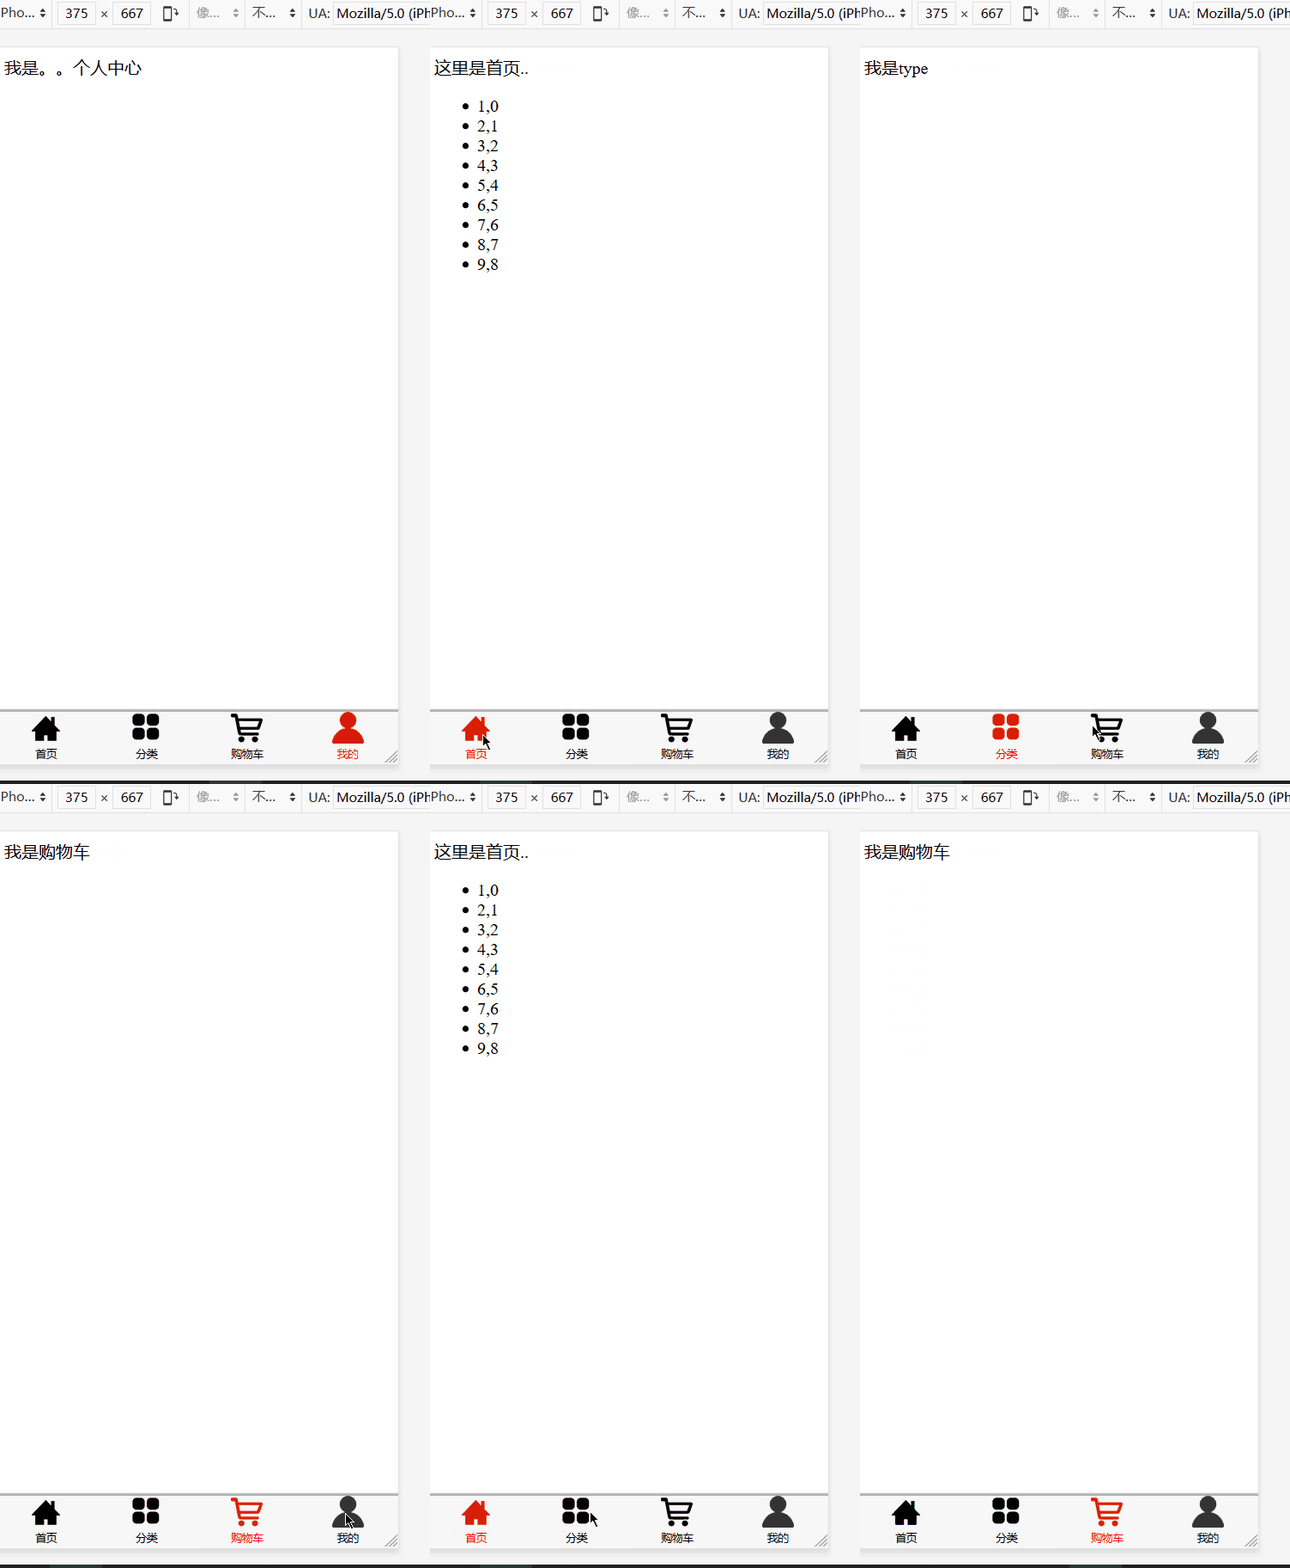
首先先来看封装好的组件的效果图,文末尾附项目下载地址,可以直接拖过去使用:

首先,我们需要思考,如何才能写出这一个组件以及如何对他进行不断抽取的思想。我们想要封装好一个组件,都是从静态到动态行为开始的,就是说,一开始,先最简单的做出来,然后一层一层把它抽取,不断封装。最终能够封装彻底。下面进行简要的描述封装过程:
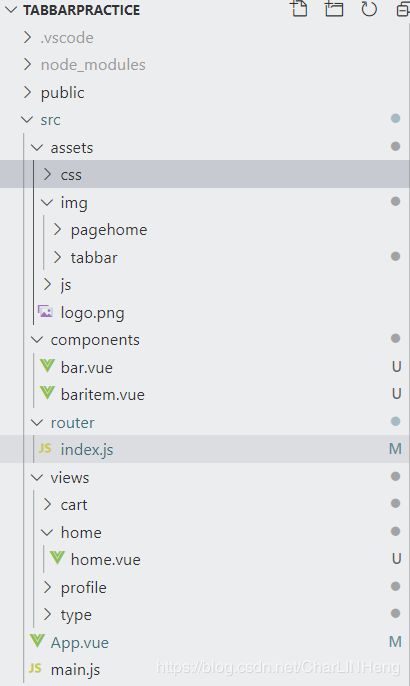
- 在components文件夹下创建bar.vue,其内容如下:
<template >
    <div id="tab-bar">
      <slot></slot>
    </div>
</template>
<script>
export default {
  name: 'bar',
}
</script>
<style  scoped>
    #tab-bar{
        margin: 0 auto;
        justify-content: center;
        display: flex;
        background: rgba(0,0,0,0.03);
        position: fixed;
        left: 0;
        font-size: 10px;
        right: 0;
        bottom: 0;
        box-shadow:  0 -1px 1px 1px rgba(0,0,0,0.3);
    }
</style>
这里是组件最外层的东西,slot插槽是用来给用户自定义内容,这样的话,就不会写死,复用性增强。
2. 创建导航栏的每个元素的组件封装,在components文件夹下创建baritem.vue文件,代码如下:
<template >
		<!-- 导航栏的每个元素item -->
      <div class="tab-bar-item">
      		<!-- 下面就是一些定位,图片、标题、自以及点击后显示的图片的插槽定义 -->
            <div v-if="!active" @click="goview">
                <slot name="icon" ></slot>
            </div>
             <div v-else>
                 <slot name="icon-active"></slot>
             </div>
             <div :style="judge()">
                 <slot name="text"></slot>
             </div>
   		<!--  到这里定义结束 -->
        </div>
</template>
<script>
export default {
  name: 'vueitem',
  props:{
      path:String,
      color:{
          type: String,
          default: 'red'
      }
  }
  ,methods: {
        goview(){
        //   console.log("你在点击...")
        //当用户点击后,切换路由
        this.$router.replace(this.path)
        },
        judge(){
        //当用户点击后,文字变为用户预定义的颜色。
          return this.active?{color:this.color}:{}
      }
  }
  ,computed: {
      active(){
	      //如果用户点击了,那么这个组件的图片变为红色[可以自由定义]
            return this.$route.path.indexOf(this.path)!= -1;
      }

  }
}
</script>
	<!-- 下面是定义格式标准的css,不解释 -->
<style  scoped>

   .tab-bar-item{
        margin: 0 auto;
        height: 49px;
    }
    .tab-bar-item img{
        width: 30px;
        height: 30px;
    }
    .tab-bar-item span{
        margin: 0 auto;
        justify-content: center;
        display: flex;
    }
    .textcolor{
        color: red;
    }
</style>
子组件负责导航栏的每个元素选项。
- 在route文件夹下的index.js中,定义内容访问映射:
import Vue from 'vue'
import VueRouter from 'vue-router'
Vue.use(VueRouter)
//首页
const home = ()=>import('../views/home/home.vue');
//分类
const type = ()=>import('../views/type/type.vue');
//购物车
const cart = ()=>import('../views/cart/cart.vue');
//个人中心
const profile = ()=>import('../views/profile/profile.vue');
  const routes = [
    {
      path: ''
      ,redirect: '/home'
    },
  {
    path: '/home',
    component: home
  },
  {
    path: '/type',
    component: type
  },
  {
    path: '/cart',
    component: cart
  },
  {
    path: '/profile',
    component: profile
  }
]
const router = new VueRouter({
  routes
  ,mode:'history'
})
export default router
- 创建views文件夹,在其下面分别创建每个路由的组件需要显示的内容,这里举例home.vue组件:
<template>
    <div>
        这里是首页..
        <ul>
          <li v-for="(item,index) in data">{{item + ','+index}}</li>
        </ul>
    </div>
</template>
<script>
export default {
  name: '',
  data(){
    return {
      data:[1,2,3,4,5,6,7,8,9]
    }
  }
}
</script>
<style  scoped>

</style>
- 在app.vue中进行导入组件,以及使用
<template>
  <div id="app">
    <router-view></router-view>
    <bar>
      <baritem v-for="item in datalist" :path="item.path" :color="item.color" :key="item.path">
          <img slot="icon" :src="item.image" alt="">
          <img slot="icon-active" :src="item.image_active" alt="">
          <span  slot="text">{{item.text}}</span>
      </baritem>
    </bar>
  </div>
</template>
<script>
import bar from './components/bar.vue';
import baritem from './components/baritem.vue'
export default {
  name: 'app',
  components:{
      bar,
      baritem
  },
  data(){
    return {
       //利用promise或者axios从服务器响应返回的资源
      datalist:[
        {
          path:'/home',
          color:'red',
          image:require('./assets/img/tabbar/首页.png'),
          image_active:require('./assets/img/tabbar/首页_active.png'),
          text:'首页'
        },
        {
          path:'/type',
          color:'red',
          image:require('./assets/img/tabbar/分类.png'),
          image_active:require('./assets/img/tabbar/分类_active.png'),
          text:'分类'
        },
        {
          path:'/cart',
          color:'red',
          image:require('./assets/img/tabbar/购物车.png'),
          image_active:require('./assets/img/tabbar/购物车_active.png'),
          text:'购物车'
        },
        {
          path:'/profile',
          color:'red',
          image:require('./assets/img/tabbar/我 的.png'),
          image_active:require('./assets/img/tabbar/我的_active.png'),
          text:'我的'
        }

      ]
      }

  }
}
</script>

