CentOS6.5 使用rpm安装 mysql5.7.29
今天在CentOS6.5下练习使用rpm安装软件,选用的是mysql5.7.29版本的rpm包,官网下载确实很慢,经常断线,费劲下载,上传到百度网盘,有需要的去下载:链接:https://pan.baidu.com/s/1zmhxG4MN0TGL_S-N-IxCGg
提取码:zhz8
安装过程比较曲折,安装了几次才成功,在网上搜了很多解决方案,为了让大家少走弯路,我将安装过程的文档粘贴如下:
1.检查已经安装的mysql模块
rpm -qa | grep mysql
发现安装了mysql的包,下面要卸载
mysql-libs-5.1.71-1.el6.x86_64
2.删除(卸载)已经安装的mysql模块
rpm -e mysql-libs-5.1.71-1.el6.x86_64 --nodeps
3.按一下顺序安装mysql
1)rpm -ivh mysql-community-common-5.7.29-1.el6.x86_64.rpm
2)rpm -ivh mysql-community-libs-5.7.29-1.el6.x86_64.rpm
3)rpm -ivh mysql-community-client-5.7.29-1.el6.x86_64.rpm
yum install perl
yum install numactl
安装server之前安装如上两个依赖,否则会有如下错误提示server安装不成功
4)rpm -ivh mysql-community-server-5.7.29-1.el6.x86_64.rpm
如果上面两个依赖没有安装,会出现:
warning: mysql-community-server-5.7.29-1.el6.x86_64.rpm: Header V3 DSA/SHA1 Signature, key ID 5072e1f5: NOKEY
error: Failed dependencies:
/usr/bin/perl is needed by mysql-community-server-5.7.29-1.el6.x86_64
libnuma.so.1()(64bit) is needed by mysql-community-server-5.7.29-1.el6.x86_64
libnuma.so.1(libnuma_1.1)(64bit) is needed by mysql-community-server-5.7.29-1.el6.x86_64
libnuma.so.1(libnuma_1.2)(64bit) is needed by mysql-community-server-5.7.29-1.el6.x86_64
perl(File::Path) is needed by mysql-community-server-5.7.29-1.el6.x86_64
perl(Getopt::Long) is needed by mysql-community-server-5.7.29-1.el6.x86_64
perl(POSIX) is needed by mysql-community-server-5.7.29-1.el6.x86_64
perl(strict) is needed by mysql-community-server-5.7.29-1.el6.x86_64
4. rpm 安装后 mysql 默认安装目录等信息
数据库文件默认在:cd /usr/share/mysql
配置文件默认在:/etc/my.cnf
数据库目录:/var/lib/mysql/
配置文件:/usr/share/mysql(mysql.server命令及配置文件)
相关命令:/usr/bin(mysqladmin、mysqldump等命令)(*mysql的一种安全启动方式:/usr/bin/mysqld_safe –user=root &)
启动脚本:/etc/rc.d/init.d/ (启动脚本文件mysql的目录)
/usr/bin(mysqladmin mysqldump等命令)
rpm安装默认目录:
数据文件:/var/lib/mysql/
配置文件模板:/usr/share/mysql
mysql客户端工具目录:/usr/bin
日志目录:/var/log/
pid,sock文件目录:/tmp/
第一次启动会出现初始化失败,所以要进入第5步,如果启动正常,可以忽略5、6步
5.清空数据目录 rm -rf /var/lib/mysql/*
6.初始化:mysqld --initialize --user=mysql
7.启动:service mysqld start
Starting mysqld: [ OK ]
8.第一次登录前看root的密码
#grep 'temporary password' /var/log/mysqld.log
2020-03-28T10:16:17.872230Z 1 [Note] A temporary password is generated for root@localhost: vpGw6:T4ni
9.登录:使用上面红色字体的随机密码(每个人的不一样)登录
#mysql -uroot -p
Enter password: 在此输入上面的密码(每个人的不一样哦)
进入mysql了:
Welcome to the MySQL monitor. Commands end with ; or \g.
Your MySQL connection id is 3
Server version: 5.7.29
Copyright (c) 2000, 2020, Oracle and/or its affiliates. All rights reserved.
Oracle is a registered trademark of Oracle Corporation and/or its
affiliates. Other names may be trademarks of their respective
owners.
Type 'help;' or '\h' for help. Type '\c' to clear the current input statement.
10:登录后改密码
修改密码并允许其他机器上客户端登录
mysql> alter user 'root'@'localhost' identified by 'root'
grant all privileges on *.* to 'root'@'%' identified by 'root' with grant option
11.开放防火墙的3306端口
vi /etc/sysconfig/iptables
加入下面这行
-A INPUT -m state --state NEW -m tcp -p tcp --dport 3306 -j ACCEPT
12.重新启动防火墙 service iptables restart
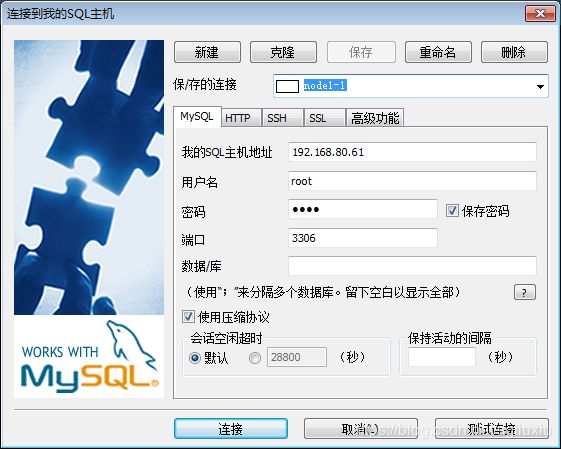
13.在windows下使用sqlyog连接Mysql,我的虚拟机的ip地址是192.168.80.61 数据库登录用户为root,密码也是root

