SpringBoot整合RabbitMQ消息中间件(菜鸟学习)
前言
自学多时,写一个demo做个总结
从建项目开始,比较简单的实现springboot+rabbitMQ消息中间件,一对多发送消息,供初学者参考,更快的理解rabbitMQ消息中间件
环境
win10
Idea2018.1.2x64
jdk1.8.0_131
erlang 10.1
rabbitmq_server-3.7.9
配置环境
erlang
由于rabbitmq是用erlang语言开发,所以先配置erlang环境
http://www.erlang.org/downloads
下载安装并配置环境变量,cmd显示版本号,配置成功

rabbitMQ
http://www.rabbitmq.com/download.html
需要下载安装,添加rabbitmq账号,设置账号远程访问权限,启动sbin/rabbitmq-plugins.bat
http://localhost:15672/#/
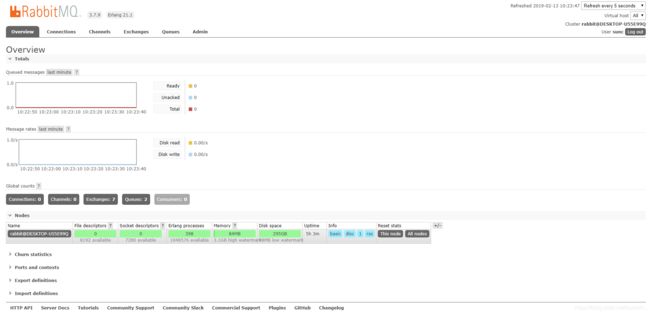
rabbitmq安装成功
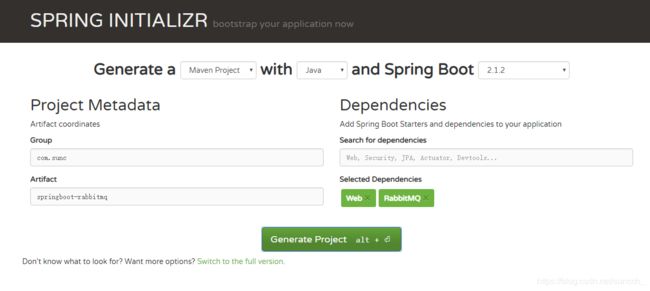
创建项目
新建项目引入web和RabbitMQ依赖
https://start.spring.io/
导入idea
项目结构

RabbitConfig
创建"hello"队列(也可以创建交换机,用交换机关联队列,实现各种类型的广播)
package com.sunc.springbootrabbitmq.config;

import org.springframework.amqp.core.Queue;
import org.springframework.context.annotation.Bean;
import org.springframework.context.annotation.Configuration;

@Configuration
public class RabbitConfig {

    @Bean
    public Queue queue(){
        System.out.println("加载RabbitConfig...");
        return new Queue("hello");
    }
}
controller
连续调用10次send
package com.sunc.springbootrabbitmq.controller;

import com.sunc.springbootrabbitmq.send.HelloSend;
import org.springframework.beans.factory.annotation.Autowired;
import org.springframework.web.bind.annotation.RequestMapping;
import org.springframework.web.bind.annotation.RestController;

@RestController
@RequestMapping("/hello")
public class HelloController {
    @Autowired
    private HelloSend helloSend;

    @RequestMapping("/sayHello")
    public String sayhello(){
        for (int i = 0; i < 10; i++) {
            helloSend.send1(i);
        }
        return "hello";
    }
}
send
发送消息
package com.sunc.springbootrabbitmq.send;

import org.springframework.amqp.core.AmqpTemplate;
import org.springframework.beans.factory.annotation.Autowired;
import org.springframework.stereotype.Component;

@Component
public class HelloSend {
    @Autowired
    private AmqpTemplate amqpTemplate;

    public void send1(int i) {
        String context = i + " hello";
        System.out.println("send== " + context);
        amqpTemplate.convertAndSend("hello", context);
    }
}
至此其实已经可以发送消息到队列了
http://localhost:8080/hello/sayHello
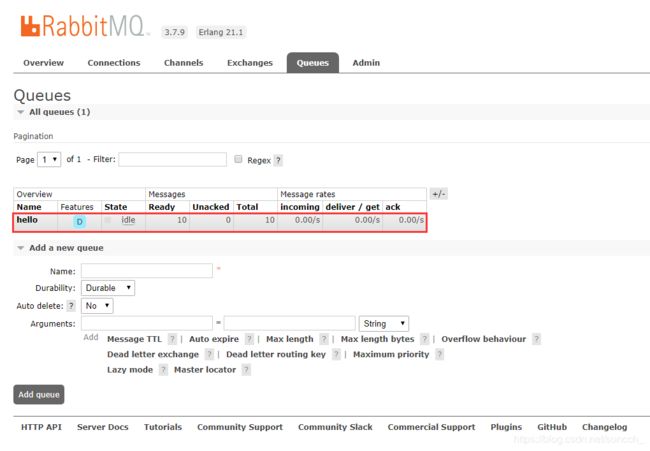
管理界面已经可以看到hello队列有10条消息在了
ReceiverService
监听消息
package com.sunc.springbootrabbitmq.receiver;

import org.springframework.amqp.rabbit.annotation.RabbitListener;
import org.springframework.stereotype.Service;

@Service
public class ReceiverService {
    @RabbitListener(queues = "hello")
    public void rece1(String hello){
        System.out.println("rece1== "+hello);
    }
    @RabbitListener(queues = "hello")
    public void rece2(String hello){
        System.out.println("rece2== "+hello);
    }
}
完成
启动项目

可以看到之前发送的10条消息
刷新一下浏览器
http://localhost:8080/hello/sayHello
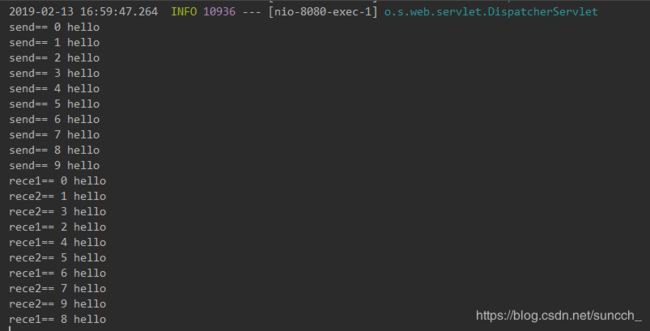
rece1和rece2共同处理了send发送的十条消息,成功
补充
HelloReceiver1
也可以用这种方法实现监听,HelloReceiver2同理,把1改成2就行,实现二等一
package com.sunc.springbootrabbitmq.receiver;

import org.springframework.amqp.rabbit.annotation.RabbitHandler;
import org.springframework.amqp.rabbit.annotation.RabbitListener;
import org.springframework.stereotype.Component;

@Component
@RabbitListener(queues = "hello")
public class HelloReceiver1 {
    @RabbitHandler
    public void hello(String hello) {
        System.out.println("Rece1==" + hello);
    }
}
结果
HelloReceiver1和HelloReceiver2共同监听到这十条消息

application.properties配置文件
完全默认什么都不用写
如果RabbitMQ用了自己创建的账号,或者没有配在本地,需要改一下配置
spring.rabbitmq.host=localhost
spring.rabbitmq.username=guest
spring.rabbitmq.password=guest
问题
这个启动类中EnableRabbit注解,加不加都项目都好用,不太理解
package com.sunc.springbootrabbitmq;

import org.springframework.boot.SpringApplication;
import org.springframework.boot.autoconfigure.SpringBootApplication;

@SpringBootApplication
//@EnableRabbit
public class SpringbootRabbitmqApplication {

	public static void main(String[] args) {
		SpringApplication.run(SpringbootRabbitmqApplication.class, args);
	}
}
成功
由于理解能力有限,序列化消息,创建交换机,大广播,局部广播,点对点类型还没有完全理解,后续继续学习
如有偏颇敬请斧正,本厮邮箱:[email protected]